
 Guns, Politics, Gunsmithing & Reloading Gunsmithing
 Go | New | Find | Notify | Tools | Reply |
| Amateur stock shaping - Show and Tell | Login/Join |
| One of Us |
I'm an amateur worker on guns, occasionally do a stock on one of my guns just because I'm too cheap to pay someone good. Thought I would do a show and tell as I do one to maybe encourage someone to try it, the results are worthwhile and there's a real satisfaction in doing it yourself. The stock is a cherry wood semi-inletted blank that I bought on ebay for $65 including shipping. It was a heavy, fat blank that is just plain obese. Rounded forend, rounded cheekpiece, mushroom shaped grip, too thick in the wrist, too thick on the sides. There's a marilyn monroe hiding in the rosie O'donnell fat. At least, I think so. At the point of the first pictures, I have already inlet the action in, inlet the barrel, and drilled for cross bolts. That's at the point where I thought of doing this thread. Here's where I slabbed a lot of the extra wood off the forend. Also have cut a big slab off of the cheekpiece.  Here's the shaping tools for the rough work. Use the spokeshave to cut the corners off, round to shape, and thin. Then, rasps to rough in the shape and smooth it up a bit. 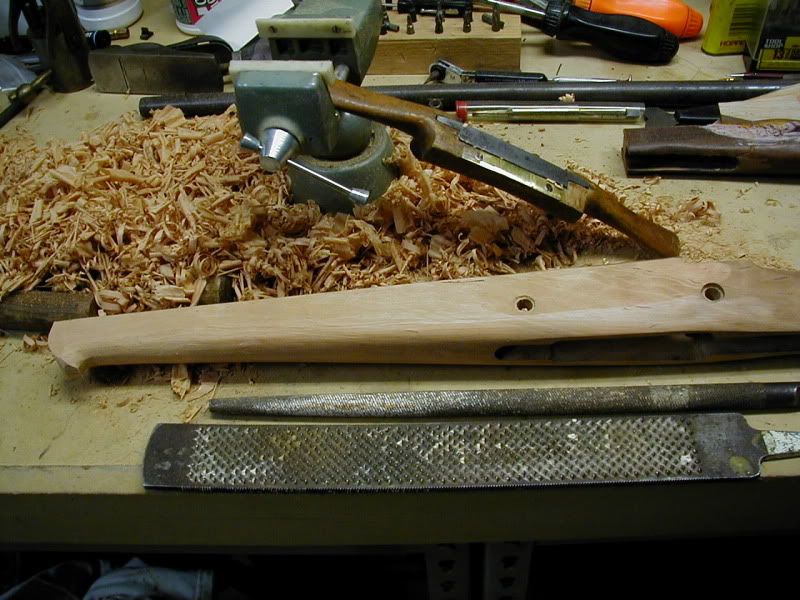 Here's the tools I will use for the detail work. 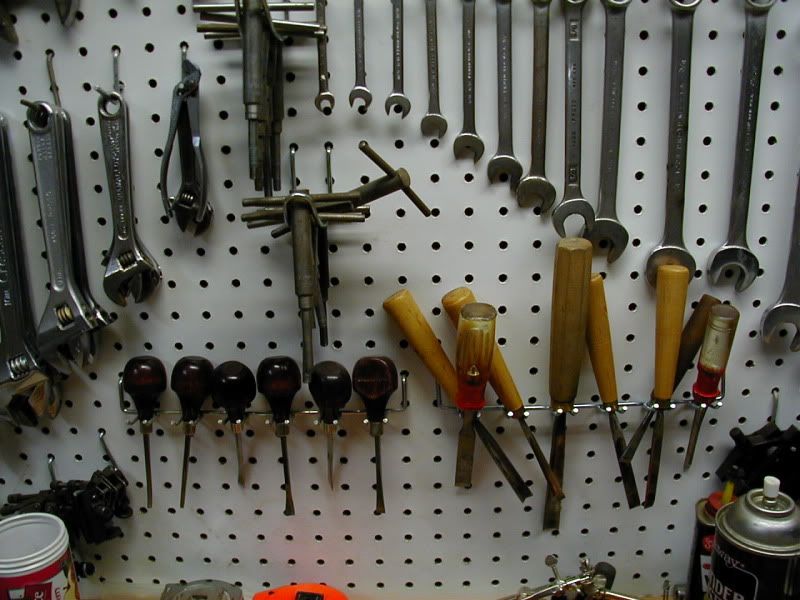 | ||
|
| One of Us |
ssdave, Looks good so far. Just not sure why you chose cherry for the stock. Any notion will suffice. The only cautionary I have is to be careful using power tools so close to your final dimensions. At this stage, noting the action is inlet, your stock should be covered with that black inletting stuff. Also, your kitchen table and forehead. Care to explain the lack of such? Keep up the good work. I do the same as you, my wife makes me a cheapskate. Stephen | |||
|
| One of Us |
Stephen, Remember, this is a marilyn monroe stock. Has to be blonde. I don't use black inletting much, it's too messy. I use blue lumber crayon on the barrel and straight action body, use inletting black on the corners and bearing surfaces. I use pencil marks a lot, and cut to them. Here's some more layout and cutting work, starting in on the cheekpiece. I planed it to get rid of the saw marks, and thin it out and get it near the finish plane. This was an ugly rollover bulging thing, needs some weight off of it. First photo, front of cheekpiece has been cut back to allow me to thin the wrist and pistol grip. The pencil line shows where it originally was. Just hogged this out with a 1/2" round gouge. Back of the cheekpiece is marked to cut it to shape. 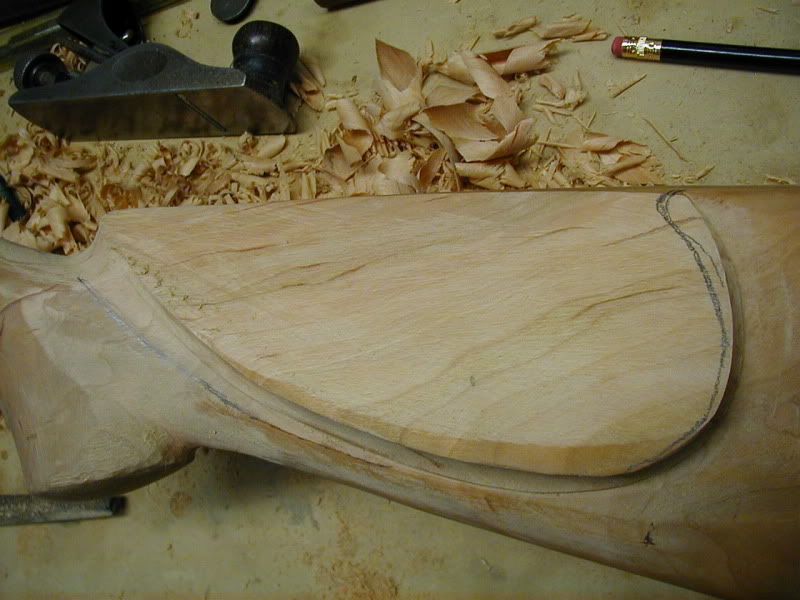 Next, use a 1/4 inch gouge cross grain to cut the back of the cheekpiece to rough shape. It's about as smooth as the pencil guide line was.  Here's hacked to shape, and the shadow line pencilled in. 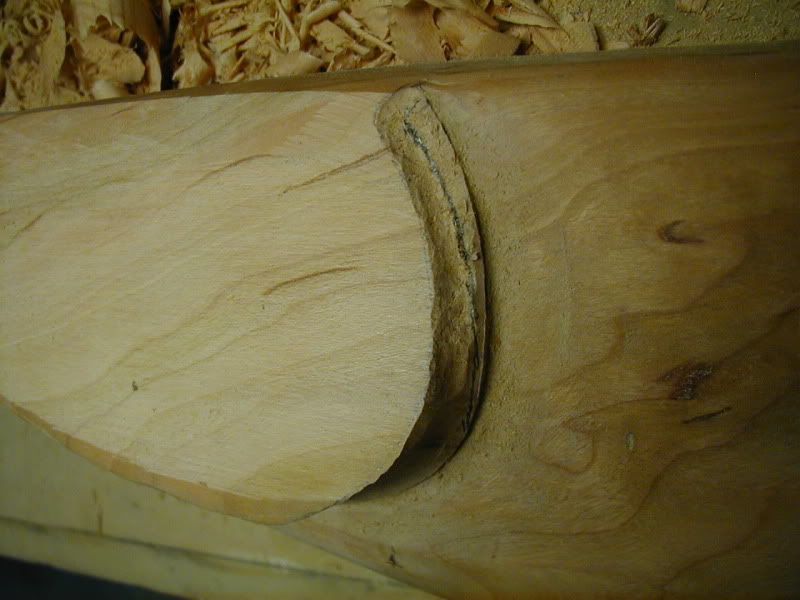 Cut the shadow line: 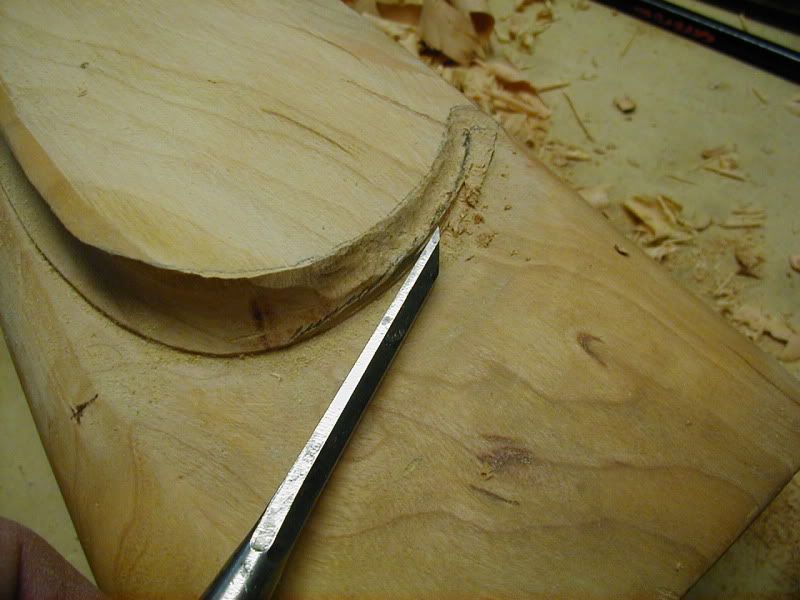 Now, it's roughed in, ready to shape with a rasp. Time to go to bed tonight. 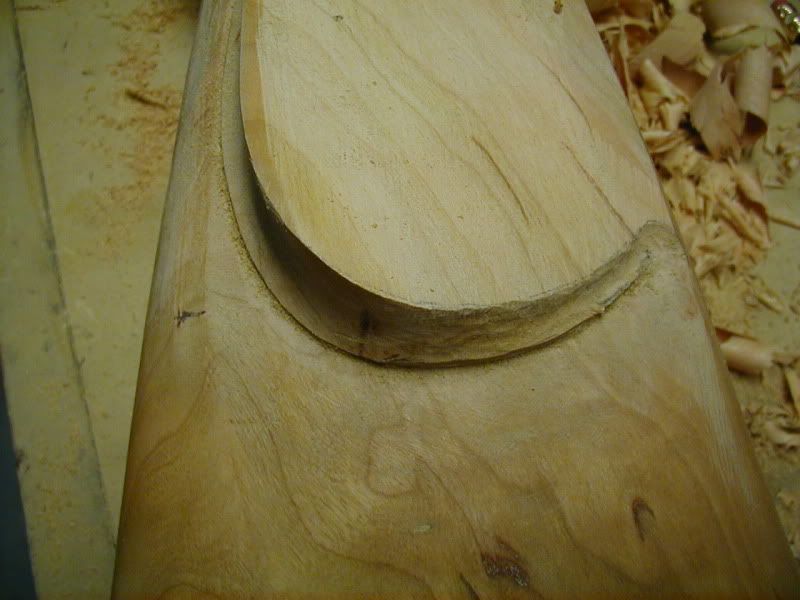 | |||
|
| Moderator |
i have used, and prfer, the barrel bedding tools to cut that curve under the cheekpiece .. varying sizes, of course http://www.midwayusa.com/viewp...productnumber=142923 opinions vary band of bubbas and STC hunting Club Information on Ammoguide about the416AR, 458AR, 470AR, 500AR What is an AR round? Case Drawings 416-458-470AR and 500AR. 476AR, http://www.weaponsmith.com | |||
|
| one of us |
Looks great to me! Wish I had more talent. NRA Life Member, Band of Bubbas Charter Member, PGCA, DRSS. Shoot & hunt with vintage classics. | |||
|
one of us |
SSDave, You are doing an outstanding job. And i love your choice of cherry. I have a really nice stock turned and waiting to be fitted out of some amazing curly cherry. Cherry makes for a light and strong stock and will look especially nice with the pattern you have selected. I hope you realize you are going to have a redhead instead of a blonde once your stock is finished. Cherry develops a really deep red patina rather quickly - which is when it really looks at its best in my opinion. What are your plans or finish? I have had excellent success with Seafin Teak Oil on cherry. I am looking forward to your progress and the finished product. William Berger True courage is being scared to death but saddling up anyway. - John Wayne The courageous may not live forever, but the timid do not live at all. | |||
|
| One of Us |
William, I know that the color will darken, I'll probably sun darken it for a couple of days before I stain it, if any. I'll probably finish with tung oil, may stain, but I dont know. I'll experiment with some concrete stains on the scraps from the thinning operation, I use the metal oxide pigments and rub them in with paint thinner, gives a nice natural looking color to wood. The red and tan mix that gives a nice color to wanut makes cherry come out too red, like a lot of commercial furniture. Maybe I can add a brown to darken it without the pink/red. Here's more work: First, use a rattail rasp to clean up the cheekpiece contour. 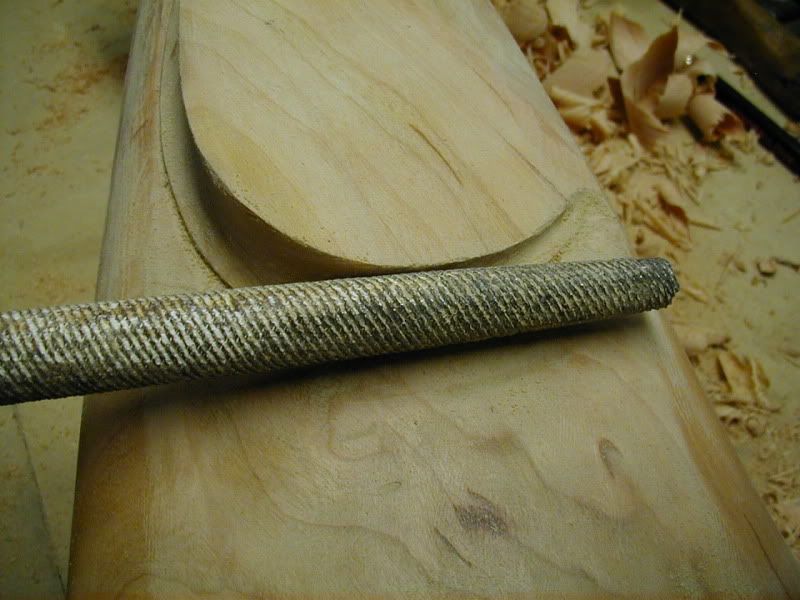 Then, use a coarse file to flatten the cheekpiece to a flat plane. I'm a believer that all the lines on a stock should be straight, except for tangent curves. no bowed or warped edges or planes.  Now, to start in on the front of the cheek piece. The wrist needs thinned, that will give me an opportunity to do a little fancy work here. Nice thing about doing work for yourself and not being a guild gunsmith, you don't have to worry about your brand and the fashion police! I lay out a guide line;  Cut to it with a chisel to establish the shadow line;  Another guide line, cut to it with the chisel, and thin out the wrist. Now there's some detail to the front. Looks a bit nicer than just a round end. If you don't like how it turns out, you can always cut it away and just leave a rounded end. The detail work and definition will be added to this with a bit of small round file work and the sanding. for now, I'll leave it rough so if I ding it on something when working on the other side or grip or buttplate, it won't be ruined. 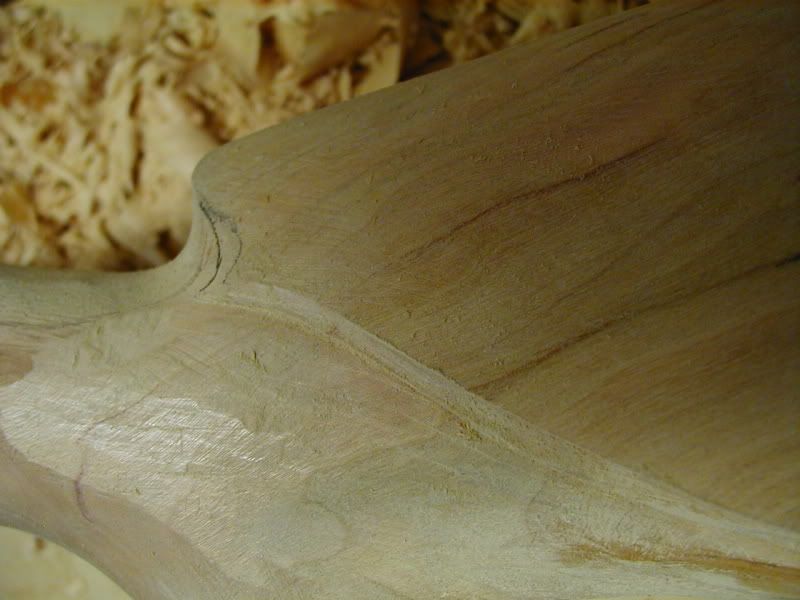 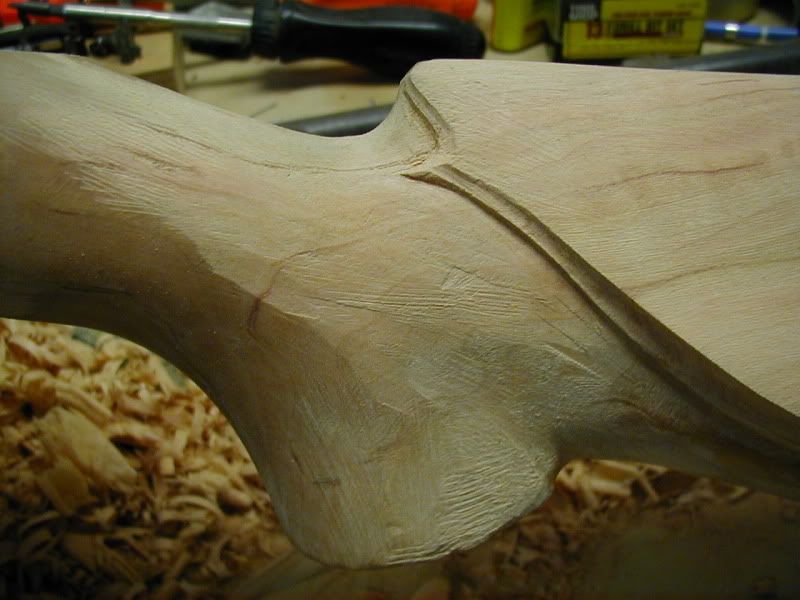 | |||
|
| One of Us |
Now, went back to the rear of the cheek piece, and thinned the stock slightly. I want to get the transition to the cheekpiece right before I layout for the buttplate. 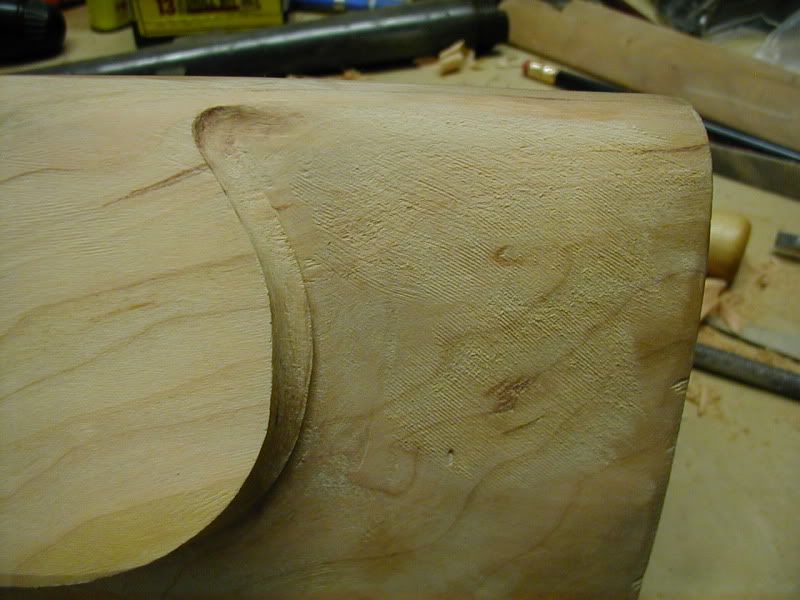 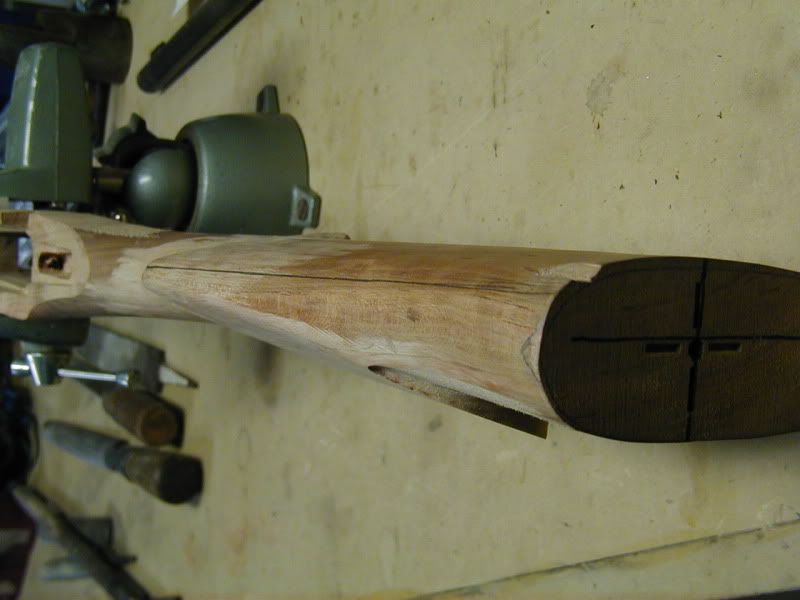 One of the reasons I got this stock cheap is it had a chip on the butt end on the right side. I can work around this, by thinning the wrist as I did, and by offsetting the buttplate to the left, I'll end up with some cast off in the stock, which I want anyway. Here's the chip, and then a look at the cast off I'll end up with. I'll be using a takeoff model 70 plate I had lying around.  [IMG]  I've laid out a line to plane to. One of the reasons to work on this side is that there's a thumb cut in the comb. Thumb cut is superfluous; it's a sign that the comb is too thick. http://i49.photobucket.com/alb.../ssdave/19.jpg[/IMG] 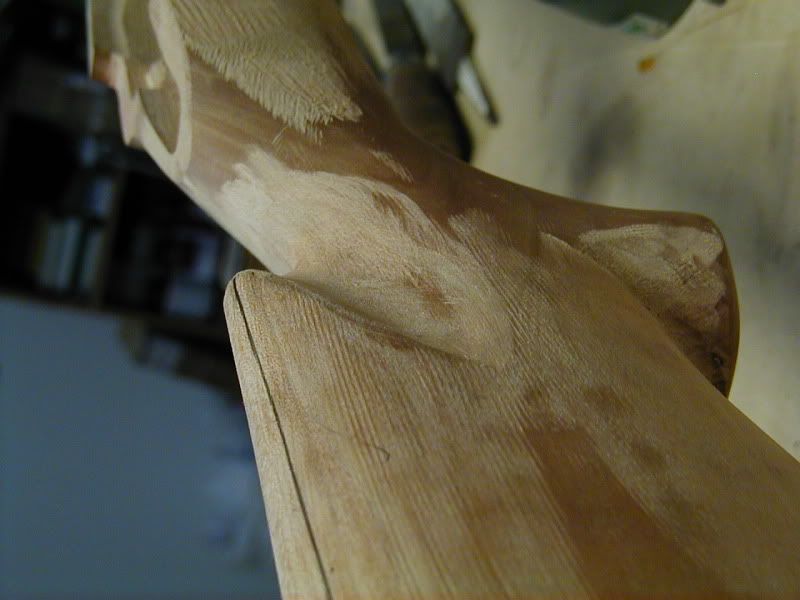 A plane removes the bulk of the material; some rough rasp work cleans up the stock lines. Again, rasp this to a straight surface. There shouldn't be any bulging or rounding to the stock fore to aft.  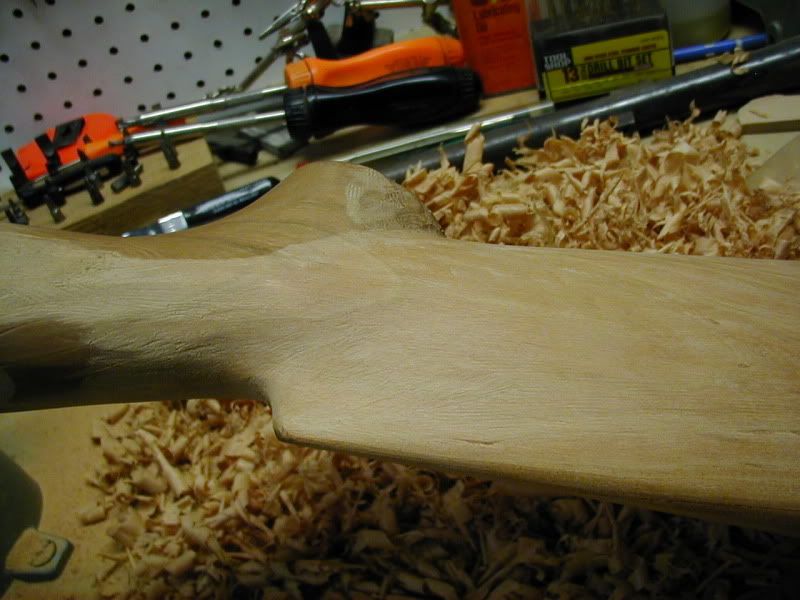 Time for bed for tonight, tomorrow will start to inlet the buttplate. That's a nights job by itself. dave | |||
|
| one of us |
I can see why you have such crappy work, on your work bench you have 2 of your Crescent wrenches and 2 of your open end wrenches turned wrong. Correct that and you can probably turn out some passable work. All kidding aside that is fantastic work. I would end up with something that looked like a crazed Beaver with one tooth got hold of it. I will love to see the end result. Steve E.......... NRA Patron Life Member GOA Life Member North American Hunting Club Life Member USAF Veteran | |||
|
| one of us |
Nice thread.........Thanks for doing this. Can't wait to see the finished product. | |||
|
| One of Us |
Inletting the buttplate is a lot of tedious repetition. To start,I have the stock at the right length, and inlet the top widows peak of the model 70 plate. This lets me pencil in a line parallel to the plate to cut the stock to shape,at the length I want it to be. I've checked the angle of the plate, and it's got the drop or relief at the toe that I want. Now, I just cut it off with a saw.   Now, I put inletting black on the back of the plate, and start spotting it in by removing the black marks where the plate hits the wood. To make the inletting black less messy, I apply it with a cue tip, and then put lighter fluid on it to thin it. Spread it thinly, and let it dry a couple of minutes. It will still mark the wood when you tap with a rubber hammer, but won't get all over everything as bad.  After I get about 70% fit to the plate, I want to have a bit more repeatability in where the plate is each time I mark. Now is the time to drill for the plate screws. To keep from wearing out the holes, I use wood screws that are thinner and smaller in size than the final screws. The tapered heads will still center the plate in the right place. I snug in the screws, and then tap the plate with a rubber hammer to mark, remove the screws, and take off the high spots with a chisel. Repeat, about 30 to 50 times.  Here's what the inletting looks like as you're going. Shave off the black spots, a bit at a time, until it's all even contact everywhere. 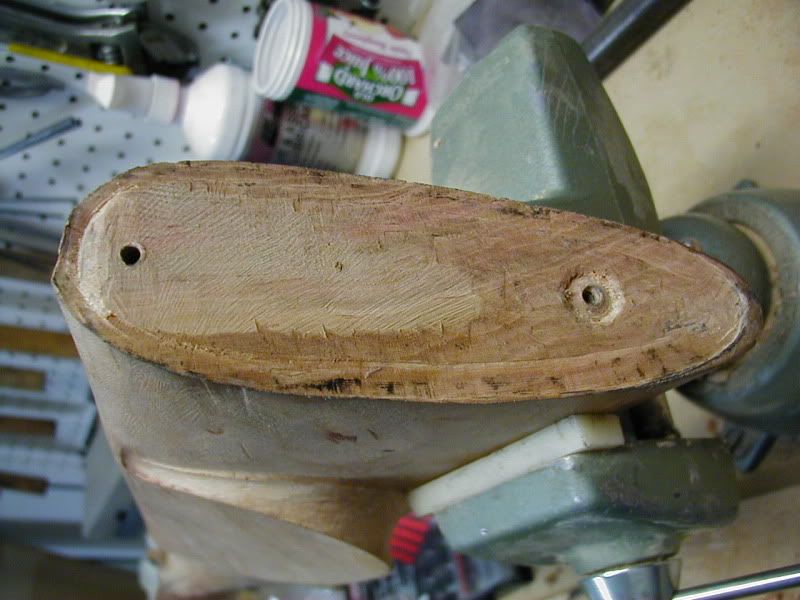 A couple of hours of this, and the plates down flush on the stock, no seam, and I've rasped the wood off mostly even with the edge of the plate. Will do the grip cap tomorrow.  | |||
|
| One of Us |
I love work in progress shots, keep 'em coming! | |||
|
| One of Us |
Dave, I'm not a stockmaker. Let me ask a stupid question, aren't you putting cast on and not cast off in the stock? Butch | |||
|
| one of us |
That's what I thought, too. I'm also not a stockmaker. Roger | |||
|
| One of Us |
Looks like cast on to me. | |||
|
| One of Us |
Butch, you're absolutely right. I'm not a stockmaker either, so I looked it up in my books, I've called it exactly backwards all the time. Learned something today. Thanks! What I wanted was the cheekpiece and stock to angle away from my face. This is a .338-06 and weighs about 7 to 8 pounds, so will have less felt recoil if it doesn't slam into my cheek. Not a lot of progress tonight, another tedious inlet, the pistol grip cap. This cap is really quite nice to inlet, it is a sunny hill. Nice shape that goes back to the same location each time, and won't twist. 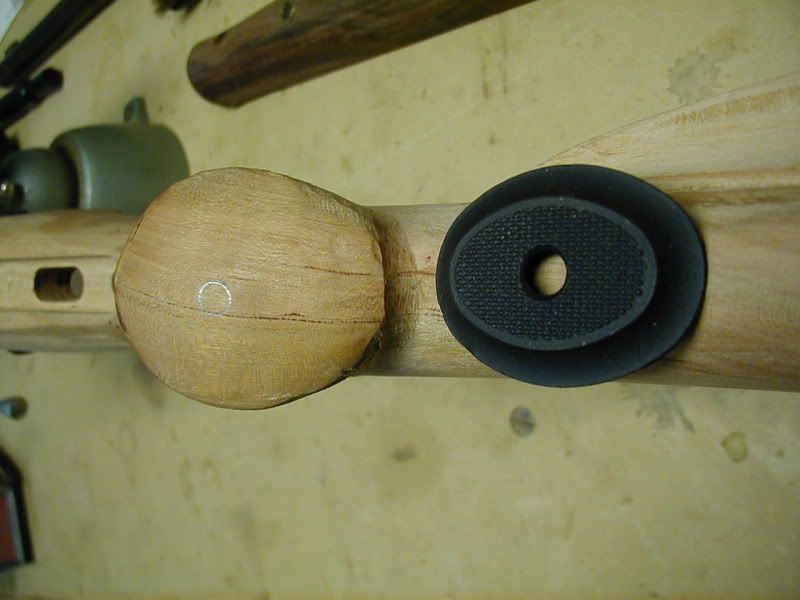 First, drilled screw hole, snugged it down, penciled around the cap. Cutoff excess with a coping saw. 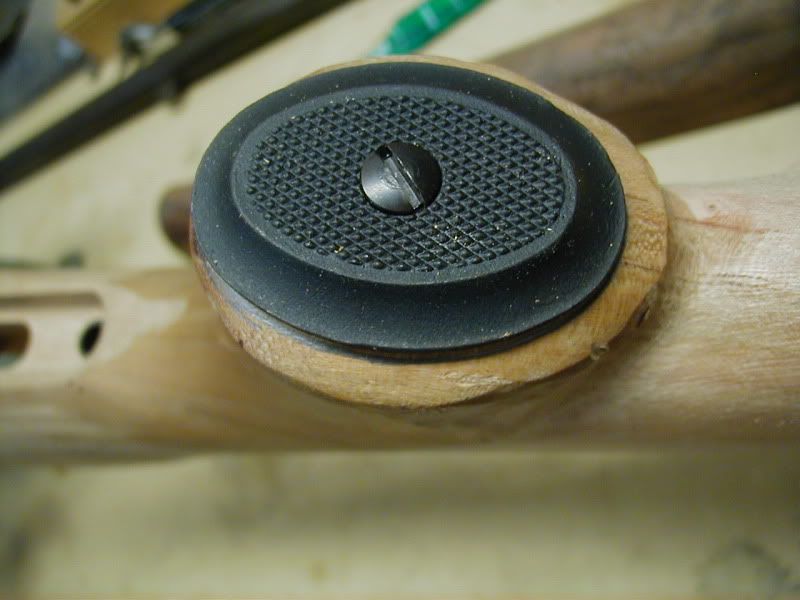  Tapped it with a hammer to mark the center recess, then sketched in the cut lines with a pencil.  Grip is just rough rasped to shape, I'll do the rest once the cap is in place.  Put inletting black on it, dilute with lighter fluid again, screw it on and remove the black spots. Repeat about 15 times, it's even contact everywhere and I'm done. Not as hard as the buttplate!  Then, I rasped the pistol grip to the size of the cap, and shaped it smoothly. Camera died before I could get the final picture, have to charge batteries so no final picture of tonights work. Next I will clean up the stock around the action. Have to cut for the bolt, the bolt release,and cocking piece clearance behind the tang. Thin the sides, and make sure the cross bolts are correct depth. Then, see if there's anything that doesn't look in proportion, adjust a bit if needed, and start the sanding. Really will start to see what the stock will look like then. dave | |||
|
| One of Us |
wow amazing ! | |||
|
| One of Us |
Kind of winding down the shaping work, will be sanding next. Still have to thin the sides under the receiver, cut for the bolt stop/release, inlet for the striker clearance and inlet for the bolt handle. First, mark for the bolt stop notch; note that the cross bolt is deep here, anticipating that the side will be thinned:  I cut out the notch with a coping saw, and file to shape. Then, mark for the pivot screw, and drill a small hole for the point of it to go into. I assemble it again, check it for clearance, file the notch again until it fits. then, mark how much the stock needs thinned here. 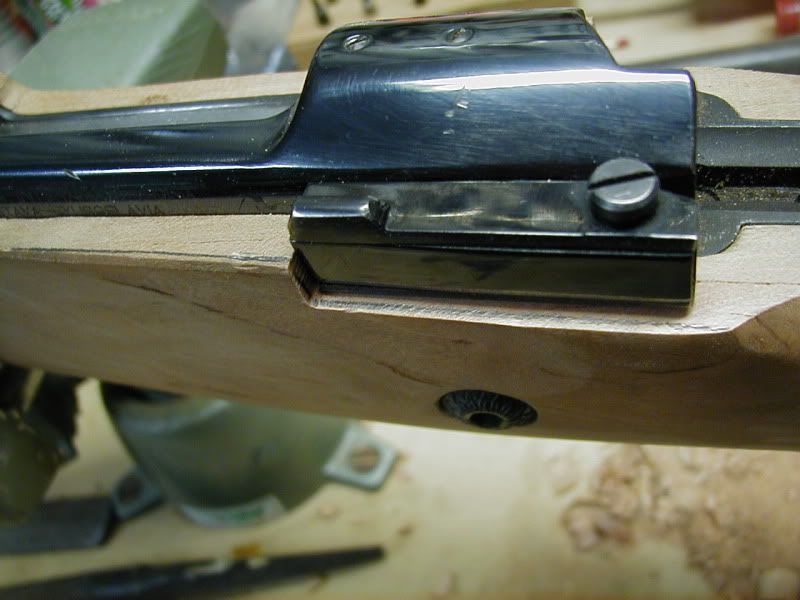 Then, mark for the bolt striker clearance:  I cut the edges of the notch with a straight chisel, then use a narrow flat chisel to cut out the notch. Check the clearance with the bolt, and if it won't drag, it's good enough. Now, to make the bolt notch, assemble the bolt,and pencil in around it. I'll cut it with a 1/4 inch gouge chisel, but I'm out of time tonight. Messed with a new 40X I'm assembling from parts, and used up my stock time! Dave  | |||
|
| One of Us |
Nice work. This is very helpful. Please post a side view of the grip. I would like to see how you shaped it after the cap was fit. Thanks. Jeremy | |||
|
| One of Us |
Here's a view of the grip: 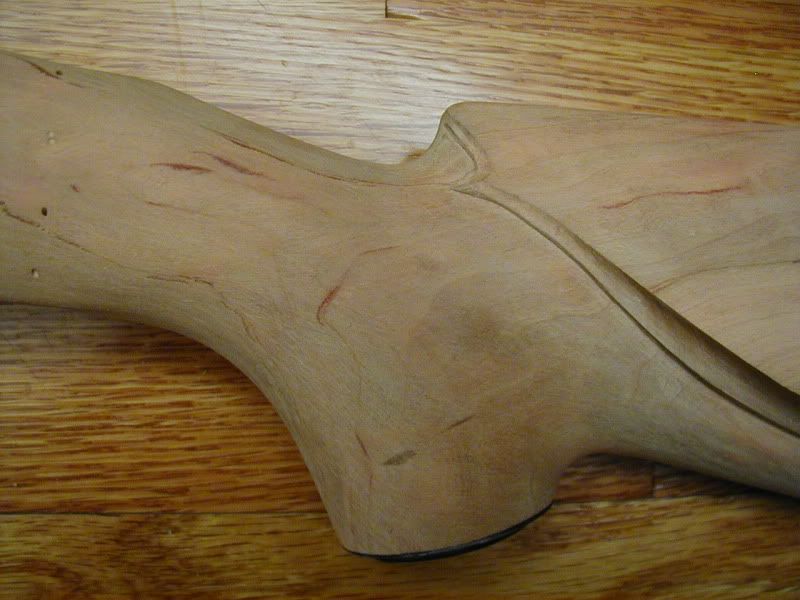 I cut out for the bolt handle, until it cleared fully closed: 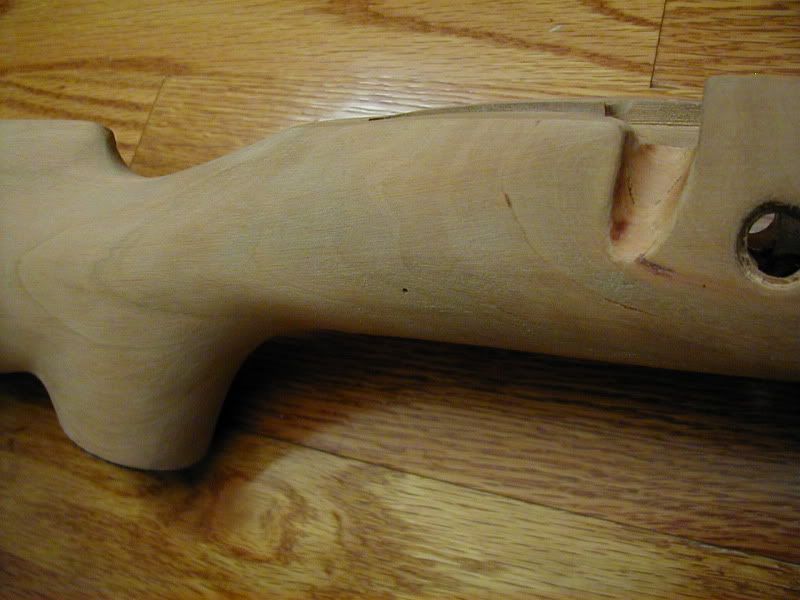 Then, put the action in and looked at it to see if any more shaping work needed before sanding. Looks good to go: 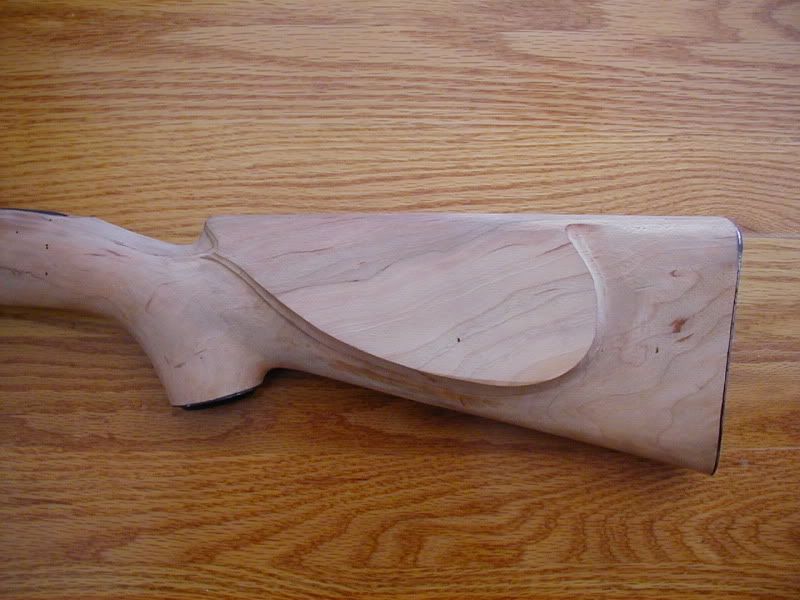 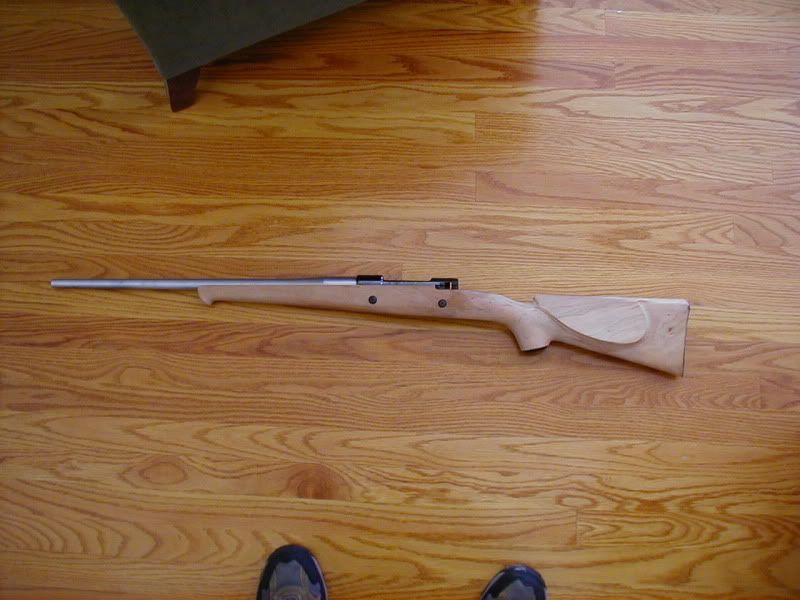 I'll sand using a wood block and starting with 80 grit. The wood block keeps the surface flat and smooth, without dishing and rounding. 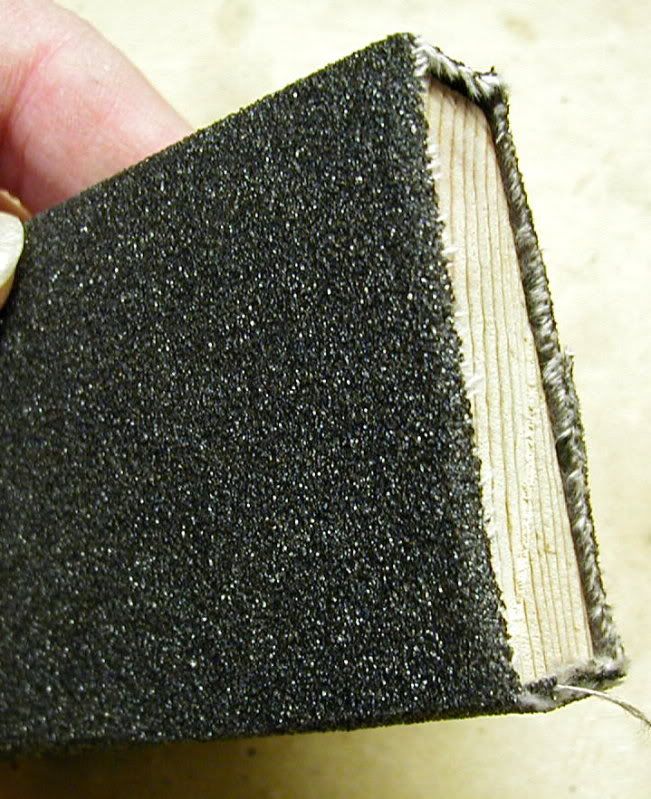 Sand parallel to the grain, butt it right up against the cheekpiece. Don't sand cross grain along the shadow line or you'll work forever to get the scratches out! I'll show later how to sand there. 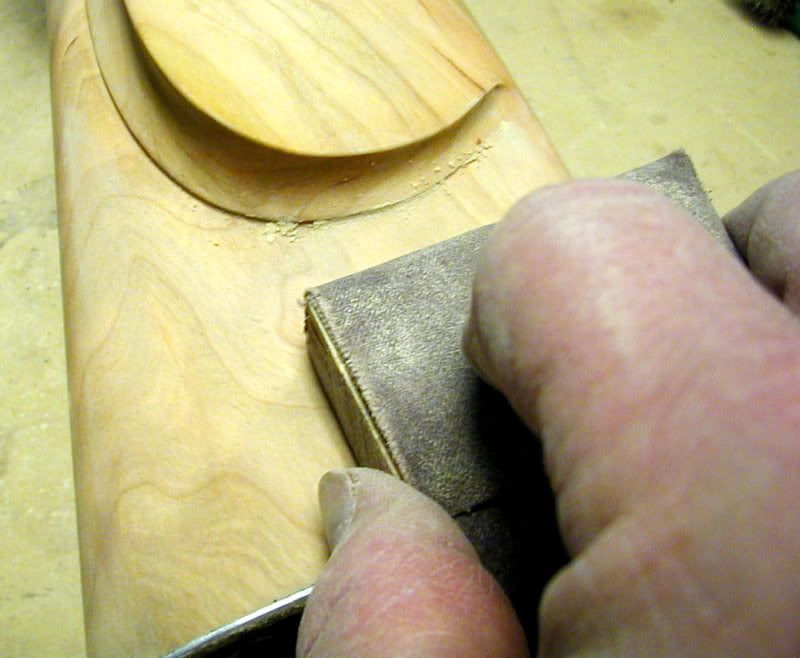 Wrap sandpaper around a dowell and use that to sand the cheek piece recess, and behind the grip, and the wrist of the stock, and all curved areas. Roll the paper slightly as you go, will keep down scratches. Sand with the grain, there will be a few areas where that's impossible, but do the best you can. On the wrist and grip, I move in the grain direction, and roll the dowell at the same time. Helps cut a bit more without cupping the flat areas next to the curve. 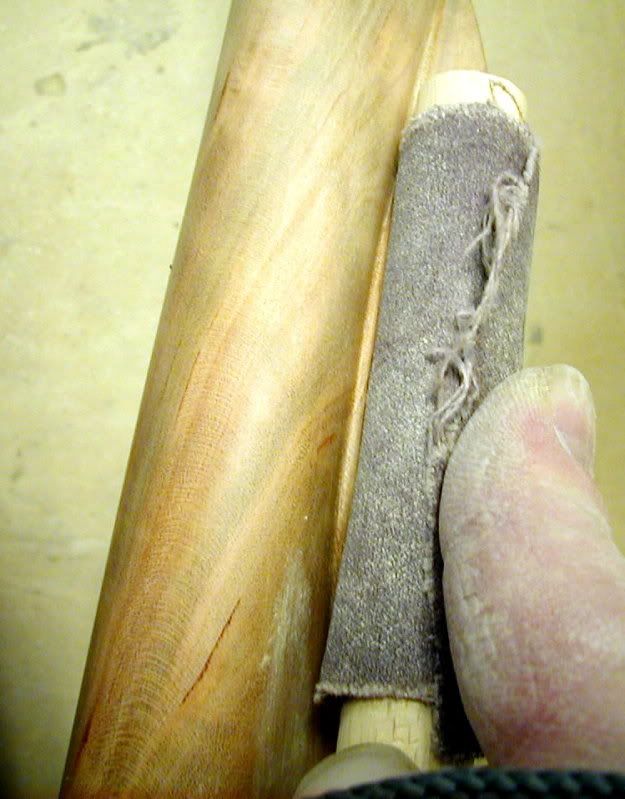 I use a pencil with eraser end to sand down into the finest detail of the cheekpiece:  When it comes to getting tight into the corners along the cheekpiece, I use a softwood door wedge to hold the paper. Now, you can sand tight up against the cheekpiece, again with the grain direction. 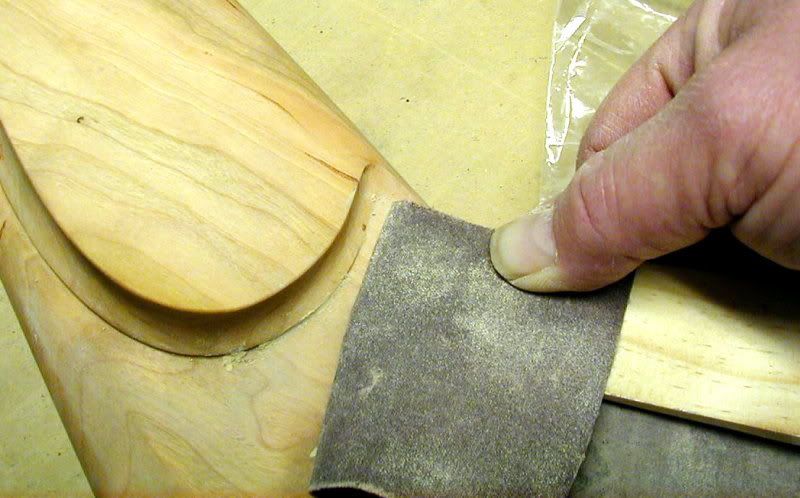  I sand the schnabel tip with a dowel, and roll it a lot to get it to cut the concave part in the directionof the grain.  When I got it through all the grits, I used my thumb with the finest grit to smooth and blend all corners and curves. Spend some time on the cross grain at these areas, or they will look poor when you start oiling the stock. I used 80, 120, 150, 180, 220 grit paper sequentially. Took about 3 hours, and here is the result, ready to stain:  I'll do some experimenting with stain, and get the stain and first coat of oil on it in the next post. dave | |||
|
| One of Us |
Now, I need to do some decision work on the color. I use the scraps from the forearm thinning to test. I tested a few different things. First, I took one piece and rubbed in concrete dye powder, and then used neutral, walnut stain, and a 4:1 mix of neutral and walnut over the stained wood. Also, took one piece and used the same oil stains over plain wood. All the pieces had been sun aged to natural cherry brown first. Here's the test strips:  I liked the mix over concrete dye best. The plain walnut had a greenish tinge, the neutral looked too much like birch. All the ones with no powder stain looked too much like birch or maple. Here's the dye, and how I mix it: 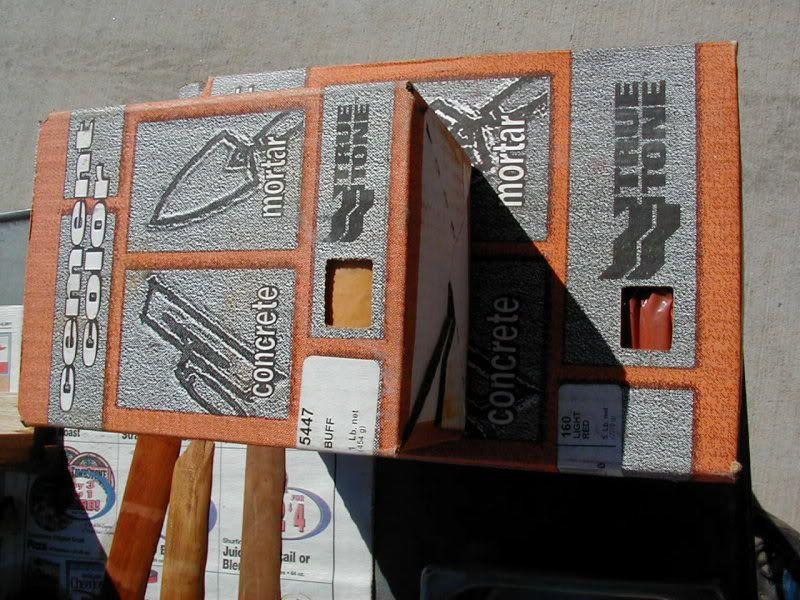   Once the powder is mixed, rub it on dry with a cloth. Gloves are essential, this stuff is messy. Don't do this in the house or anywhere you want clean. It will permanently stain anything it gets on including concrete floors.  Rub it in with the cloth until it is nice and even and you have full coverage: 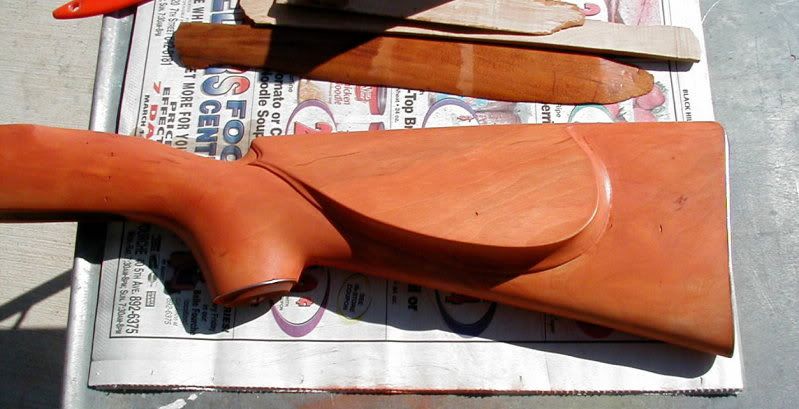 [IMG] Now, I wet a cloth with paint thinner. Rub in the stain with the thinner, and pay attention to getting it even. Where it's too thick, add thinner, and rub until some of it comes off. Keep working it until you get the shade you want. 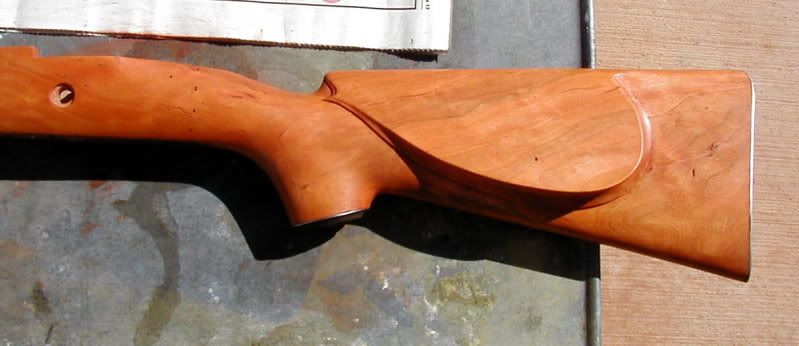 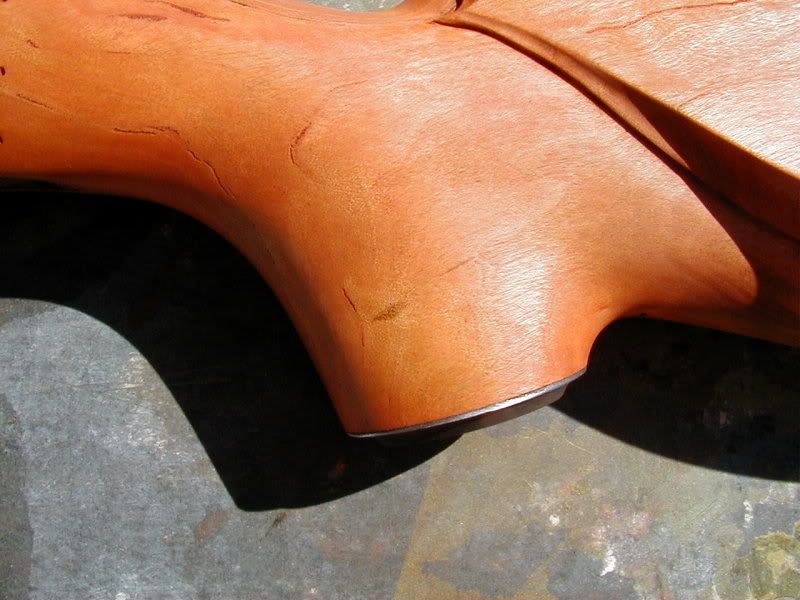 When I had the shade matching my test strip, I let the paint thinner dry out for a couple of hours in the sun outside. Luckily, mid 50's here today, outside tee shirt weather for staining, I got a couple of stain projects done, including some house trim and this stock. Then, liberally coated the stock with danish oil in my 4:1 natural and walnut mix, and let stand for an your or so. Then, wiped it off and let it hang outside for another hour. Then buffed off what I could with a clean cloth. Here's what it looks like:  Now, I'll let the oil that penetrated dry for several days. Then, I can start in with the tung oil finish. dave | |||
|
| One of Us |
What a great thread.... thank you so much Dave Ray ...look up, and lift up your heads; for your redemption draweth nigh. | |||
|
| One of Us |
Thanks for the grip photos. The wood took on a lot more character with your process. It looks nice. Jeremy | |||
|
| one of us |
I did a cherry stock years ago came out a very nice light red. looks like this well be very nice. | |||
|
| One of Us |
Very nice! Thanks for posting! | |||
|
| Powered by Social Strata |
| Please Wait. Your request is being processed... |
Guns, Politics, Gunsmithing & Reloading Gunsmithing

Visit our on-line store for AR Memorabilia