
 The Accurate Reloading Forums
  THE ACCURATE RELOADING.COM FORUMS
  Rifles
  Double Rifles
  Damascus hornet double...in progress
Go  | New  | Find  | Notify  | Tools  | Reply  |  |
One of Us |
sweet!!!!!!!!!!!!!!! go big or go home ........ DSC-- Life Member NRA--Life member DRSS--9.3x74 r Chapuis | |||
|
| One of Us |
You are making great progress. Bill Member DSC,DRSS,NRA,TSRA A man who carries a cat by the tail learns something he can learn in no other way. -Mark Twain There ought to be one day - just one – when there is open season on Congressmen. ~Will Rogers~ | |||
|
| One of Us |
Moving along nicely. One lesson learned is to get everything that has an affect on the rifle being smoked on face fitted so I only have to do that one time. So the ejectors, striker bushings and of course the side clips are next. I locate and spot drill where the center of the bores will be. The firing pins are at a slight angle down and to the center of the action by about 5 degrees. Using a compound vise, I am able to drill the holes for the bushings, and counter bore the hole for the bushing. The bushing runs all the way through the action face, and the body is threaded. Here is a picture of the holes, and next with the bishings in place. 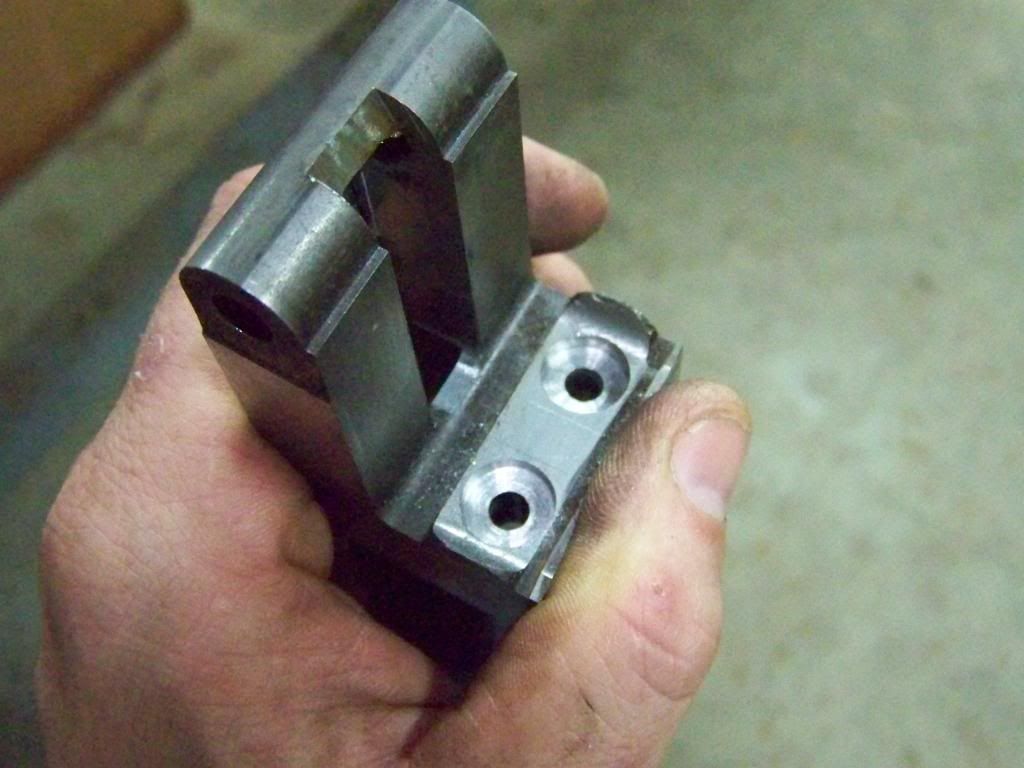 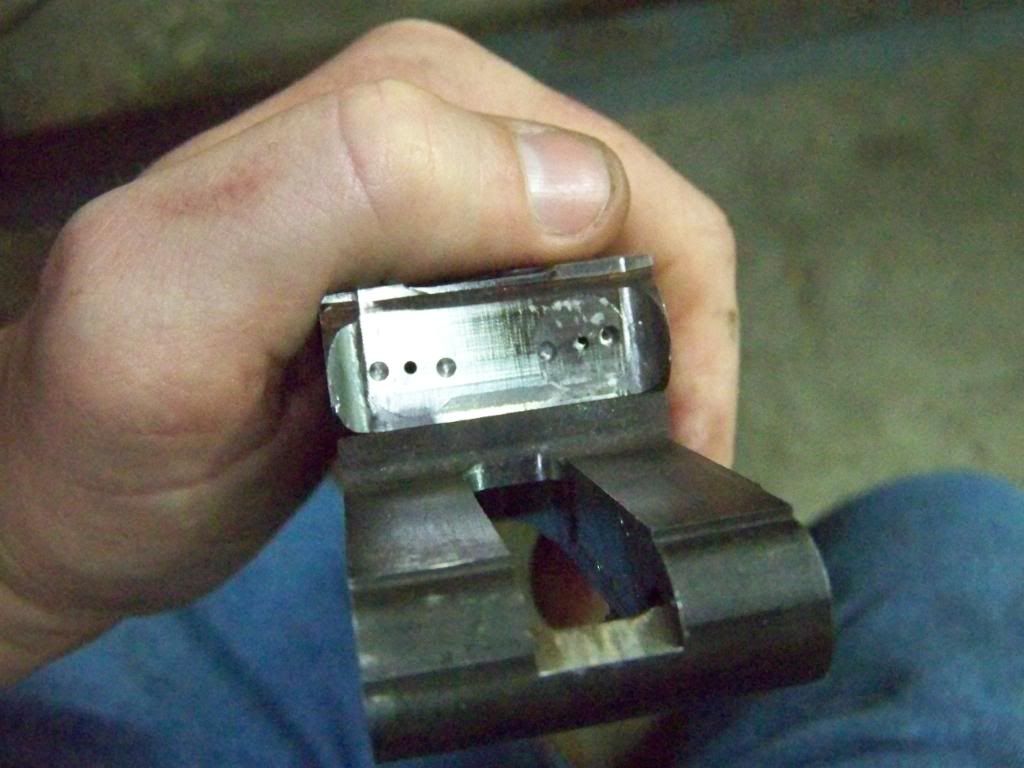 After the bushings are seated, I machine off the excess material down to the face. Remember I left the face with about .005 extra material. I fitted the ejectors when I made the shoe lump, but since the barrels were not in place, fitting them requires machining the cavity where they ejectors will be. I would love to have a horizontal mill for this, but a modified keyway cutter is another way to get it machined. From here, I go in with rifling files and make sure it is flat and the ejectors fit. 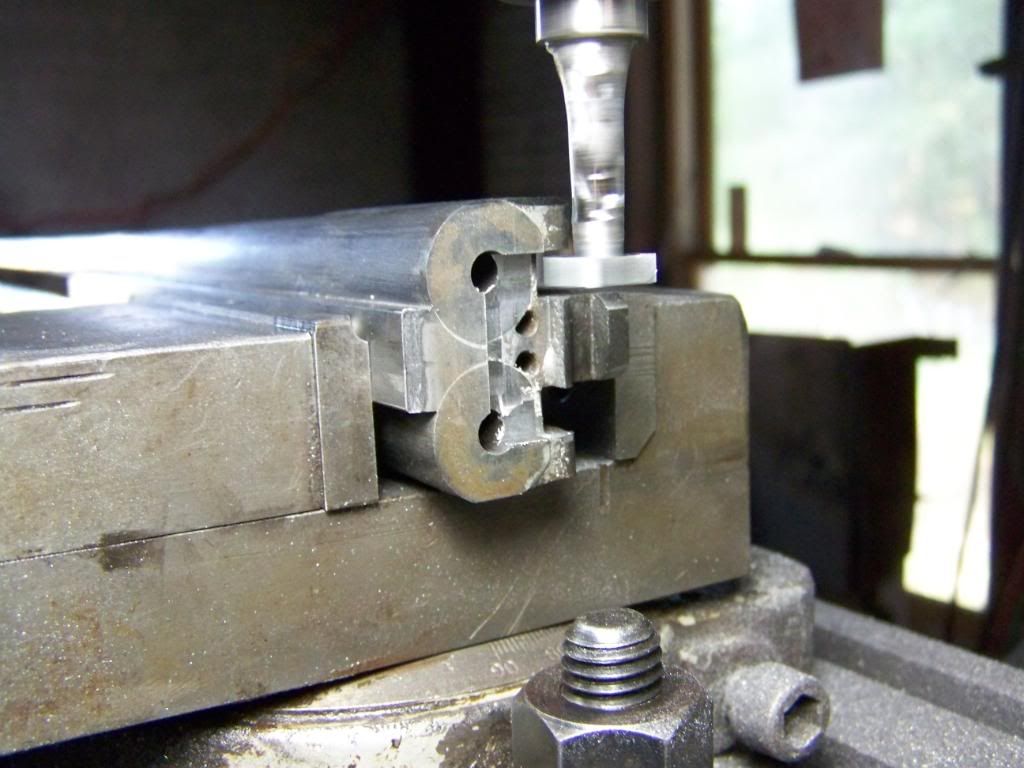 The next step is smoking the barrels on face. I didn't have the camera at the shop yesterday when I did this, but I am sure most of you have seen it done. It's slow and tedious work, but I kind of like it. It ends up putting me in a zen-like state of mind and the time goes quickly. Her is the action with the barrels on face. 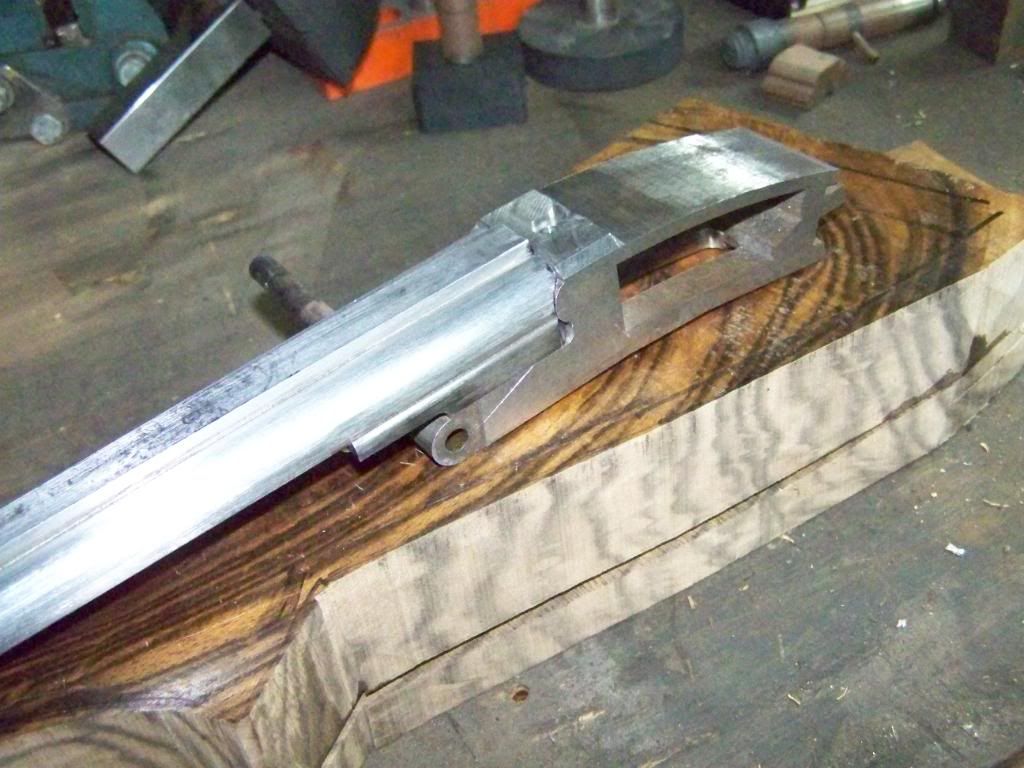 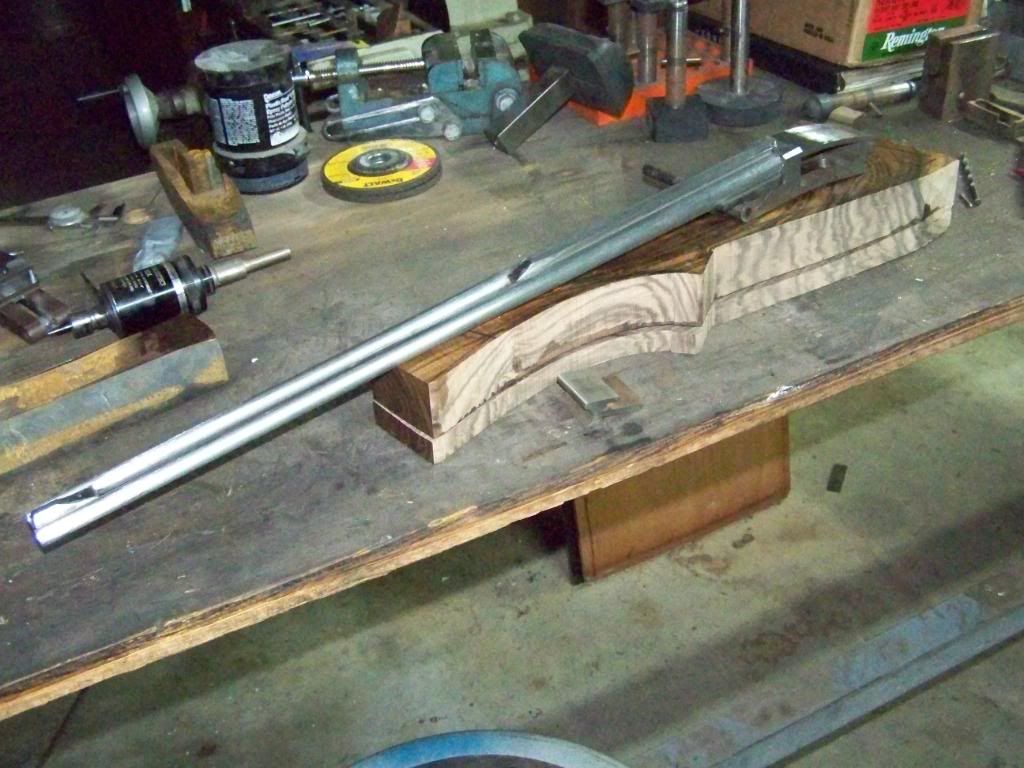 With the barrels smoked in, I can begin work on the top lever and sliding bolt. Again, I use a keyway cutter to machine the slot for the bolt. The rifle has double underbites, so the bolt is too long to machine only from the bottom. This is one of those operations where everything must be good and square. Once I machine part of the slot from the bottom of the action, I flip it over and machine the forward portion. It the action isn't square and level in the vise, the slots won't line up and there will be a step where the cuts meet. 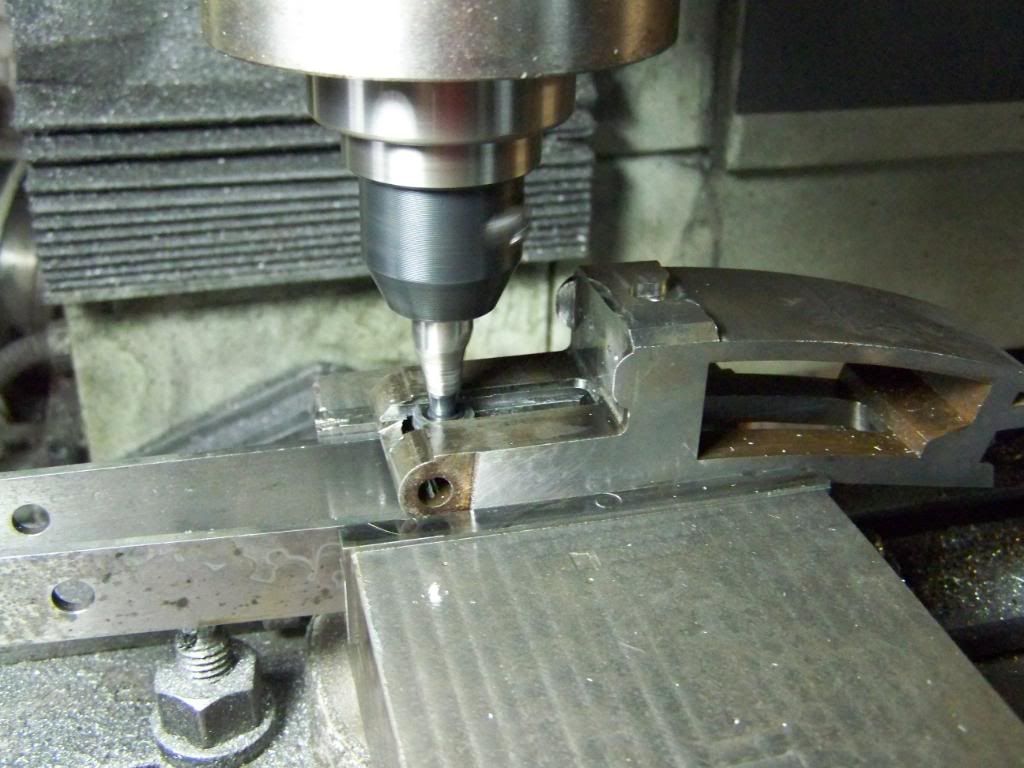 Here is a shot of the bottom of the action with hte barrels on. You can see the relationship of the underbites with the action. Nice snug fit in there :-) 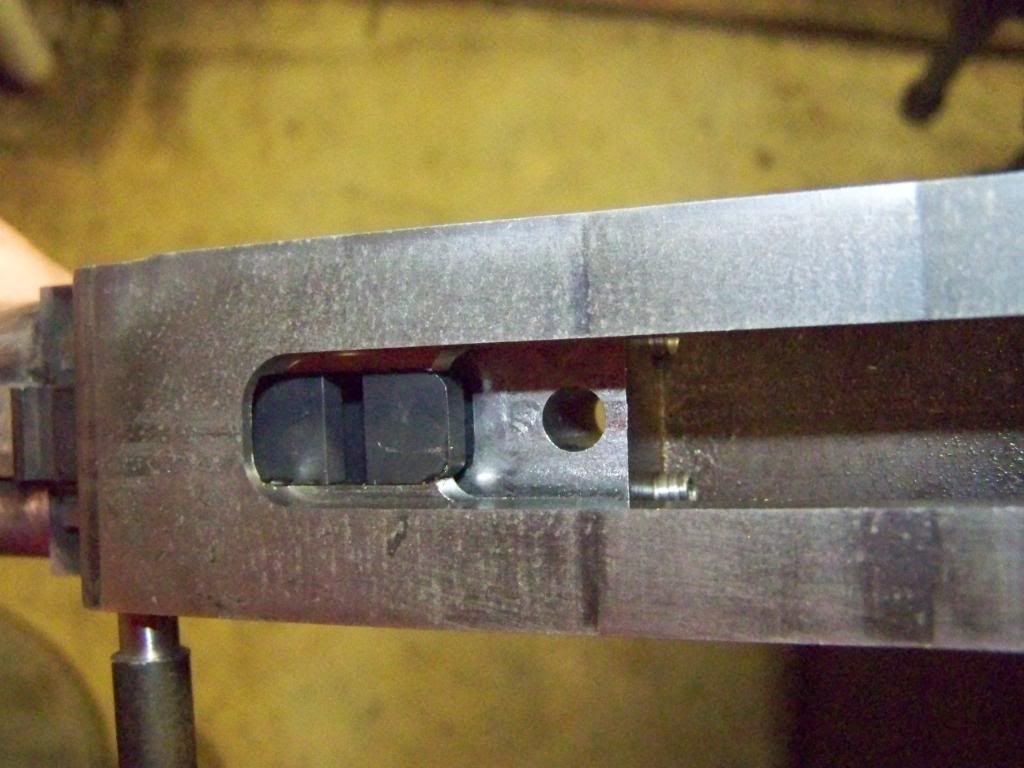 Bailey Bradshaw www.bradshawgunandrifle.com I'm in the gun buildin bidness, and cousin....bidness is a boomin | |||
|
| One of Us |
Worked on the lock slide today, and the top lever is on the mill now. I start with a 3/4"x.140"x3" piece of 52100. Machine the top lever dog hole and the underbite holes. Once those are machined, the part is surface ground to fit the slot in the action. At this point it is heat treated and tempered to 42rc. Here is the part after tempering. 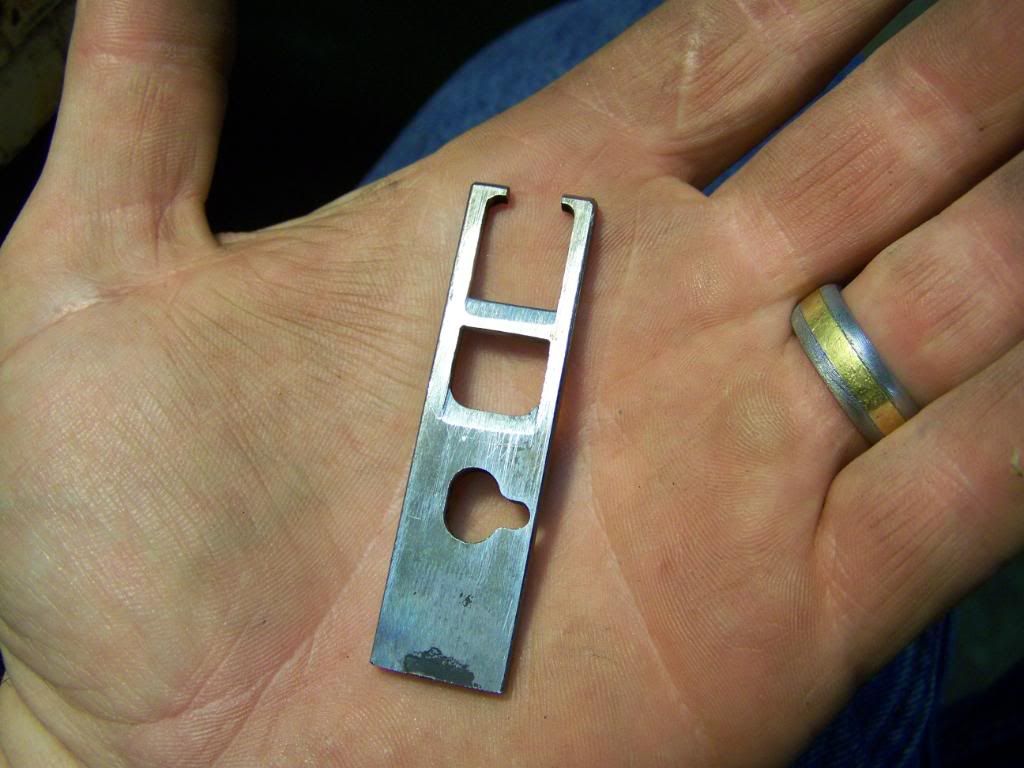 A picture of it in the action 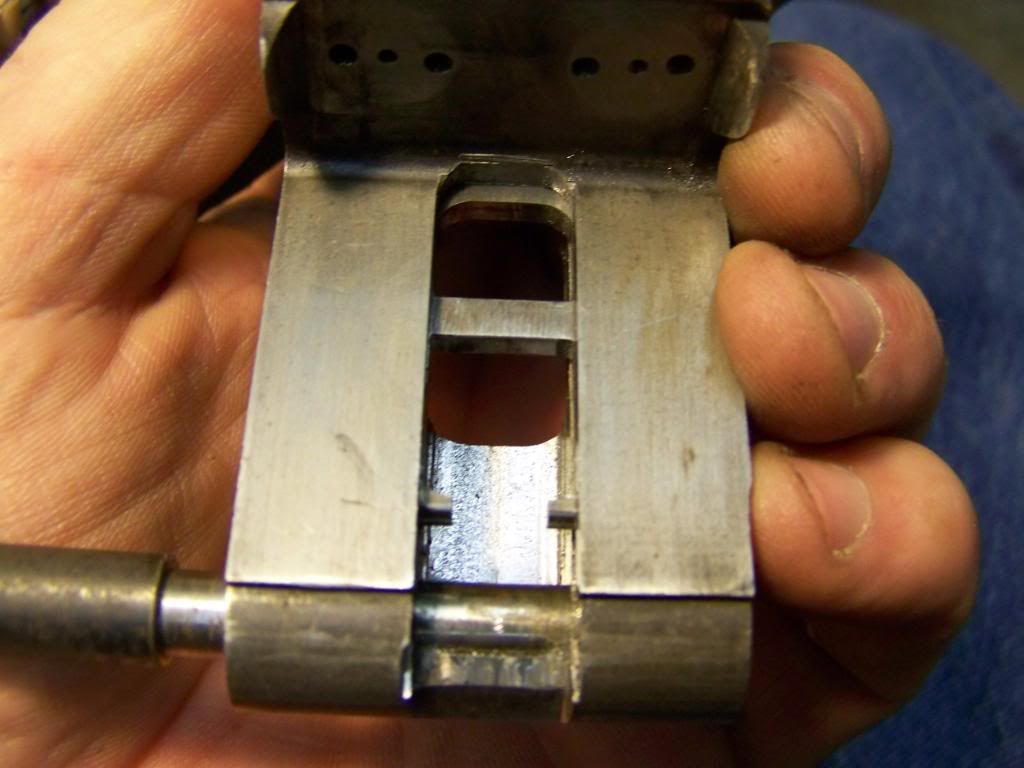 I file fit the lock slide to enguage the underbites. I don't want it too far into the underbites, just enough at this point to lock down the barrels. It has about 6 degrees of angle. 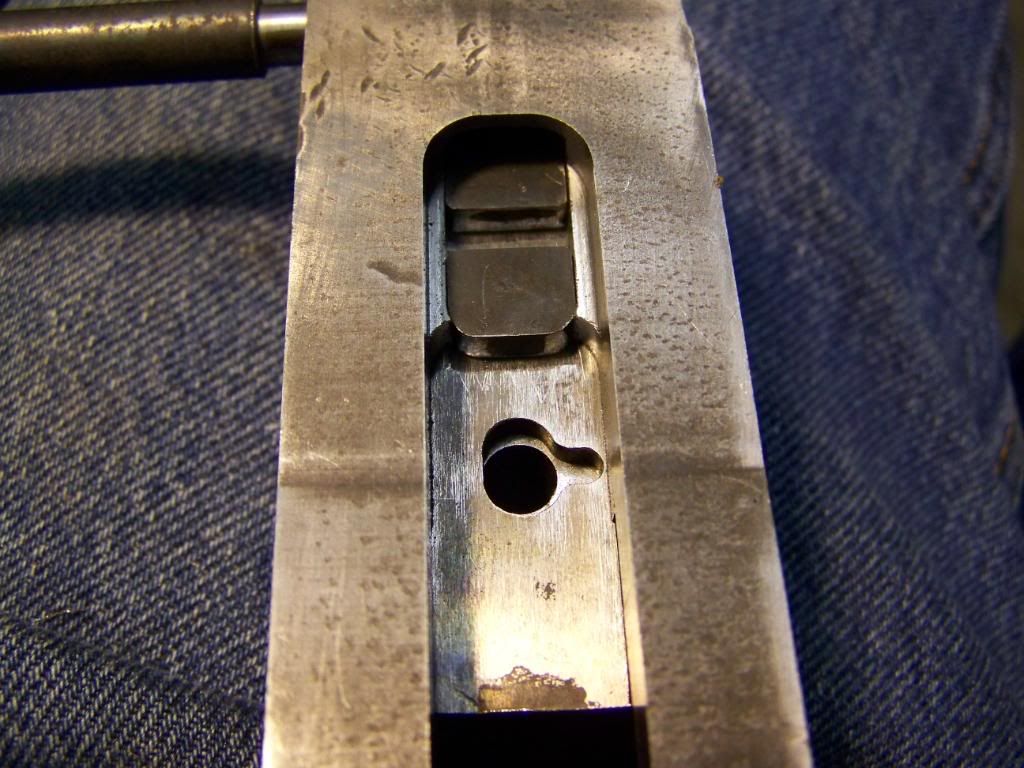 While waiting on the top lever to finish machining, I went to work fitting the trigger group housing. I will finish this up tomorrow, but here it is with the front end inserted. The trigger group will be removeable for cleaning, just one screw at the rear holds it in place. 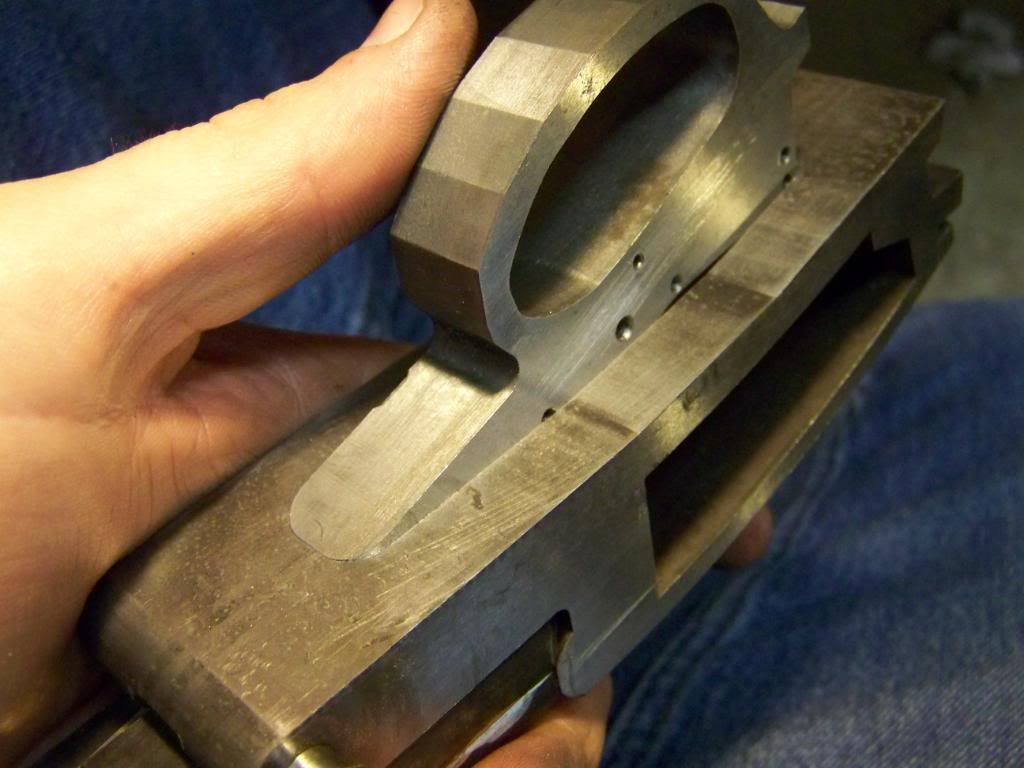 Bailey Bradshaw www.bradshawgunandrifle.com I'm in the gun buildin bidness, and cousin....bidness is a boomin | |||
|
| Moderator |
amazing opinions vary band of bubbas and STC hunting Club Words aren't Murder - Political assassination is MURDER Information on Ammoguide about the416AR, 458AR, 470AR, 500AR What is an AR round? Case Drawings 416-458-470AR and 500AR. 476AR, http://www.weaponsmith.com | |||
|
| one of us |
+1!!! | |||
|
| One of Us |
Mr. Bradshaw, This is my favorite post on AR. Thank you for sharing! | |||
|
| new member |
Truly amazing. Glenn B. Glenn | |||
|
| One of Us |
Truly fascinating to watch. Thank you | |||
|
| one of us |
We just need to get Don to "sticky" this to the top of the "Double Rifle Forum" so that it is saved for everyone to see. Frank "I don't know what there is about buffalo that frightens me so.....He looks like he hates you personally. He looks like you owe him money." - Robert Ruark, Horn of the Hunter, 1953 NRA Life, SAF Life, CRPA Life, DRSS lite | |||
|
| One of Us |
Ohhh My god... Im learing a lot with this gunsmith report, like a metalugic school, thanks for sharing Your time and show Your work, very anxious to see the happy end, Im working in a 450 NE double too... but just with the E. Brown Book & Ron Vella Help by mail, Regards from Argentina: Guille. "Every ignored reallity prepares its revenge!" | |||
|
| One of Us |
Fooking incredible. After you've finished this project, what are you going to tackle next, coming up with an AIDS vaccine, or time travel, perhaps? Pure magic you possess, working with your hands. Big thanks for sharing with we mere mortals! ______________________ Hunting: I'd kill to participate. | |||
|
| One of Us |
That's phunny!! Time travel.... Really, this is not rocket science, just a healthy dose of patience and planning. Study and keep trying....all the stuff your parents told you when you were little Now back to the build...Here is the top lever after machining. I leave the final shaping to do by hand as there is so much character in the top lever shape.  the top lever with the cam for the lock slide.  The action has an additional pocket for the lever cam, it's being machined here. I always get nervous when machingin in confined spaces. Machines can do freaky thing from time to time.  once the pocket is cut and deburred, the top lever and associated parts can be installed and checked for fit.  Looks like I did OK :-)  The rifle's future owner wanted sling swivels installed. I didn't want the front eye to be too close to the forend, so I made a small rib to create some distance.  and here is the top side  Starting to look like it's little brother ( the stocked rifle is a .22lr, this one will be .22 hornet) 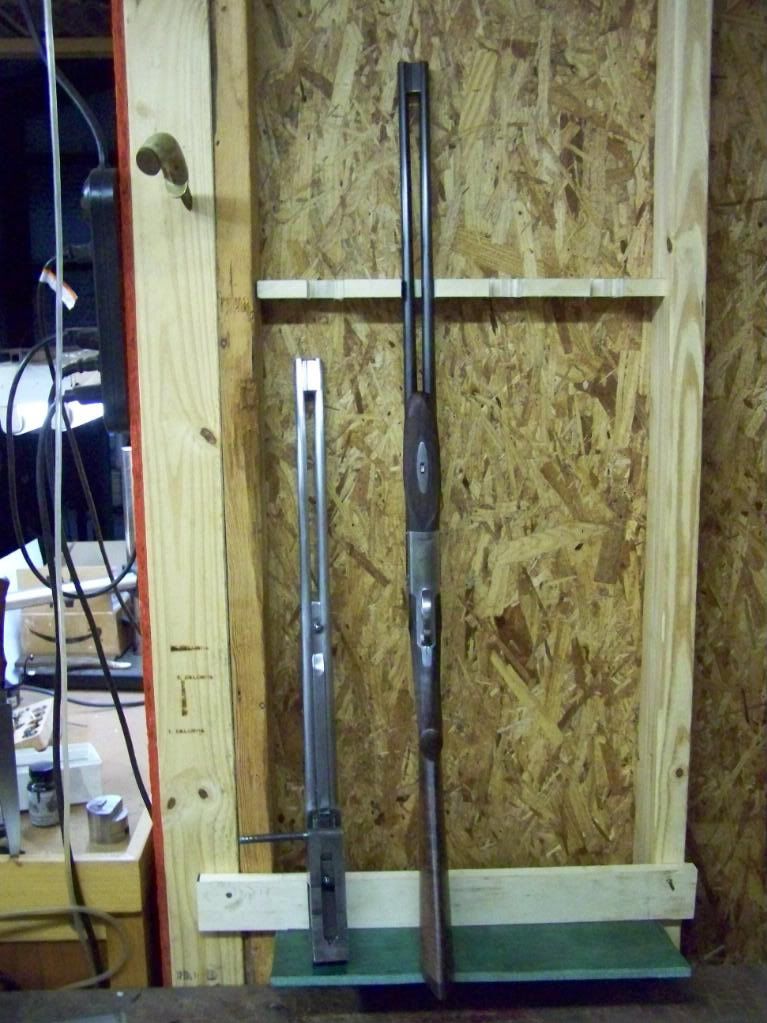 Bailey Bradshaw www.bradshawgunandrifle.com I'm in the gun buildin bidness, and cousin....bidness is a boomin | |||
|
| One of Us |
Thanks again, Bailey! Rusty We Band of Brothers! DRSS, NRA & SCI Life Member "I am rejoiced at my fate. Do not be uneasy about me, for I am with my friends." ----- David Crockett in his last letter (to his children), January 9th, 1836 "I will never forsake Texas and her cause. I am her son." ----- Jose Antonio Navarro, from Mexican Prison in 1841 "for I have sworn upon the altar of god eternal hostility against every form of tyranny over the mind of man." Thomas Jefferson Declaration of Arbroath April 6, 1320-“. . .It is not for glory, nor riches, nor honours that we are fighting, but for freedom - for that alone, which no honest man gives up but with life itself.” | |||
|
| One of Us |
Mr. Bradshaw, this work you are doing has left the confines of rifle building and has become art. I had no idea there were people in the world that could build a rifle from scratch at this level. Words fail me in my admiration of you and your skill. I am stunned, please continue to post pictures for us. josh | |||
|
| one of us |
Bailey, Are you coming down to the big bore shoot Sat? I am sure everyone would love to see your work in progress on you SxSs. Keith IGNORE YOUR RIGHTS AND THEY'LL GO AWAY!!! ------------------------------------ We Band of Bubbas & STC Hunting Club, The Whomper Club | |||
|
| One of Us |
Time just won't allow it. I have too many deadlines and a trip to Wyoming in a couple of weeks. I hate that I am missing it,....again!! Bailey Bradshaw www.bradshawgunandrifle.com I'm in the gun buildin bidness, and cousin....bidness is a boomin | |||
|
| One of Us |
I have the trigger group housing fitted in place and the retaining screw installed. 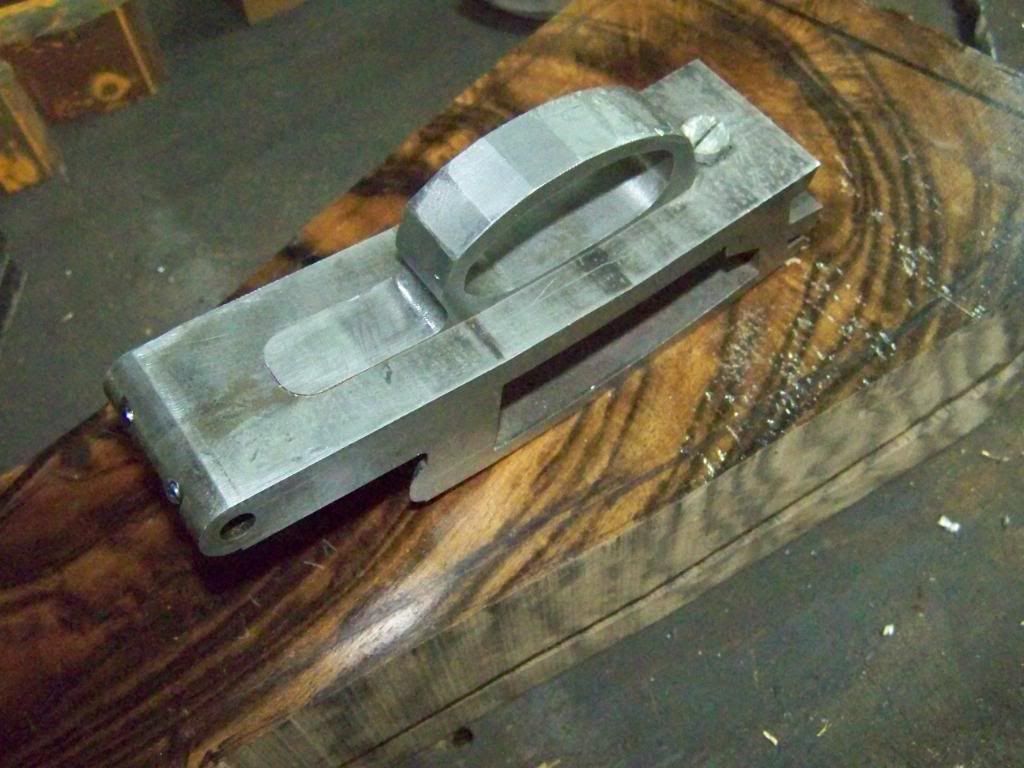 With that step complete, all of the internal machining has been done. Now I can start the exterior machinging. I use the 4th axis on the mill so I can rotate the action as needed. This is a tense process as a slip up is not repairable at this point. All of the external surfaces are machined leaving .005" over the finished dimension as designed. This allows me to finish the action without worrying about undercutting parts. .005" is actually a lot of material to remove with polishing stones and paper. Here is the setup.... 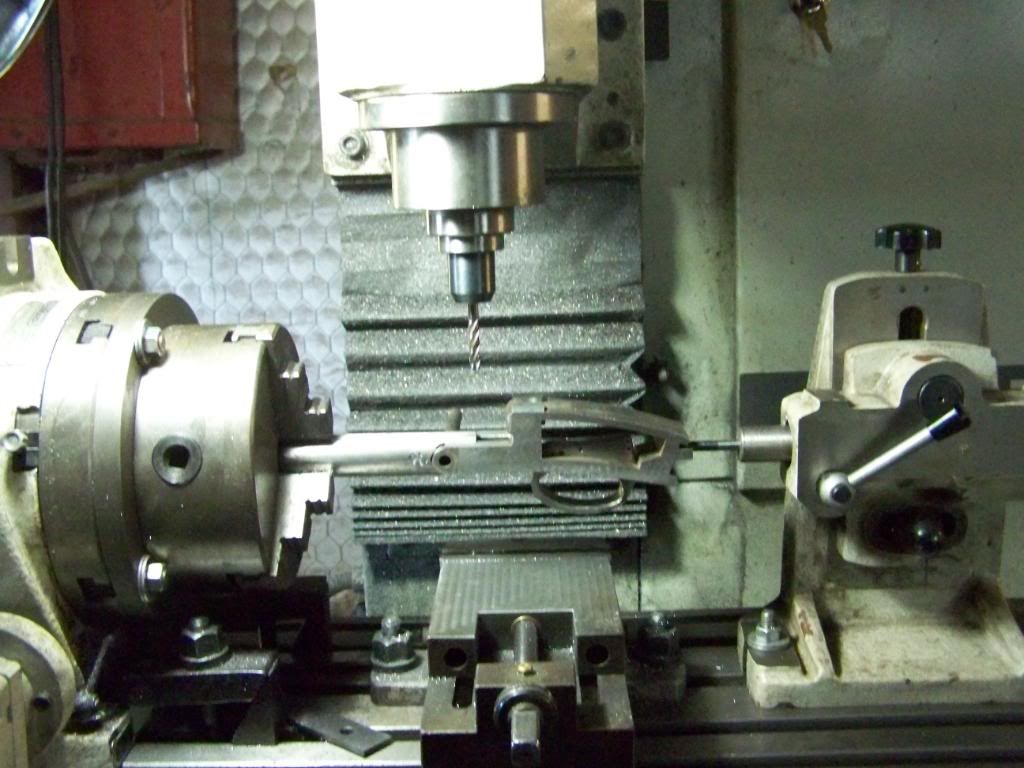 I figured a short video clip would be better than a picture at this point.  Bailey Bradshaw www.bradshawgunandrifle.com I'm in the gun buildin bidness, and cousin....bidness is a boomin | |||
|
| One of Us |
Mr. Bradshaw Do you mind if i asked where did you get the action design? Did you design it or copied from another action? Even if it is a copy of an action, it is no less a tremendous undertaking to build such a rifle. I only ask as I have the tools in my shop to build a double I just don't have a design or someone's rifle to take apart and copy. Not saying that I would try this As I just don't have the time to devote to such a project but it sure looks tempting www.KLStottlemyer.com Deport the Homeless and Give the Illegals citizenship. AT LEAST THE ILLEGALS WILL WORK | |||
|
| One of Us |
It's my own design. Nothing new in regards to mechanics, but it is not a direct copy of any other action. It has taken a LONG time to get here, and there are definately easier paths to get to a finished rifle. You could certainly but an old sidelock or boxlock and make you own using it as a pattern. Bailey Bradshaw www.bradshawgunandrifle.com I'm in the gun buildin bidness, and cousin....bidness is a boomin | |||
|
| One of Us |
Oh believe me, Even if I don't know all the ins and out of exactly what is entailed. I fully understand that that what you are doing could amount to a full time job for at least a year. Yes there are simpler ways to get there. Finding an old boxlock is not a bad idea Thank you sir for the post and the info. Keep at I'm waiting patiently to see the finished product www.KLStottlemyer.com Deport the Homeless and Give the Illegals citizenship. AT LEAST THE ILLEGALS WILL WORK | |||
|
| One of Us |
Bailey, Really cool stuff! I've thoroughly enjoyed your build in progress post, the work looks top notch. My only complaint is that the video is too short Shane Thompson | |||
|
| One of Us |
That is the coolest, most informative piece of journalism I've ever read. I should have studied metalwork at school--- at least I would then know what those machines are. Keep up the great work Malcolm | |||
|
| One of Us |
Made a lot of progress, but didn't get pictures of all of it. Once the action was rough shaped on the mill, I refine the shape with good ole files, stones and sandpaper. Most of this work is at the fences and arouns the trigger guard. 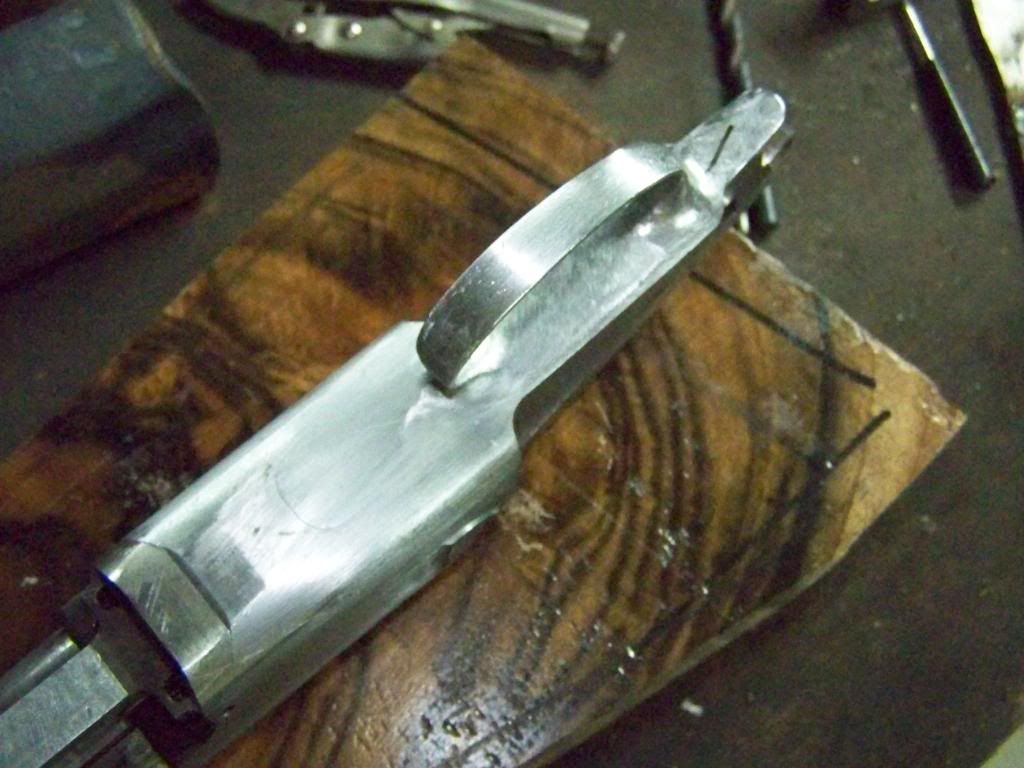 The forend is fitted with the latch assembly, and the barrel set is fitted with the bite. Once it is locked in place, I am able to shape it with the action 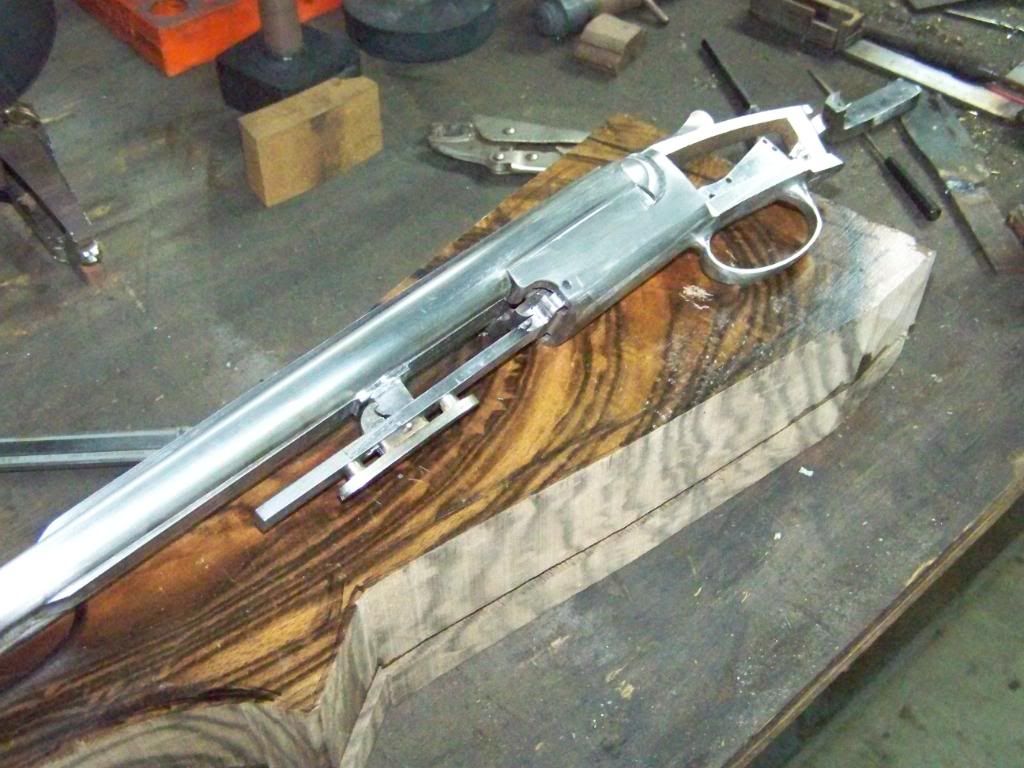 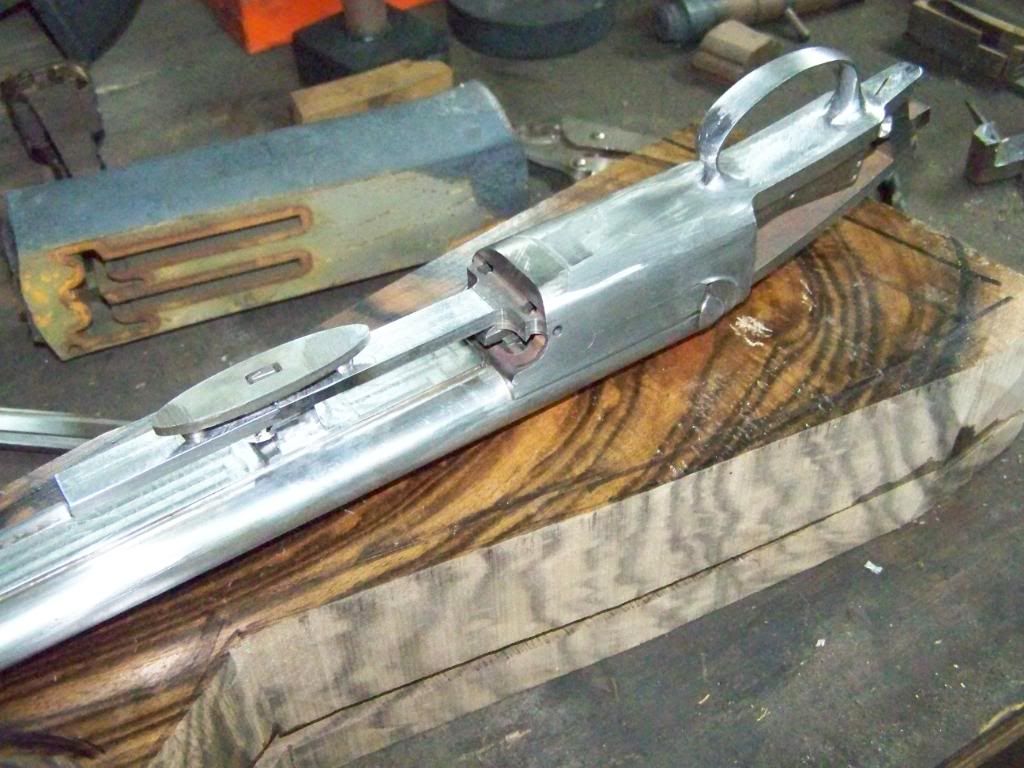 It's starting to look like a rifle!! 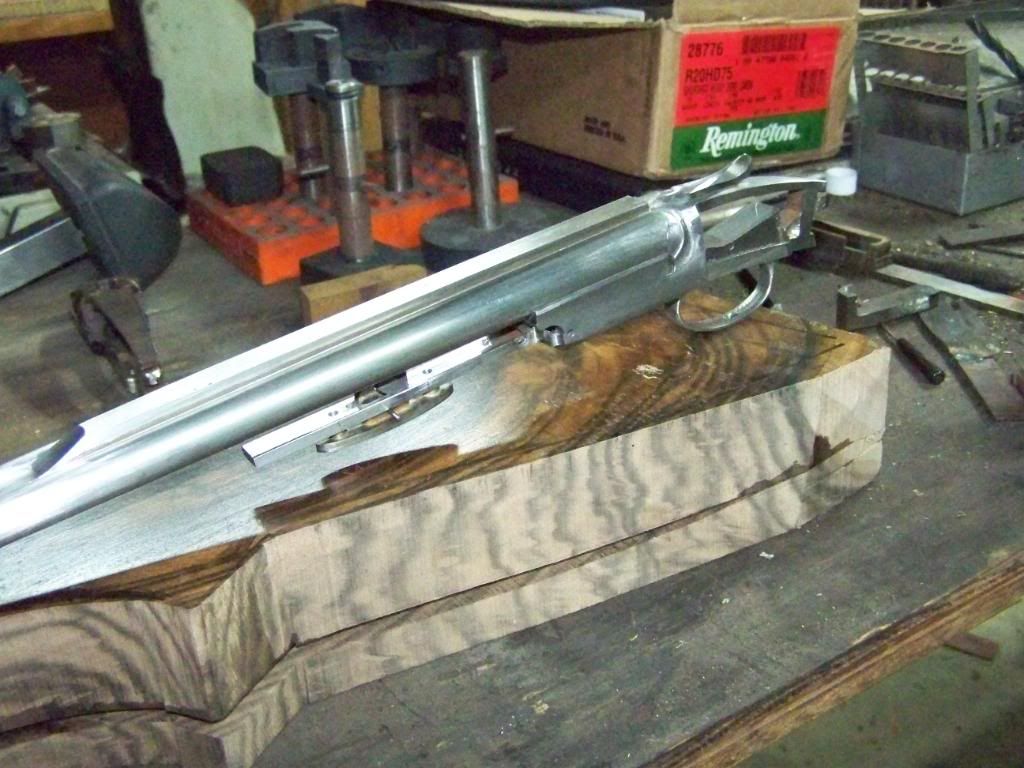 The next step is to fit and install the lockwork, firing pins and cocking rods. I also need to finish the ejectors. While have the machines running the lock parts, I will continue polishing the action and barrels. Bailey Bradshaw www.bradshawgunandrifle.com I'm in the gun buildin bidness, and cousin....bidness is a boomin | |||
|
| One of Us |
Thanks for the update, Bailey! Rusty We Band of Brothers! DRSS, NRA & SCI Life Member "I am rejoiced at my fate. Do not be uneasy about me, for I am with my friends." ----- David Crockett in his last letter (to his children), January 9th, 1836 "I will never forsake Texas and her cause. I am her son." ----- Jose Antonio Navarro, from Mexican Prison in 1841 "for I have sworn upon the altar of god eternal hostility against every form of tyranny over the mind of man." Thomas Jefferson Declaration of Arbroath April 6, 1320-“. . .It is not for glory, nor riches, nor honours that we are fighting, but for freedom - for that alone, which no honest man gives up but with life itself.” | |||
|
| One of Us |
kcstott- If you want to see how to do it the easy way get a copy of this month's issue of Machinist Workshop magazine. The have a great article on making a double rifle from a shotgun. When the buffalo are gone we will hunt mice, for we are hunters, and we want our freedom---Sitting Bull .470 Chapuis double; 9.3x74R Mathelon triple; 30-06 Winchester O/U | |||
|
| One of Us |
Bailey, this is awesome! I followed your link over from BladeForums. I just started making knives and am loving it, but I would like to learn how to do this someday. What would you suggest as the best way to learn the double rifle building process? Thanks Brandon | |||
|
| One of Us |
Brandon, Glad you are enjoying the build. My best advise is to buy and read every book you can on double rifles, buy an inexpensive one and learn to shoot it, study action designs, build a set of double rifle barrels on a shotgun action, make and assemble a lock mechanism. I can't say I took the easiest way, but I spent several years off and on designing my single shot rifle, and learned a ton when I actually built it. Hands on is the best way for me. I think Trinidad college in Colorado offers classes on building doubles. Bailey Bradshaw www.bradshawgunandrifle.com I'm in the gun buildin bidness, and cousin....bidness is a boomin | |||
|
| One of Us |
Today went as follows...... sculpt and shape fences and shoe lump at the breech, then...polish polish polish polish polish polish... deep breath....polish polish polish polish polish... Here is my engraving bench with microscope. I do a lot of fitting and finishing under 10x magnification. 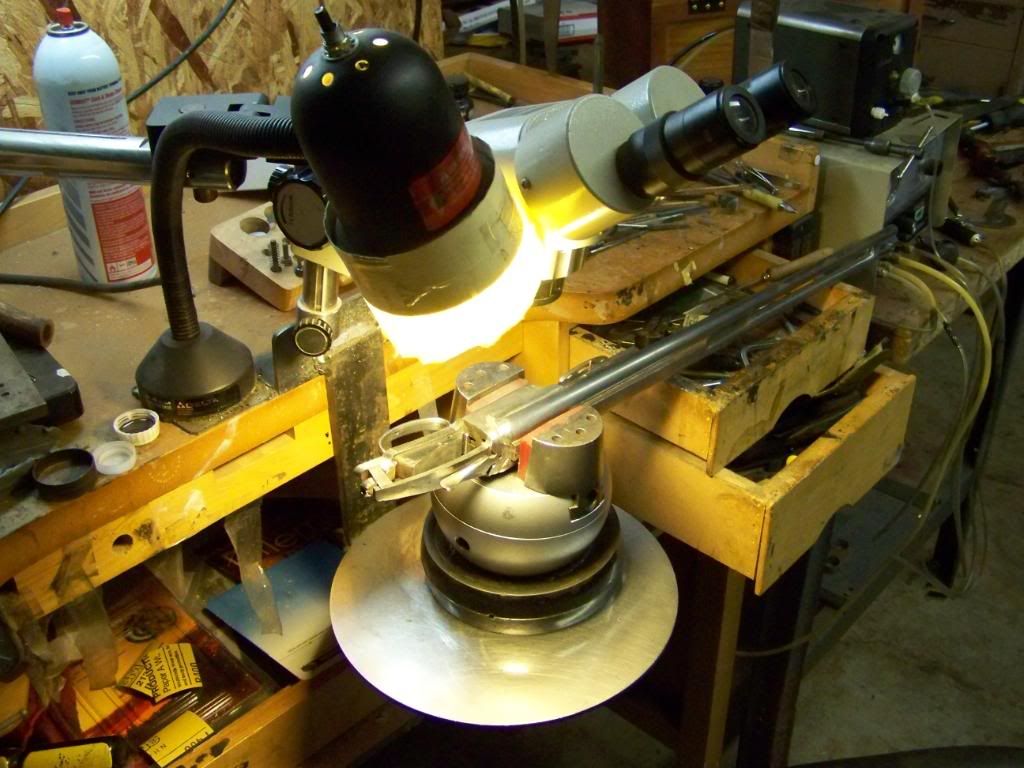 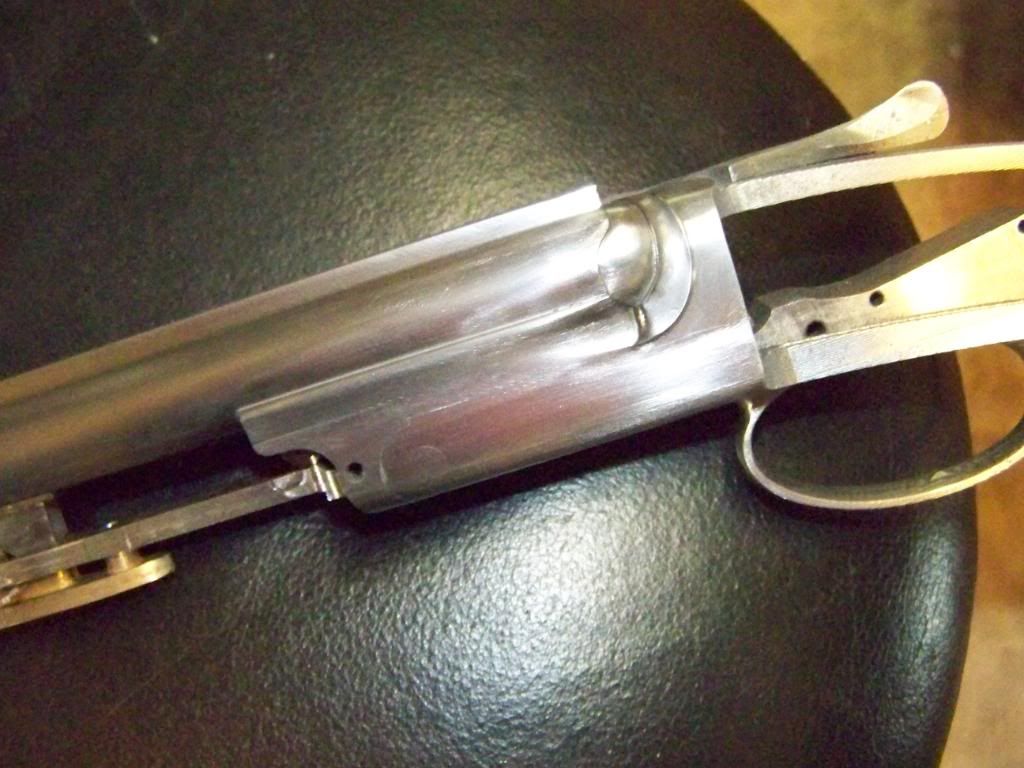 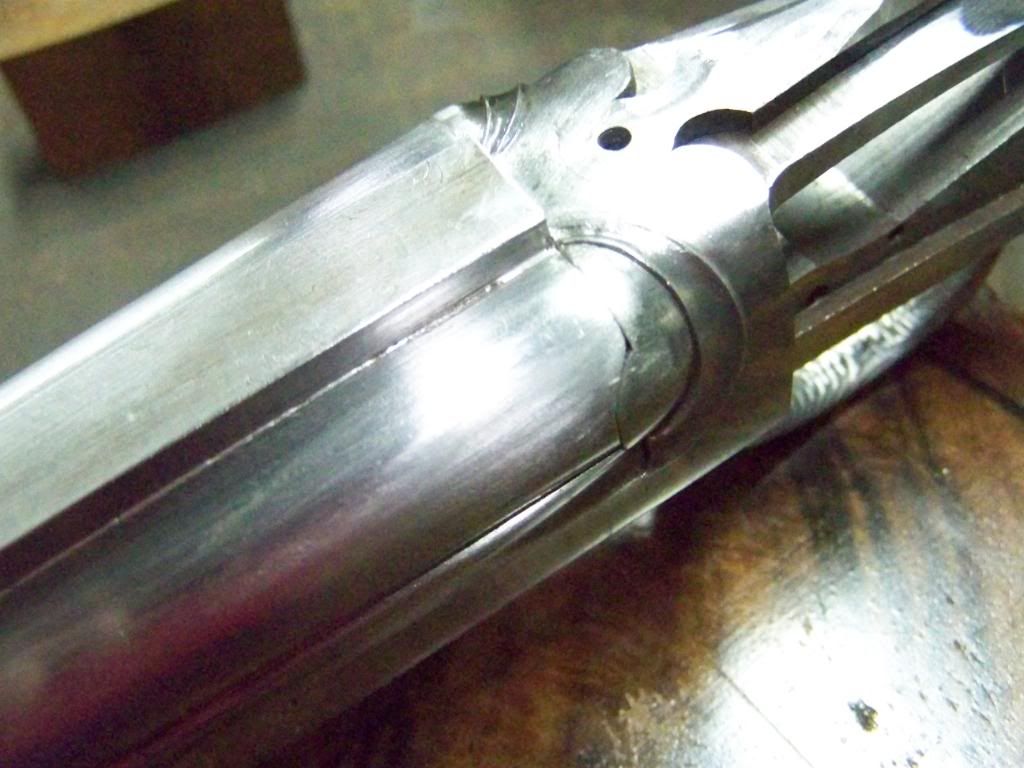 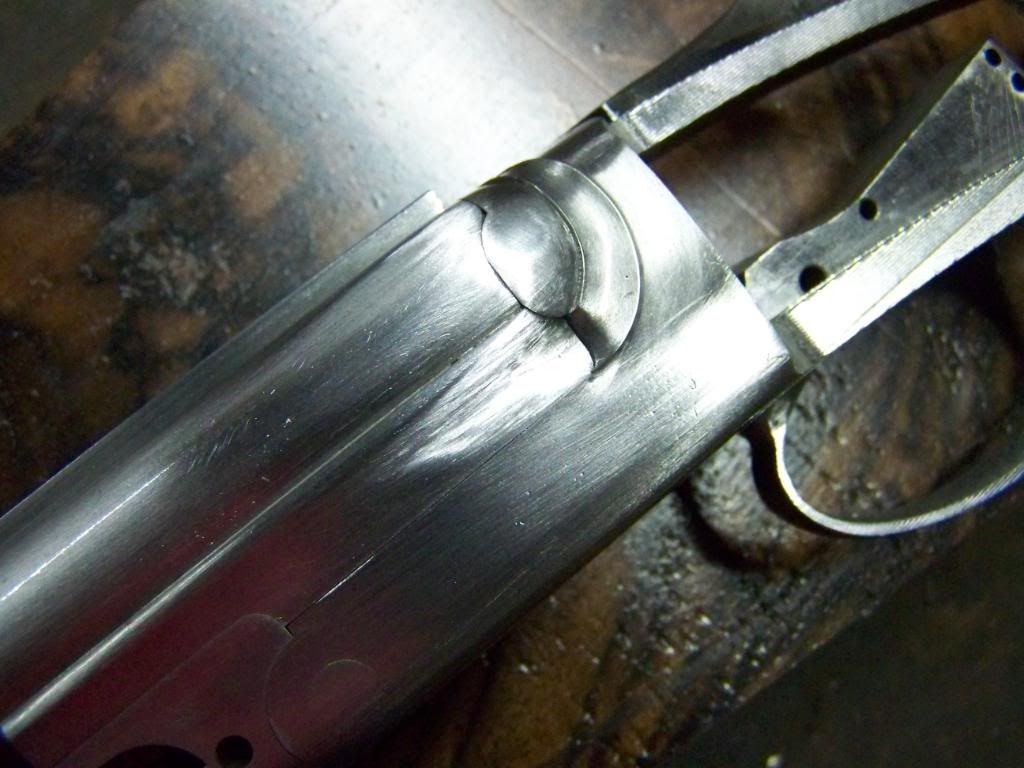 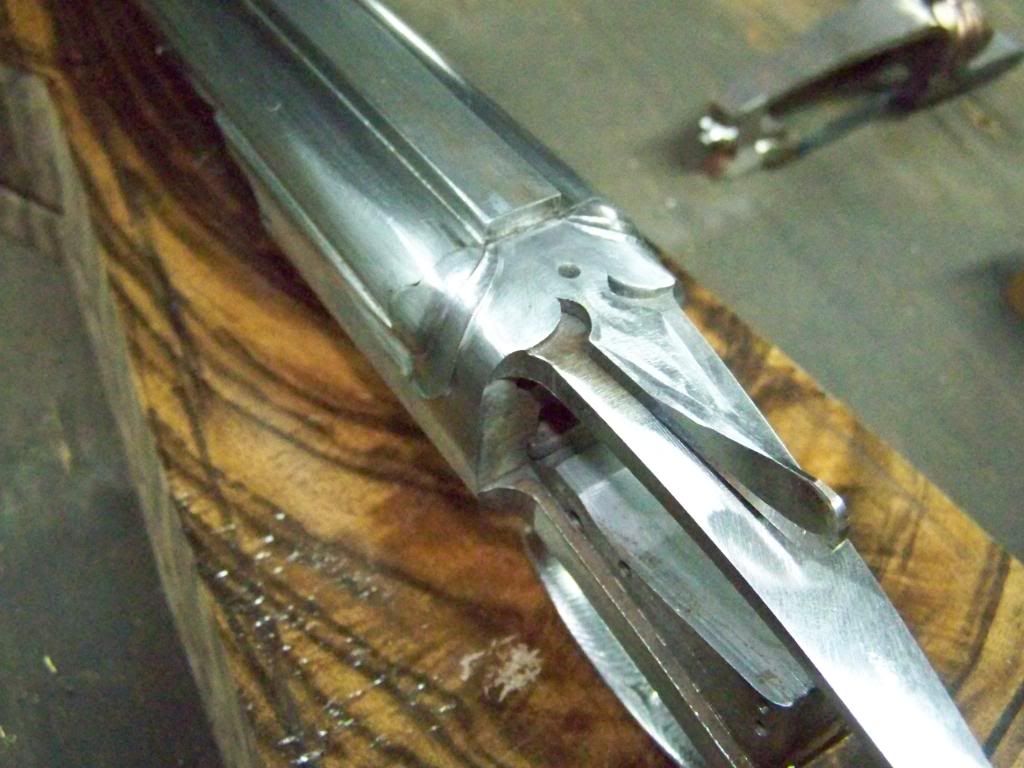 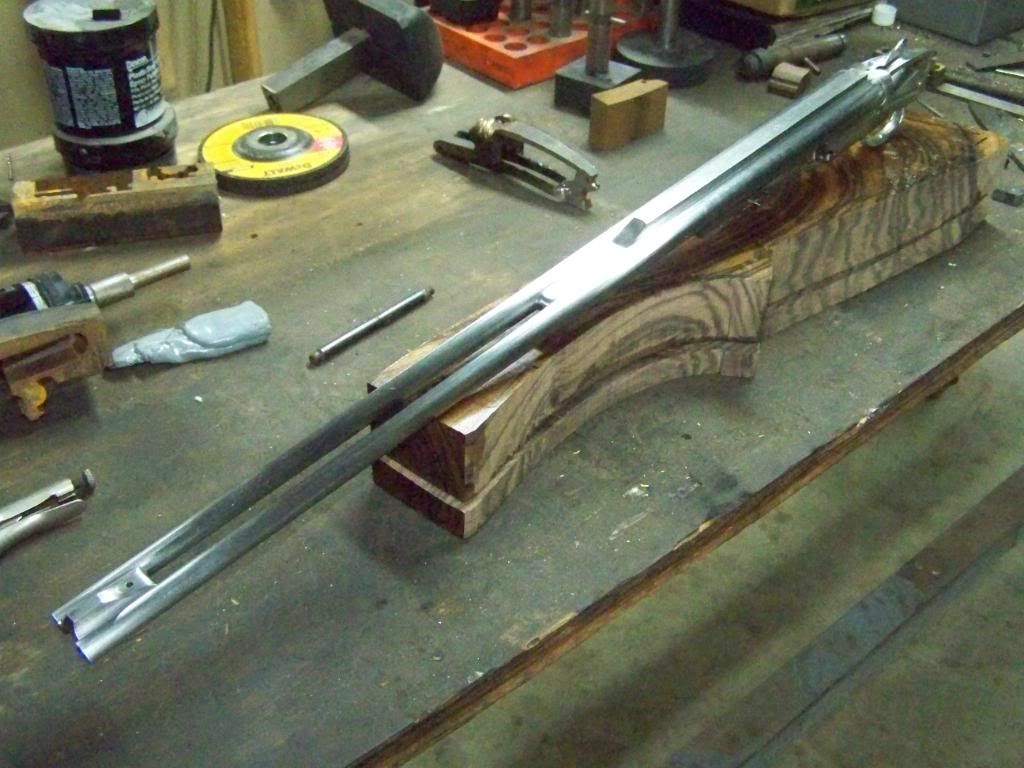 Bailey Bradshaw www.bradshawgunandrifle.com I'm in the gun buildin bidness, and cousin....bidness is a boomin | |||
|
| One of Us |
The last two days have been spent making wood shaving and dust. I changed a few features on my CAD program for my stocks since I made my prototype, so I had to prove the programing, and I certainly wasn't going to put an exhibition English blank on the machine and test my work. I have a few blanks on han dso I picked one that is nice, but wouldn't fill me with remorse if all went South. As it turns out, the stock had some nice figure hiding in there. Here it is, almost finished machining the action inletting. 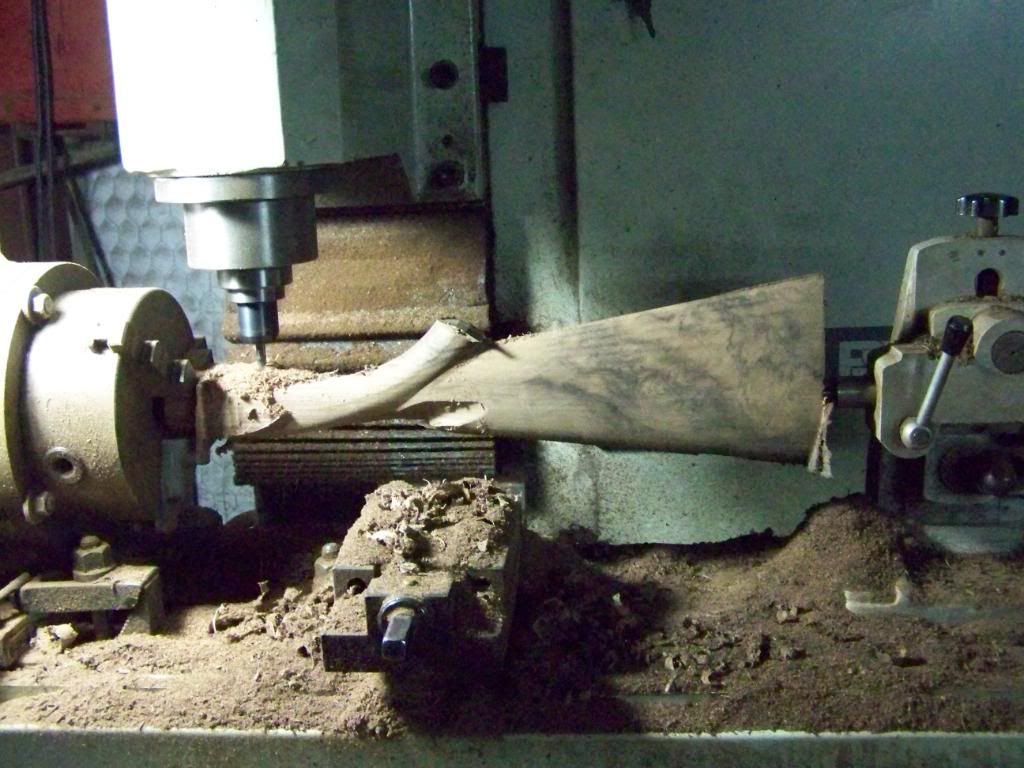 Since the program was good, time for the real blank to go under the cutter. 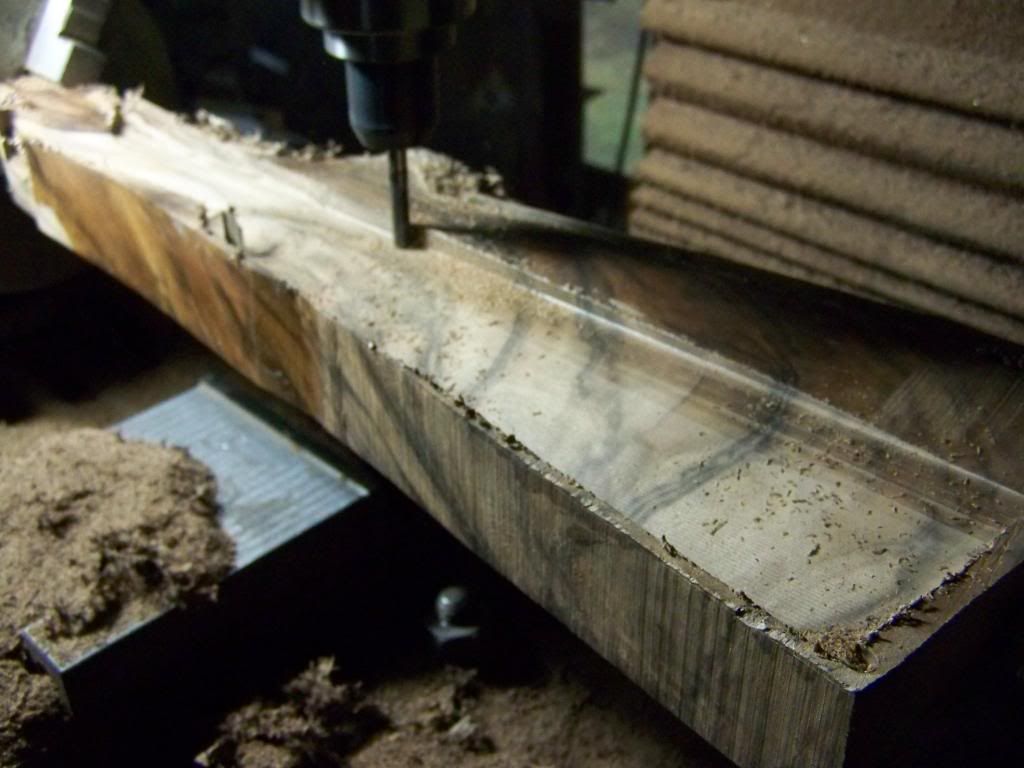 And a shot during the final stage of inletting the top side of the action. 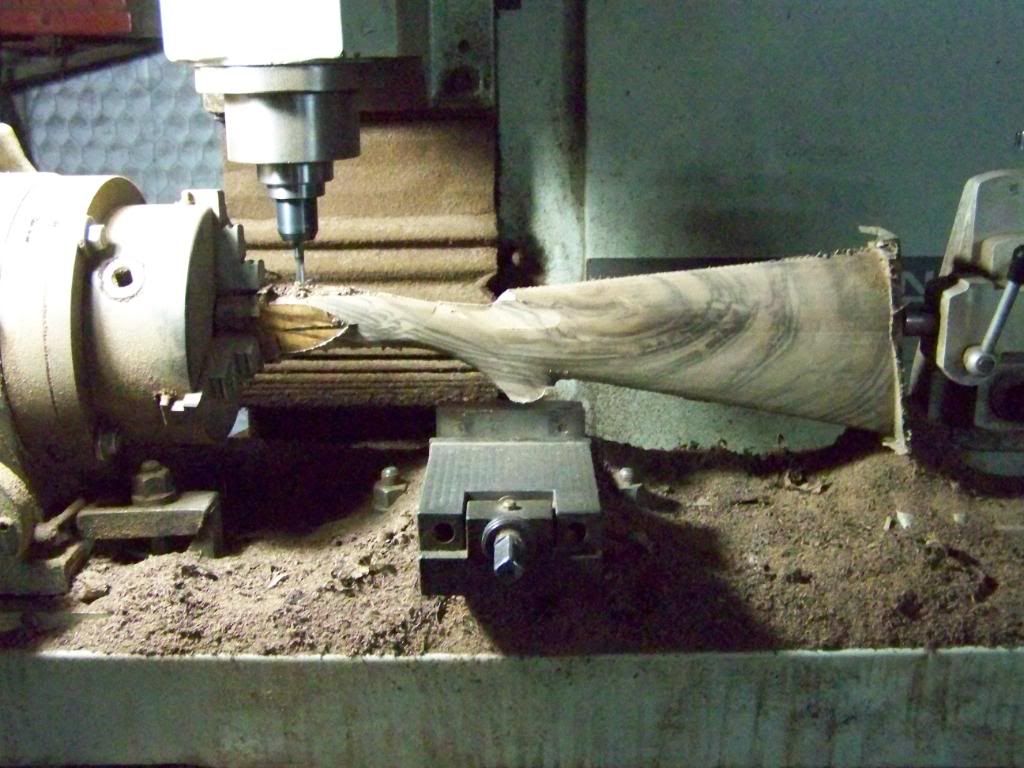 The inletting is not machined close enough to fit the action. I just get a good start on the cavity and it ensures alighnment. Bailey Bradshaw www.bradshawgunandrifle.com I'm in the gun buildin bidness, and cousin....bidness is a boomin | |||
|
| One of Us |
This stage always gets me excited. It's that first feel with the stock that reveals so much time and effort. I must say, this one will be hard to see go. It feels great, fits me at the moment ( it will be too short at it's final length of pull)and due to the heavier wood, balances better than my prototype. Nothing like good, dense English walnut. Hope you enjoy!! 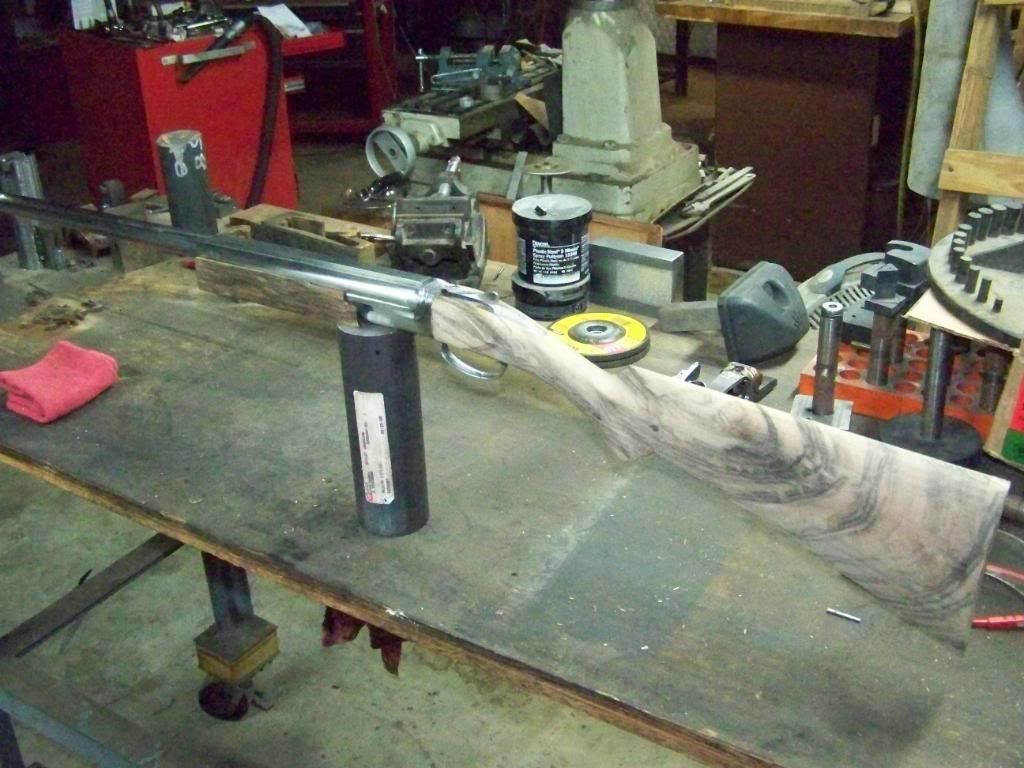 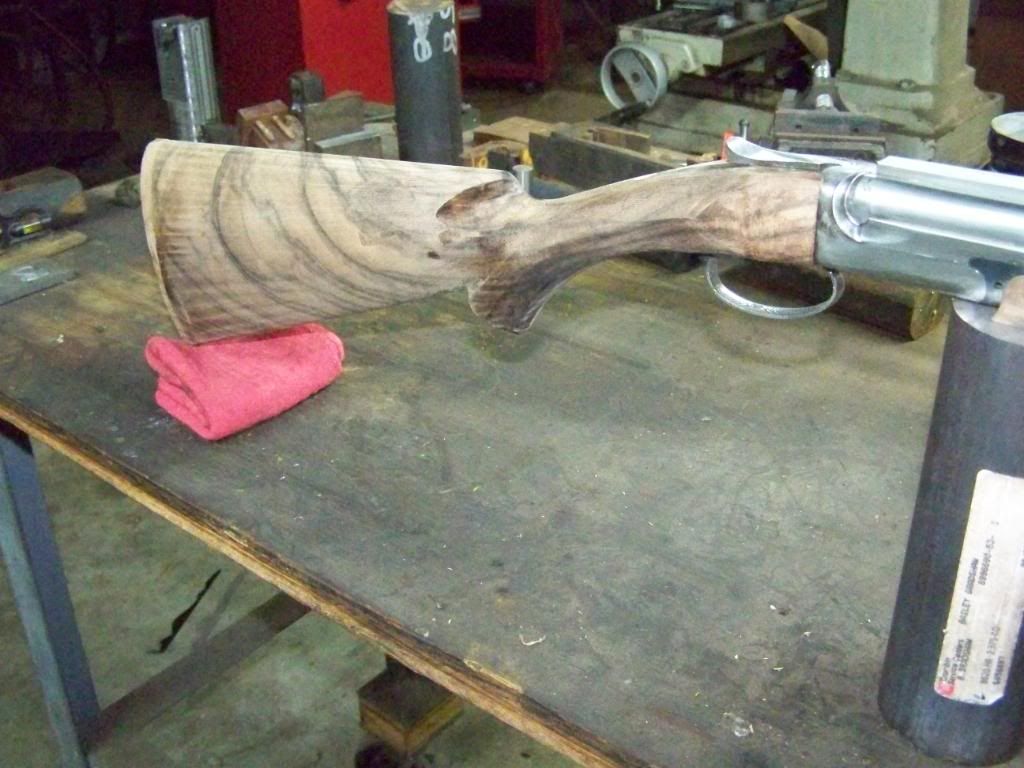 Two of a kind... 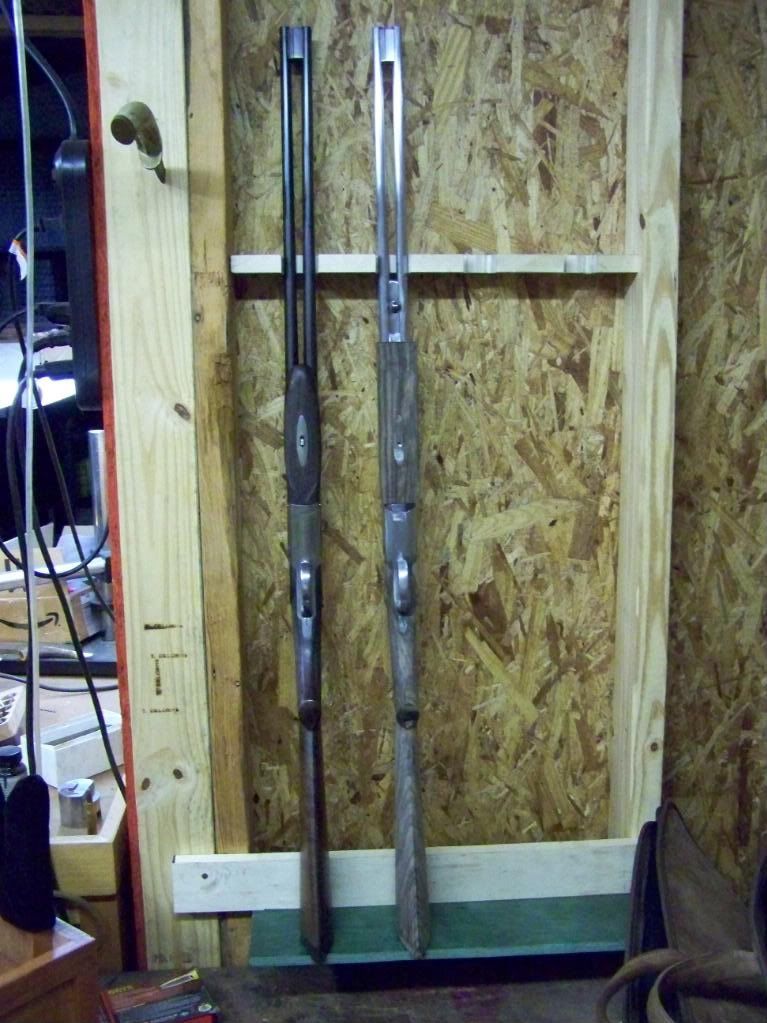 Bailey Bradshaw www.bradshawgunandrifle.com I'm in the gun buildin bidness, and cousin....bidness is a boomin | |||
|
| one of us |
Bailey, this project amazes me more with every post you make. Frank "I don't know what there is about buffalo that frightens me so.....He looks like he hates you personally. He looks like you owe him money." - Robert Ruark, Horn of the Hunter, 1953 NRA Life, SAF Life, CRPA Life, DRSS lite | |||
|
| One of Us |
Shaped the forend wood and sanded the stock to 320. Also have the first couple coats of finish on. I use Permalin to finish my stocks. I like both the sealer and finish. I start by applying a few coats of sealer until it stops soaking in, then follow with a thick coat of finish. Let it dry for a ferw hours, then wet-sand the surface buildup off. Recoat and repeat until the pores are all filled. This stock will only take two rounds as the pores are so small to begin with. From there, I can use a couple of methods depending on the level of sheen desired. Anyway, here are a few pics.... 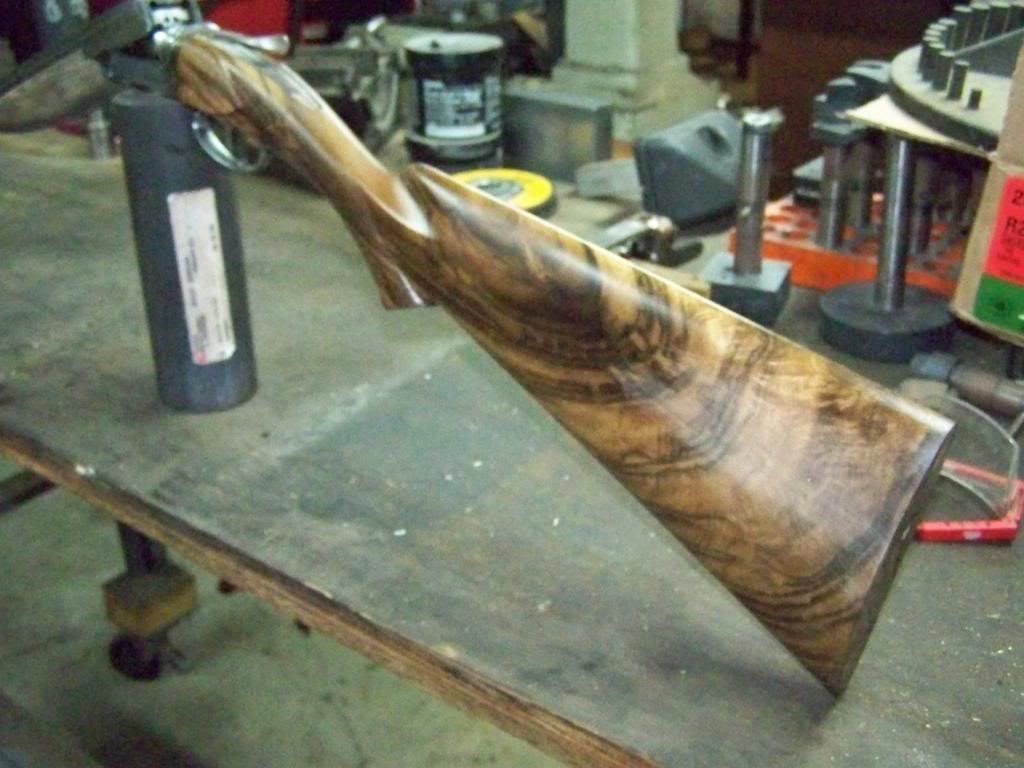 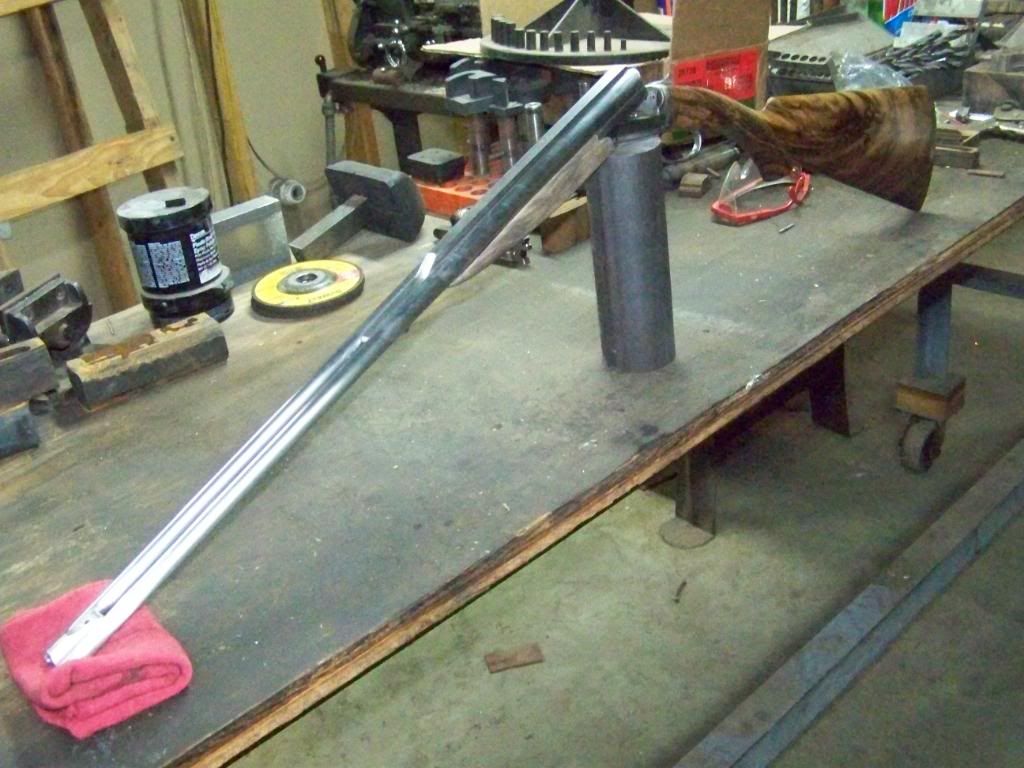 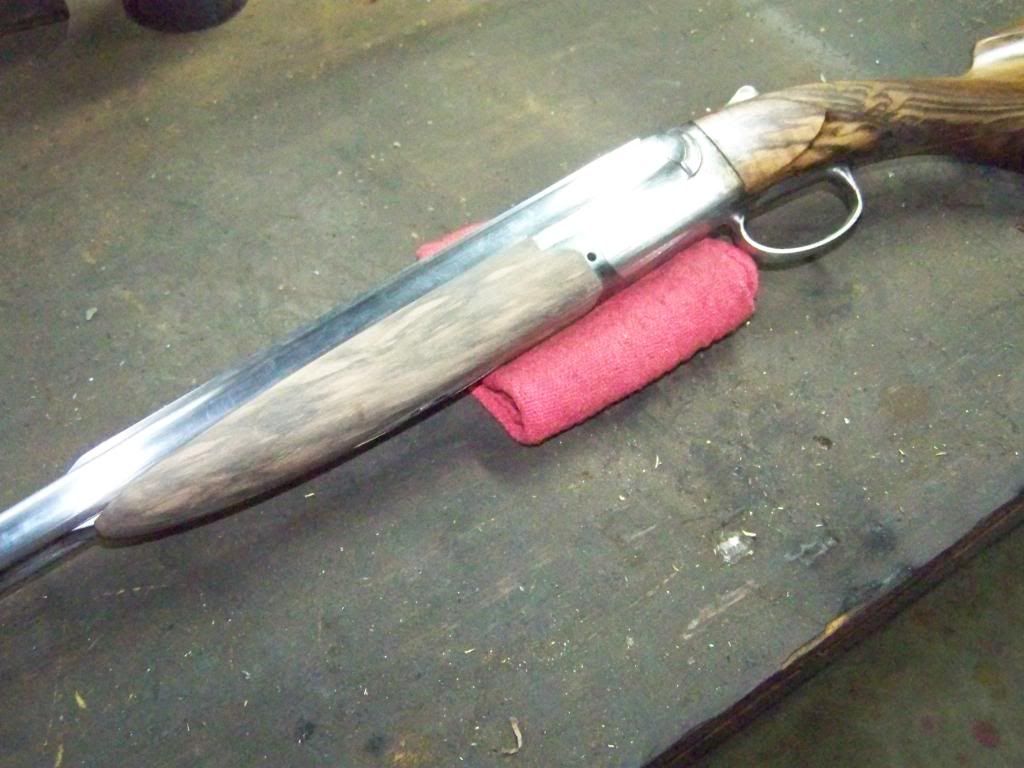 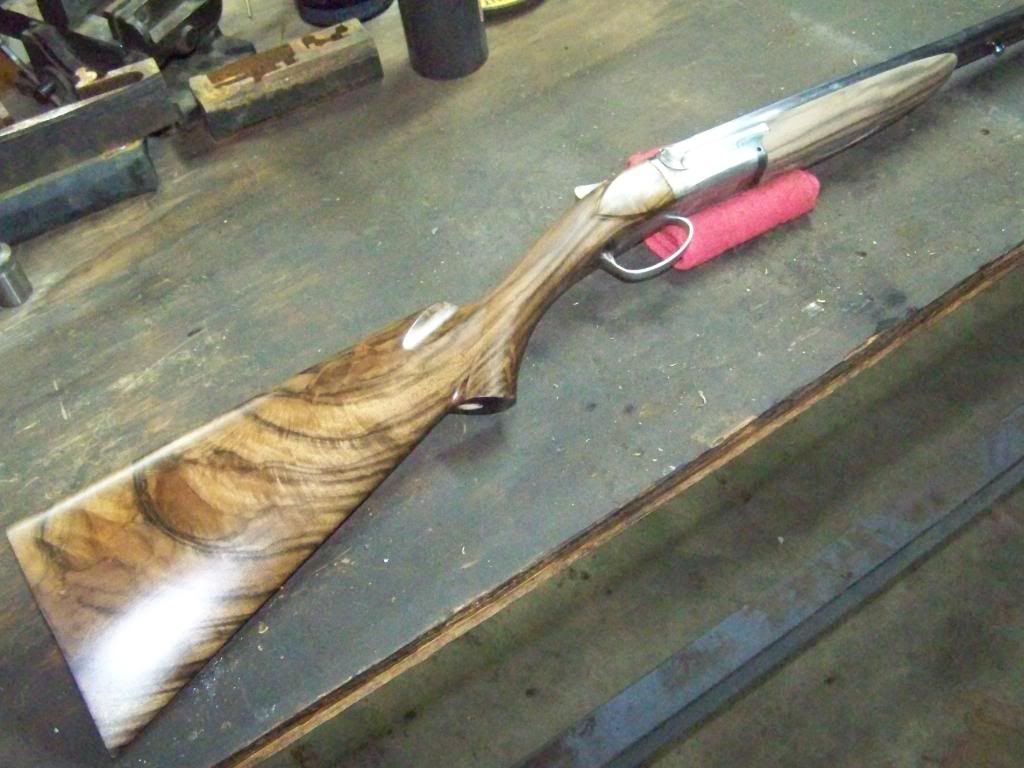 Bailey Bradshaw www.bradshawgunandrifle.com I'm in the gun buildin bidness, and cousin....bidness is a boomin | |||
|
| Moderator |
i am amazed!! opinions vary band of bubbas and STC hunting Club Words aren't Murder - Political assassination is MURDER Information on Ammoguide about the416AR, 458AR, 470AR, 500AR What is an AR round? Case Drawings 416-458-470AR and 500AR. 476AR, http://www.weaponsmith.com | |||
|
| One of Us |
Just beautiful, Bailey! Rusty We Band of Brothers! DRSS, NRA & SCI Life Member "I am rejoiced at my fate. Do not be uneasy about me, for I am with my friends." ----- David Crockett in his last letter (to his children), January 9th, 1836 "I will never forsake Texas and her cause. I am her son." ----- Jose Antonio Navarro, from Mexican Prison in 1841 "for I have sworn upon the altar of god eternal hostility against every form of tyranny over the mind of man." Thomas Jefferson Declaration of Arbroath April 6, 1320-“. . .It is not for glory, nor riches, nor honours that we are fighting, but for freedom - for that alone, which no honest man gives up but with life itself.” | |||
|
| One of Us |
Mr Bradshaw Can I ask why the barrels are gapped as far as they are? Beautiful work none the less www.KLStottlemyer.com Deport the Homeless and Give the Illegals citizenship. AT LEAST THE ILLEGALS WILL WORK | |||
|
| One of Us |
LOOKING GOOD!!!! Nice piece of wood. Bill Member DSC,DRSS,NRA,TSRA A man who carries a cat by the tail learns something he can learn in no other way. -Mark Twain There ought to be one day - just one – when there is open season on Congressmen. ~Will Rogers~ | |||
|
| One of Us |
Just fantastic. Thanks for sharing with us. ----------------------------------------- "I went to the woods because I wished to live deliberately, to front only the essential facts of life, and see if I could not learn what it had to teach, and not, when I came to die, discover that I had not lived. -Henry David Thoreau, Walden | |||
|
| One of Us |
Kcscott, The center of the bores are just under 3/4" appart, but the barrels measure .435" at the muzzel. They spread just over .3". Not as much as it looks, but you have to realize how small they are to begin with. Bailey Bradshaw www.bradshawgunandrifle.com I'm in the gun buildin bidness, and cousin....bidness is a boomin | |||
|
| One of Us |
It must be that there is nothing in the picture for perspective. I thought it was because of the caliber and how thin the barrels would need to be to keep the rifle balanced www.KLStottlemyer.com Deport the Homeless and Give the Illegals citizenship. AT LEAST THE ILLEGALS WILL WORK | |||
|
| Powered by Social Strata | Page 1 2 3 4 5 |
| Please Wait. Your request is being processed... |
|
 The Accurate Reloading Forums
  THE ACCURATE RELOADING.COM FORUMS
  Rifles
  Double Rifles
  Damascus hornet double...in progress

Visit our on-line store for AR Memorabilia

