 Rifles Double Rifles
 Go | New | Find | Notify | Tools | Reply |
| Damascus hornet double...in progress | Login/Join |
| One of Us |
One of our brothers over on NE forums ordered this rifle. I mentioned I would like to do an "in-progress" thread, and he agreed. Though you all would enjoy it as well. So, here is what I will be making for him. One of my doubles chambered in 22 hornet, exhibition English walnut stock, quick detatch scope rings and......drum roll please...damascus action. To start with, here are the raw materials. 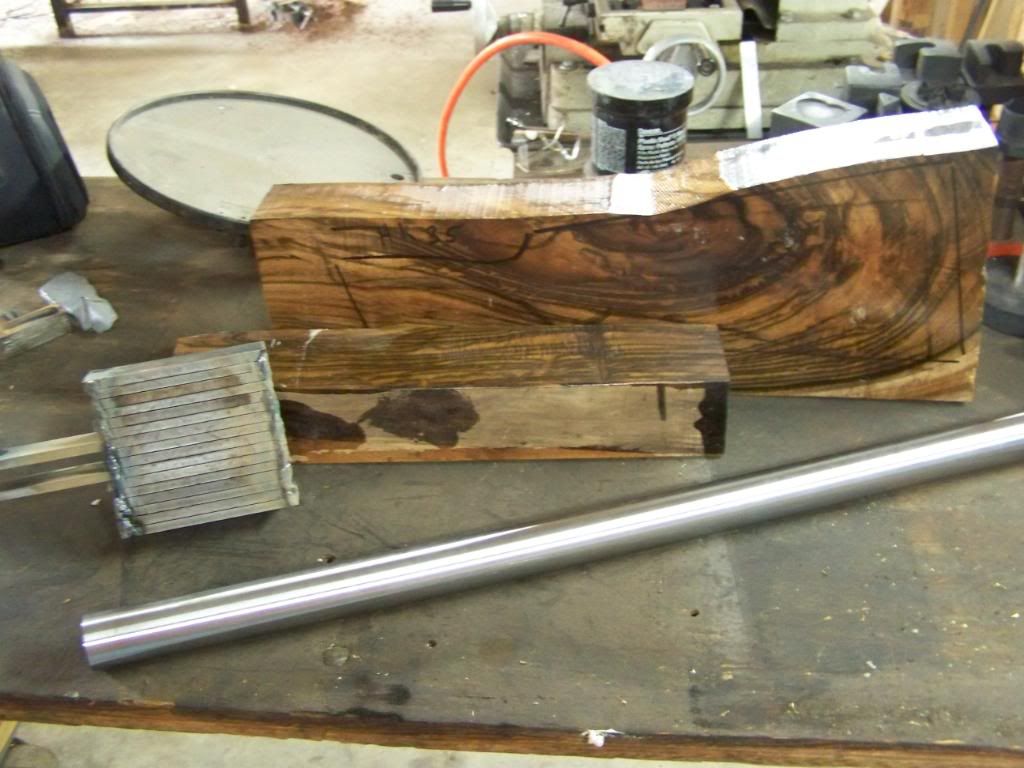 The damascus billet starts with 16 layers of 1075 and L-6. Both steels have .75% carbon, which is high for a typical rifle action. Through the forging process, the steel will loose. .1 % or so of carbon. I know my heat treating on these steels very well, and will end up with 40rc hardness. 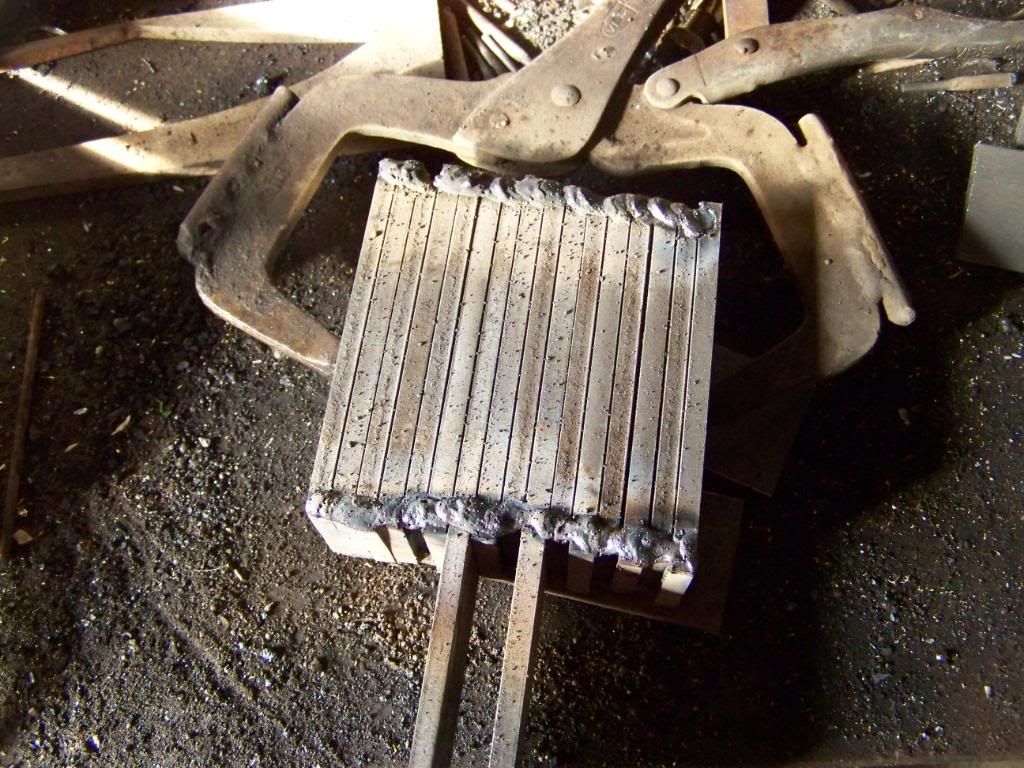 so, into the forge we go. It's a large billet, but won't yield enough for everything, just the action. I will forge another billet for the top lever, trigger group and forend iron. 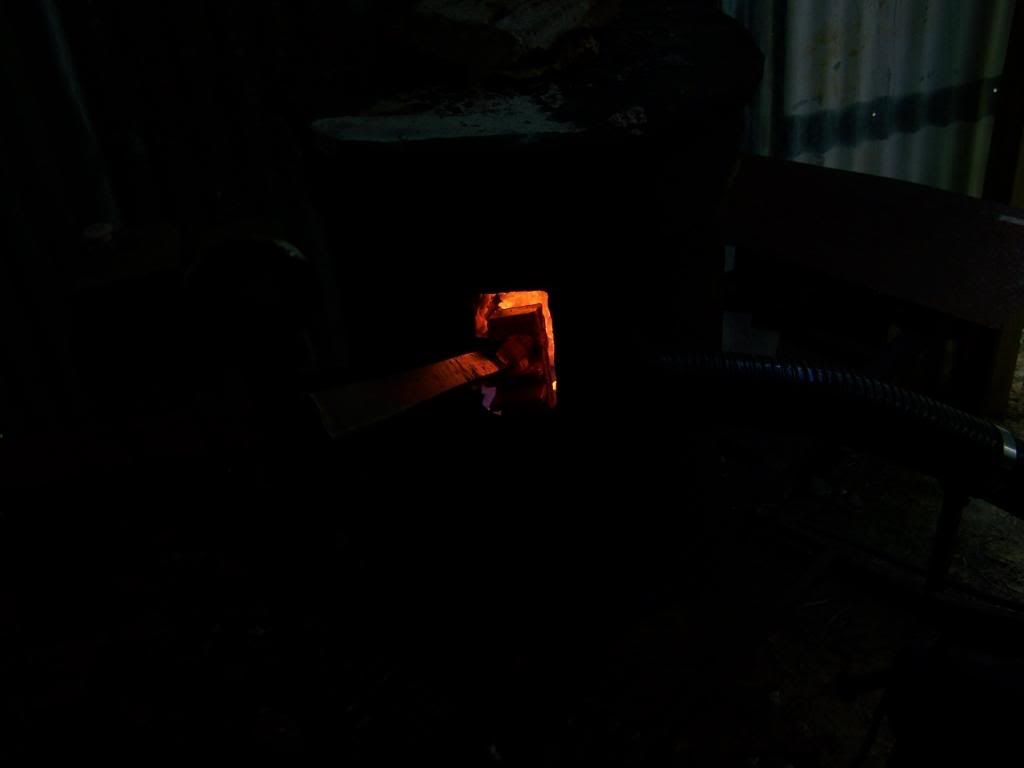 After it gets hot enough to melt the flux ( borax), it recieves a coating. This will allow the steel to stick by keeping an oxygen free enviornment at the weld joints. 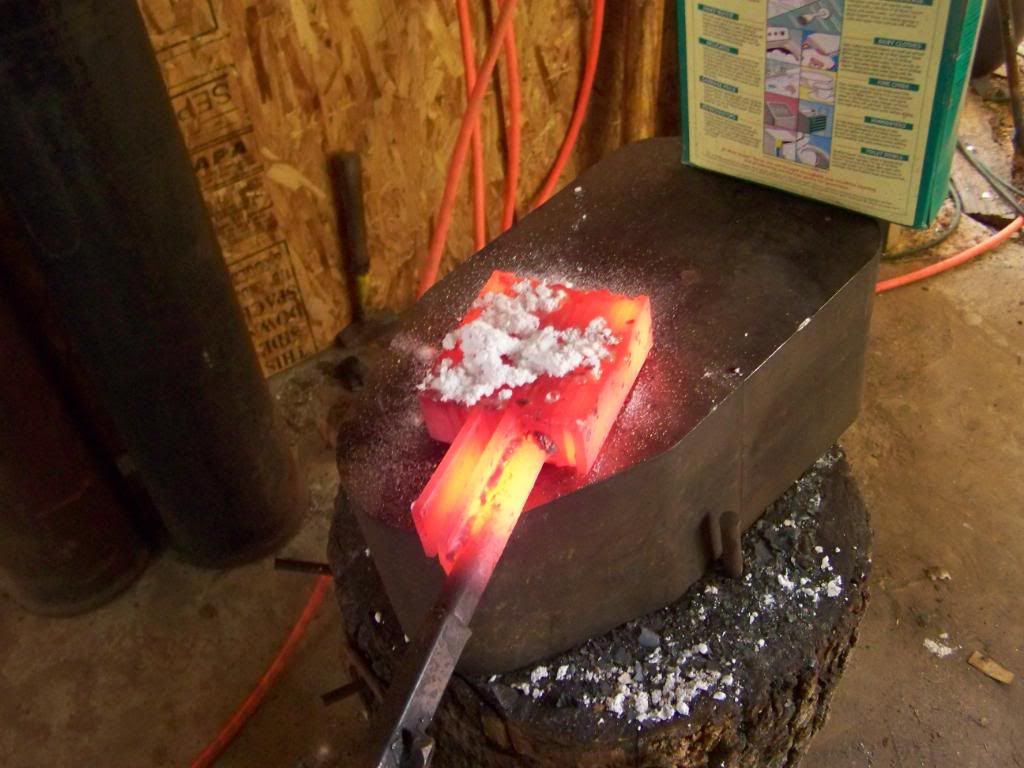 Squeezing for the first weld. I use a hydraulic press with 24 tons of pressure to forge, as well as my Grandfather's 25lb Little Giant power hammer. 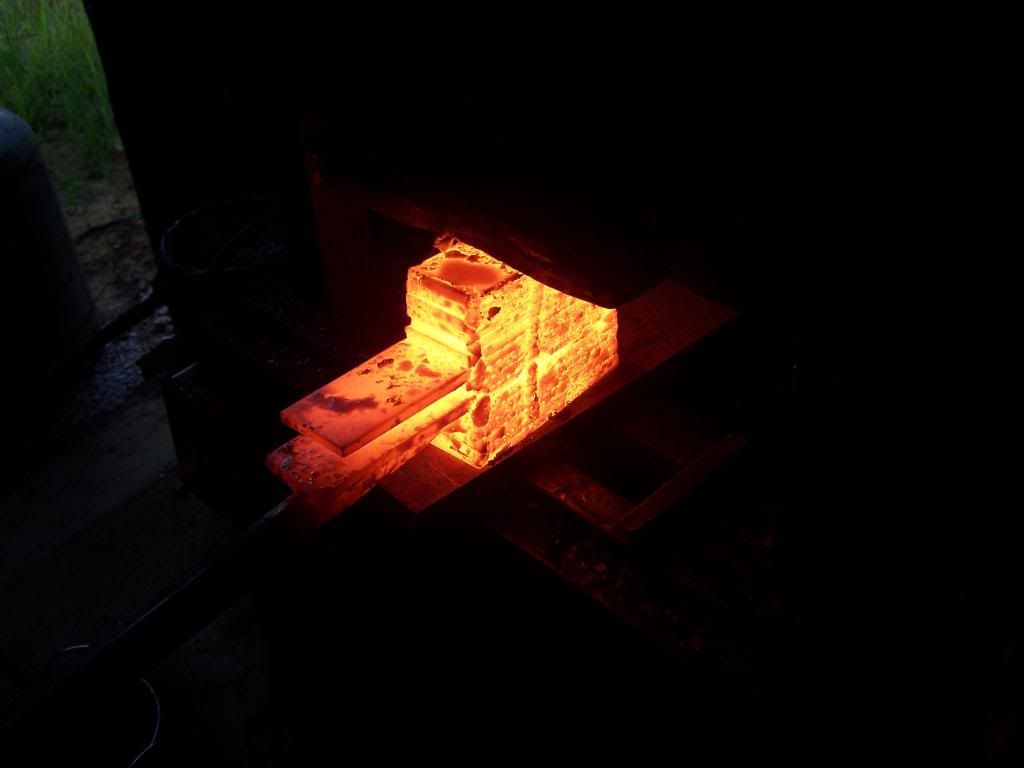 Once I get the first weld complete, which takes 2 or 3 weld cycles for insurance, I begin to draw it into a long bar. 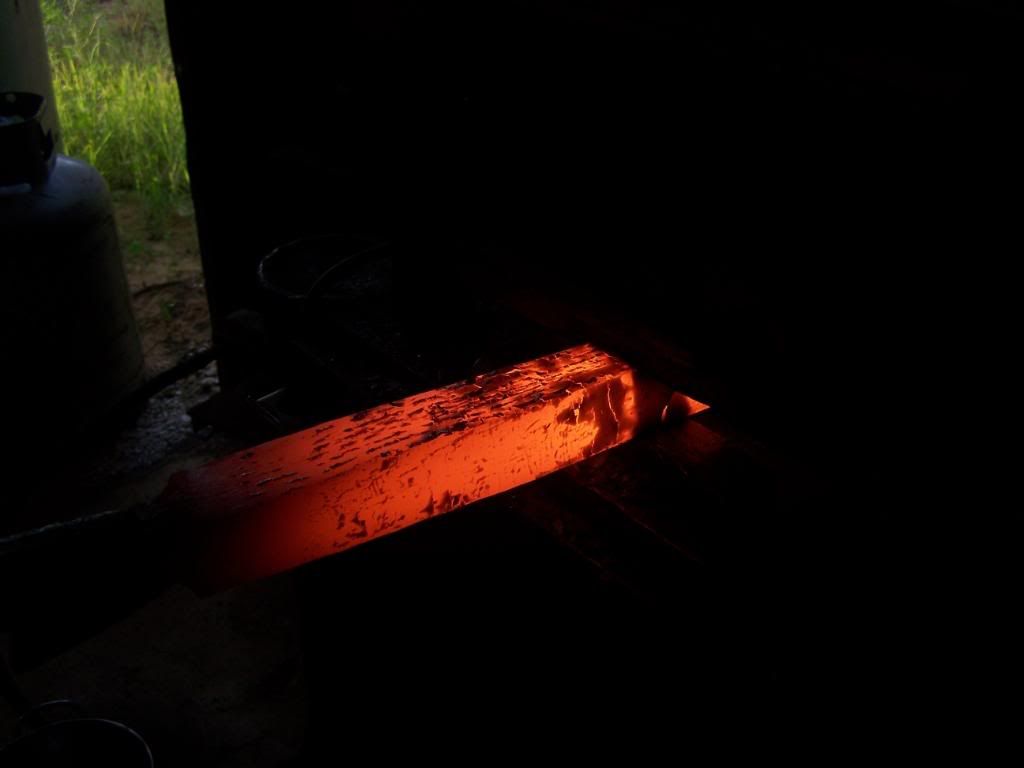 And finaly, the bar drawn enough to cut into five pieces, restack and forge weld together. This will give me 80 layers, the next cycle of weld, draw, cut and stack will give 400 layers, and finaly 2000 layers. That is a high layer count, but given the thickness of the action, it will take that many layers to create the surface effect I want. 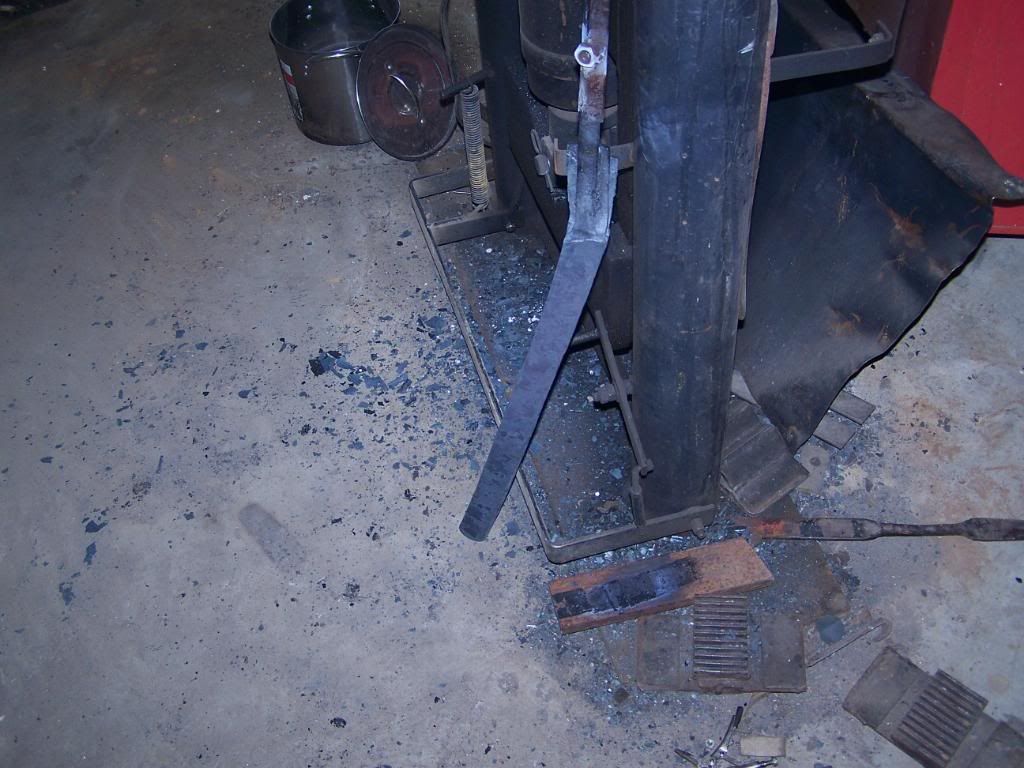 Since I just can't resist, a shot of the stock blank. 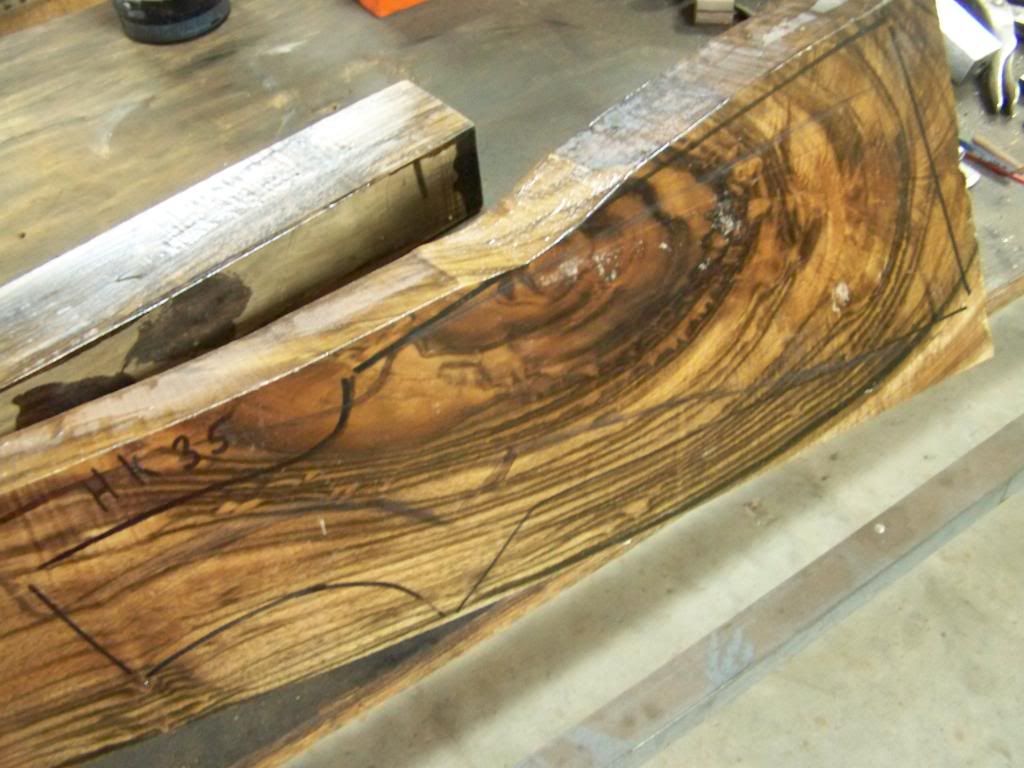 A couple more notes on the damascus. It will be a random pattern, but each layer will run the length of the action. The result will be a tight wood grain effect. The L-6 has 2% nickle and remain bright once the steel is etched with acid to reveal the pattern. The 1075 will etch deeper than the L-6, and once polished after the etch, it will create a sort of holographic shimmer. More to come...... Bailey Bradshaw www.bradshawgunandrifle.com I'm in the gun buildin bidness, and cousin....bidness is a boomin | ||
|
| one of us |
WOW!!! xxxxxxxxxx When considering US based operations of guides/outfitters, check and see if they are NRA members. If not, why support someone who doesn't support us? Consider spending your money elsewhere. NEVER, EVER book a hunt with BLAIR WORLDWIDE HUNTING or JEFF BLAIR. I have come to understand that in hunting, the goal is not the goal but the process. | |||
|
| One of Us |
I'm going to enjoy this thread! Keep us updated. Proud DRSS member | |||
|
one of us |
I would like one please in 32-20 with 28 ga barrels. Perry | |||
|
| One of Us |
Oh, Wowzy, WOW! Bailey, ya kill'n me! Rusty We Band of Brothers! DRSS, NRA & SCI Life Member "I am rejoiced at my fate. Do not be uneasy about me, for I am with my friends." ----- David Crockett in his last letter (to his children), January 9th, 1836 "I will never forsake Texas and her cause. I am her son." ----- Jose Antonio Navarro, from Mexican Prison in 1841 "for I have sworn upon the altar of god eternal hostility against every form of tyranny over the mind of man." Thomas Jefferson Declaration of Arbroath April 6, 1320-“. . .It is not for glory, nor riches, nor honours that we are fighting, but for freedom - for that alone, which no honest man gives up but with life itself.” | |||
|
| One of Us |
Hey Rusty, Here is a picture for you, the bastogne pre-shaped blank has your name on it if you approve... 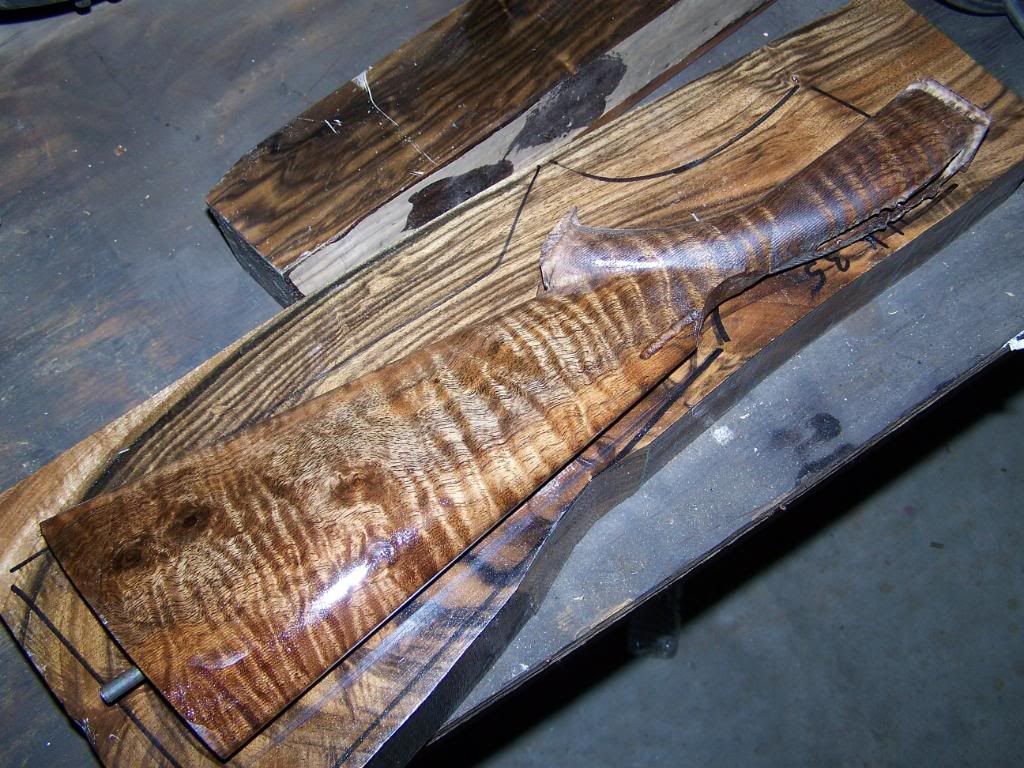 Now for more progress... 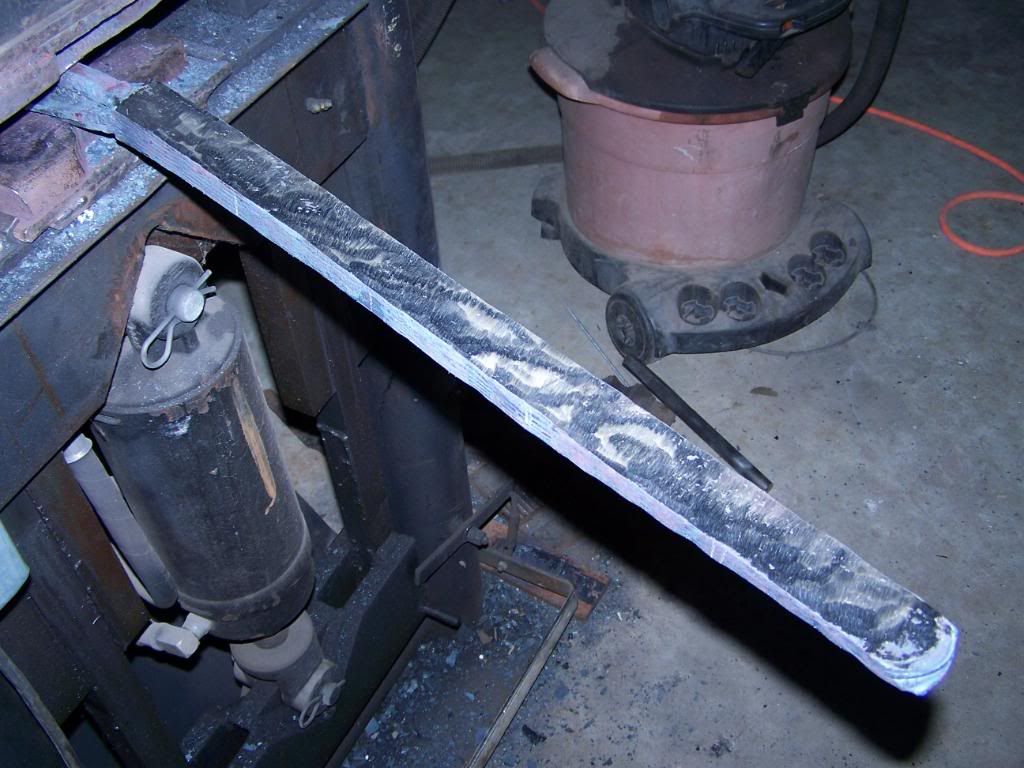 Here the bar has been de-scaled and marked for cutting 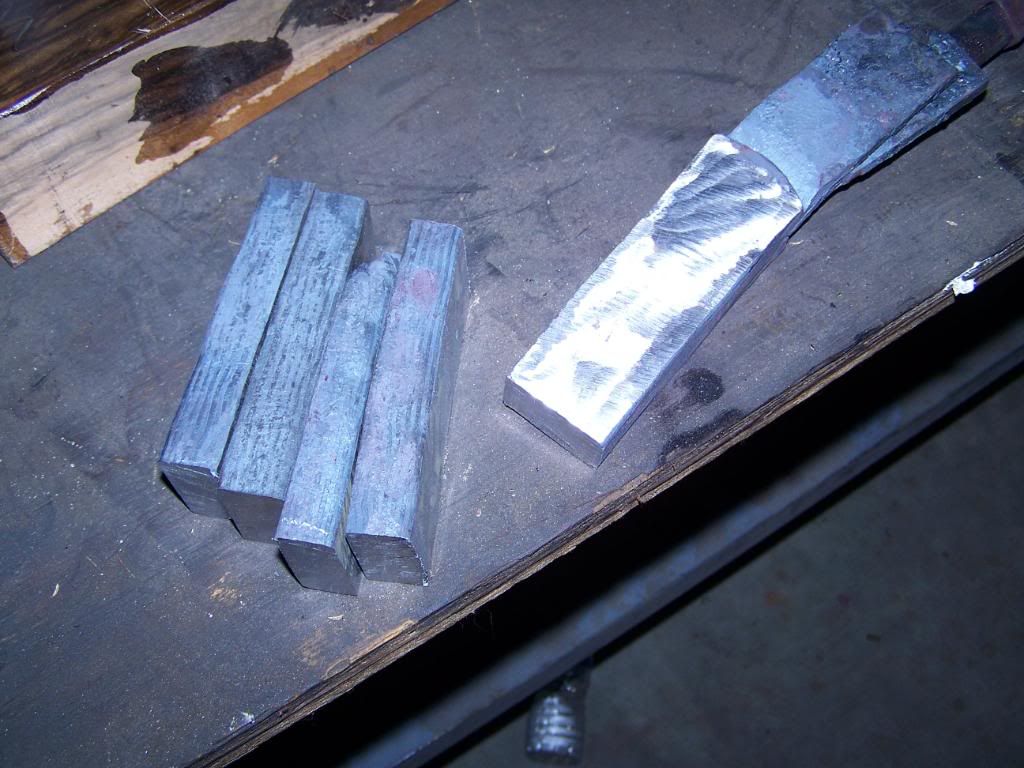 Blocks have been cut and ready for stacking and welding 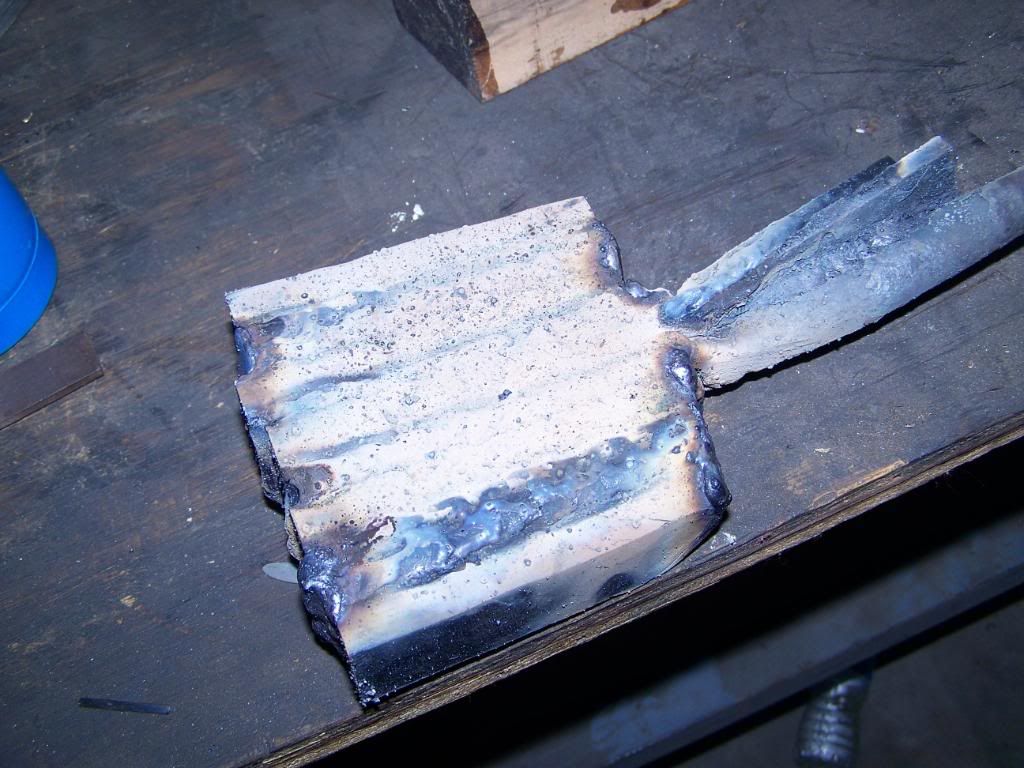 Here the stack is assembled and all the joints welded closed for dry forge welding. I don't do this on the first weld as there are so many seams to weld closed. 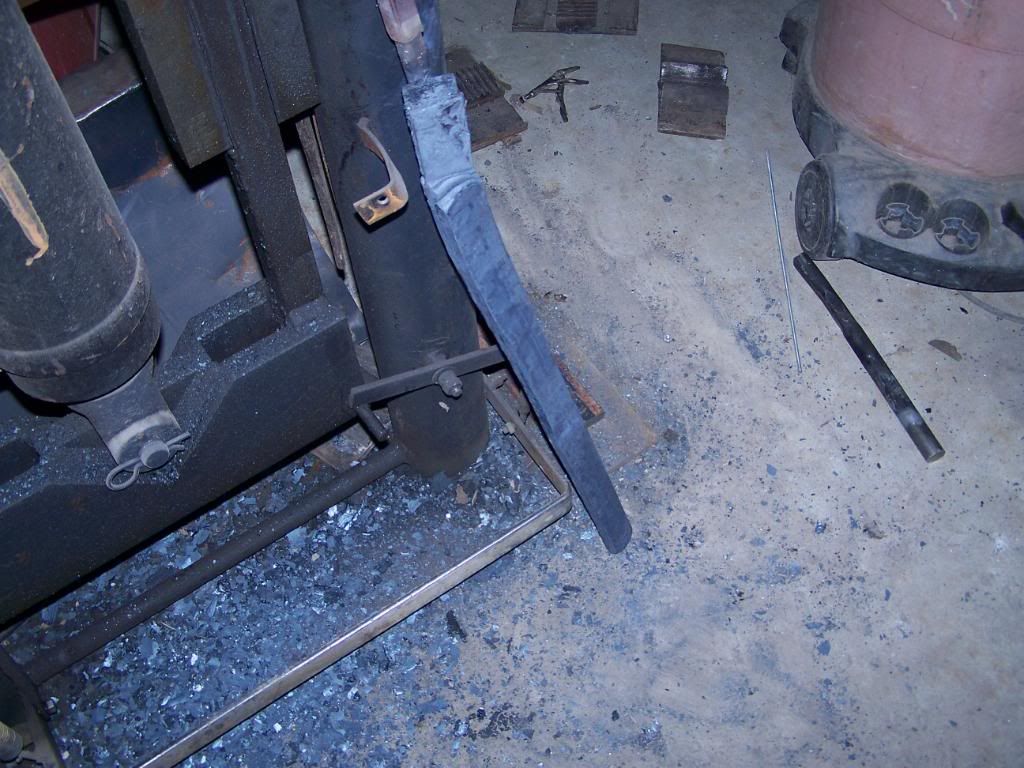 And the bar drawn out once again, ready for cutting and stacking. Bailey Bradshaw www.bradshawgunandrifle.com I'm in the gun buildin bidness, and cousin....bidness is a boomin | |||
|
| One of Us |
Heck yeah! Beautiful! And thanks for the update on making the damascus action. Rusty We Band of Brothers! DRSS, NRA & SCI Life Member "I am rejoiced at my fate. Do not be uneasy about me, for I am with my friends." ----- David Crockett in his last letter (to his children), January 9th, 1836 "I will never forsake Texas and her cause. I am her son." ----- Jose Antonio Navarro, from Mexican Prison in 1841 "for I have sworn upon the altar of god eternal hostility against every form of tyranny over the mind of man." Thomas Jefferson Declaration of Arbroath April 6, 1320-“. . .It is not for glory, nor riches, nor honours that we are fighting, but for freedom - for that alone, which no honest man gives up but with life itself.” | |||
|
| one of us |
+1 Keith IGNORE YOUR RIGHTS AND THEY'LL GO AWAY!!! ------------------------------------ We Band of Bubbas & STC Hunting Club, The Whomper Club | |||
|
| One of Us |
Oh my. Oooooh My! I'm in for the long run on this thread! Regards, Robert ****************************** H4350! It stays crunchy in milk longer! | |||
|
| new member |
Bailey, Very nice thread. Like many, I would imagine, I look forward to every update. Thank you, Buchseman | |||
|
One of Us |
too sweet!!!!!!!!!!!!!!... i'd like 1 in a 22 hi-power or .225 win..... im looking fwd to following this thread.... go big or go home ........ DSC-- Life Member NRA--Life member DRSS--9.3x74 r Chapuis | |||
|
| one of us |
Awesome!!! We, the lowly, are not worthy of your presence on this BBS. Thank you so much for sharing this with us. Cannot wait to see it progress. | |||
|
| One of Us |
OK, I have the rough forging complete. The billet is at 2560 layers. This sounds like a lot, but consider the average 1/4" thick knife blade in damascus has a nicely balanced pattern ( not too course, not too fine) at 340 layers. This action blank in the rough measures 1.8", equal to just over 7 blade thickness, for an average layer count of 350 per blade thickness. 2560 layers should look perfect. First picture if just the billet and a side project coming to weld temp in the forge. Ever heard the phrase "too many irons in the fire"? 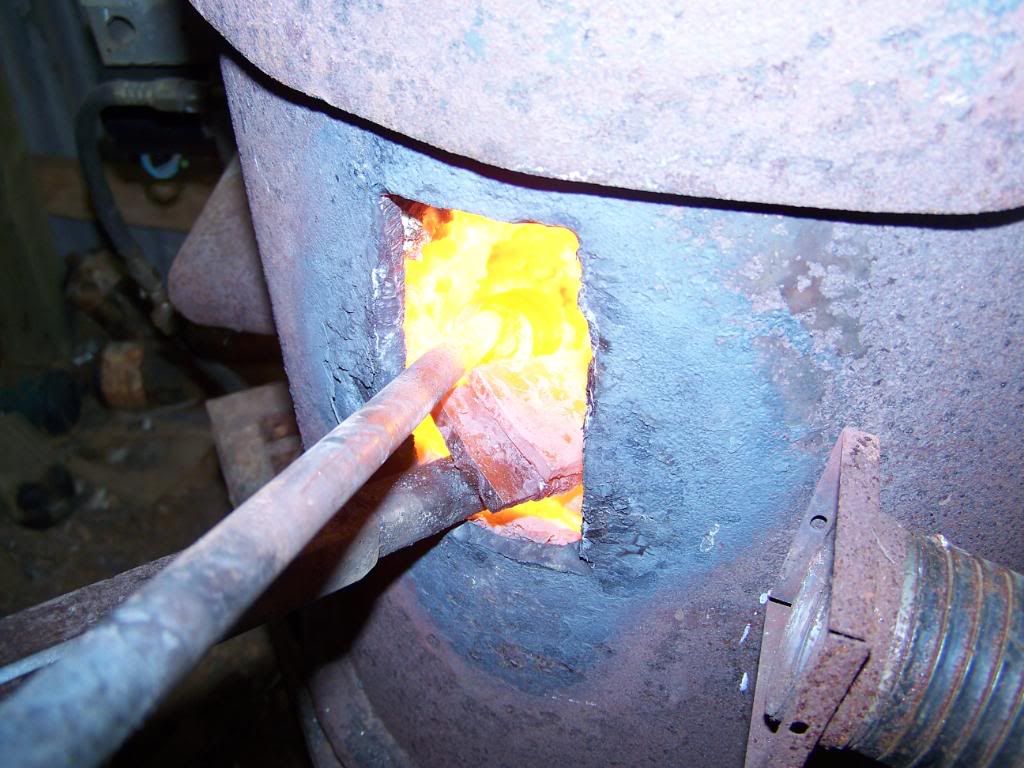 Here is the billet at 320 layers ready to grind clean and cut and stack for 1280 layers. 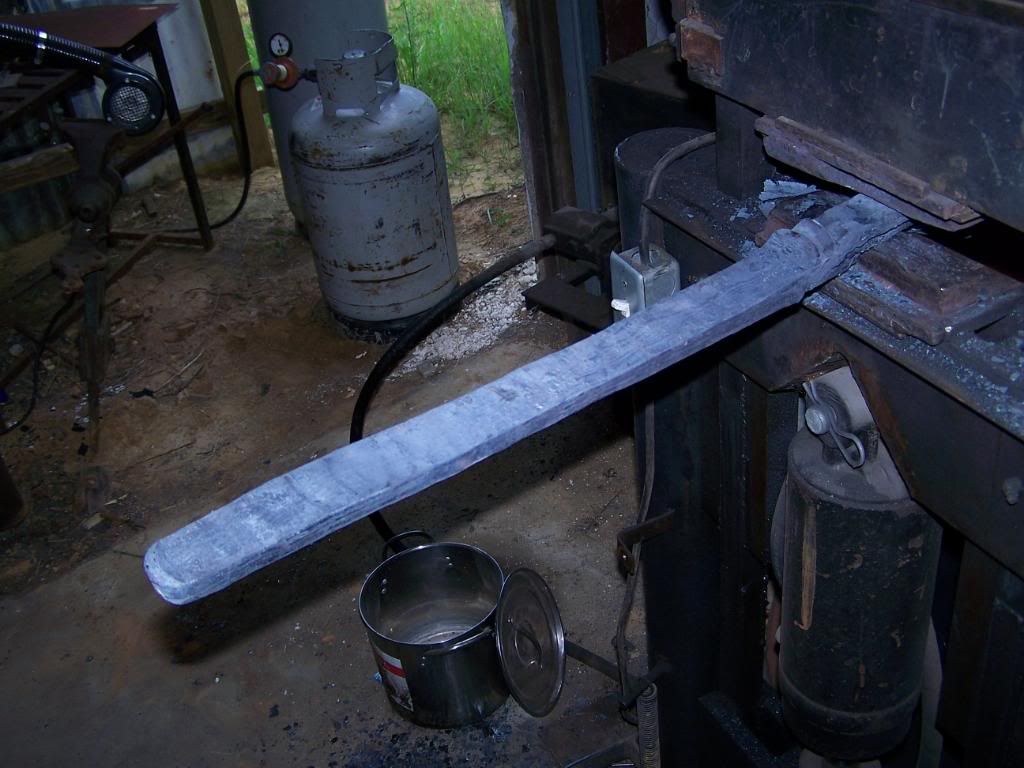 And the stack welded together and ready to go into the forge 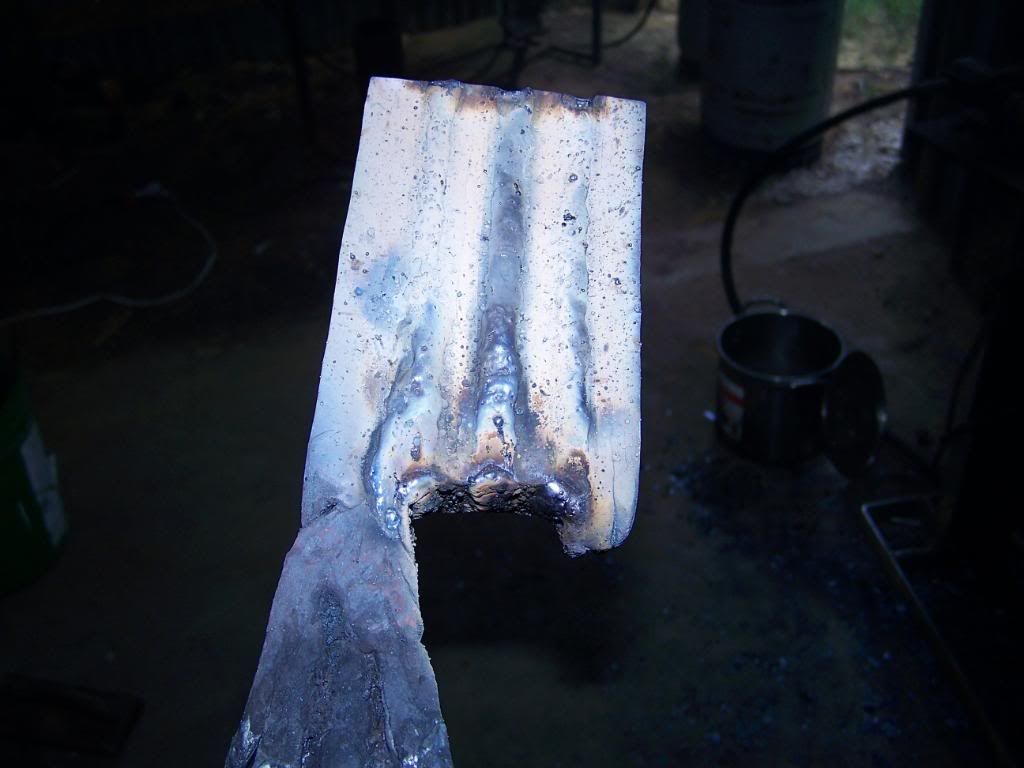 I failed to get a picture of the last welding process. I drew the billet out to about 8" long, and hot cut it in the milld leaving about 1/4" uncut. Then fold it back and tack weld the end, then into the forge and make it all one. I squeeze the end that will make the action bars for a couple of reasons. One to help maximize the billet, and to get the pattern to flow from the action bars to the standing breech. Here is the rough damascus billet ready to clean up. 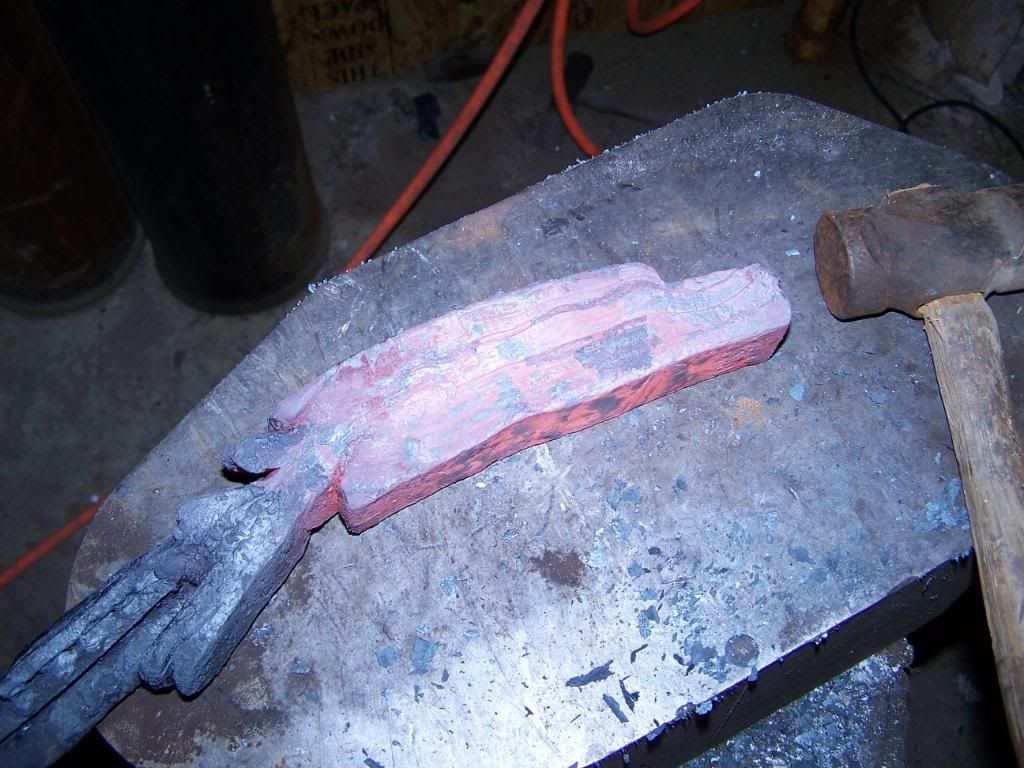 More later today... Bailey Bradshaw www.bradshawgunandrifle.com I'm in the gun buildin bidness, and cousin....bidness is a boomin | |||
|
One of Us |
Amazing! Please keep the updates coming. ______________________ Hunting: I'd kill to participate. | |||
|
| One of Us |
After the rough forging, obviously the billet needs to be flat on the sides and squared. The scale and slag on left from the forging is very hard, and eats grinding belts, so I fly cut the majority of the scale off. 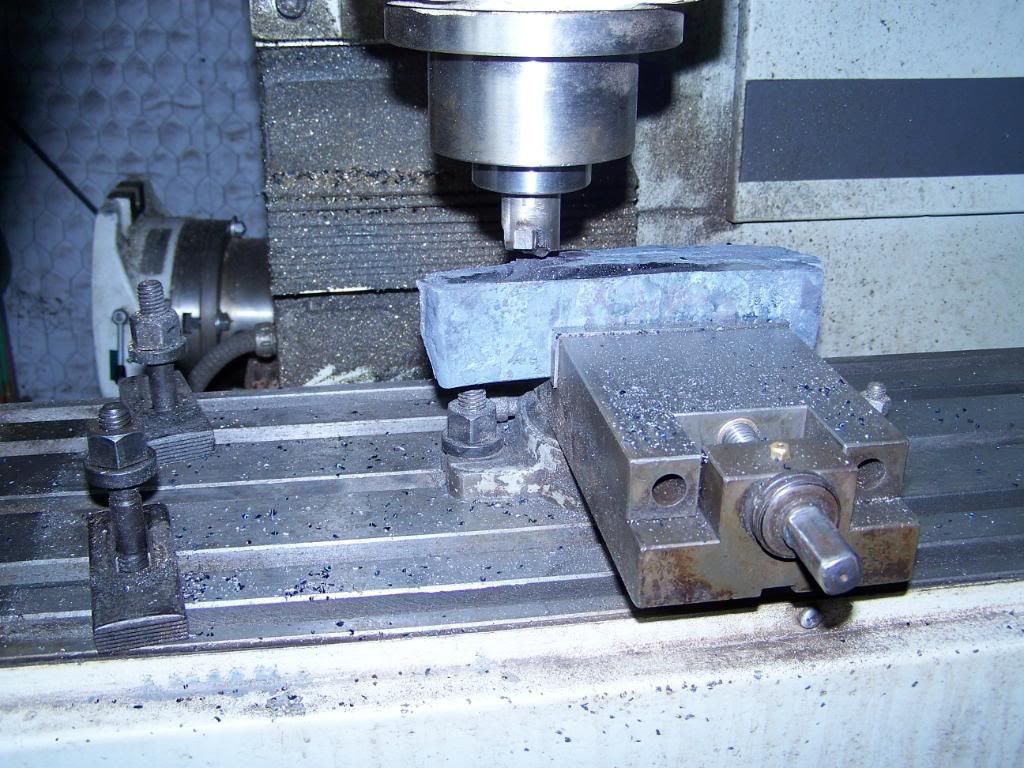 Next I surface grind the sides to ensure they are a flat and parallel as I can get them. This is critical as it is the foundation for the precision of the work yet to come. It also allows me to square up the critical areas of the action where I will take measurements from for locating holes and orienting the billet on the wire EDM. 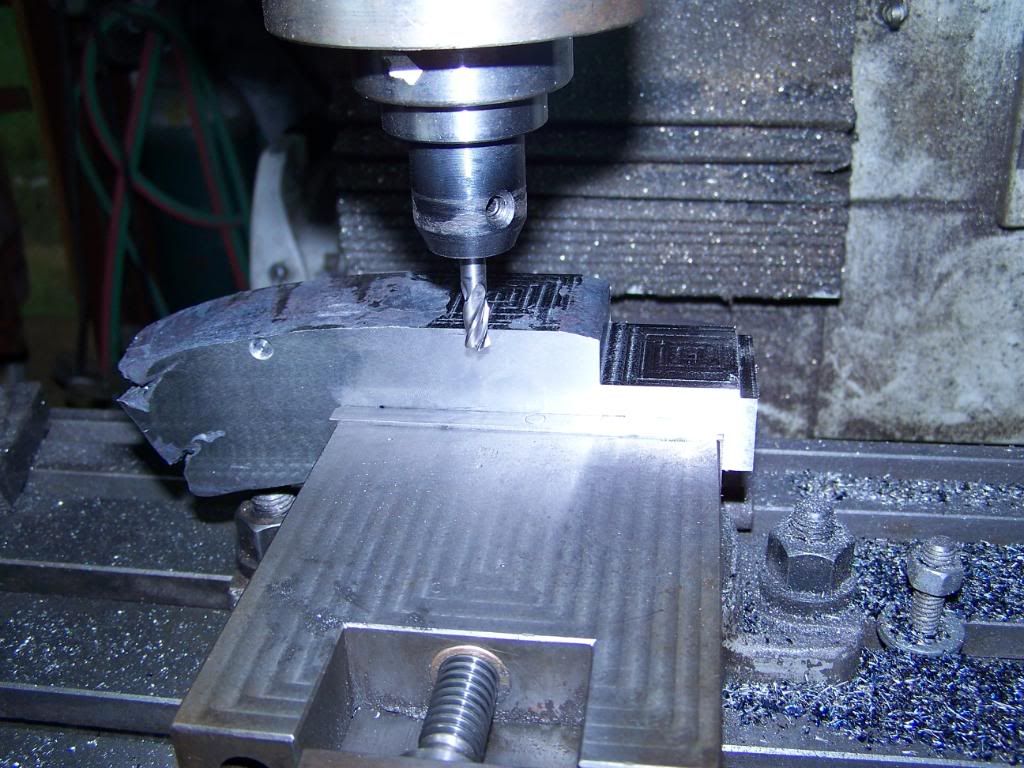 The next step is to anneal the billet to relieve forging stress and refine the steel's grain. Fine grain dramaticly increases toughness, so it is paramount. I did a quick etch of the action top to show the damascus pattern before going into the furnace. 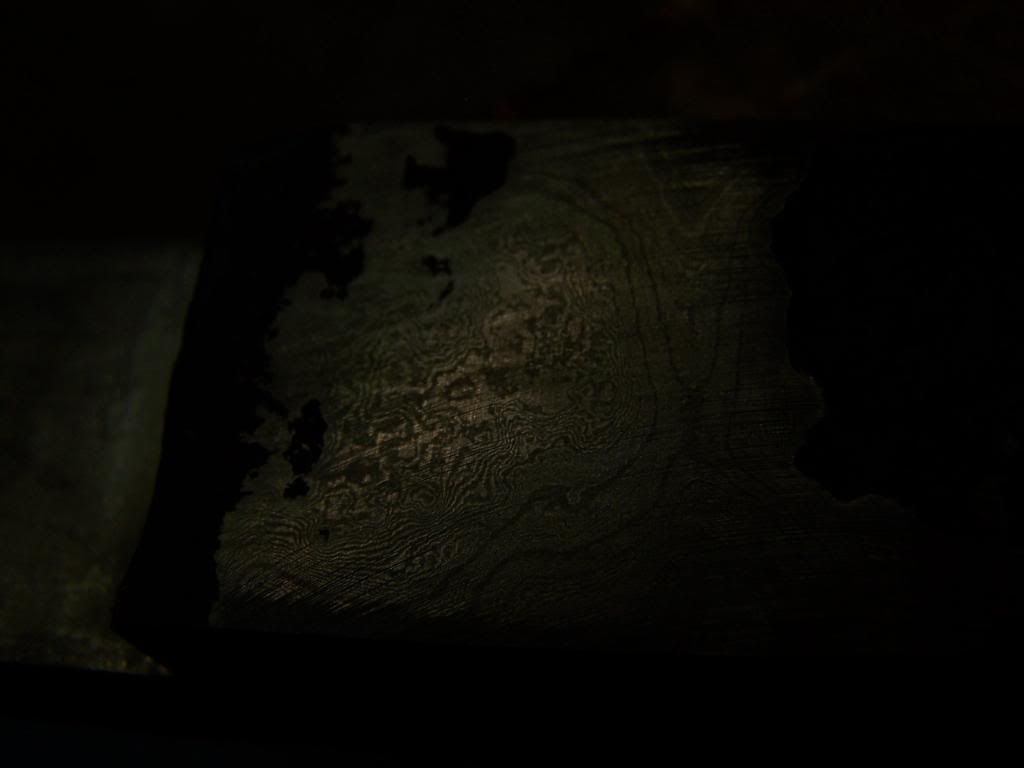 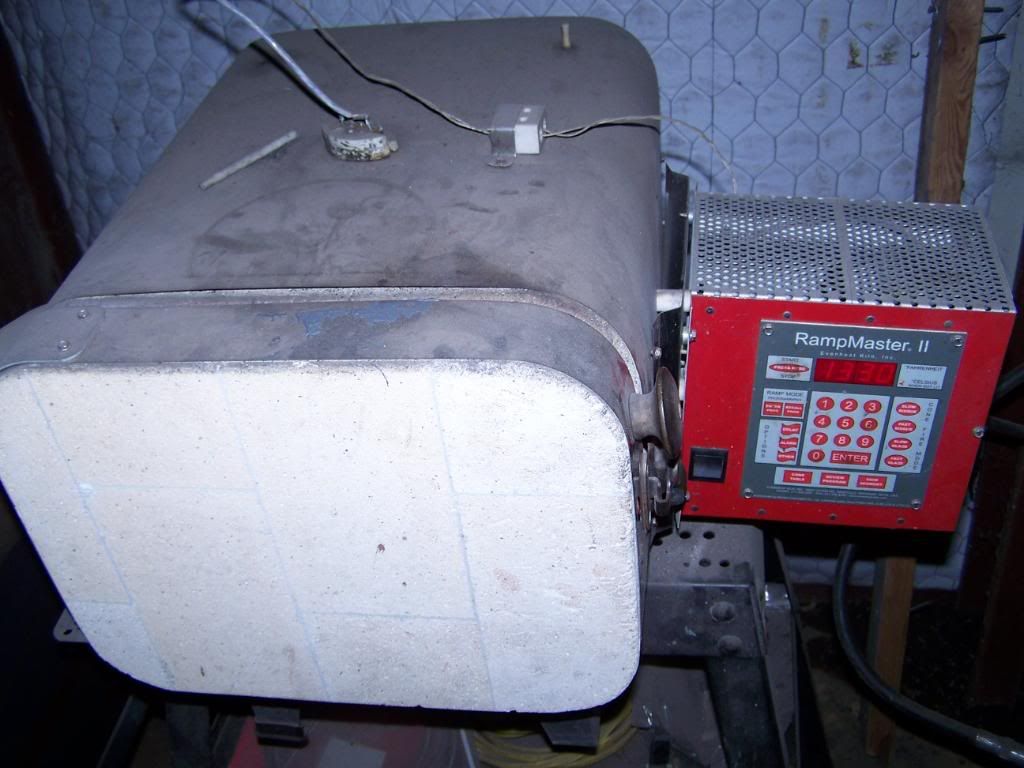 Bailey Bradshaw www.bradshawgunandrifle.com I'm in the gun buildin bidness, and cousin....bidness is a boomin | |||
|
| one of us |
Bailey, are you planning on browning the action, or to black it? Looking good so far. Keith IGNORE YOUR RIGHTS AND THEY'LL GO AWAY!!! ------------------------------------ We Band of Bubbas & STC Hunting Club, The Whomper Club | |||
|
| One of Us |
Thank you for sharing this with us. I for one think it is an amazing process and envision a spectacular end result SS Whatdaya mean...........there's other calibers besides 45-70 | |||
|
| One of Us |
This is just so much fun to watch, Bailey! Thanks again for sharing! Rusty We Band of Brothers! DRSS, NRA & SCI Life Member "I am rejoiced at my fate. Do not be uneasy about me, for I am with my friends." ----- David Crockett in his last letter (to his children), January 9th, 1836 "I will never forsake Texas and her cause. I am her son." ----- Jose Antonio Navarro, from Mexican Prison in 1841 "for I have sworn upon the altar of god eternal hostility against every form of tyranny over the mind of man." Thomas Jefferson Declaration of Arbroath April 6, 1320-“. . .It is not for glory, nor riches, nor honours that we are fighting, but for freedom - for that alone, which no honest man gives up but with life itself.” | |||
|
| One of Us |
OK, With the billet annealed, I need to locate and drill two starter holes for the wire EDM. I use an edge finder to locate the center of my wrist pin hole, which is X0, Y0 (remember basic geometry from school)for all operations from this point on. This is just a starter hole, and will be opened up with the EDM. Drill the wrist pin hole, then move to the tang cavity starter hole and drill it as well. 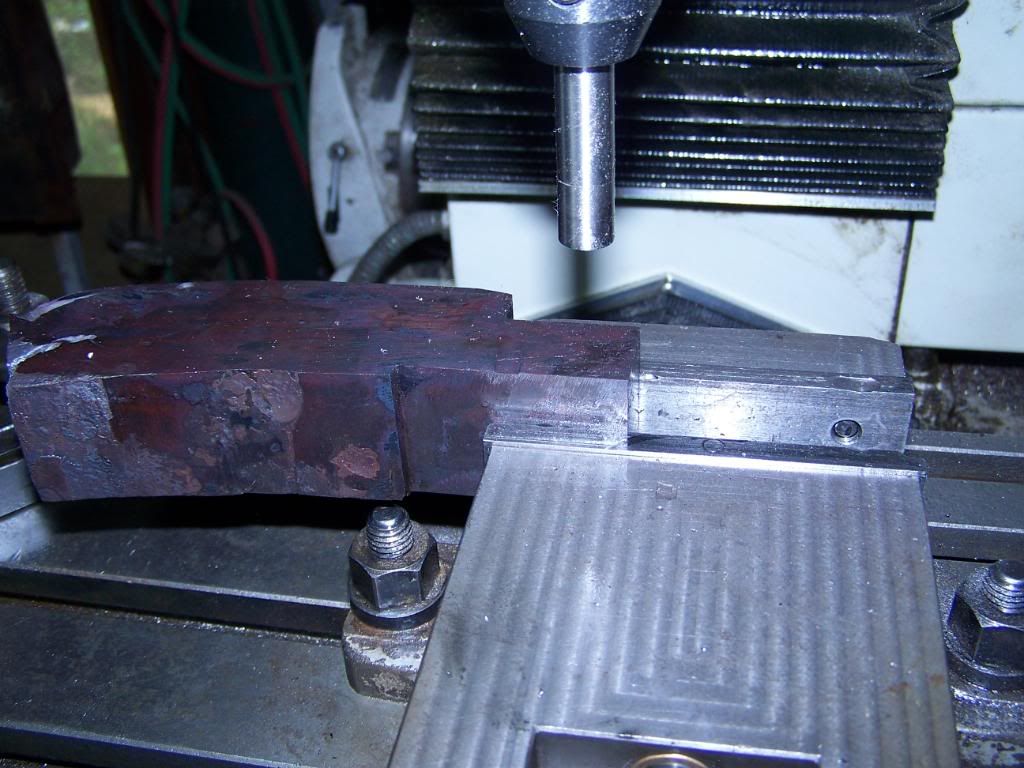  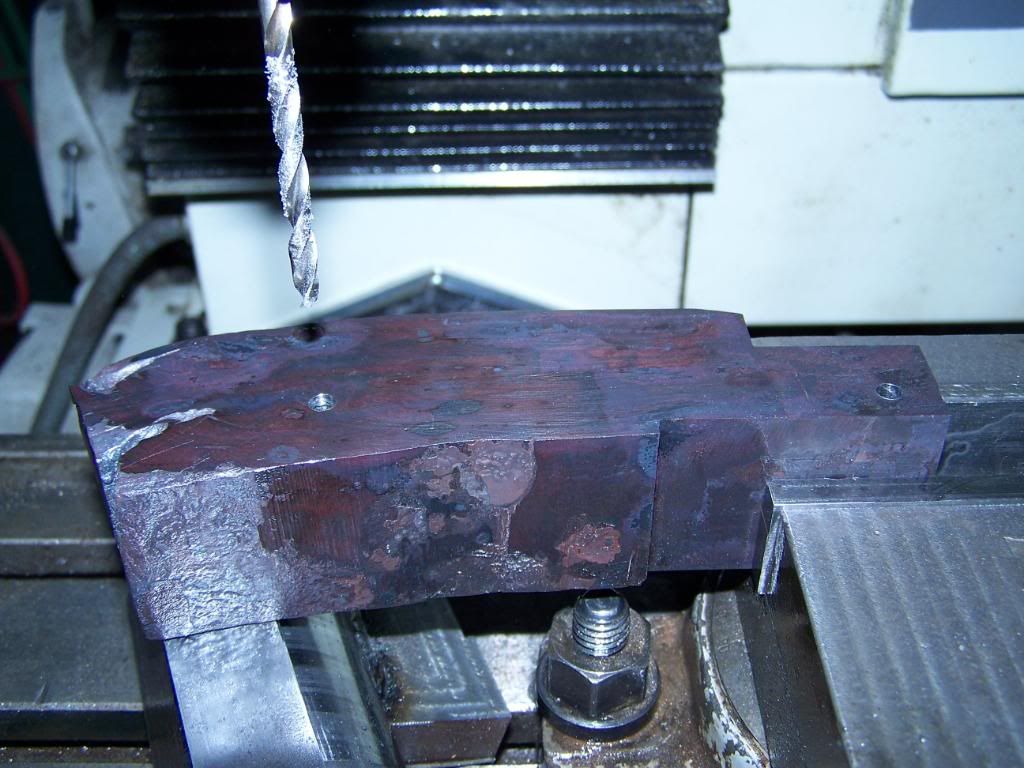 The billet is then loaded in the wire EDM, and useing the same method as the edge finder on the mill, I find X0, Y0...the center of the wrist pin. Once I have that location, I thread the wire through the cavity starter hole and make the cut. Here is a picture of the program path on the EDm screen. 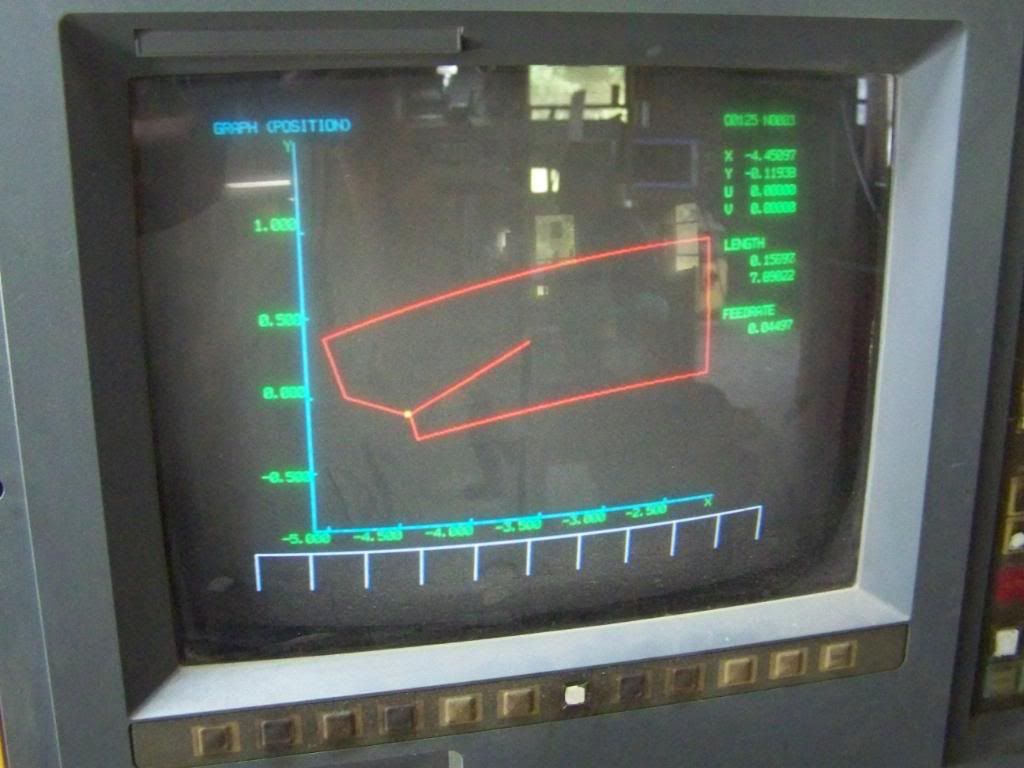 I would shoot a picture in the EDM work area, but you would only see water spray everywhere. EDM stands for electrical discharge machining. It works like and arc welder in reverse. The machine uses a .010" brass wire, with fresh wire being constantly feed through the work, with an electric charge, which causes an arc between the wire and the work piece, to erode the metal in front of the wire. The wire never touches the work, but maintains about .001" gap. It is VERY accurate, but VERY slow. Once I cut the tang cavity, I clean up the wrist pin hole in a spiral path. Produces a better hole than a drill and reamer, and since the rest of the profile of the action will be cut next, the hole will be perfectly parallel with the action face. 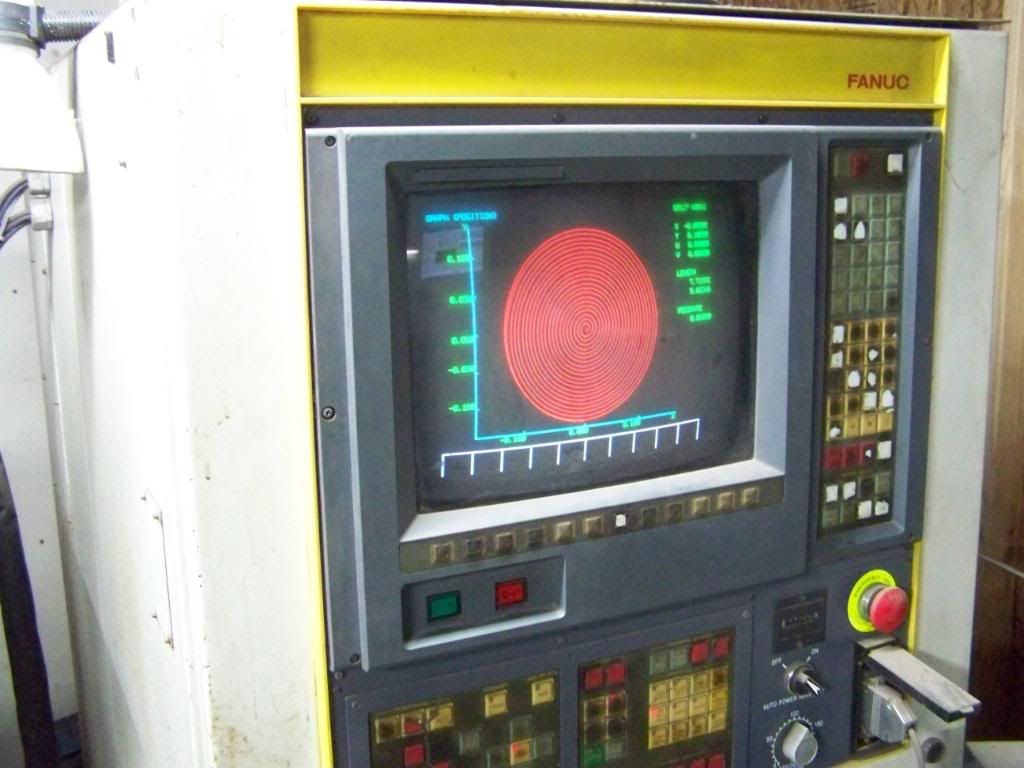 Bailey Bradshaw www.bradshawgunandrifle.com I'm in the gun buildin bidness, and cousin....bidness is a boomin | |||
|
| One of Us |
While waiting for the EDM, I precut the stock blank for machining. I left it oversized of course, but it sure shows how the layout runs. I rough machine the exterior of the stock on my 4 axis mill, as well as the inletting. The inletting saves about 10 hrs of work. 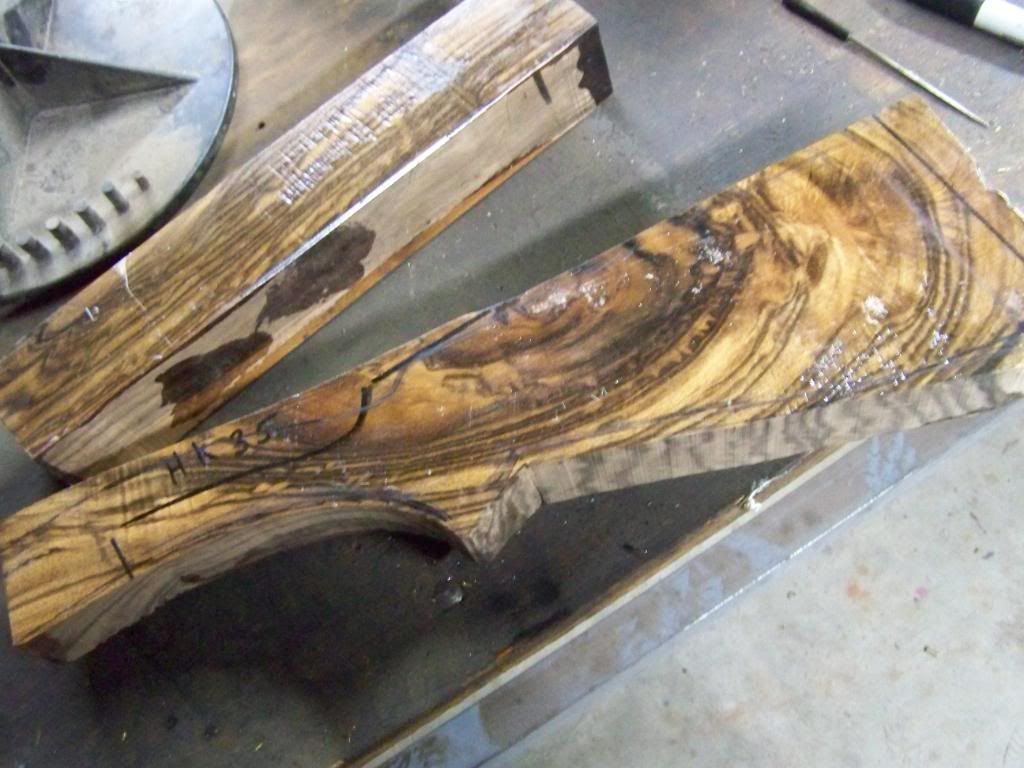 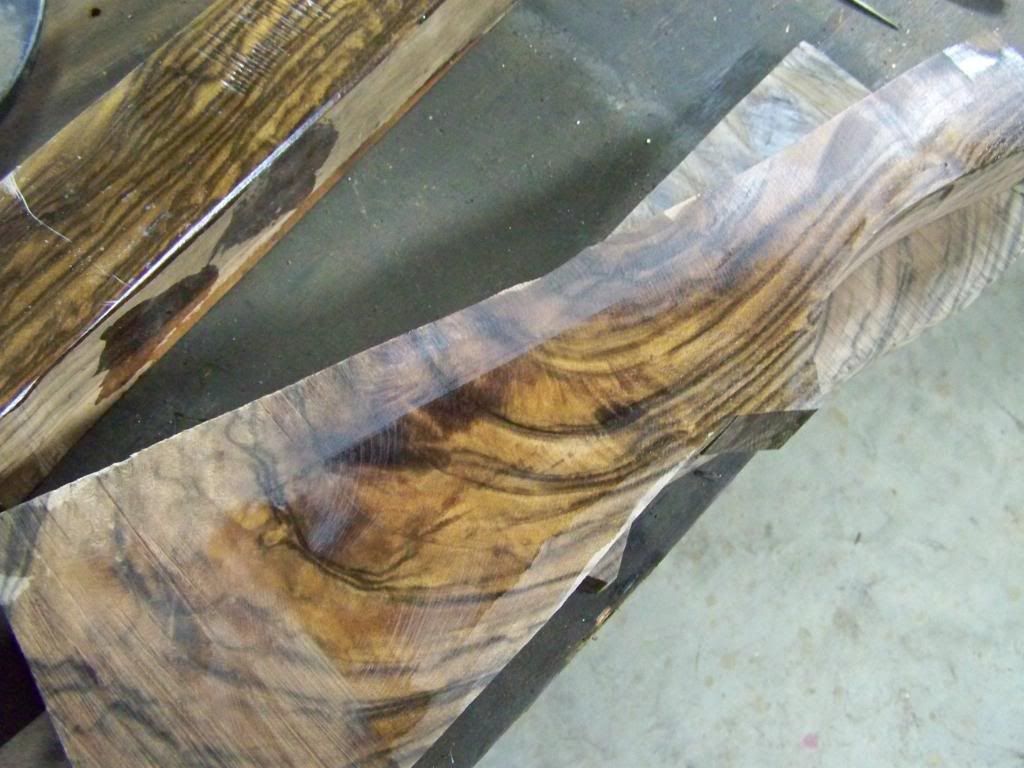 Back to the EDM, here is the tool path for the action breech top and bar.  I also have the damascus forged for the trigger group. I wanted the pattern to show on the sides of the housing, and on the bottom of the trigger guard. I used 3 pieces, and turned the center bar 90 degrees.   Since the trigger guard is centered, the damascus pattern will show. The billet has such a high layer count, that the edges of the billet don't show, as the layers are too fine unles there is enough surface area to show some movement. Here is a picture of the pattern that will be the sides of the trigger housing.  Bailey Bradshaw www.bradshawgunandrifle.com I'm in the gun buildin bidness, and cousin....bidness is a boomin | |||
|
| Moderator |
edm, cnc, on damascus double hornet ... that is awesome on 10 levels opinions vary band of bubbas and STC hunting Club Words aren't Murder - Political assassination is MURDER Information on Ammoguide about the416AR, 458AR, 470AR, 500AR What is an AR round? Case Drawings 416-458-470AR and 500AR. 476AR, http://www.weaponsmith.com | |||
|
One of Us |
Bailey, You have put back interest into this old carcass! My word this is perhaps the best informative and entertaining thread I've ever had the pleasure to read/view. Thanks just doesn't seem adequate.  Member NRA, SCI- Life #358 28+ years now! DRSS, double owner-shooter since 1983, O/U .30-06 Browning Continental set. | |||
|
| One of Us |
Moving ahead.... Here is the trigger housing billet being profiled on the mill. 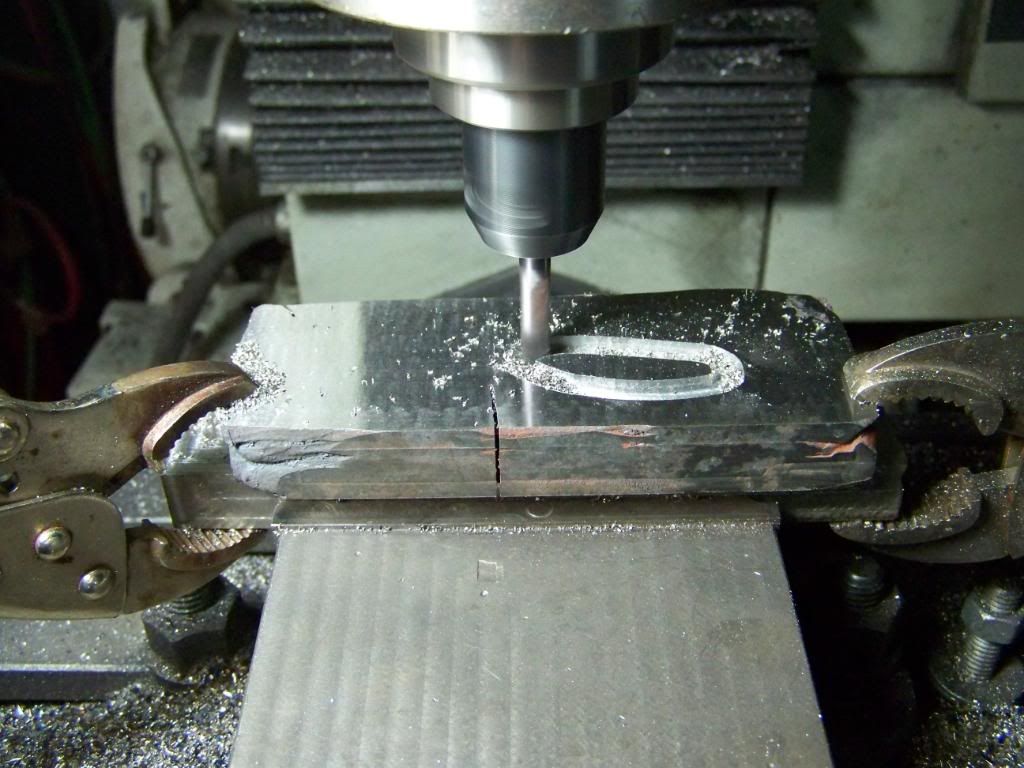 The trigger guard and bottom surface will be finish machined with the action, so those areas are left oversized for now. 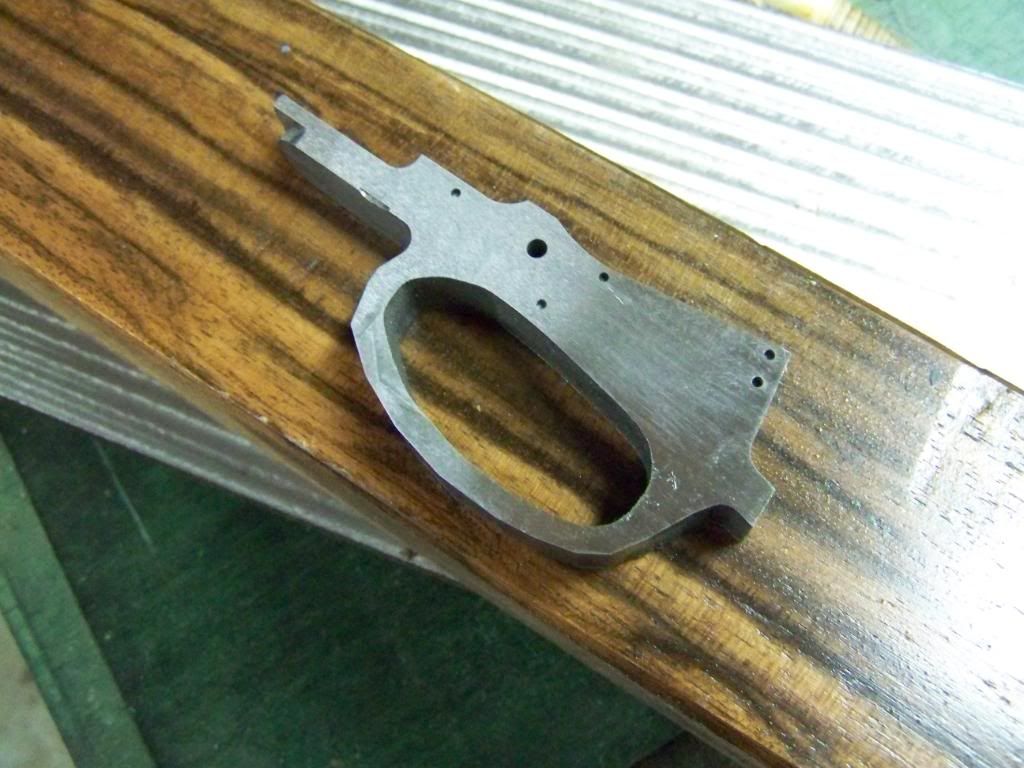 And the part profiled and the holes spotted and drilled as well as the front end machined with the "tounge" that secures the housing in the action. I am working on two other rifles at the same time, I had a delay from my steel supplier getting the 8620 bar to me. It arrived Monday, and here is the first forging.  It's a 2 1/2" round bar, and forging this big stuff makes me want a larger power hammer. Now back to the rifle in question....The action body is off the EDM and is ready to start machining. We added side clips, which I like and they should add a lot to the appearance of the action. Here are all the parts so far. 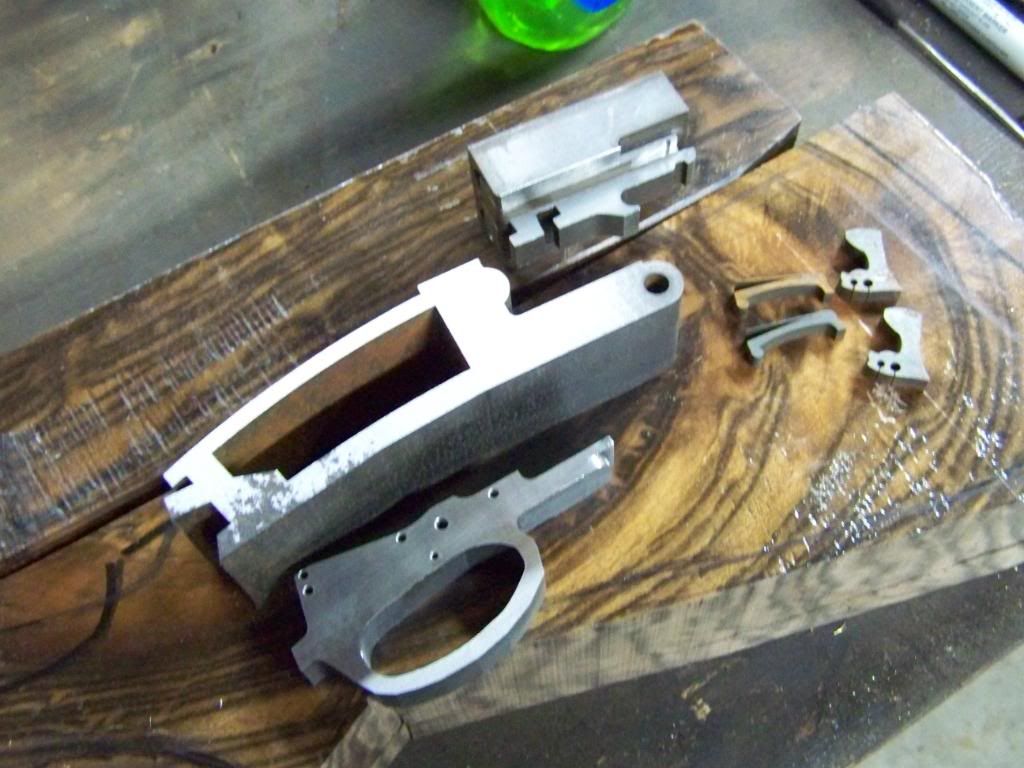 In the last fold I made when forging the damascus, I added 5 layers of steel that were full thickness, like what I started with. It produced the stripes in the center of the action shown here. 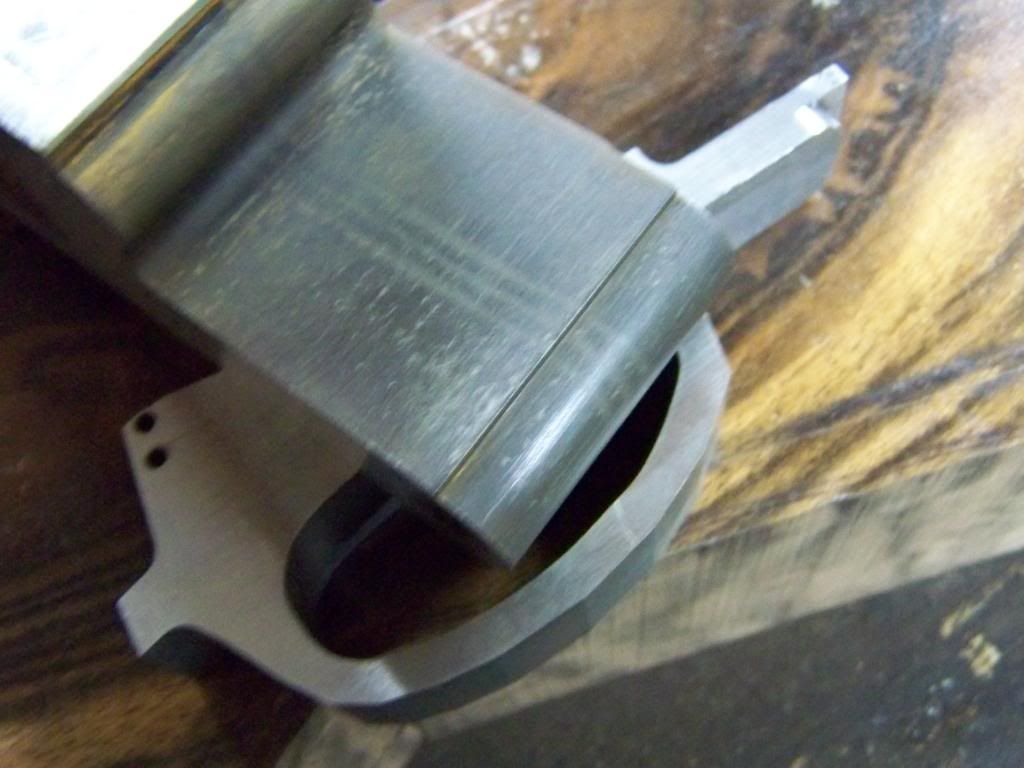 They run the length of the action and show on top and bottom. Bailey Bradshaw www.bradshawgunandrifle.com I'm in the gun buildin bidness, and cousin....bidness is a boomin | |||
|
| One of Us |
This is just about the coolest damn thing I've ever seen! Amazing. I can't wait to see more. | |||
|
| One of Us |
The pictures are great but I am sure they don't show the full beauty of the damascus grain. I can't wait to see the final product. When the buffalo are gone we will hunt mice, for we are hunters, and we want our freedom---Sitting Bull .470 Chapuis double; 9.3x74R Mathelon triple; 30-06 Winchester O/U | |||
|
| one of us |
Bailey that is just scary-impressive. Frank "I don't know what there is about buffalo that frightens me so.....He looks like he hates you personally. He looks like you owe him money." - Robert Ruark, Horn of the Hunter, 1953 NRA Life, SAF Life, CRPA Life, DRSS lite | |||
|
| One of Us |
Thank you Bailey for taking the time to show how a pice of raw material turns into a piece of art. I am reallly enjoying this tread. Pulki. | |||
|
| One of Us |
Thank you for sharing the in work processes needed to make the Damascus say nothing to the other task and they thought you were just another pretty face. Will you have this project done so you can show it off in Tulsa? Bill Member DSC,DRSS,NRA,TSRA A man who carries a cat by the tail learns something he can learn in no other way. -Mark Twain There ought to be one day - just one – when there is open season on Congressmen. ~Will Rogers~ | |||
|
| One of Us |
Awesome "Every ignored reallity prepares its revenge!" | |||
|
One of Us |
The best thread ever!! I can't wait to see more | |||
|
| One of Us |
WOW !!!!!! I love Damascus, and admire what you are doing. Please, please keep showing us your progess. Larry | |||
|
| One of Us |
Thanks everyone, I am glad you are enjoying the build. I have the fortune of making Sporting Classics magazine's knife actually knives...two models) of the year, and have been getting the prototypes in as there is a deadline. It has kept me away from the rifle for a ferw days, but I do have a big update coming this weekend. Thanks again!! Bailey Bradshaw www.bradshawgunandrifle.com I'm in the gun buildin bidness, and cousin....bidness is a boomin | |||
|
| one of us |
Keith IGNORE YOUR RIGHTS AND THEY'LL GO AWAY!!! ------------------------------------ We Band of Bubbas & STC Hunting Club, The Whomper Club | |||
|
| One of Us |
OK, finaly have an update ready. I buy mt barrels as blanks at the moment, so I have to machien them down to profile or have a local machine shop do it for me. I machined these on my 4 axis mill. It's a pain in the rear, but it works pretty good. I am talking with Shilen about getting them turned close to my finished contour, then I will take them from there. Once I have the barrels turned down, I fit the shoe lump. I am able to machine it to almost fit off the mill, but it always takes a little work with a file. The shoe lump is then heat treated and tempered. While the shoe is in the oven, I machine the rib. I use a solid rib that I machine a trough on each side that the barrels mate to. It helps with alighnment and with a proper fit, it makes the barrel unit feel really solid even before soldering. Here is a picture of the barrels, show lump and rib soldered together and partially cleaned 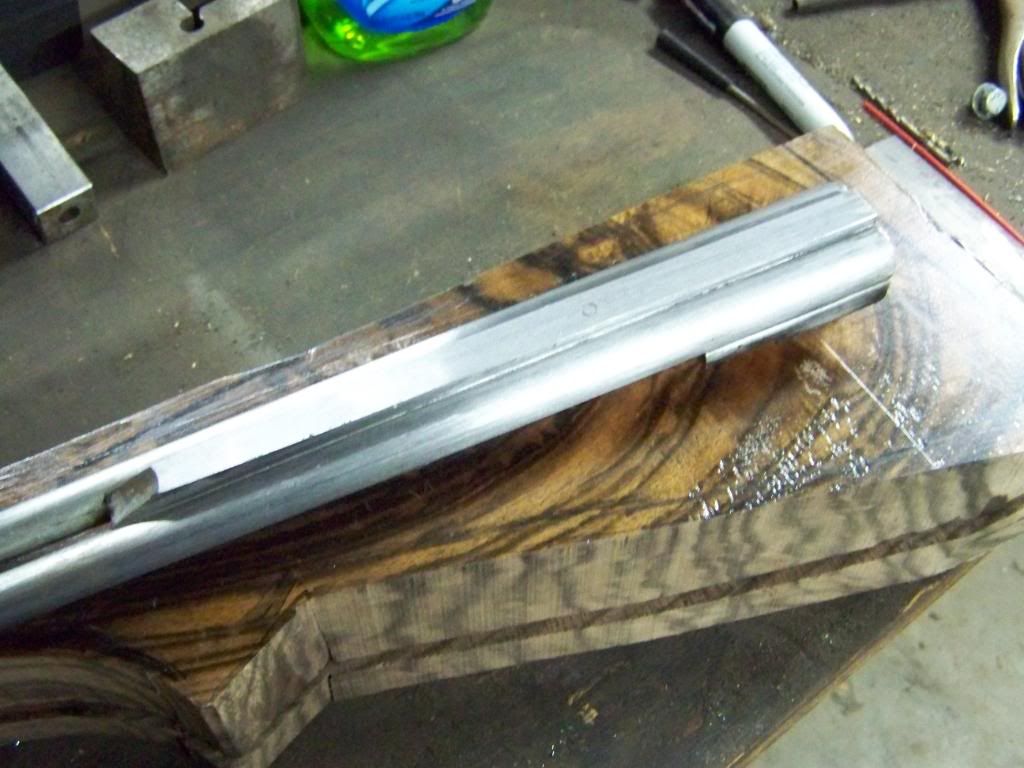 I assemble to parts with the barrels mounted on the spacer blocks at each end. I have the muzzels closer by a few thousandths each to provide an expected place to start for regulating. I set them on my mill table since it is as flat a surface as I have in the shop currently. 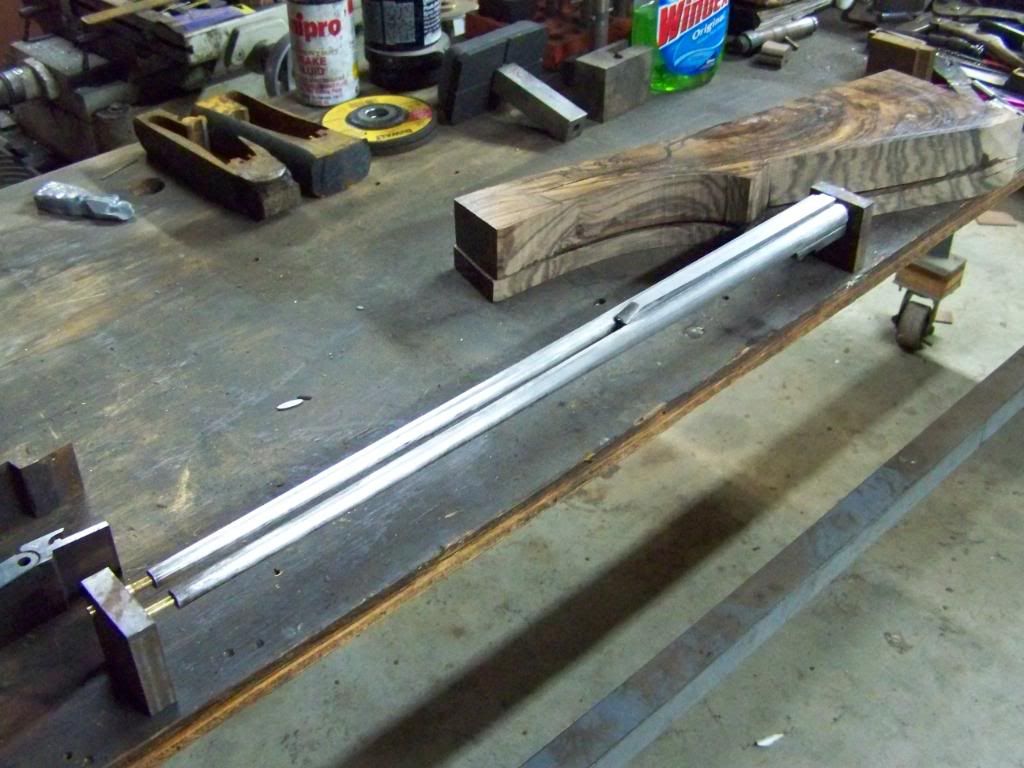 A picture of the breech end with recesses for the ejectors 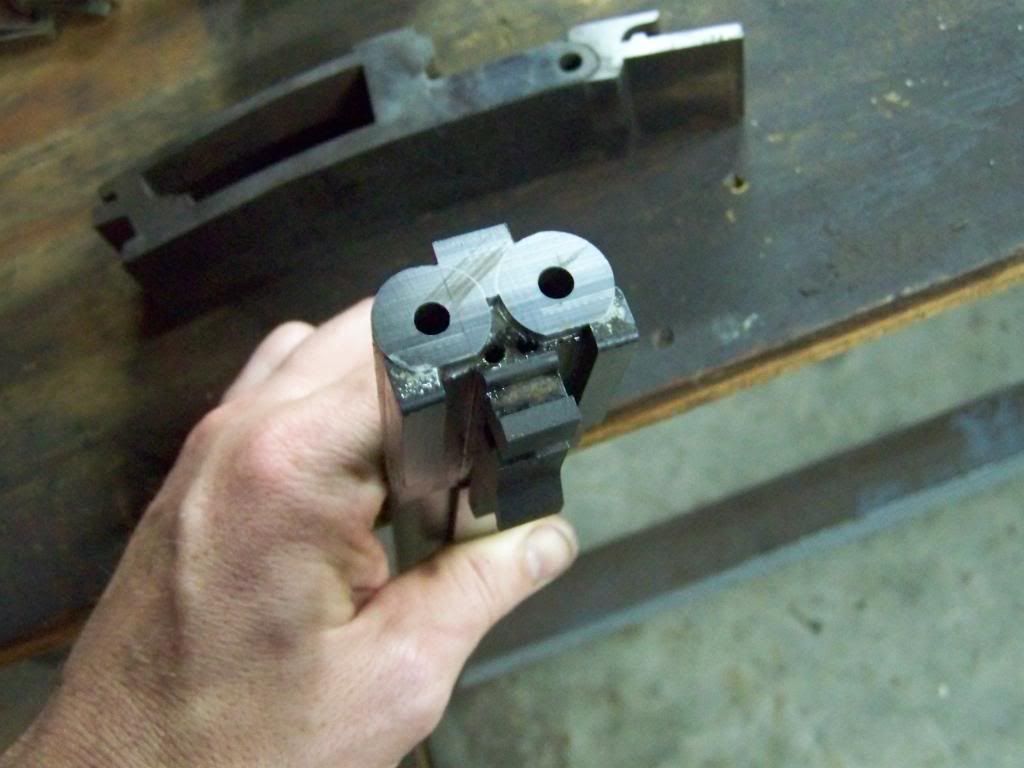 A picture of the action, forend iron, and barrels 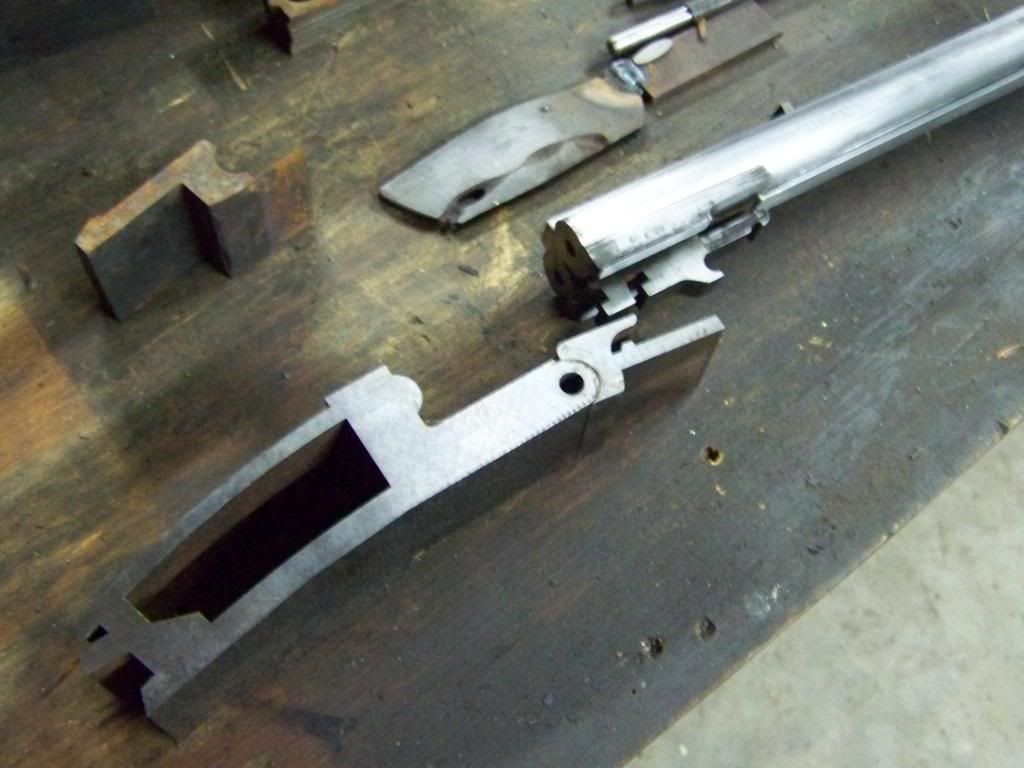 Finaly, a pic of the forend iron and action as they fit together. This is the fit directly off the EDM. 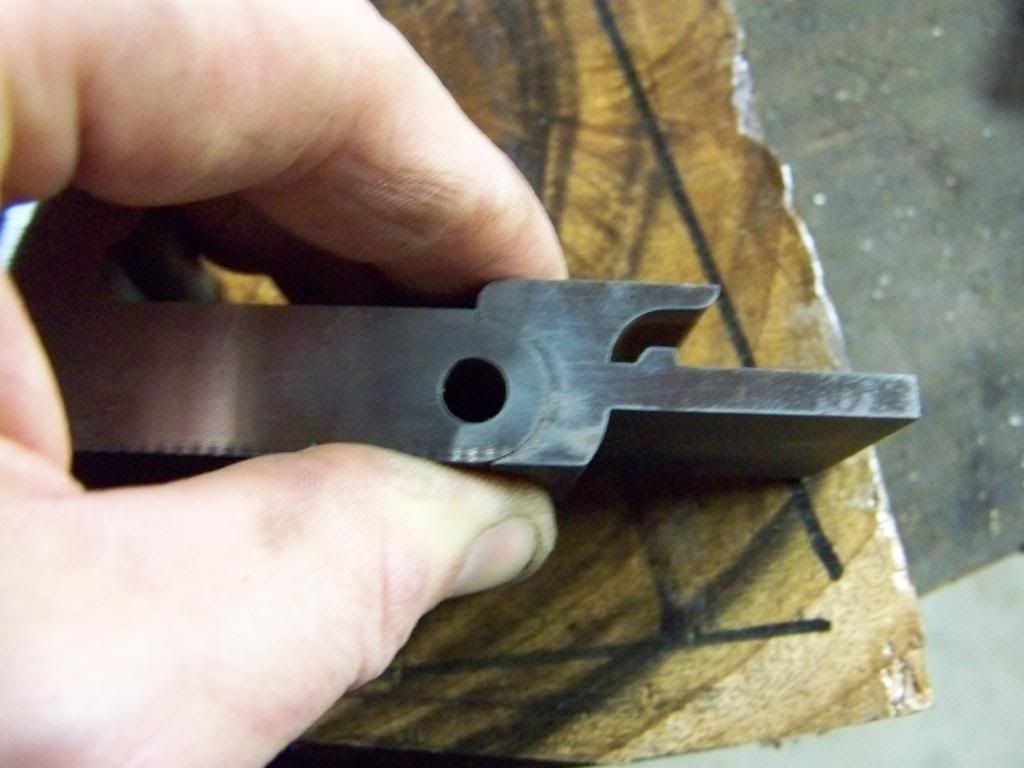 Next step is to begin machining the action to mate the majpr components. This is where it gets exciting!! Bailey Bradshaw www.bradshawgunandrifle.com I'm in the gun buildin bidness, and cousin....bidness is a boomin | |||
|
| One of Us |
Regards, Robert ****************************** H4350! It stays crunchy in milk longer! | |||
|
| one of us |
Keith IGNORE YOUR RIGHTS AND THEY'LL GO AWAY!!! ------------------------------------ We Band of Bubbas & STC Hunting Club, The Whomper Club | |||
|
| One of Us |
Looking good! Rusty We Band of Brothers! DRSS, NRA & SCI Life Member "I am rejoiced at my fate. Do not be uneasy about me, for I am with my friends." ----- David Crockett in his last letter (to his children), January 9th, 1836 "I will never forsake Texas and her cause. I am her son." ----- Jose Antonio Navarro, from Mexican Prison in 1841 "for I have sworn upon the altar of god eternal hostility against every form of tyranny over the mind of man." Thomas Jefferson Declaration of Arbroath April 6, 1320-“. . .It is not for glory, nor riches, nor honours that we are fighting, but for freedom - for that alone, which no honest man gives up but with life itself.” | |||
|
| One of Us |
Worked on the front sight base this morning. With the EDM, I can cut the base to shape and the proper width. Since it is adjustable for spread, it is in two pieces. I have the barrels set to cross by a few thousandths, so the sight base is closed when installed. Here it is fresh of the EDM. 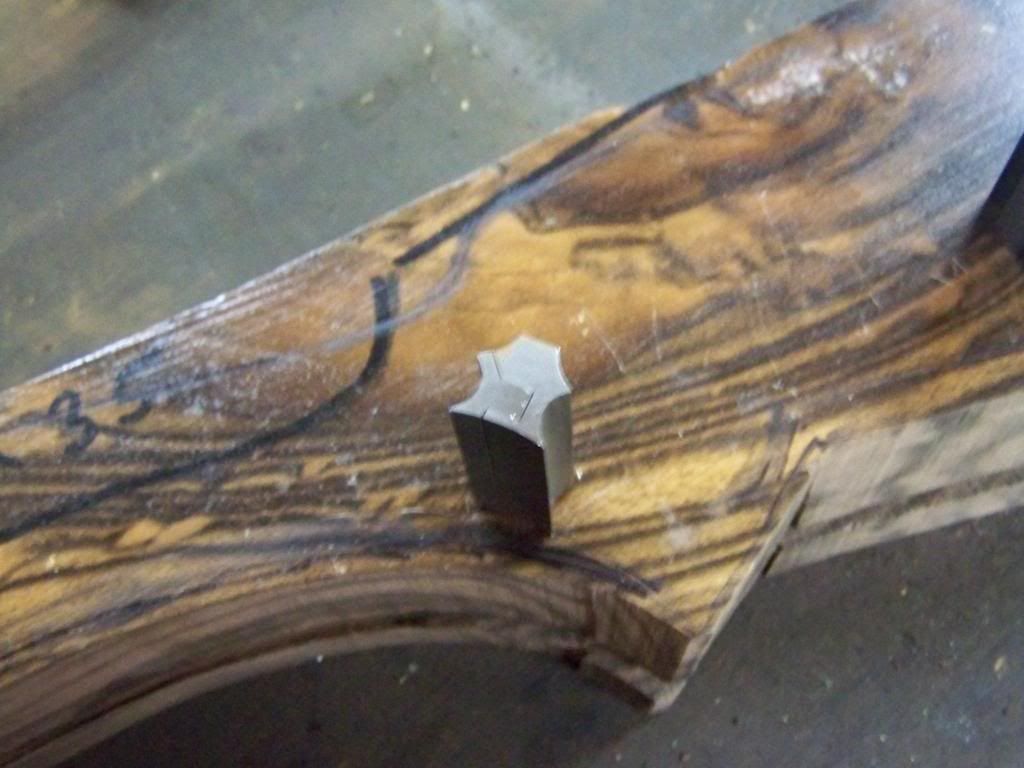 The base has two set screws, one in the front for adjustment, and a lock screw on top to secure the setting. After I drill and tap the holes for the screws, I shape the base and tin the areas that will be in contact with the barrels. 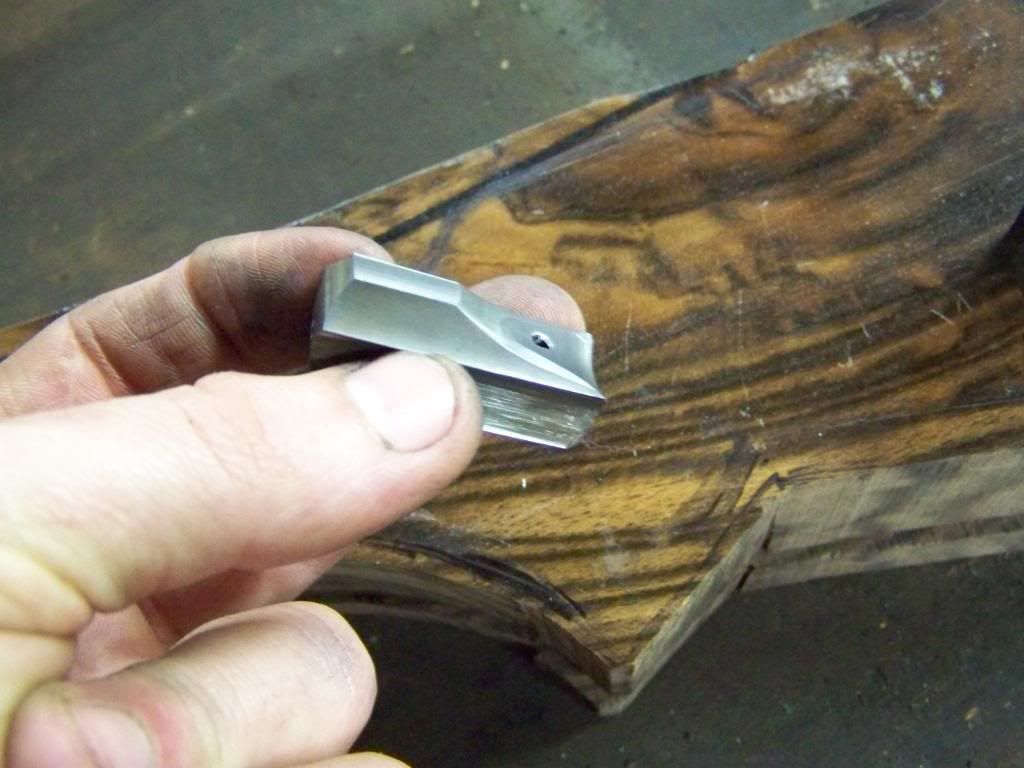 Here it is soldered in place. I will cut the dovetail for the front and rear sights in one operation, so both bases need to be in place. 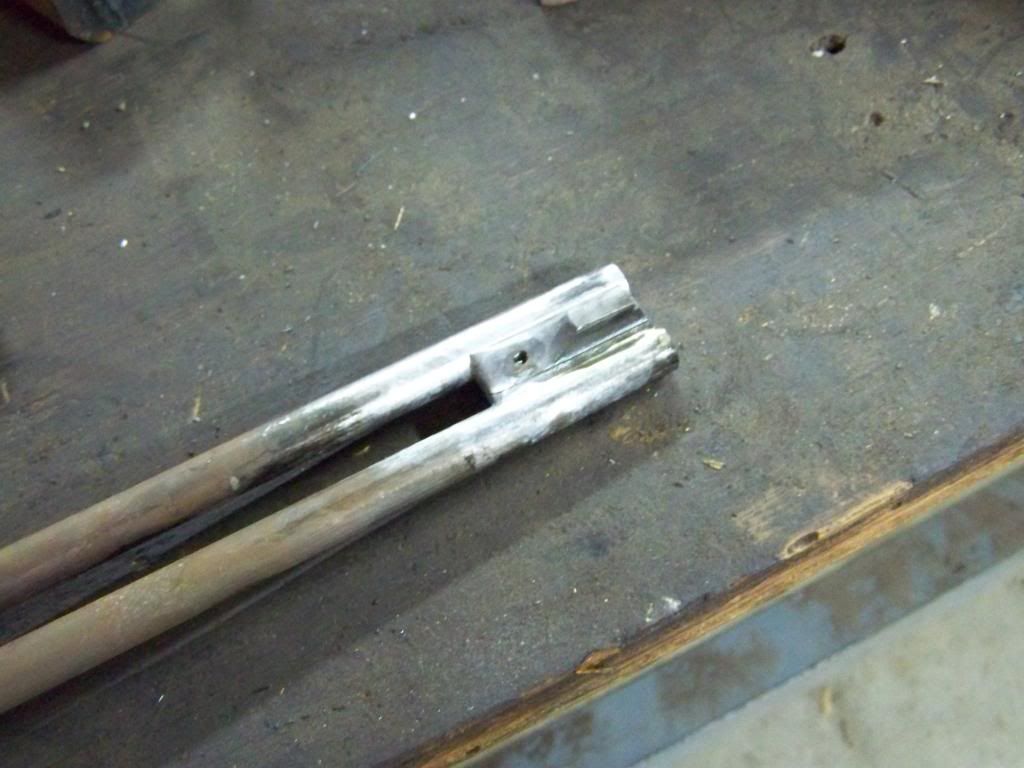 I've been shooting the heck out of my prototype rifle. It's more fun than the law should allow. Shot an 18" steel hog silouhette at 150yds yesterday. Can't say I had any kind of grouping, but was suprised I hit it consistently with open sights.....both barrels too! My son shot this video in front of the shop. The target is a block of tile grout that got wet and hardened, bottom right on the screen. It was getting dark, but if you watch it in full size, you can see the imacts.  Bailey Bradshaw www.bradshawgunandrifle.com I'm in the gun buildin bidness, and cousin....bidness is a boomin | |||
|
| One of Us |
Wow, what an amazing thread and what a privilege to watch the progress of that rifle. Thank you | |||
|
| One of Us |
LOTS of machining to do at this stage, and there are a lot of details to check and double check. Make sure the vise is squared up with hte X axis, double check positions ect. Here the trigger group pocket is beginning to be machined. 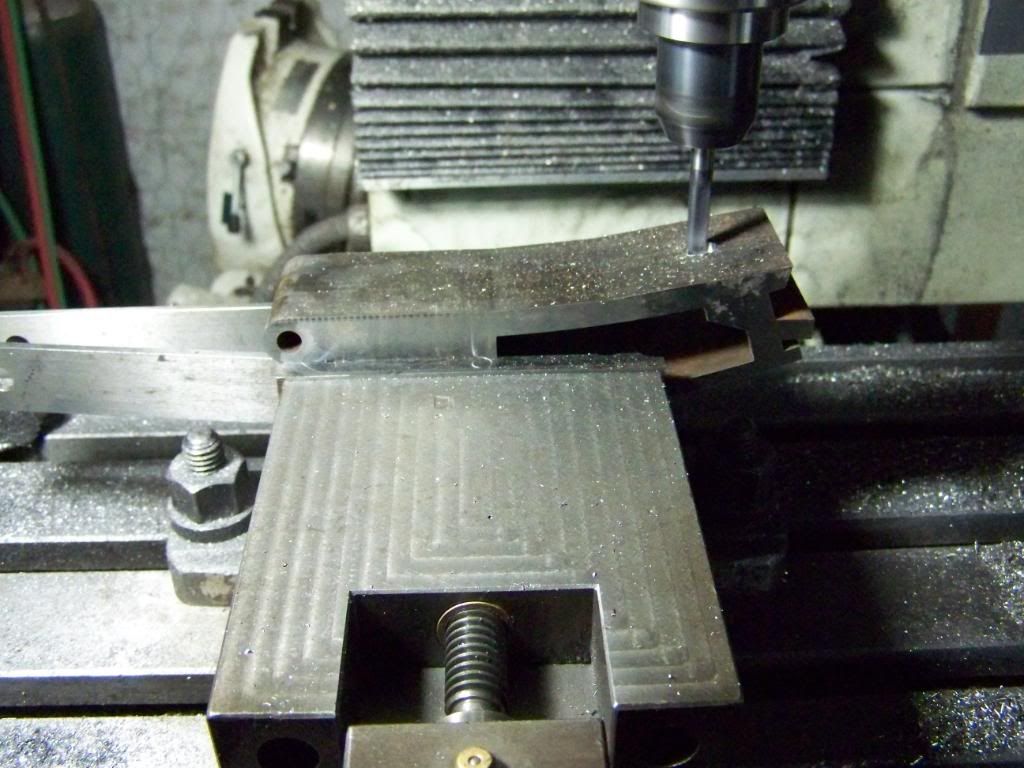 1 1/2 hr later.... 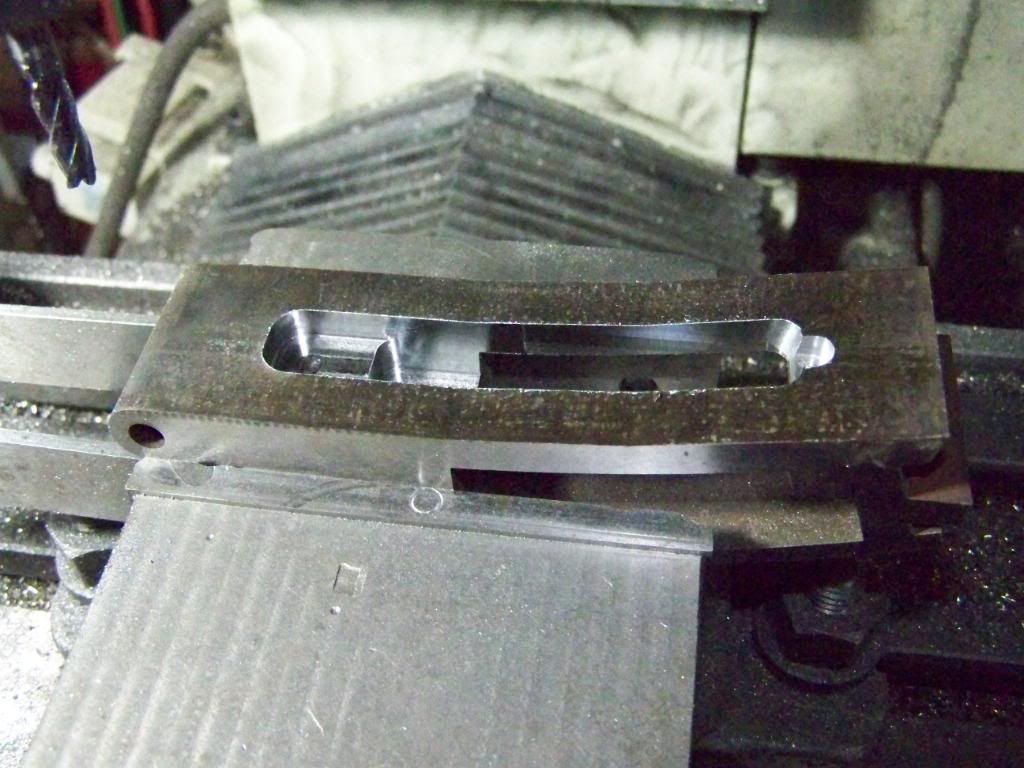 Climb milling finish cuts leave a nice finish. There is more to do inside the pocket, but I have to turn the action over and machine the trunion cavity. That will allow access to machine the slots for the sliding bolt. The top side machining includes the top lever pocket and rough machining the side clips and breech face. 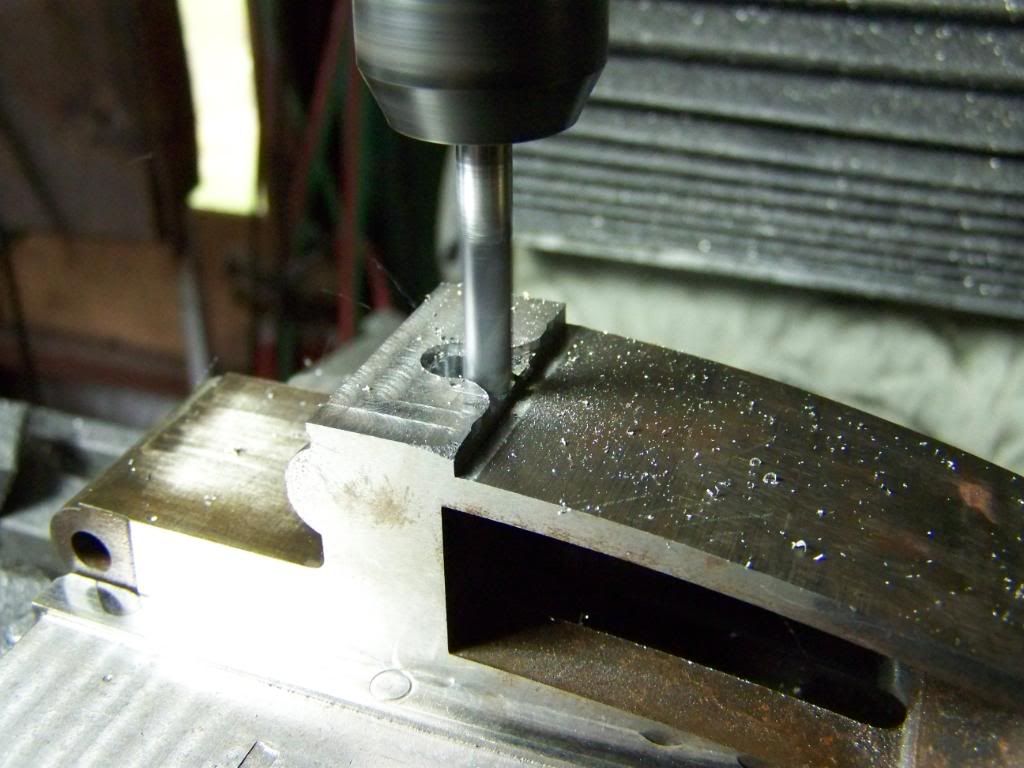 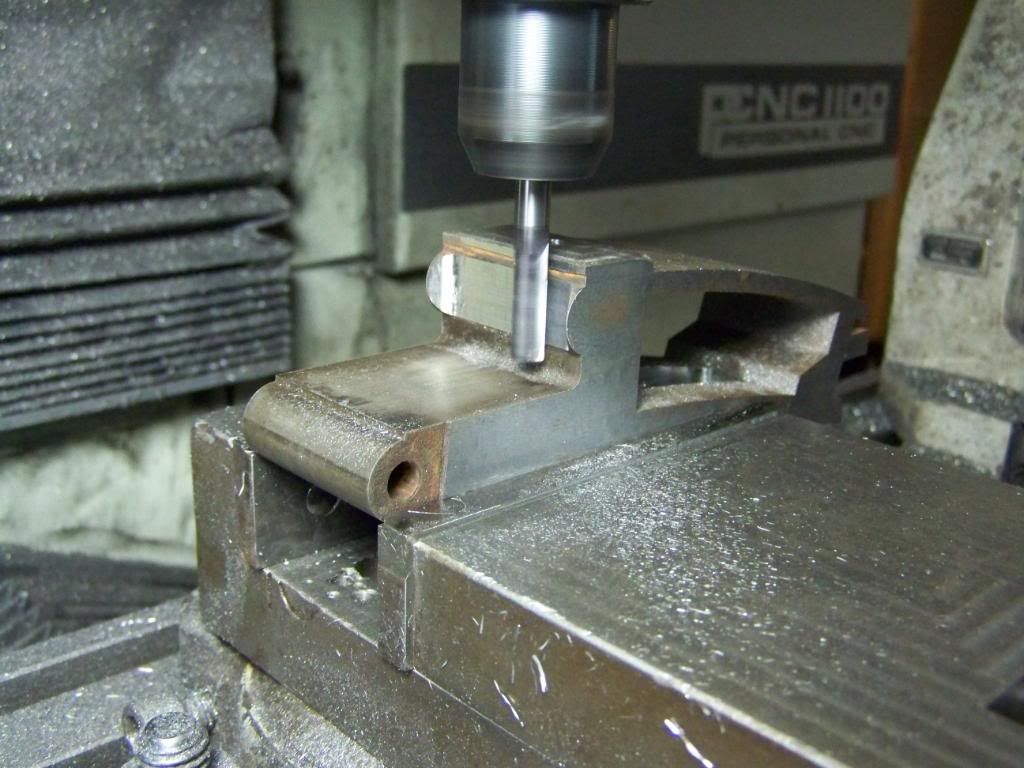 The breech face is left "rough" because I will have to smoke in the face with the barrel faces, so machining too much off will require remaking the shoelump/barrel set. I leave .005" to clean up with the file and stones. Once the trunion has been machined, I can begin joining the action and barrels. Useing a dummy wrist pin, here is the first mating of the action and barrels. 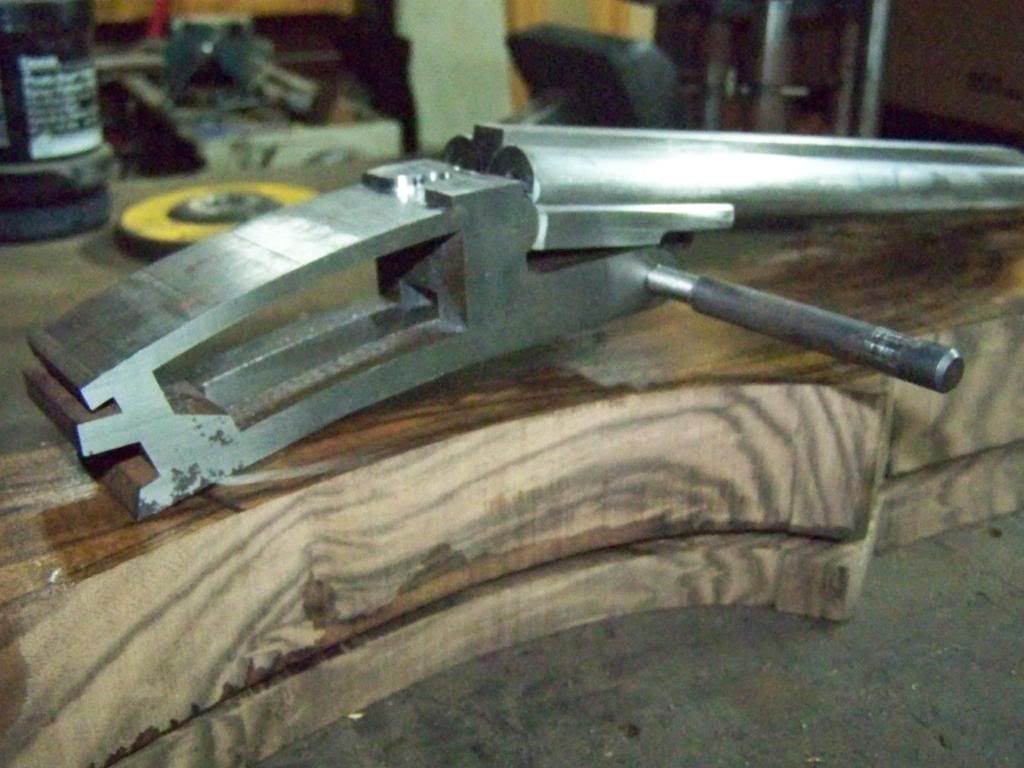 Bailey Bradshaw www.bradshawgunandrifle.com I'm in the gun buildin bidness, and cousin....bidness is a boomin | |||
|
| Powered by Social Strata | Page 1 2 3 4 5 |
| Please Wait. Your request is being processed... |
Rifles Double Rifles

Visit our on-line store for AR Memorabilia