
 Guns, Politics, Gunsmithing & Reloading Gunsmithing
 Go | New | Find | Notify | Tools | Reply |
| Work in progress, Rigby | Login/Join |
| One of Us |
I do not want to upstage Mr Weibe here, he is much to talented for me to try and duplicate his work; just thought it might entice someone to look at how I do it. I use the milling machine to rough mill the stock to the width depth and rough profile of the barrel channel to keep things straight. 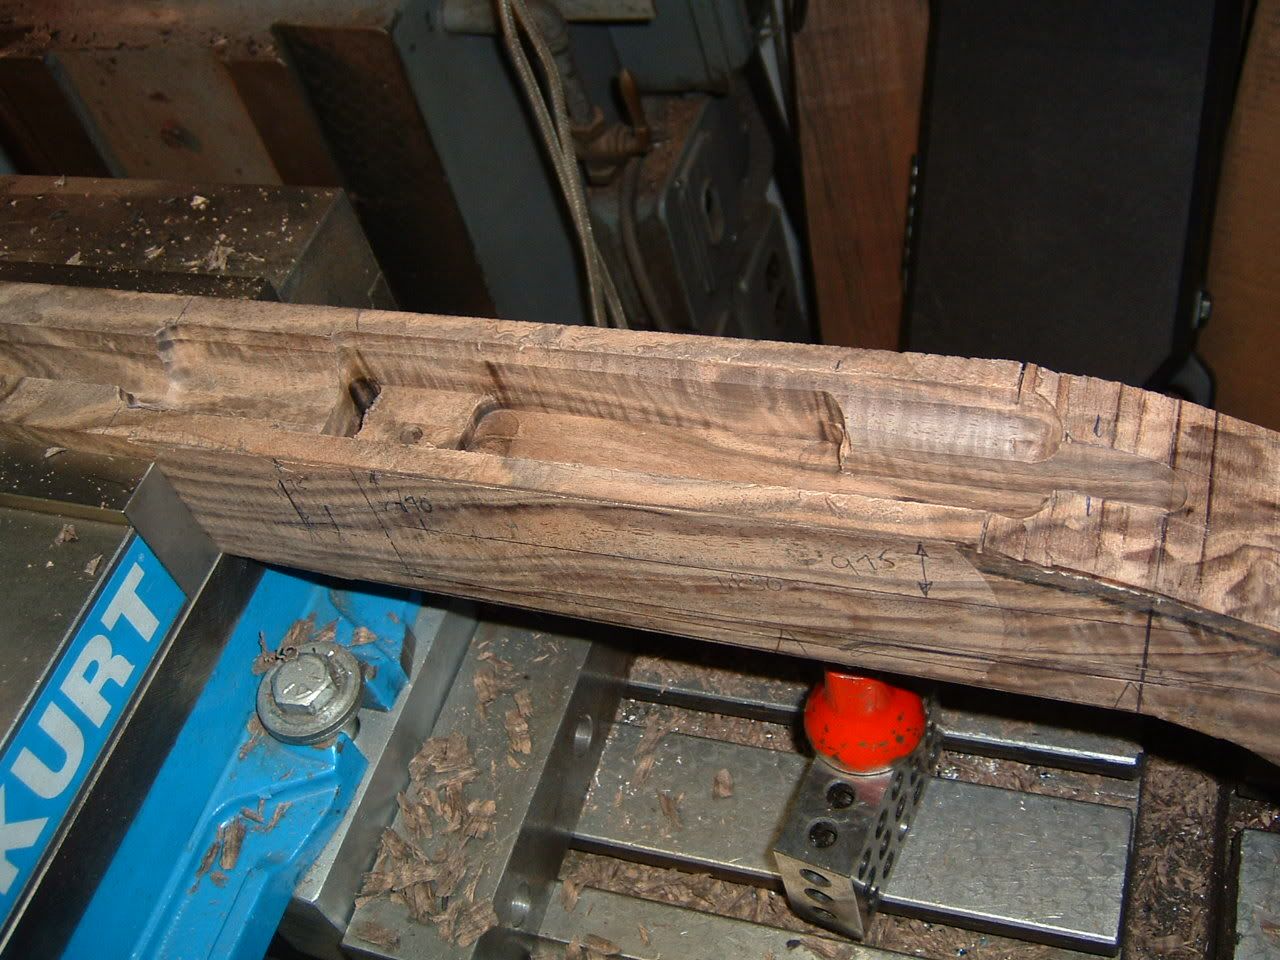  1.jpg[/IMG] 1.jpg[/IMG]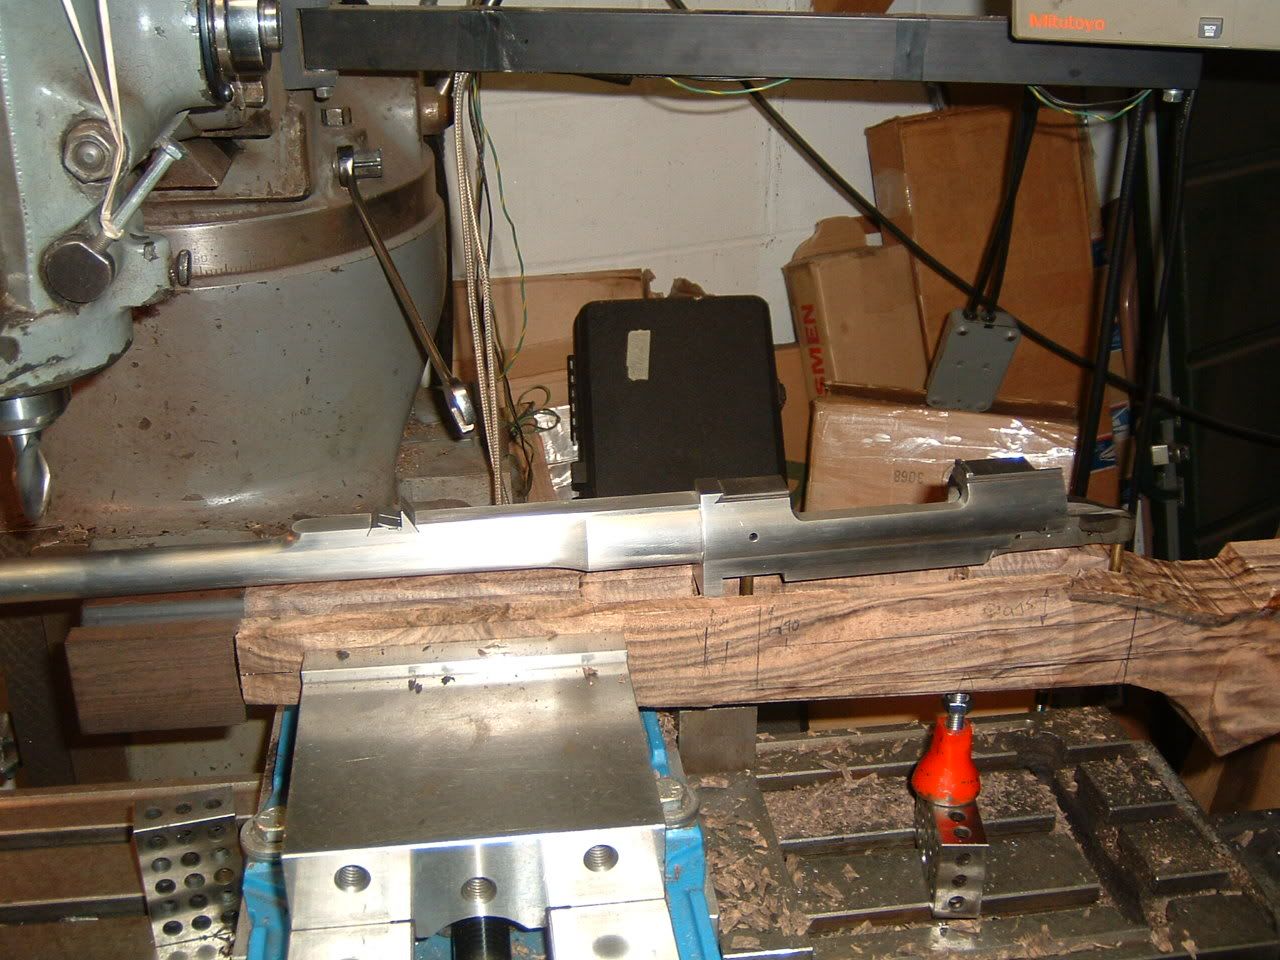   Jim Kobe 10841 Oxborough Ave So Bloomington MN 55437 952.884.6031 Professional member American Custom Gunmakers Guild | ||
|
| One of Us |
Thanks Jim for showing your work. Please tell us more about the barrel and action. | |||
|
| One of Us |
Looks good Mr. Kobe! Show us more pics as you go along. Butch | |||
|
| one of us |
Thanks Jim. Looking forward to the next installment.  Doug Humbarger NRA Life member Tonkin Gulf Yacht Club 72'73. Yankee Station Try to look unimportant. Your enemy might be low on ammo. | |||
|
| One of Us |
I love these "work in progress" threads. Keep the updates coming Jim. Jeff | |||
|
| One of Us |
The barreled action is the last, I believe, action that Pete Noreen did before he let his manufacaturing go to Hein. He did the integral barre and rib also. The pictures show the roughing out of the action and barrel channel and then after a short time the inletting of action into the stock. I don't have a CNC mill so most has to be done using my DRO. I definitly saves a lot of time. I do the bottom metal first. Jim Kobe 10841 Oxborough Ave So Bloomington MN 55437 952.884.6031 Professional member American Custom Gunmakers Guild | |||
|
| One of Us |
Gotta luv that fiddle back You gonna use that stock for application to the guild? | |||
|
| one of us |
Jim thanks for posting pictures of your work. I don't think we can see to many of these fine examples on the gunsmithing forum | |||
|
| One of Us |
Jim: Great work...love to see the use of the mill...very precise,,,kinda make me wonder why more guys don't do it this way...more sense than invseting a $15000.00 duplicaor that can do only one thing....then you have to make a pattern in the first place! Keep us up to date! | |||
|
| one of us |
+1 If it weren't for threads like this, I'd just be hanging out in the Political Forum with the other knuckleheads. Nice work. Now you're committed to keep us posted through to the end of this project. ______________________________ "Truth is the daughter of time." Francis Bacon | |||
|
| one of us |
Jim, I'm also glad to see that you practice proper dental hygiene while inletting the stocks. | |||
|
| One of Us |
If that reference is to the toothbrush, I use them for cleaning stuff, if the floss, I also use that for cleaning and sometimes for stiching up large gashes from sharp chisels, who's go time or money to go visit a doctor Jim Kobe 10841 Oxborough Ave So Bloomington MN 55437 952.884.6031 Professional member American Custom Gunmakers Guild | |||
|
| One of Us |
I am curious as to how many different cutters you use to cut the mortises, and what the starting point is. | |||
|
| One of Us |
A few more pictures if anyone is interested. They are after the final inlet to depth with bottom metal in, bolt cutout, trigger and bolt release cutout done, magazine box fitted and just trying to figure out what to do with the "flat" tang, I think it looks funky. 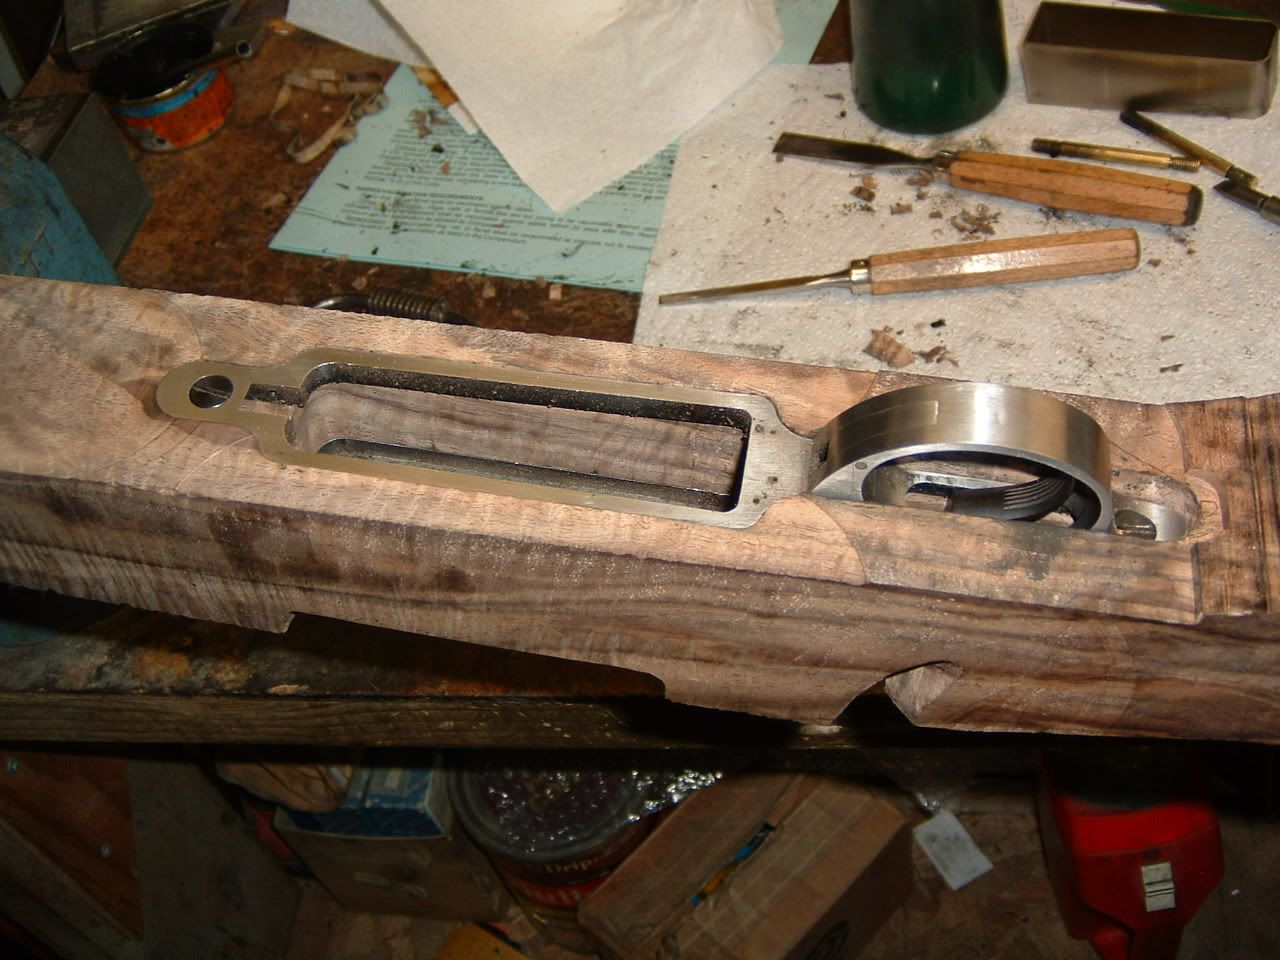 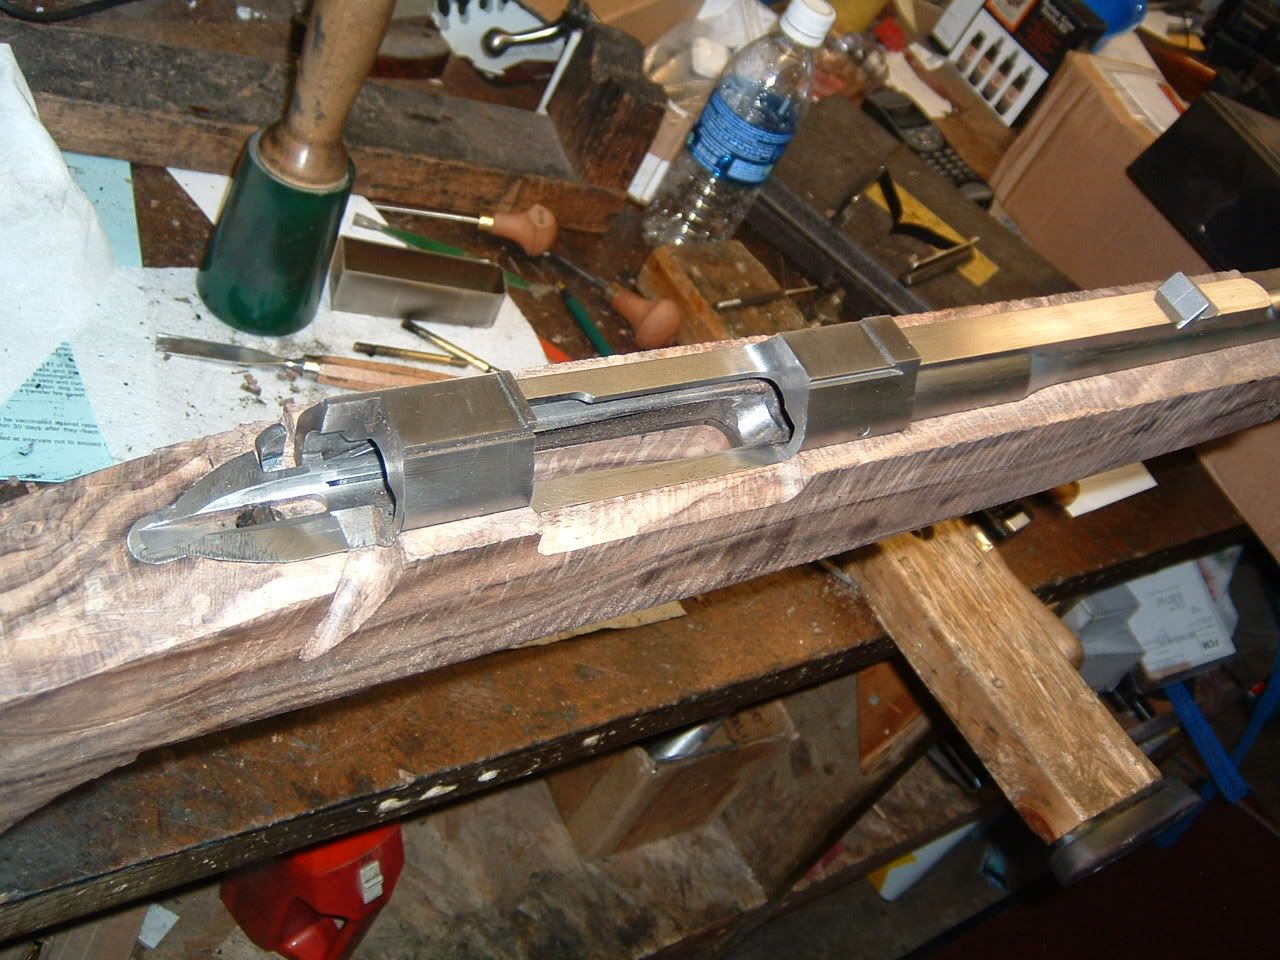 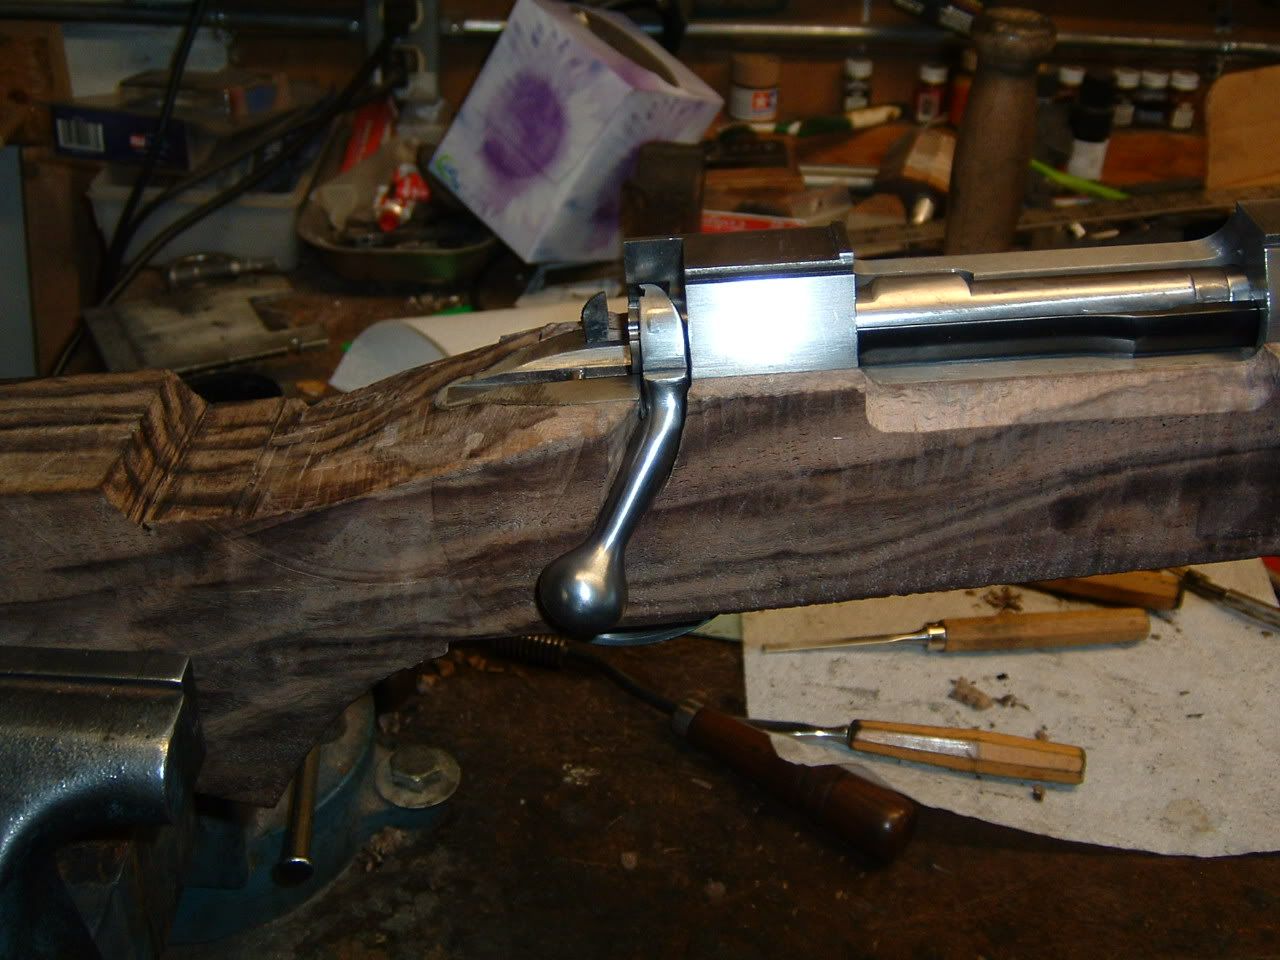 Jim Kobe 10841 Oxborough Ave So Bloomington MN 55437 952.884.6031 Professional member American Custom Gunmakers Guild | |||
|
| One of Us |
I start with a large fly cutter and square up the blank, making sure it is flat and the sides are parallel. All of my measurements are taken off the center of the blank. Drill the guard screw holes first and use the forward hole as the "zero" on the DRO. Next is the 1/2" endmill to cut the outline of the flat on the bottom sides of the receiver to depth and the rear tang. I normally cut a groove in the forend for the barrel channel to just under the diameter of the barrel at the tip and the breech section of it just forward of the action. This is done with a ball endmill. The recoil lug recess is cut with a long 1/4" endmill to correct depth, width and thickness. WHen inletting after this, a series of flat chisels and gouges to cut the corners left by the round endmills and to remove the material that doesn't look to be "part of the stock" Jim Kobe 10841 Oxborough Ave So Bloomington MN 55437 952.884.6031 Professional member American Custom Gunmakers Guild | |||
|
One of Us |
Great thread....thanks Jim /////////////////////////////////////////////////////////////////////////// "Socialism is a philosophy of failure, the creed of ignorance, and the gospel of envy, its inherent virtue is the equal sharing of misery." Winston Churchill | |||
|
one of us |
Thanks for sharing. Did rem721 do the metal work? ______________________ Always remember you're unique, just like everyone else. | |||
|
| One of Us |
Going to put in the cross bolts next. Standby. Jim Kobe 10841 Oxborough Ave So Bloomington MN 55437 952.884.6031 Professional member American Custom Gunmakers Guild | |||
|
| one of us |
Keep them coming. | |||
|
| One of Us |
The following are of the cross bolt install. I use 5/16 threaded rod with c'sunk washers and 10-32 flat head allen screws and glassed into place with ebony caps for covers. 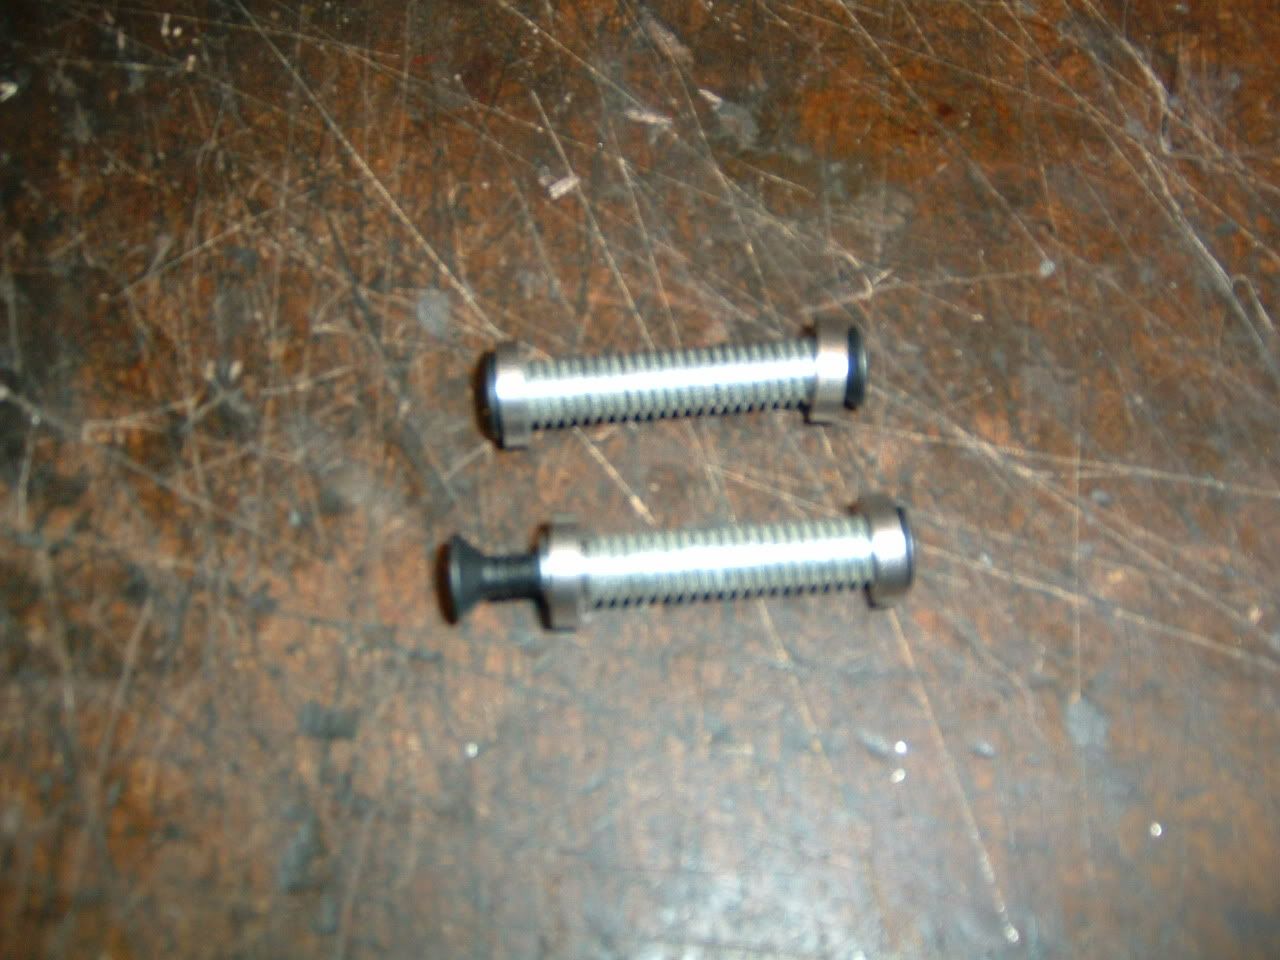  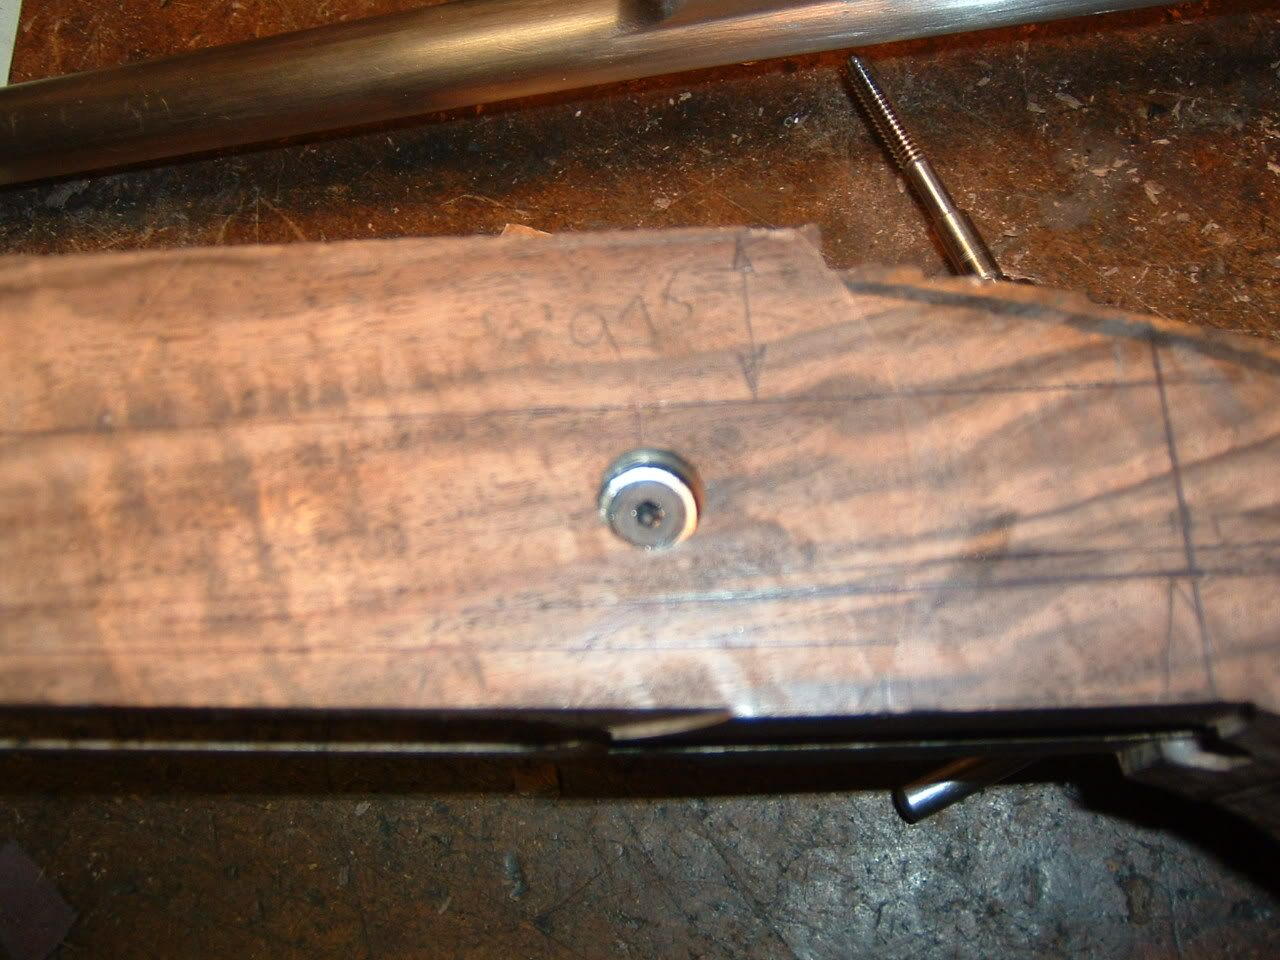 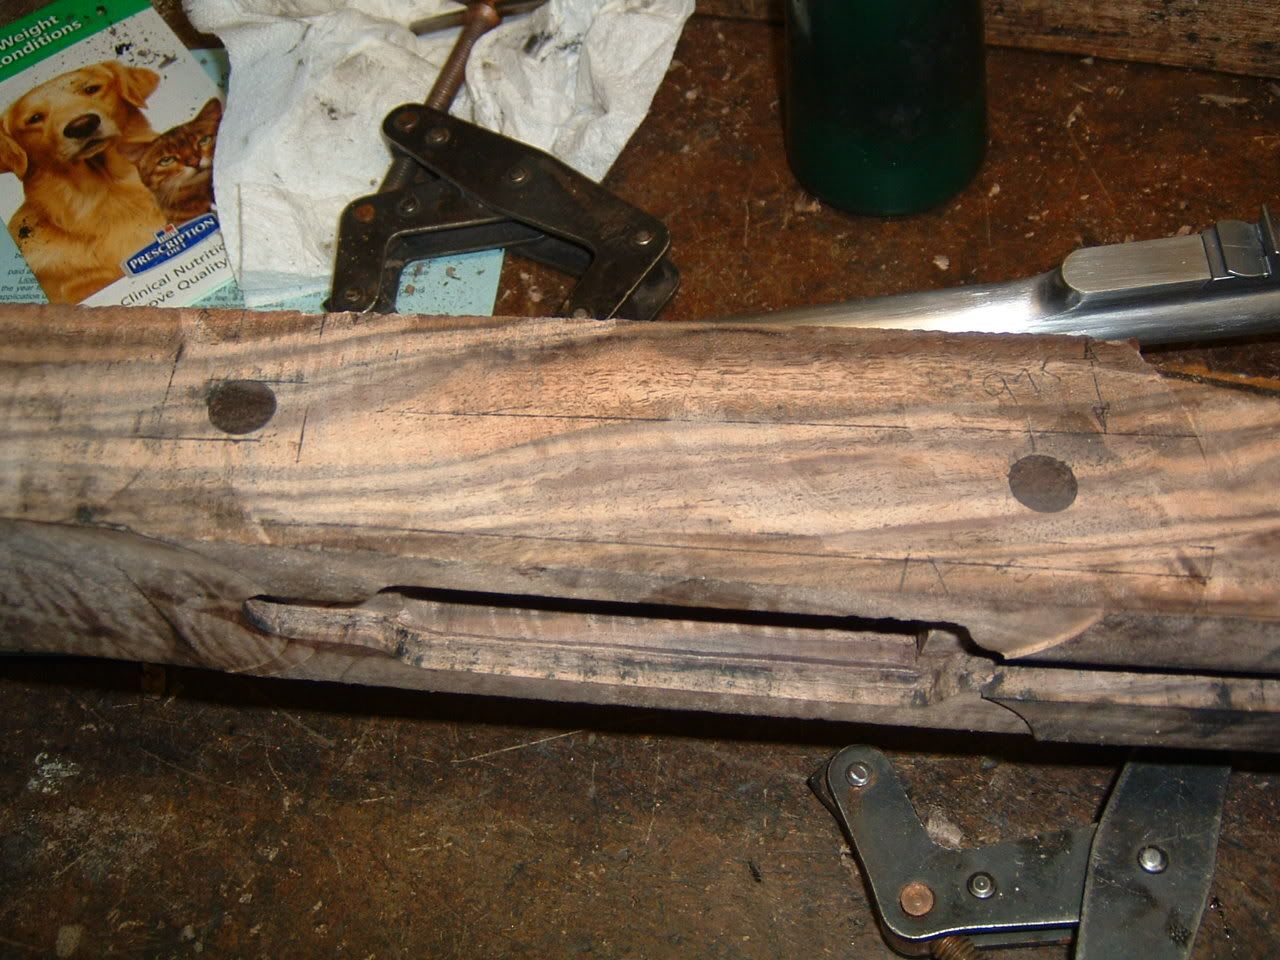 Jim Kobe 10841 Oxborough Ave So Bloomington MN 55437 952.884.6031 Professional member American Custom Gunmakers Guild | |||
|
| One of Us |
That's a lotta wood. Very nice. Rich | |||
|
| one of us |
| |||
|
| One of Us |
Nice work Jim. Keep the pictures coming. | |||
|
| One of Us |
Heck yeah, Jim. Keep 'em coming! -- Brian | |||
|
| One of Us |
Today I start on the grip cap, butt plate and sling swivel inlet. Standby and thanks for the interest. Jim Kobe 10841 Oxborough Ave So Bloomington MN 55437 952.884.6031 Professional member American Custom Gunmakers Guild | |||
|
| One of Us |
Great stuff! | |||
|
| One of Us |
These next progress photos are of the bottom line on the stock, the inlet for the sling swivel stud, the grip cap and the butt plate. A steel buttplate for a Rigby, you ask? That's what he wanted; it will be engraved. 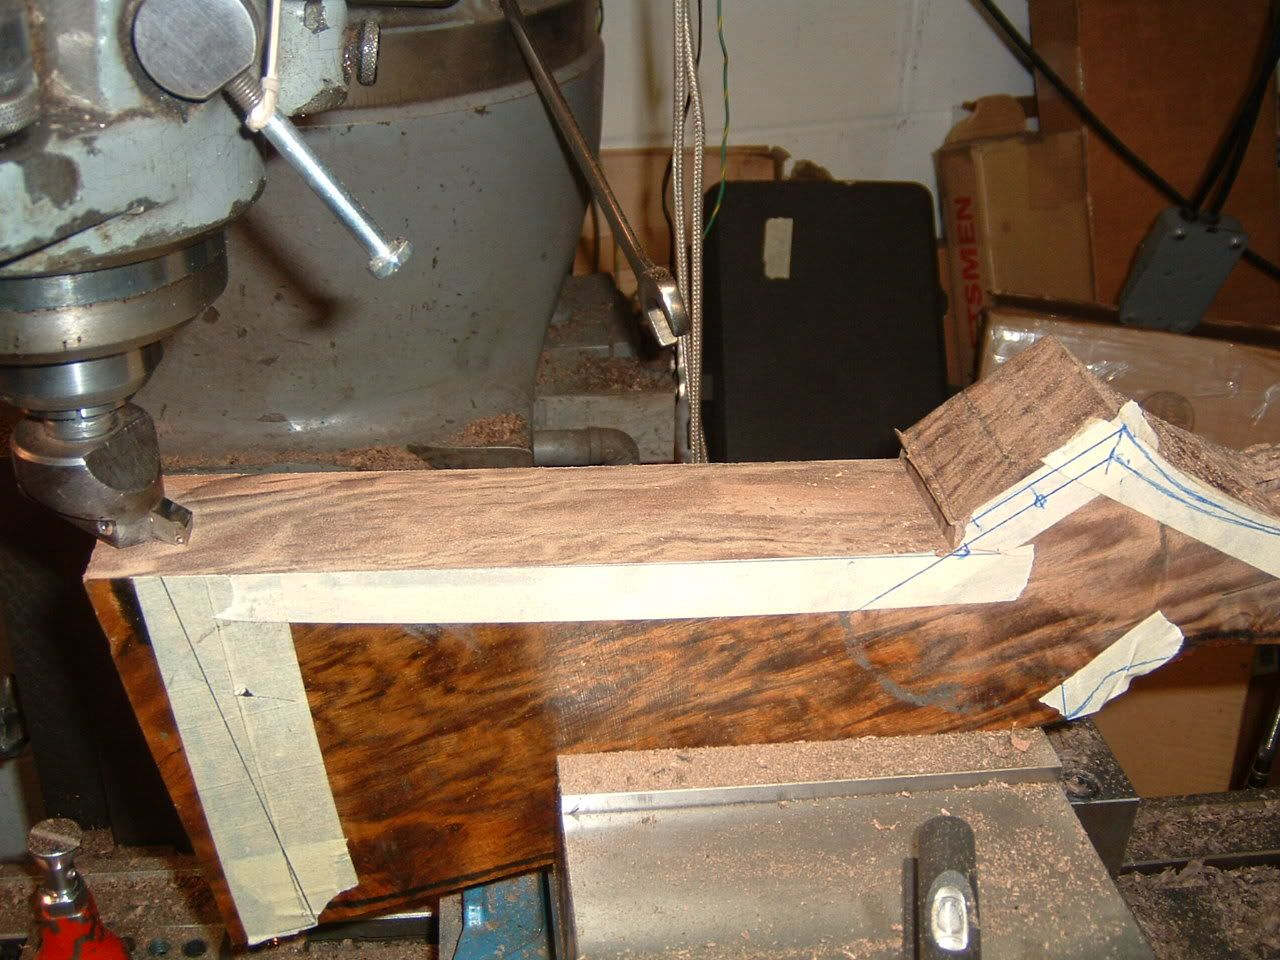 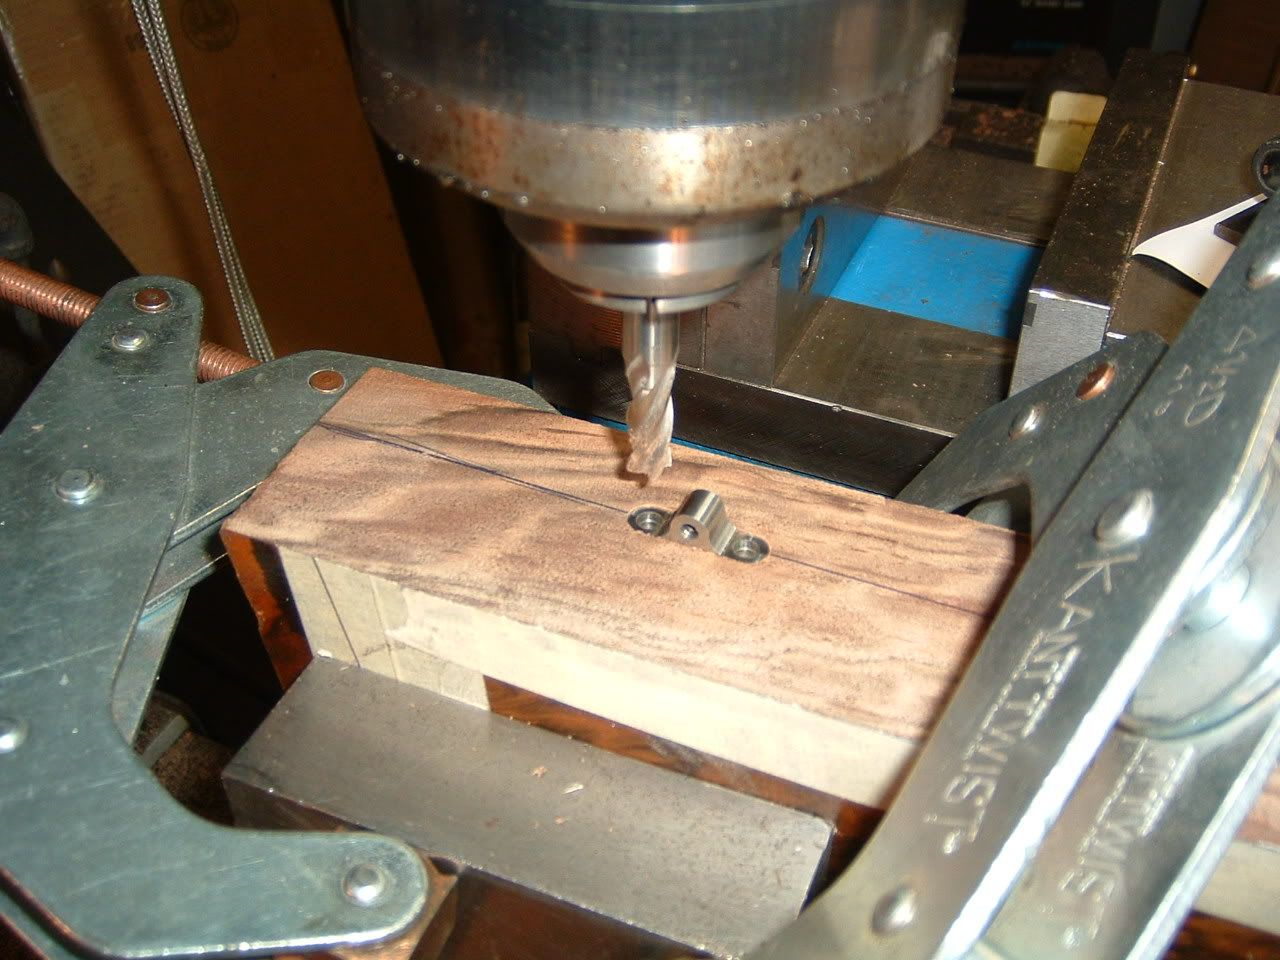 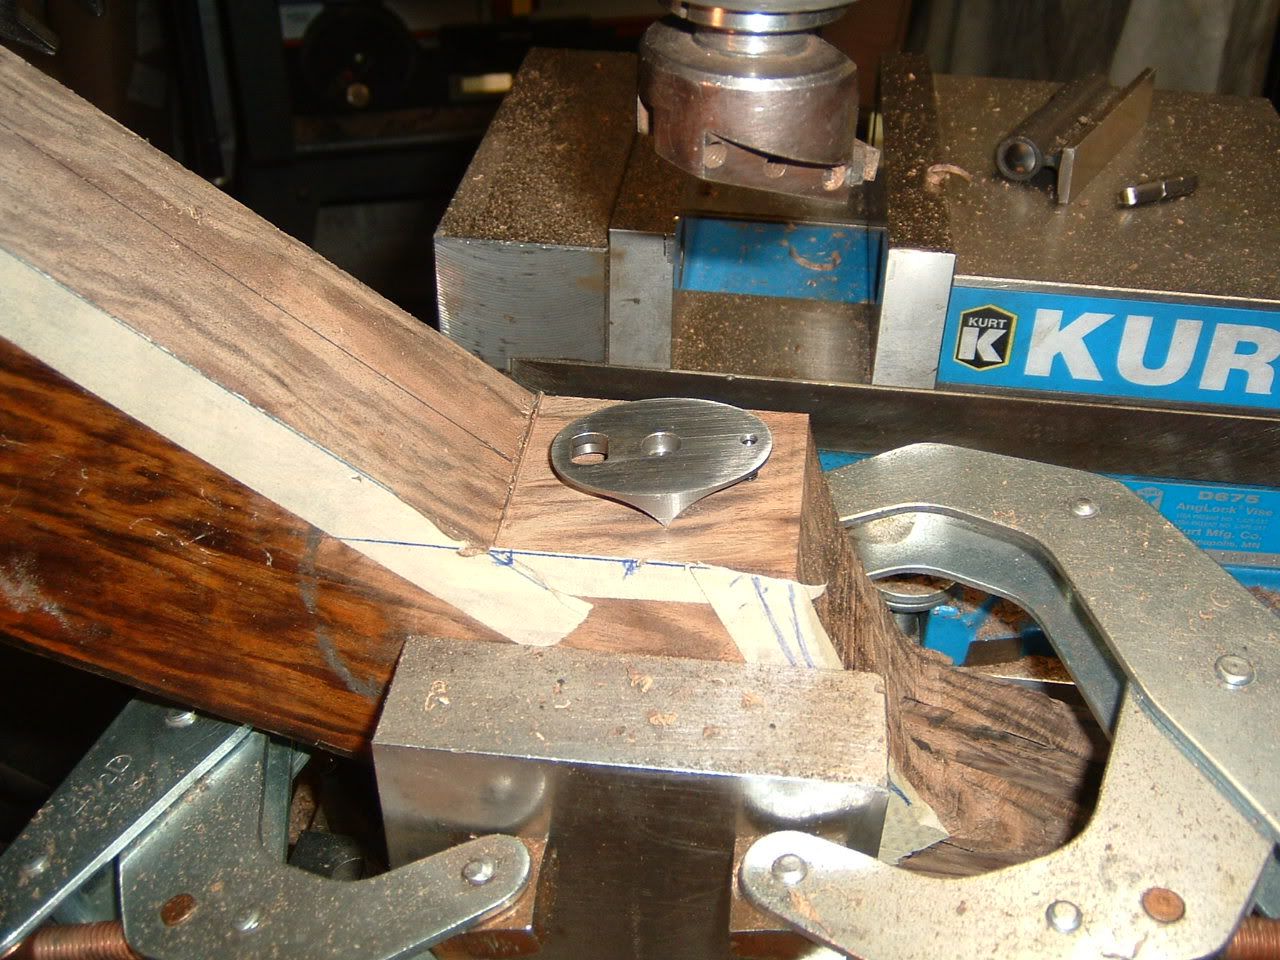 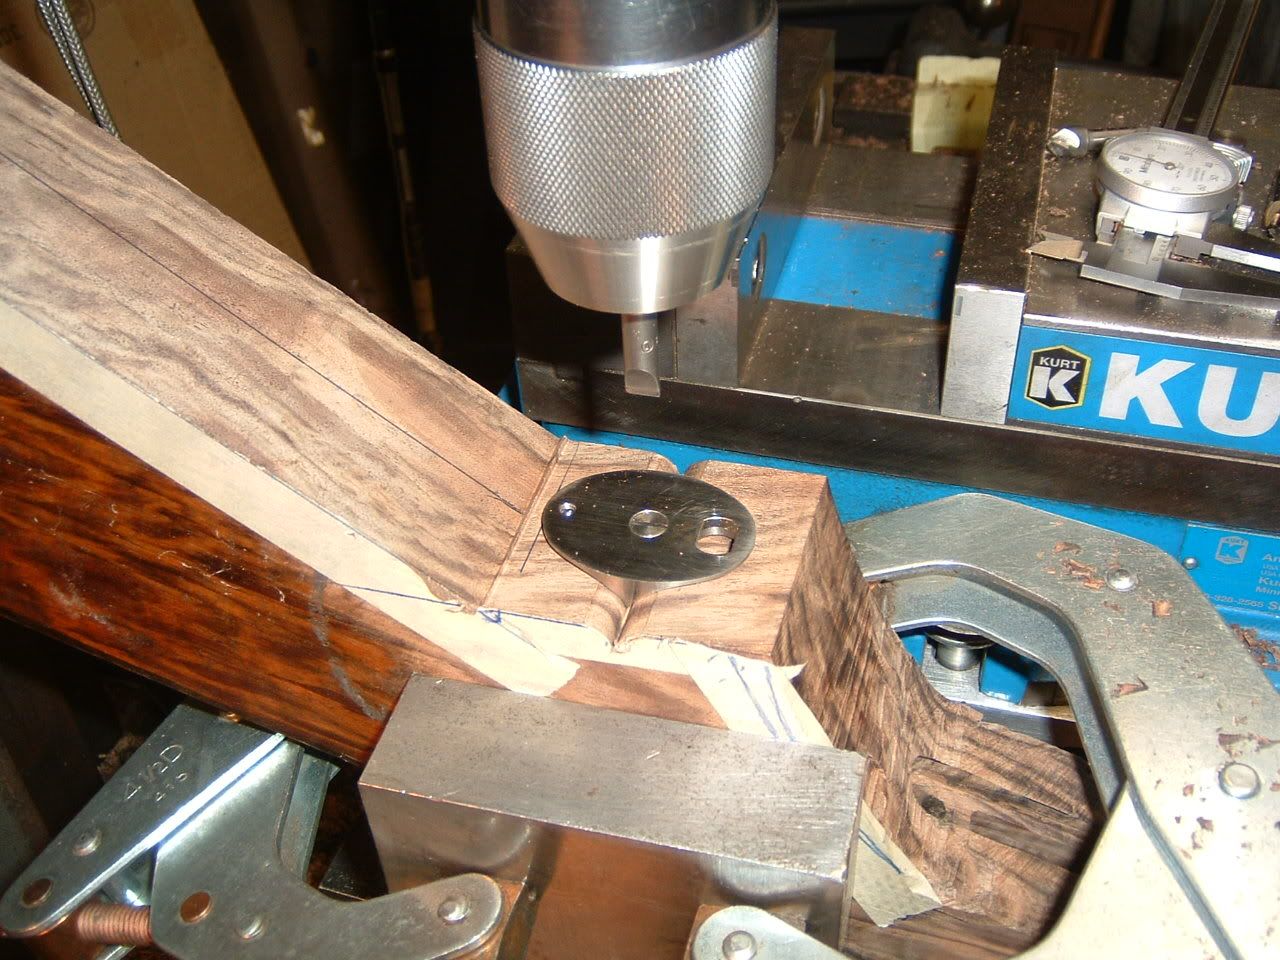 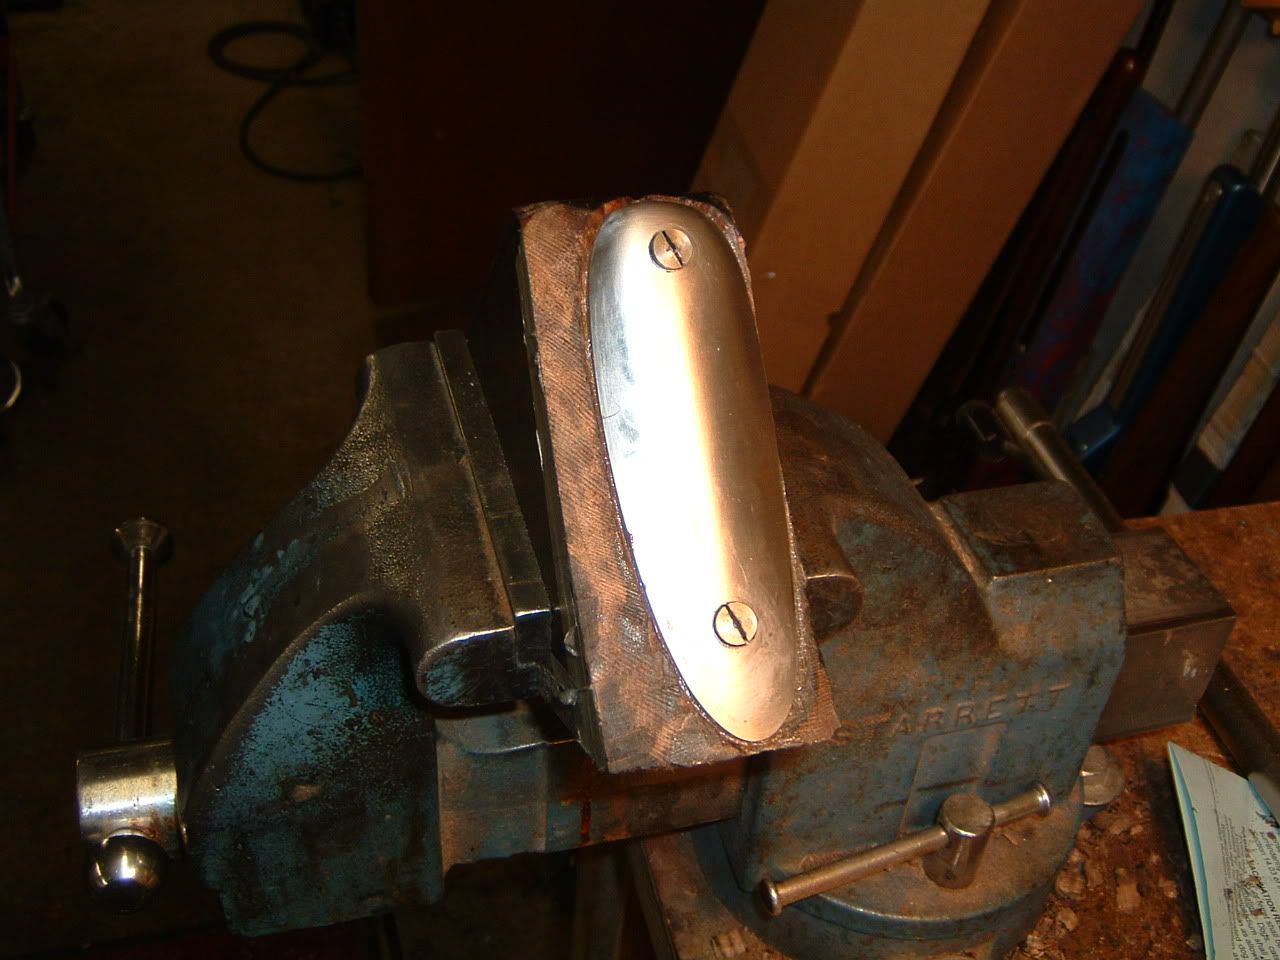 \ \The screw on the buttplate are not oriented, yet. They will be on the final tightening. Jim Kobe 10841 Oxborough Ave So Bloomington MN 55437 952.884.6031 Professional member American Custom Gunmakers Guild | |||
|
| One of Us |
I have never seen that type of grip cap before. Nice!! Who makes that? | |||
|
| one of us |
That steel butt plate is making my shoulder hurt and I'm just looking at it! | |||
|
| One of Us |
Neat use of the mill. Do you inlet the buttplate by hand or machine it before the glass is used? _____________________ Steve Traxson | |||
|
| One of Us |
I only use the band saw, I do not have a CNC that I can program. The grip cap was sent along with the buttplate and Ebony tip. The butt plate was indeed the longeste to fit. You start with the band sawed butt and start to inlet from there. There is glass there, but only to seal the butt, it is fitted tight, the glass makes it better. You can look right through the glass and see the wood under it. I think it took me a bunch of time. If you noticed, there is a bit of cast off in the butt, I like to put a bit there, usually about 3/8 to 1/2 to shift the but over left or right, depending on the shooter, to keep the head more erect and recoil away from the face. Hopefully, tomorrow I will start on the external shaping and provide some more pics. I just got back from a trip up to Ely (up north a bunch) on a golf trip. Can't hit the ball worth a shit. Jim Kobe 10841 Oxborough Ave So Bloomington MN 55437 952.884.6031 Professional member American Custom Gunmakers Guild | |||
|
| One of Us |
Thanks for the reply, and all the pictures... I know sharp tools are worth there weight in gold but i think one would have to have big golf balls to inlet sling studs this way. I guess you can have wood chip out doing it by hand also! Nice mill/stock work!!! _____________________ Steve Traxson | |||
|
one of us |
Great thread. Great photos too. | |||
|
one of us |
Great looking work Jim! | |||
|
| One of Us |
BTT for more pictures and updates!! | |||
|
| One of Us |
I got in some barrels that I had ordered about 4/1 and had to get those done and some other stuff. Thanks for the interest and will be back shortly with more stuff. Jim Jim Kobe 10841 Oxborough Ave So Bloomington MN 55437 952.884.6031 Professional member American Custom Gunmakers Guild | |||
|
| One of Us |
Nice but does not look like Guild quality stuff but we will see the finished product and make a judgement. | |||
|
| One of Us |
For you guys that don't know Boss Hog, he is an expert in all things. We are sooo lucky to have him grace our forum. Butch | |||
|
| one of us |
Butch, I agree. I'd like to ask BH to post some of HIS work here to the scrutiny of all, just to show us how it should be done. I did say HIS, not something he paid some other talented person to produce for him. Shoot straight, shoot often. Matt | |||
|
| One of Us |
Man,that boss hog guy, I think he knows more than even Martha Stewart, and that bitch knows EVERYTHING. Jim Kobe 10841 Oxborough Ave So Bloomington MN 55437 952.884.6031 Professional member American Custom Gunmakers Guild | |||
|
| Powered by Social Strata | Page 1 2 3 |
| Please Wait. Your request is being processed... |

Visit our on-line store for AR Memorabilia