The Accurate Reloading Forums
The Silver-Lining Scholarship Rifle
14 July 2007, 05:33
577NitroExpressThe Silver-Lining Scholarship Rifle
quote:
I guess we need to start organizing a raffle.
Anyone and everyone who wants to volunteer for helping out with our publicity effort please remind us who you are. We need national (even international) publicity in order to raise the most amount of money possible. Think about what needs to be done and what part of that you're willing to do.
Thanks,
Forrest
Forrest:
My original offer to help out in any way still stands. I would be honored to continue to be a part of this.
577NitroExpress
Double Rifle Shooters Society
Francotte .470 Nitro Express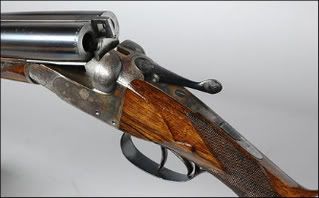 If stupidity hurt, a lot of people would be walking around screaming...
 Oh My! When one can see the process the results are doubly appreciated. Thank You, Simply Perfect
14 July 2007, 05:59
Michael RobinsonMan, I would come to Jesus sixteen times and have nineteen heart attacks doing that to that fine piece of wood!
Truly a peek into the infinite!
Thanks again.
Mike
Wilderness is my cathedral, and hunting is my prayer.
14 July 2007, 06:57
gasgunnerMr Weibe,
Do you mind if I ask how much time you have in a simple wrap around pattern such as on this forend? I do a bit of checkering and I am curious just how slow I am ccompared to someone who knows what they are doing.
Thanks,
John
14 July 2007, 07:26
Duane WiebeSo far, five hours
14 July 2007, 17:54
Bill SovernsDuane,
Very nice work! I make my parallel lines across the pattern with Dymo labeling tape. Its fairly stiff but still flexible enough to follow the master lines. I struggled for a long time with a veiner, until I discovered that it wasnt sharp. I figured since it was new, it was sharp. Bad assumption. I also use my jointer to "get me out of trouble" when the lines wander.
Ive never used a lubricant with the veiner but Im going to give it a try on this next job.
14 July 2007, 18:49
Jim KobeDuane, I am tickled that you chose to mention how the lines wander. I have tried using my MMC for years and could never figure out why the lines tended to wander. I too had to stop and use the jointer. I even sat down with Pat Taylor for an hour or so at the guild show and still didn't know what I did wrong.
Now when I do a checkering pattern, I don't use the electric tool unless it is for a coarse pattern, 18LPI or so.
Jim Kobe
10841 Oxborough Ave So
Bloomington MN 55437
952.884.6031
Former Professional member American Custom Gunmakers Guild
14 July 2007, 20:02
Duane WiebeWell, part of it is having a very sharp cutter and using a litle vague pressure to conteract the wandering tendency as you go. The guide must also have a pretty sharp corner..this is 26 line..you're not doing anything wrong
14 July 2007, 22:58
Michael RobinsonForrest, I am sure that somewhere in this thread there is a complete description of the rifle but I couldn't find it with a quick scan and I don't have the time to look through 15 pages of posts!
Could such a description be put in the first post or somewhere else prominent?
Mike
Wilderness is my cathedral, and hunting is my prayer.
15 July 2007, 06:03
gunmakerquote:
Originally posted by ForrestB:
Duane, your work shows why very well made rifles don't need a lot of frills and fluff for decoration. All we're lacking is some tasteful rose & scroll and a good bluing job.
Thanks,
Forrest
I'd have to agree 100%

15 July 2007, 23:28
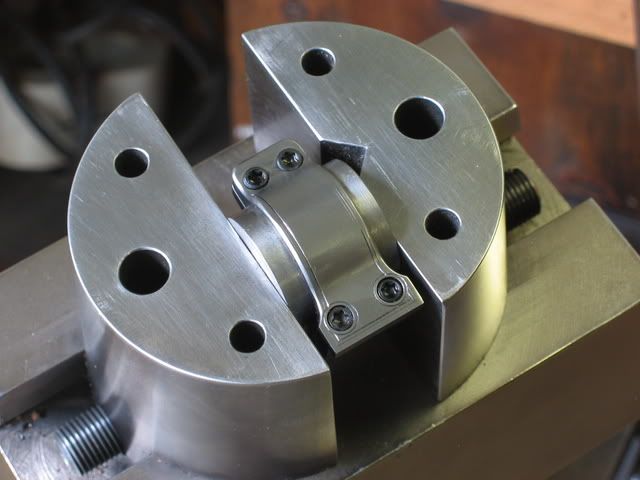
Marc_StokeldMr. Wiebe-
What model number Loc-Tite do you use for securing the barrel band sling swivel?
I was serious when I earlier asked if you have ever considered writing a book. We could learn so much from you, plus the pictures of your finished work give us good goals for which to aim.
16 July 2007, 03:47
Duane WiebeBeen using the red, hammer it on really tight, short of deforming the swivel band, of course...used to shrink them in place, but if you're off a little, you're screwed
16 July 2007, 03:50
Duane WiebeSorry....re the book: Gonna be busy that day..but, the AR guys are looking toward the possibility of making a CD, DVD, something like that
16 July 2007, 05:00
Marc_StokeldI saw that Loctite has two that they call "red." One is #262 and one is #271. Their web site had no dierct comparisons between the two, and even in their strength tests, they were judged by different methods.
Any more info would be appreciated.
16 July 2007, 07:37
ForrestBquote:
Originally posted by mrlexma:
Forrest, I am sure that somewhere in this thread there is a complete description of the rifle but I couldn't find it with a quick scan and I don't have the time to look through 15 pages of posts!
Could such a description be put in the first post or somewhere else prominent?
We're building a nice trim 7X57 in the British stalking rifle style. It's the kind of rifle anyone could appreciate and put to good use.
We started with a G.33/40 Mauser action that made its' first stop with Tom Burgess. Tom polished the action and bolt, added a new bolt handle, three-position safety and trigger. The action was heat treated and then went to Mark Stratton for sculpted scope mounts.
Duane Wiebe chambered and fitted a 23" Krieger barrel, added a quarter rib and accessories. We're using Fisher rounded bottom metal and a Fisher trap-door grip cap. Duane is building the stock from a Turkish walnut blank that came courtesy of Denli.
Roger Kehr will do the engraving and lettering, then it goes back to Duane for final fit and finish. The rifle will be topped off with a Leupold 1.5 - 5X scope in Talley screw QD rings.
______________________________
"Truth is the daughter of time."
Francis Bacon
16 July 2007, 21:25
Duane WiebeMark: The loctite I have is 271.
16 July 2007, 21:31
Marc_StokeldThank you sir!
Can't wait for your DVD.
17 July 2007, 04:00
Michael RobinsonThanks, Forrest. Just what I was looking for - the description and the rifle both!

Mike
Wilderness is my cathedral, and hunting is my prayer.
17 July 2007, 05:29
333_OKHForrestB---
Thanks for the advice. This classic stlyed rifle is just what I am trying achieve. I still like the African blackwwod tip for the forend, but no more deviations from the classical.
May I ask what caused you to select the scope power you are utilizing?
Dan
17 July 2007, 09:30
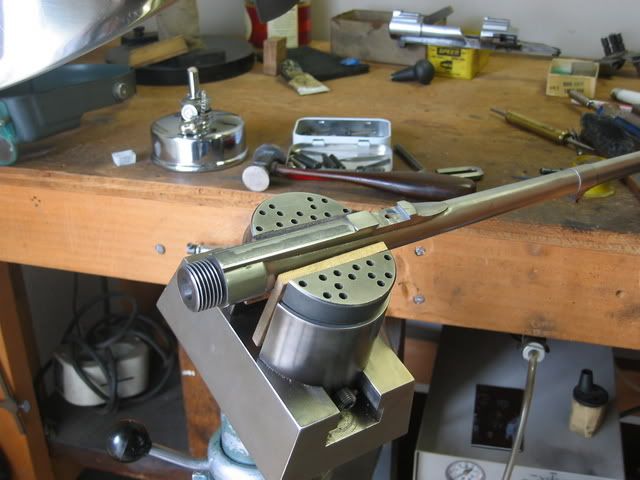
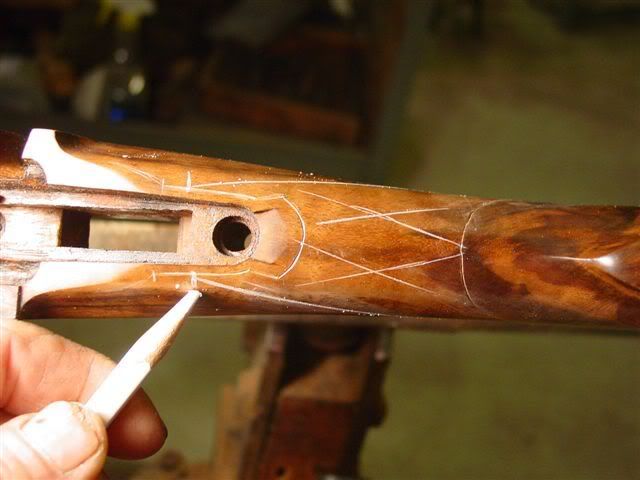
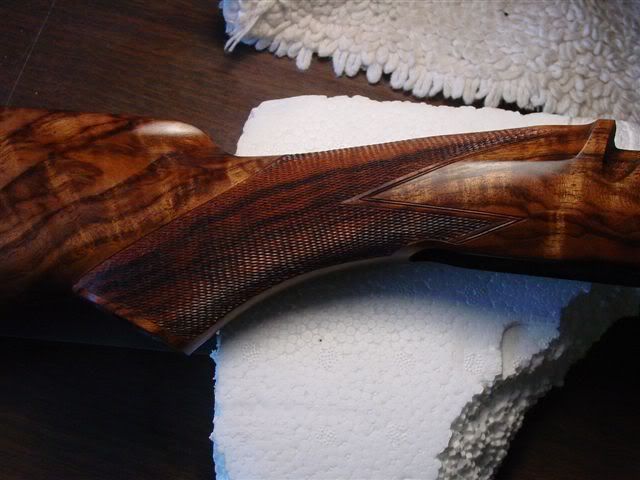
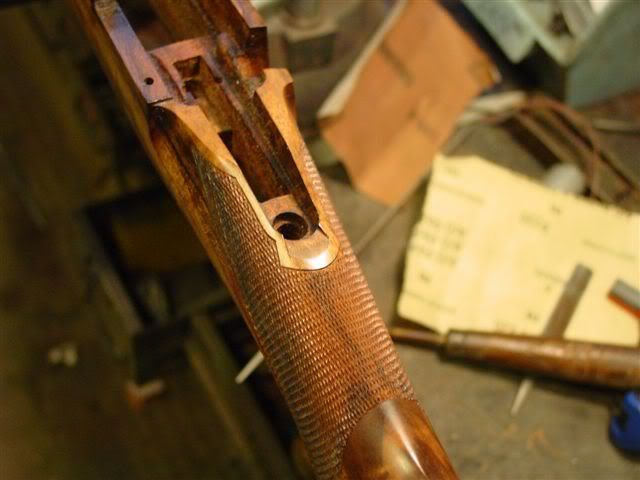
Duane WiebeI like to start off the grip checkering by creating certain borders…here we lay out the grip border
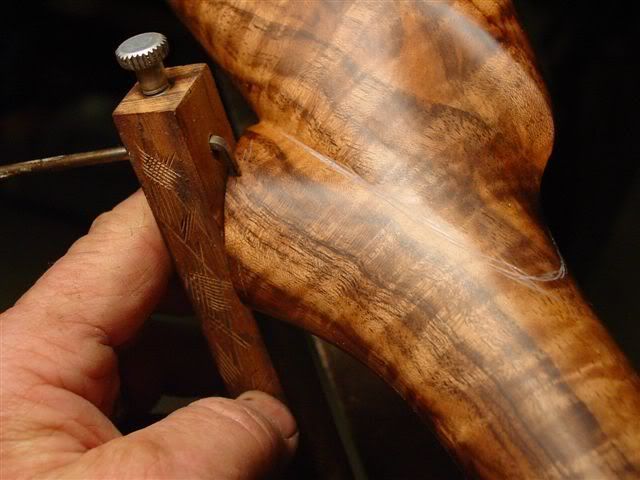
Now why didn't I think of that? Thanks to Bill Soverns mention of Dymo label tape, I find the borders at the inside of the grip are so simple to lay out that it's almost humorous
The Dymo tape "sticks" well and is stiff enough to hold up to pressure of scriber...Before, I used masking tape...the edges are so soft that every now and then I'd have one of those "Aw shit!" episodes.
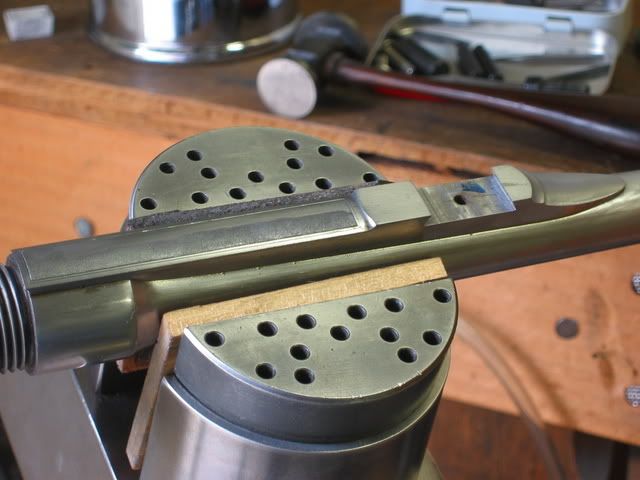
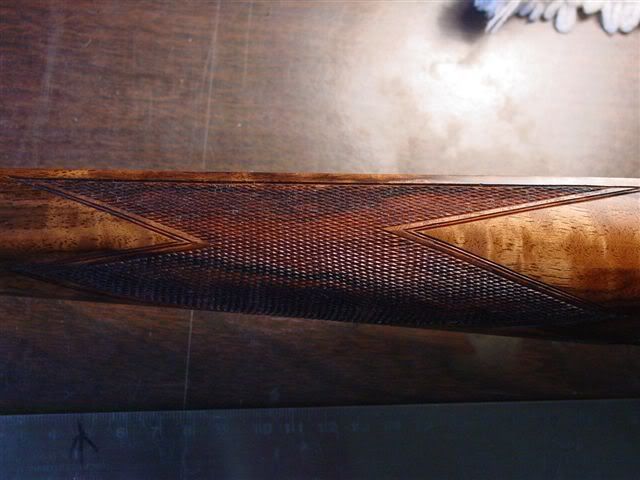
Here again, we use the diamond template
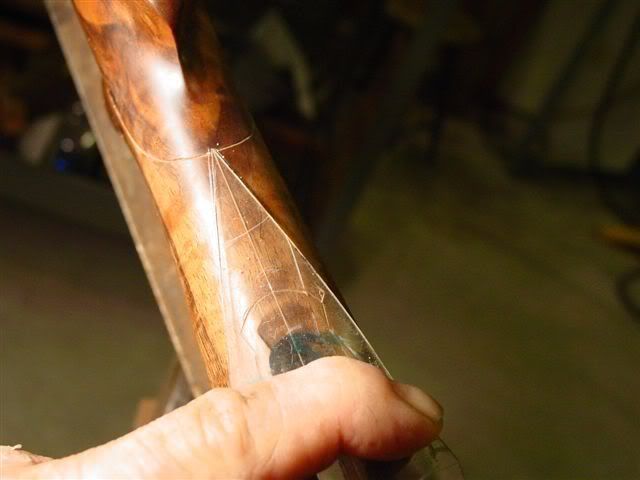
These are the master lines...I make sure each side starts and ends a the same relative point...You will probably find these master lines need a bit of juggling...then we can confidently lay out the parallel lines, knowing the pattern will be the same on both sides.
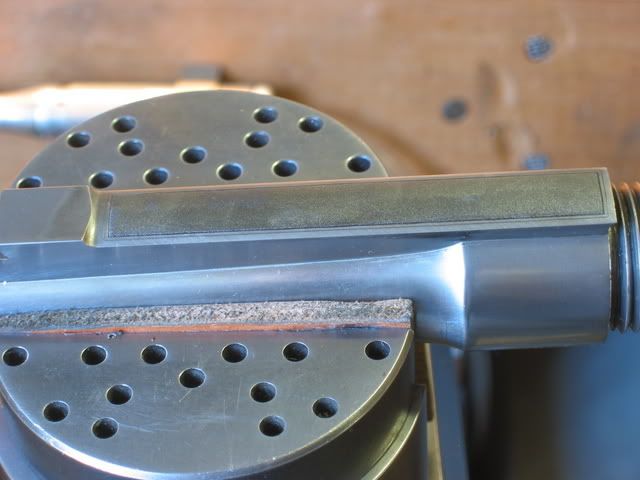
Extend the lines to form the points/borders...here border "1" is established, the fill in to establish "2"
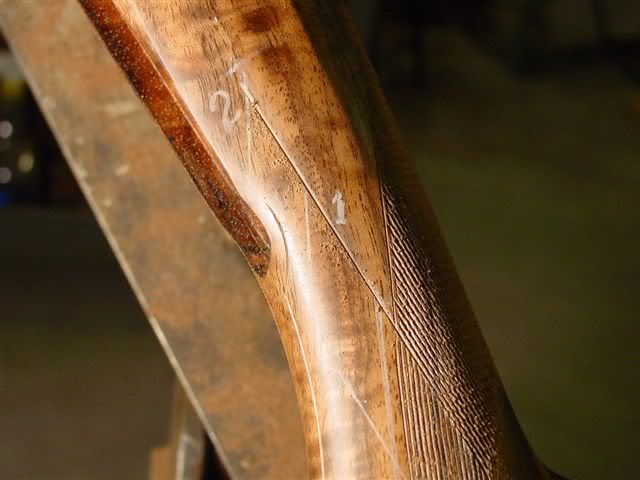
This is kind of a pesky area...you have to slightly flare each line here using the jointer
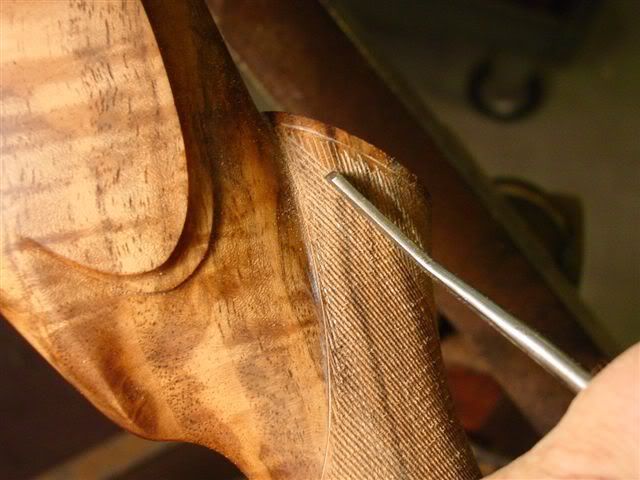
After all is filled, lay out the first part of the border with a fairly wide line
Here's where you'll be best off drinking decaf. The wood is removed at a slight angle, so you reach the bottom of the original border groove. but not remove wood beyond the wide border line.
Here is the final detail, a narrow border outside the wide border...there's many border styles...I just kind of like this one.
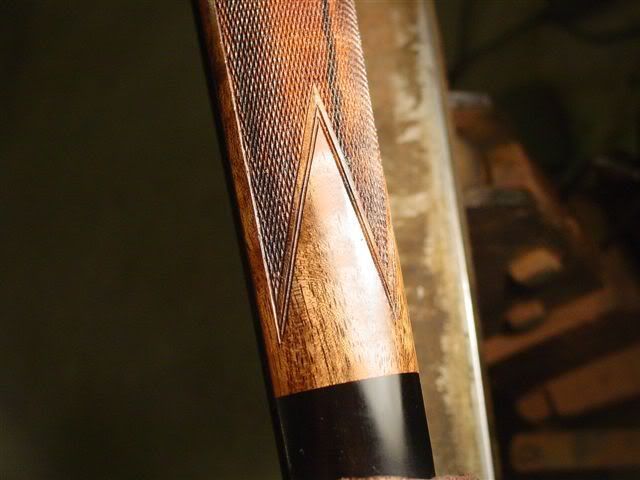
There's one coat of linseed oil, I'll put another coat of Sea Fin in a couple days...and that's about it
Thanks Duane, Nice ! Nice work on the photos and posting this for us also! Very cool...
17 July 2007, 18:29
gunmakerGreat stuff Duane!
Any pics of the finished checkering as it wraps over top of the grip?
Another question. Do you always cut the clearance in the stock for the cocking piece? Just curious why you didn't shape the tang down more? I know that's your preference, I'm just not sure why.

17 July 2007, 19:34
Bill SovernsThat picture of you cutting the border with a chisel gives me the heebee geebees.

Great pictures and work again Duane!!!
17 July 2007, 20:36
ScrollcutterPeople who haven't done much checkering might not know the complexities of an over the top grip checkering job. Especially, down to a 3/8" open area under the grip.
On a 2 panel grip the master lines are generally the longest lines. So the subsequent lines are shorter. The one piece job forces the stockmaker to lengthen and shrink the lines many times over the course of the pattern. At the same time, the line needs to appear straight as it follows a constantly changing compound curve.
Sometimes the least complicated job (in appearance)turns out to be quite difficult to execute.
As always, nice work Duane.
Roger Kehr
Kehr Engraving Company
(360)456-0831
17 July 2007, 22:04
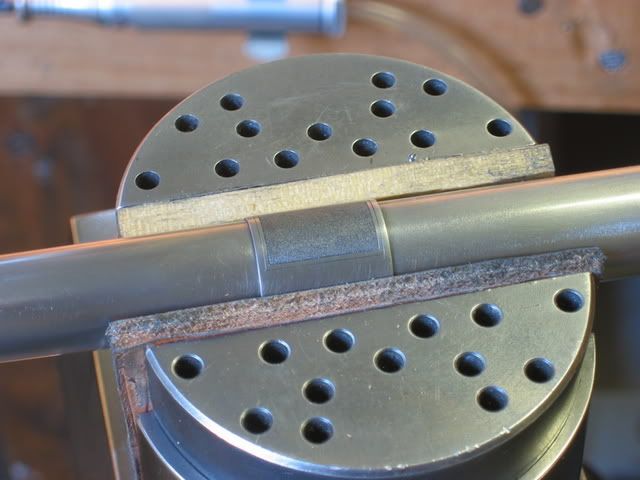
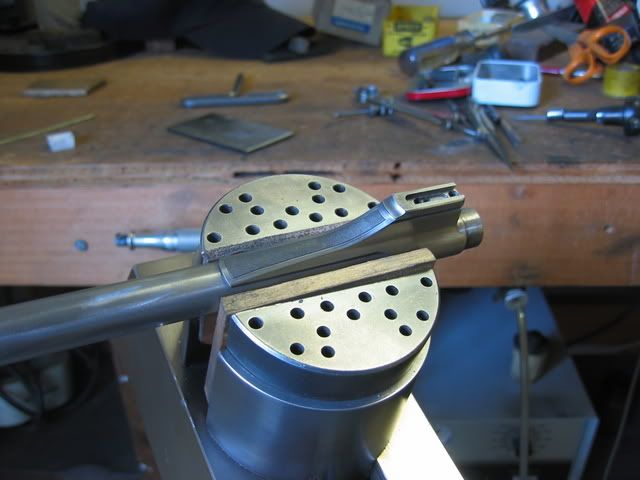
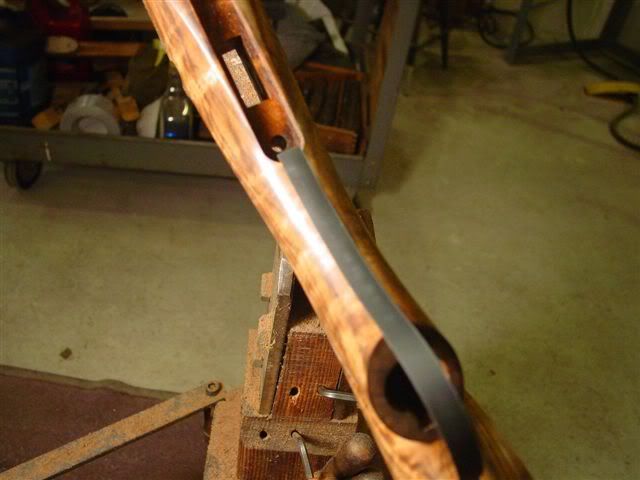
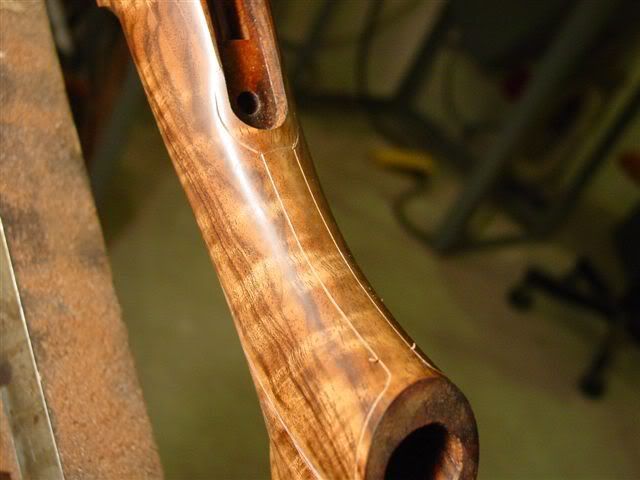
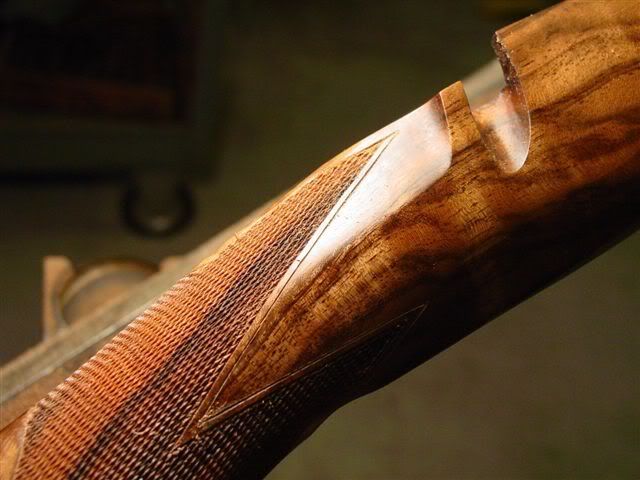
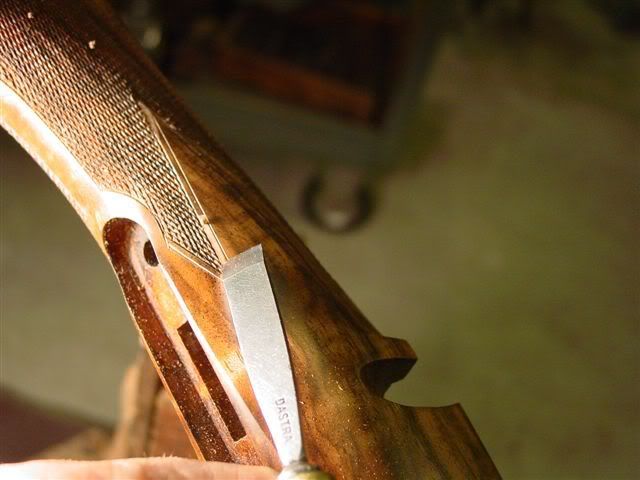
Duane WiebeAnswers to a couple questions…Two different schools of thought are illustrated in the tang treatment. One may look a little "slicker", but I've seen the right side of the groove really chewed up on too many occasions. The late J R Davis told me a story in Africa of a wounded critter...his bolt jammed because the cocking piece "missed" the groove, rode up the tang and jammed solid. He quickly figured out the problem, but not until he had bit a donut out his shorts! So...I never do the "slick" treatment anymore.
On the Silver Lining rifle, the "fan" is a little larger than I would normally do, but the idea is to leave the tang at this area high enough to make certain the cocking piece engages the groove . Of course, this means a little more work on the wood behind tang. This tendency for the bolt sleeve/ cocking piece assembly to get slightly out of line can be minimized by a notch in the rear of the bolt body for the cocking piece to rest (something like you see on a Rem 700)
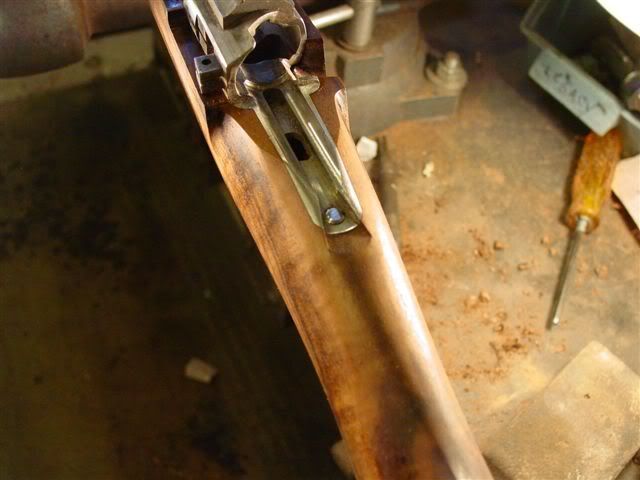
Over the top!
18 July 2007, 05:18
CAS IIDuane,
You owe me a new computer ............ I've got slobber all over the keyboard of this one.
Where should I send the bill?
After seeing one of yours in person, I am quite confident that the pictures don't do that rifle justice.
18 July 2007, 18:13
J BennettDuane
As always, Beautiful Work!
Thanks for the explanation on the rear tang treatment. It makes sense once you stop and think about it.
This is a case where true beauty,form and function is all rolled in one.
James
Just out of curiousity I am wondering how difficult a job it is to make the rear tang screw hole blind, and what is entailed in doing such a job.
20 July 2007, 00:26
Toomany ToolsIf you look at this thread, Mark Stratton explained his method several years ago:
https://forums.accuratereloading.com/eve/forums/a/tpc/f/...=307104354#307104354
John Farner
If you haven't, please join the NRA!
21 July 2007, 16:40
Bill SovernsDuane,
Glad that Dymo labeling tape worked out. Chic Worthing taught me that little trick a few years ago.
27 July 2007, 23:40
ScrollcutterJust finished a project that was ahead of this one. I will post photos shortly.
Roger Kehr
Kehr Engraving Company
(360)456-0831
Anybody else got Wiebe Withdrawl, I maybe addicted to this thread, and suspect there to be others.
Looking forward to seeing your work Roger aswell.
Many Thanks
HBH
10 August 2007, 21:21
Marc_Stokeldseeing his work in progress and seeing how he does sure has helped me.
14 August 2007, 02:12
cobrajetI'm very new to this forum, just a few days ago I joined and I can truly say its been the best few days I've had in quite a while. I accidentally came across this thread while visiting a thread on checkering elsewhere on this site. I must say it was well worth the time spent going through all 16 pages. I know this has all been said before but the level of craftsmanship displayed so far is mind boggling, to say the least. Now I can see why a custom gun of just average grade can cost well into the four figure range, if not more. Great work gentlman, great work indeed!!!
06 September 2007, 09:27
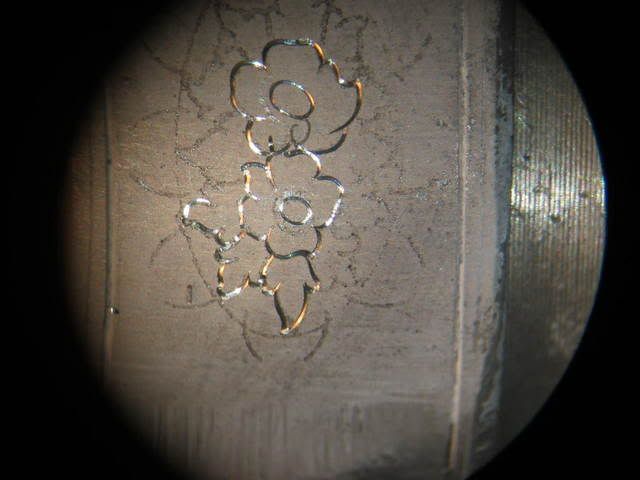
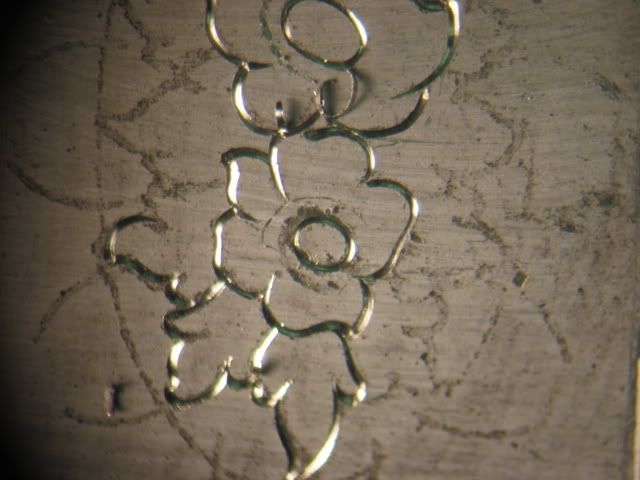
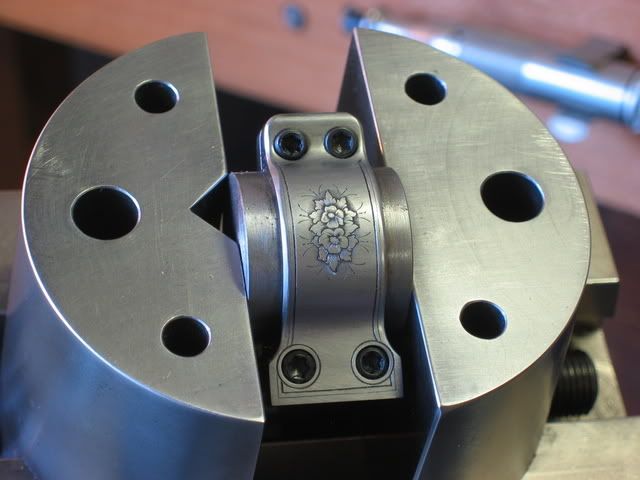
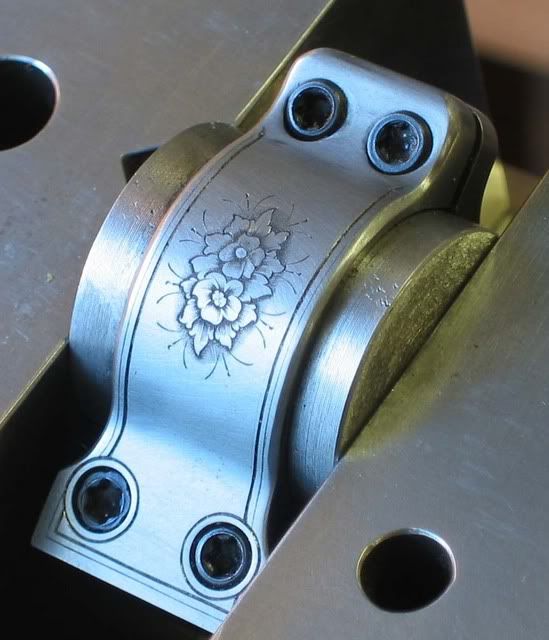
ScrollcutterJust thought I would check in let you all know that the work is progressing well. I am engraving the rifle and taking plenty of photos.
I will ask you to wait a bit for the photos. When I get to the point where I am shading the elements, I will start posting the photos.
See ya soon.
Roger Kehr
Kehr Engraving Company
(360)456-0831
08 September 2007, 04:25
boom stickcant wait!

24 September 2007, 05:28
577NitroExpressOk, scrollcutter, are you using a toothpick to do the engraving or something? Some of us out here are dying for an update of any kind!
577NitroExpress
Double Rifle Shooters Society
Francotte .470 Nitro Express If stupidity hurt, a lot of people would be walking around screaming... 24 September 2007, 22:04
ScrollcutterNo, I'm not using a toothpick to engrave the rifle.
I'm about six weeks behind where I thought I would be, but plan to have the engraving completed in early October.
Sorry for the delay.
PS I hate showing incomplete engraving. Tonight I will shade some engraving, take some pics in the morning and post them on AR.
Roger Kehr
Kehr Engraving Company
(360)456-0831
26 September 2007, 03:13
577NitroExpressquote:
Sorry for the delay.
No problem. Perfection takes time and I can understand that. Any longer, though, and you'll beat my wife's recond of the amount of time spent in the shoe department at Macy's.
577NitroExpress
Double Rifle Shooters Society
Francotte .470 Nitro Express If stupidity hurt, a lot of people would be walking around screaming...
Roger Kehr
Kehr Engraving Company
(360)456-0831