

 The Accurate Reloading Forums
  THE ACCURATE RELOADING.COM FORUMS
  Rifles
  Custom Built Rifles
  Anderson Ruger No. 1
Go  | New  | Find  | Notify  | Tools  | Reply  |  |
| One of Us |
I started out just to have a stainless No. 1 rebarreled with a chrome-moly barrel for the contrast between the receiver and barrel and found James(gunmaker) through Roger Kehr(scrollcutter). I had contacted Roger to have some engraving done to break up the large area of the stainless receiver and I came out with a fantastic full blown custom rifle. James and Roger did a unbelievable job. It is a 300 H&H and I hope James and Roger can post some pics(I'm not the best at pics or their posting). Thanks again James and Roger. The group of artists here on AR are a great resource for anyone wanting a rifle build. I'll see if James can post the pics of the ongoing build as well as the finished rifle. | ||
|
| One of Us |
I try and get some pics up later this evening. | |||
|
| one of us |
I am looking forward to this! James... I still have to get you my stuff for the .300 build! On the plains of hesitation lie the bleached bones of ten thousand, who on the dawn of victory lay down their weary heads resting, and there resting, died. If you can talk with crowds and keep your virtue, Or walk with Kings - nor lose the common touch... Yours is the Earth and everything that's in it, And - which is more - you'll be a Man, my son! - Rudyard Kipling Life grows grim without senseless indulgence. | |||
|
| One of Us |
Here's a few pics of the barrel hardware getting started. | |||
|
| One of Us |
More progress. | |||
|
| One of Us |
I always pin the barrel hardware to insure it's installed at 0 and 180 degrees. This makes lining it up while soft soldering brain dead simple. Also pinned the rib between the front pair of screws as well as the rear pair. All the barrel hardware was drawn up on CAD to insure the intended scope would clear. | |||
|
| One of Us |
Rough finished Barrel hardware | |||
|
| One of Us |
The tangs of the action need a little work. OK, a little is an understatement. I machined the sides of the tangs parallel with the action flats and then machined the radius transition and rear of the tang. This made it easier to obtain a close fit with the stock. Action flats were surface ground as well. They were way off. I don't have any pics, but I also machined the front of the receiver so the forend would inlet well. | |||
|
| One of Us |
The action was sent off to Mark Penrod for one of his excellent triggers. Well worth it! | |||
|
| One of Us |
Even with a generous sized blank you always have to be aware of little knots and work around them. Especially when they are near the inletting. I glued on an extra spacer on the butt to push this little knot off the pattern. You can see the black sharpie mark on the profiled piece where I was going to cut it out. The knot would have been part of the finished rifle. | |||
|
| One of Us |
James, you really should clean the blood off of the band saw. People might think you are short a few fingers. Don | |||
|
| One of Us |
That is looking really nice. I notice I can't see James middle finger (right hand) operating that band saw Looking forward to seeing the rest of the process and the finished rifle. Cheers, Chris DRSS | |||
|
| One of Us |
Is it a big job to take the hinge area protruding metal off on a Ruger action to make it square? It looks like it does not need to be there. I have seen some customs without it and I think it looks better. | |||
|
| One of Us |
I got a chance to break the barrel in this weekend and the rifle functioned flawlessly. I will load some ammo for sighting in soon, so I can group it. The trigger and safety, what an improvement over the factory issue. James did a great job. | |||
|
| One of Us |
And some people think high end single shot actions are no better than an inexpensive Ruger No. 1. As you can see, the Ruger needed a full going over from expert hands. It just affirms that there is no cheap shortcut to a fine rifle. . | |||
|
| One of Us |
That is blood on the saw table. Solar-lux Blood Red NGR stain. Don't have too much time to post many this morning. My wife is wanting to go blast some clay pigeons and do some other shooting today. She and my oldest boy(11), just finished hunter safety at Vallery's High Plains Game Ranch yesterday. Here's a few from the duplicator. | |||
|
| One of Us |
Great thread! | |||
|
one of us |
I believe you are referring to the "quarter round protrusion" on the front of the action that holds the rear of the fore-end.... It doesn't need to be completely removed. The sides can ground off and the remaining "tongue" is nearly invisible on a finished rifle. IMO this vastly improves the look of a No.1 custom. Jason "You're not hard-core, unless you live hard-core." _______________________ Hunting in Africa is an adventure. The number of variables involved preclude the possibility of a perfect hunt. Some problems will arise. How you decide to handle them will determine how much you enjoy your hunt. Just tell yourself, "it's all part of the adventure." Remember, if Robert Ruark had gotten upset every time problems with Harry Selby's flat bed truck delayed the safari, Horn of the Hunter would have read like an indictment of Selby. But Ruark rolled with the punches, poured some gin, and enjoyed the adventure. -Jason Brown | |||
|
| One of Us |
Nice, I have never understood the love that is running amuck for Talley rings, but different strokes for different folks. Nice looking set up you have going there. | |||
|
| One of Us |
Probably one of the few decent qd rings left out there, since there are no more burgess or pme rings being made. I wish they would go back to using opposing levers though. Most people building customs wants irons and a scope and anything build around weaver bases makes most people puke. Don | |||
|
| One of Us |
That's why I like the early Kimber QD rings, they are suitably dainty & pleasingly formed and they use the opposing adjustable levers. The Weaver-size bases and rings are IMO only suitable for industrial/agricultural/military type applications, certainly NEVER for a high-end custom. Too ugly, too bulky, too ugly, too sharp-edged, too ugly, too awkward, and did I mention that they are TOO UGLY!?! (grin) Regards, Joe __________________________ You can lead a human to logic but you can't make him think. NRA Life since 1976. God bless America! | |||
|
| One of Us |
I like to make use of my prototrak at every turn. The first pic is showing roughing out the radius swoop coming off the action flats. Makes it too easy to match both sides exactly. Inletting turned out well. Time spent machining the tangs well worth it.   | |||
|
one of us |
Awesome photos James. I only have a couple of photos from the project. I found these in my computer files. The first is a rough sketch of the side panel engraving layout. The second is a snapshot of the action in the shipping container getting ready for return to James.  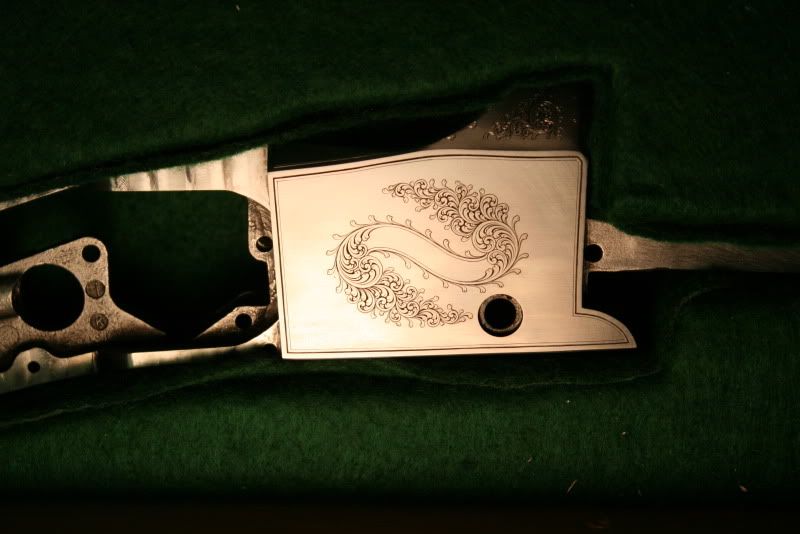 I have 3 or 4 better pics that I promise to load up when I get a bit more time. Roger Kehr Kehr Engraving Company (360)456-0831 | |||
|
| One of Us |
Gulp | |||
|
| One of Us |
Outstanding workmanship... "that shows pride",as my Dad used to say. I pray for mud on my boots the day I die... Go see the nights of Africa..... | |||
|
| One of Us |
Awesome engraving design too Scrollcutter...really like that! If it were me and I had the $'s I'd include some scrolls in the corners of the action too...but that's just nit picking! | |||
|
| One of Us |
I would use a Smithson type ring set up. If you are paying for rings they might as well be the best. That or use some kind of swing mount via EAW or Recknagel. | |||
|
| One of Us |
Back to using my Prototrak. I start cutting the sling swivel inlet by telling the machine the cutter is bigger than it is. This cuts the inlet a little tight. Then run the program again after changing the cutter size a little in the program. Do this a few times until it fits properly. | |||
|
| One of Us |
A little water raising the grain in between sanding. | |||
|
| One of Us |
This is a great thread! I always learn a lot from photos.Thanks for posting this. Do you leave all the metal on when sanding and finishing, of is it just on for the picture? | |||
|
one of us |
Super nice work ! NRA Life Member, Band of Bubbas Charter Member, PGCA, DRSS. Shoot & hunt with vintage classics. | |||
|
One of Us |
/////////////////////////////////////////////////////////////////////////// "Socialism is a philosophy of failure, the creed of ignorance, and the gospel of envy, its inherent virtue is the equal sharing of misery." Winston Churchill | |||
|
| One of Us |
Nice work. It could just be the camera angles but the LOP on that stock looks loooooong. What does it actually measure? | |||
|
| One of Us |
That was my question thank you. Very nice rifle! | |||
|
| One of Us |
It's longer than the average stock @ 14 3/4" Doesn't feel like it with the longer & open grip. After spending the time building it and pointing it several times, I'm starting to question the pull I use. Feels pretty good to me and I normally shoot 14". | |||
|
| One of Us |
Here's a few of the checkering progressing on the grip. I don't have any progress pics of the forend. The graph paper I use to layout really helps keeping lines straight when jumping over the escutcheon in the middle of the pattern. | |||
|
| one of us |
I like it! Very nice. | |||
|
one of us |
Nice work James. I like what I see in every photo. Tight work indeed. Here's the last of my pics. 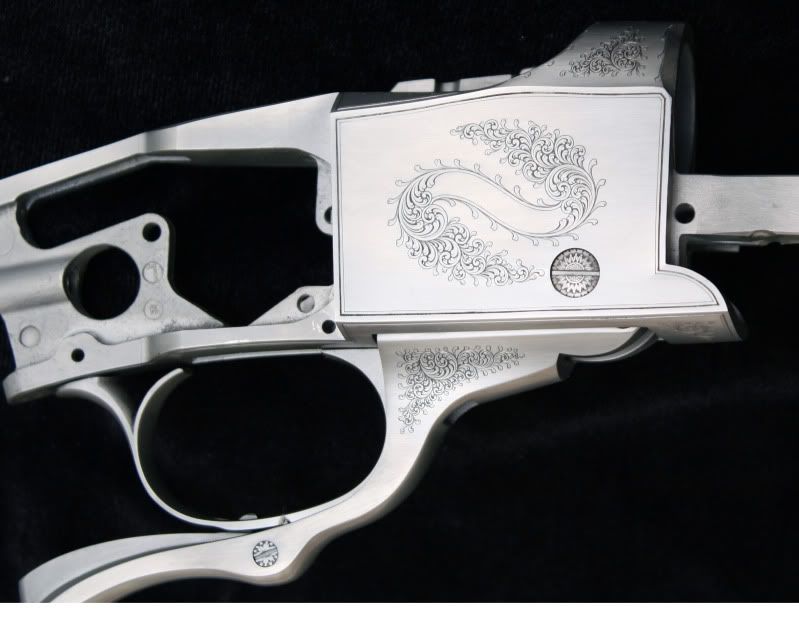 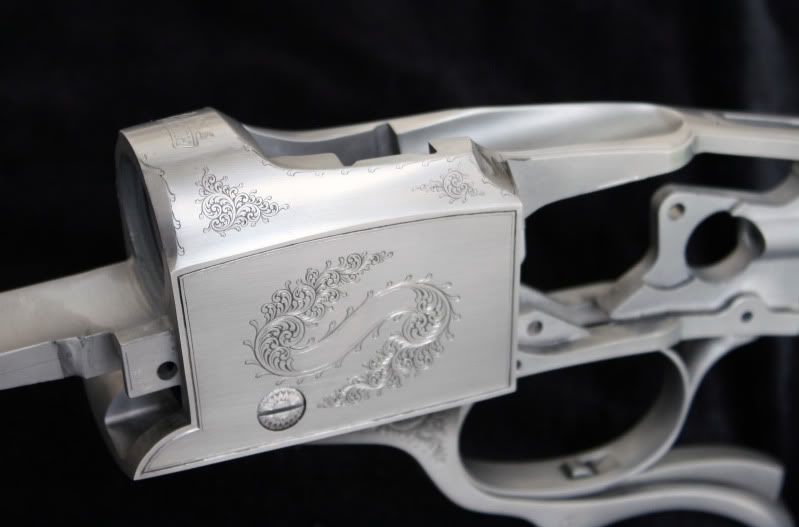 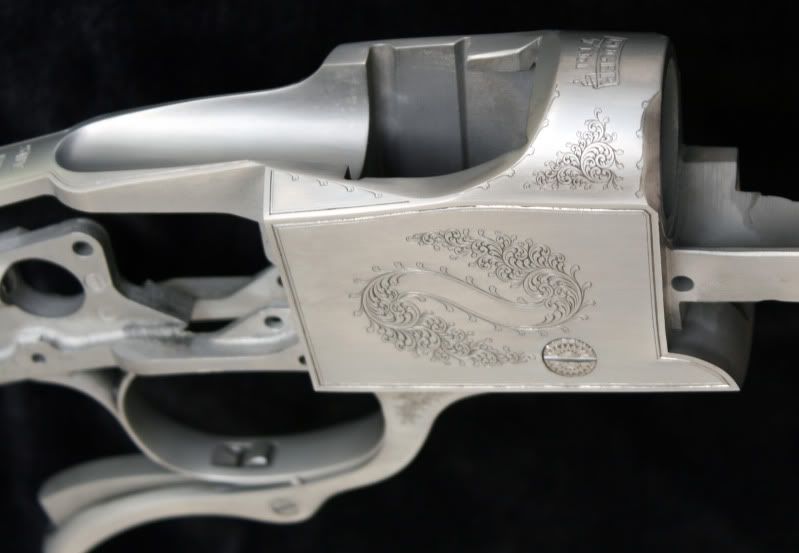 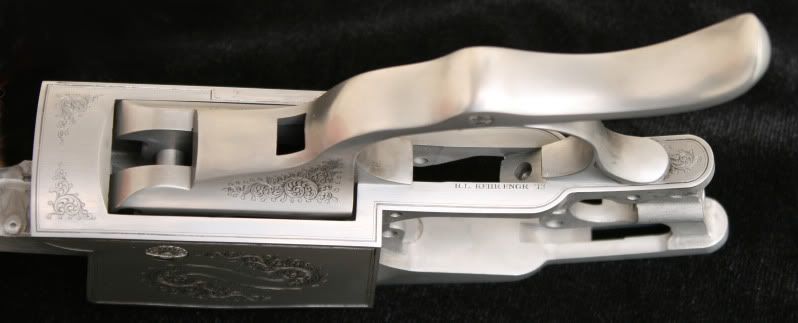 The serial number has been photo edited out. Roger Kehr Kehr Engraving Company (360)456-0831 | |||
|
| One of Us |
Great work Roger I'm one of your biggest fans. Did you get any pics of the grip cap or escutcheon? | |||
|
| one of us |
James & Roger- Thanks to both of you guys for taking the time to share your work with us. These threads always make me appreciate how talented some of you really are. | |||
|
| Powered by Social Strata | Page 1 2 3 |
| Please Wait. Your request is being processed... |
|

Visit our on-line store for AR Memorabilia

