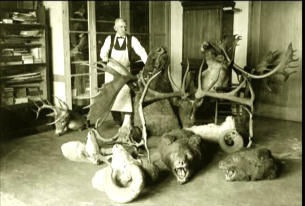
 Hunting Taxidermy
 Go | New | Find | Notify | Tools | Reply |
| Skull cleaning? | Login/Join |
| One of Us |
Ladies and gents! I have some skulls in the freezer that I would like to clean and eventually put in the bookshelf. How do I proceed to remove the rest of the meat and avoid the teeth from cracking? Boiling? How long? Detergents? Something to rub with to get the white color desired? Its mostly smaller game like birds, a seal, a badger etc. Sincerely Daniel | ||
|
| One of Us |
For best results on such small skulls you will want to simmer (not boil) the skulls. Remove any flesh you are able to from the skull. You can then either soak the skull for a few days to a week, in a bucket of water to soften up the tissue (which is preferred), or go ahead and simmer it in a pot with water and Borax washing powder (sodium carbonate), or baking soda (sodium bicarbonate) will work well also. If you are simmering more than one skull at a time I wrap the skulls individually in cheesecloth to keep any teeth that may fall out with the correct skull. Never boil a skull as this can do some serious damage to the bones(especially the small skulls you will be dealing with). Just simmer the skull until the meat comes off easily. The time for this varies, so check every half hour until you get your desired result. Presoaking the skull in water cuts down on the simmering time.Once the skull has simmered long enough to where the flesh can be removed easily, take it out and clean it under running water. Make sure to get all the brain out and rinse that cavity well. I then use a 40% peroxide and Clarol White hair bleach powder(these can be purchased at beauty supply stores) and mix them together into a paste. You should wear a dust mask and rubber gloves when you do that step. Apply the paste on with a small clean paint brush and allow to dry (preferably in the sun), When the mixture starts to flake off of the skull, rinse off with cool water thoroughly and allow to dry naturaly. You may want to seal the skull with a flat matte acrylic, non-yellowing spray. If there are grease spots on the skull, you may need to soak it in Coleman lantern fluid for a few days, to draw the grease out, before you apply the peroxide/hair dye paste for whitening. The teeth should not crack if you simmer the skulls. If they do, simply paint some white Elmer's glue on them. Use same glue to adhere any teeth back in that may fall out. Hope this helps. Kind Regards, Mary Taxidermist/Rugmaker | |||
|
| One of Us |
Mary Thanks for great advice! I have not heard about using the hair dying/bleaching kit before. Up until a few years ago it was possible to buy 30% peroxide at the pharmacy and at the house color making shops, now it is not allowed anymore. The strongest peroxide on the market here is 10%. I will look for the hair thing and see if that is the same brand as You have on the other side of the pond. At 68°N the days are getting shorter and the sun is now above the horizon for around 4 hours as we are approaching the solstice where the sun dissapears for a month before coming above the horizon again. I will try to let it dry under a lamp instead. Sincerely Daniel | |||
|
| One of Us |
10% will suffice if you cannot locate a stronger % for your peroxide. Any white powder hair dye will work also, does not need to be the specific brand I mentioned. You may want to do this procedure twice if you do not achieve the brightness you desire after the first try. Just let the paste dry naturally on the skull, the close proximity to a lamp will cause it to dry to rapidly which in turn may not brighten it as well, especially if you can only use 10% peroxide. Kind Regards, Mary Taxidermist/Rugmaker | |||
|
| One of Us |
The best results happen when you take them to a professional. | |||
|
| One of Us |
Thanks for replies! I will look into the peroxide stuff to see what can be found. I read that it is now even harder to get by anything more than 3% peroxide for cleaning wounds and stuff from the pharmacy. I dont know why, but since Sweden joined the EU we have limitations and directions on everything from strawberry shape & size to outlawing of traditional hunts on both game and vermin. Sculptor It will of course be both better and faster results when handing it in to a professional, but then the cost of it is also there. The closest "professional" in my area is found at the coast 330 km (205 miles one way travel) and that is a secondary school for forestry, farming and outdoors, where the pupils would do their first attempt on taxidermy on my "trophys". I do not mind paying for professional mounts when it is needed, but just for a ptarmigan skull, a crow skull, a goose skull, and some small mammals it is not exactly my first priority to pay 100 USD or more / bird head. If it has horns, tusks or antlers it goes to the taxidermist, but smaller than that I would like to tinker with myself on some spare time... Besides, I think (and would be happy to be wrong here...) that many taxidermists would prefer to work on some larger stuff than just a single skull of the common game birds in the area. Sincerely Daniel | |||
|
| One of Us |
I send mine to a place that throws them in a tank with beetle larvae.They come out looking like Ivory.No bleaching is Necessary.I do Put some Thompsons water seal on mine.This makes the skull resit moisture. | |||
|
| One of Us |
OLBIKER Thats a good suggestion too! Do you know if that would work with "normal" maggots too? If so, I could go and buy a box of the normal fishing maggots at the sports store, let them munch away in a sealed box with a little airhole in it. Just hope that it does not smell too bad. They use those maggots to clean up dead tissue in the hospitals as well. They just go for dead tissue and leaves the living tissue alone. I am not aware of any such larvae/maggot cleaning factory in this country though... Have to do it myself in that case... Sincerely Daniel | |||
|
| One of Us |
Daniel, The method I described and also the flesh eating beetle larvae method Olbiker mentioned are the ways any professional would handle your skulls. When you made mention of the types and sizes of the skulls you desire to clean, this certainly is a project, I feel, you could successfully undertake. I do agree that much larger valuable trophies (especially when antlers and horns are invovlved) would be better handled by a professional taxidermist. But honestly, what you have at hand can be done quite nicely by yourself at home. I had done wholesale skull cleaning for many years for added income when I first started out in taxidermy. The project you are considering to try is ideal for a beginner and I am sure will turn out fine. As far as the beetle larvae and maggots, they do need fresh flesh/meat to eat. If the flesh is dryed on the skulls it will need to be rehydrated to get them interested in it. Also there are many variables on maintaining the proper temperature,humidity, etc. in a larvae colony, so I have heard by the professionals that house them. Kind Regards, Mary Taxidermist/Rugmaker | |||
|
| one of us |
Wish i'd of known not to boil when i pressure cooked my coyote skull a couple years ago. Also about putting it in mesh. Some of the critical bones like over the eyebrwo broke and teeth fell out. I unintentionally got the flesh off some coon skulls. Been burying those carcusses in the compost, i figure why spend $$ buying blood/bone meal for the garden. I throw deer remains in there, too. Anyway, last time i turned the pile over i uncovered some very clean coon skulls and deer bones. Don't know if it was dermisteds or bacteria but they were clean. I wouldn't recommend that though. I would do like Ms Krueger says, its best just to dig right in there and get the flesh off and use the right stuff and do it right. Plinker aim small, hit small | |||
|
| One of Us |
You can actually buy kits,that include the Beetle larvae.I have done it ,but the critters are very senstive to temperture change and the stink is terrible.Give it a try with the Fly maggots,but I do not think they will clean the Skulls to a polished look. OB | |||
|
| One of Us |
A buddy puts skulls in plastic bags, cuts slashes in the plastic and hangs them in an unused chicken coop. The flies deposit eggs and then the maggots take over. The bags keep everything nice and moist for the maggots. It works of, not as nice as beetles though. have fun with your skulls, anyone can do a respectable job if they take their time. An air compressor works well to blow off the flesh after you simmer, be careful around delicate areas and keep the pressure down. the chef | |||
|
| One of Us |
and what will a professional do that Ms Hilliard-Krueger( who is a professional) did not describe, other than charge you good money for a job you can do yourself? Vote Trump- Putin’s best friend… To quote a former AND CURRENT Trumpiteer - DUMP TRUMP | |||
|
| One of Us |
I meant no disrespect to James' comment and I agree with him that most skull cleaning is best done by a professional, as I had stated in my last post. The few small skulls, which I assumed could be replaced easily, seemed like a good project for a beginner to try their hand at. But as I stated before, larger horned and antlered projects should be done professionaly, unless the hobbyest has mastered the skill. Kind Regards, Mary Taxidermist/Rugmaker | |||
|
| One of Us |
Ladies and gents! I also totally agree that with larger trophy´s that are atleast harder to come by (leaving all discussions of value on the side) a professional is the way to go. As for this topic, though, it is skulls that are not so hard to come by. In a normal season I get around 50 grouse skulls or so, and if I should happen to destroy one by cleaning it wrongly, it is just to take another one from the freezer and try again. Anyway, the skulls are soaked for the last 36 hours now, and will be put in water for a few days more, then I will let them simmer a bit. I heard that normal dishwasher detergent was good to remove fat? Sincerely Daniel | |||
|
| One of Us |
What M H-K described is exactly what I have been doing for years. One thing that I would add is to keep the bones away from the bottom of the pot when cooking, AI have had some get brittle. But I just may be cooking too hot. I also like to soak skulls in liquid peroxide to get the inside places whiter. | |||
|
| One of Us |
Also the fat accumultes on the top of the water. Use a ladle and skim it off to avoid grease stains. Or change the water a couple times. the chef | |||
|
| One of Us |
Dermestid beetles. Not that expensive, at least here. I am paying $75 for cleaning of a whitetail deer skull - small skulls as you describe, you might get for $75 for the whole lot. I have boiled skulls before - lots of work picking off small pieces, smells like hell, makes kitchen hot, and the result is a yellowish looking bone from dissolved fat. Some of the things people describe to whiten bones may also soften them. Good luck, Todd | |||
|
| One of Us |
THanks for replies and suggestions! Tomorrow is the big boiling day... The skulls have now soaked for a week or so in room temperatured water (sealed boxes of course) and the smell when opened is totally disgusting! Atleast it was that 3 days ago when I changed the water the last time, cant even imagine the smell now... Anyway, the boxes go with me out in the forrest to some remote location, then they will be boiled and I will try to peel the meat off without vomiting too much. ;-) After that I will let it dry for a while and then use the 17,5% peroxide I managed to get hold of from the paint shop. The grouse skull turned out nice, but it is not advised to let it stay more than 5 minutes or so in the peroxide because it disintegtates the thin neck area quite fast. Sincerely Daniel | |||
|
| One of Us |
If you can't get the high % peroxides, you can even have very good results with 6% solution. Use bits of paper towel or preferably the small paper squares used by doctors to clean your arm for an injection. Soak a piece in the peroxide and apply it to the skull like paper mache. Keep doing that until you have covered all exposed areas of the skull. Pour the leftover peroxide over the skull, allowing it to soak up. Then put the skull in a plastic bag and tie it shut. Keep it in a warm place for at least 8 hours (try doubling if you only have 3% solution) and then remove all of the bits of paper, rinse off, and dry in the sun. For antlered and horned skulls, you need to wrap the antlers/horns in afew layers of cheesecloth before you simmer. This keeps the oil from the head from making lines on the antlers/horns. Horned skulls need to be sufficiently simmered to allow the horn sheaths to be removed from the horn cores. Then you must scrape the membrane out of the sheaths--al this while they are still hot. Under the right conditions, you can have your cleaned, bleached skull 2 days after your hunt. The professionals might do a better job than I do, but there is no reason why you cannot do very good job yourself. Just work up from less important skulls (doe, for example). | |||
|
| Powered by Social Strata |
| Please Wait. Your request is being processed... |

Visit our on-line store for AR Memorabilia