 Guns, Politics, Gunsmithing & Reloading Cast Bullets
 Go | New | Find | Notify | Tools | Reply |
| Inexpensive Mold Making | Login/Join |
| one of us |
I'm not overly concerned, just curious about the reference to Mr. Anderson. Tim K (trk) Cat whisperer Chief of Smoke, Pulaski Coehorn Works & Winery | |||
|
| new member |
Kelly, I'm following a bit better why you are doing with form tools. Another thought, what about using a cnc mill instead of a lathe? use 3 end mills. 1st, rough out what you can with a center cutting end mill. 2nd, using a woodruff style cutter to cut the bands. 3rd, use a ballnose end mill that has been under cut on the shank similar to a woodruff cutter.Would take many passes but with cnc control should be able to get a good curve. While this would take longer to cut that a lathe. A cnc mill with the size to be able to cut 6 hole moulds could be cheaper that a lathe. Might even be able to use a sherline mill. If you were willing to do the conversion yourself could convert the mill for less than a grand. Another plus is the ease of changing mould dimensions. Just a thought. Mark | |||
|
| One of Us |
trk, Remember we talked about that shotgun jacketed slug I made for my rifled 20 ga that you were interested in? Whatever became of your interest? Joe P.S. I don't know who Mr Anderson is either. | |||
|
| One of Us |
"Neo, what IS your reality?" Speaking of nice realities, pathing a cutter in a ACCURATE heavy way CNC mill could cut multiple cavities all in a row. If you dedicated a fairly good sized CNC mill with a quick change cutter feature (such as the $6,000 heavy cast iron jobbie that I kinda liked earlier) you could set up permanent (trued perfectly square right on the machine) clamping stations that would true and pin and middle slot your mold blocks automatically. One final holding fixture for the assembled blocks, used to machine the bullet form holes. Then pop in your cavity cutters, rough & finish the holes then finish the top of the blocks nice and flat all on the same clamping. Then put the top plate on and drill matching spaced sprue holes. Problem with this particular reality, Mr. Anderson, is that I'm really just a pennyless & motionless human blob of protoplasm in a bathtub shaped liquid container, actually suitable only as a low level electrical battery for the machines. I am not Neo. My dreams are my only freedom. <g> Oldfeller | |||
|
| one of us |
Joe - I am aflicted with the American blessing/curse of having too many shootin' irons. As the mould making project gets rolling I'll most likely modify my Lyman 20ga mould to add grooves so it FITS the bore. Thanks for reminding me! Tim K (trk) Cat whisperer Chief of Smoke, Pulaski Coehorn Works & Winery | |||
|
| new member |
Why not just use a form tool in a mill. Clamp the mould blocks centered on a rotary table. Drill out the major metal to be rmoved and then replace with your form tool. Lower the form toolinto the hole in the blocks and use either the X or Y axis to feed it into the blocks the depth you need for the diameter you want. Then turn the rotary table. The form tool will cut the features into the block as the table rotates. Probably have to make a couple revolutions to get a clean cut. Only possible problem other then any other associated with machine tools would be chip evacuation from the hole. | |||
|
| one of us |
Thought of that. Might do it. It'll take a fixture on top to do x-y location for multiple cavities. (my rotary table has the x-y slides underneith - rats!). A good flow of coolant should clear chips, except perhaps down towards the nose where it'll get tight. Tim K (trk) Cat whisperer Chief of Smoke, Pulaski Coehorn Works & Winery | |||
|
| One of Us |
Why have to use a rotary table? If you have X & Y CNC you can "move" the workpiece in a small circle while the bit holds still. Only issue with this is that your motion slop applies and your bullet roundess would only be as good as your motions (all errors on both X & Y would wind up showing up as roundess issues). A rotary table costs $450 bucks, or more. | |||
|
| one of us |
I have a grand in my mill, CNC is not an option on it. I do have a rotary table (perhaps $100 on ebay) - we are talking about "Inexpensive" mould making are we not? Once the location of the rotary table is established (by the x-y slides) it is locked in place - so not to worry about roundness issues. Tim K (trk) Cat whisperer Chief of Smoke, Pulaski Coehorn Works & Winery | |||
|
| One of Us |
I'm still spending Monopoly $$ so I get to dream big at this stage. But, your reality of already having a mill and a rotary table would be very nice. Check me on this thought, you'd still have to move the mold blocks on the mill's rotary table to put the next hole on 0,0 -- in this aspect it would be a lot like a CNC lathe in manually shifting the mold blocks laterally to get to the next hole. | |||
|
| new member |
I must be missing something here. If you mount the blocks in a vise clamped to the table of the mill, the table would have to occilate to turn the blocks, right? With a rotary table, once you advance either the X or Y axis to feed in the form tool (which you may have to do more then once for the operation) you lock them back down. The quill, once moved down is locked and remains so. Once the feed is accomplished the table is locked down again. Your only motion takes place via the rotary table. Even a cheap rotary table can be very accurate in it's rotary motion. The very means by which one is constructed means they'd have to be almost intentionally sloppy in their construction. We're talking well less then a thousandth. They may be pretty sloppy so far as lost motion when changing directions, but you're not talking about needing to do that. So far as chip evacuation goes a tool with a single spiral flute like a drill bit with just one flute, would bring the majority up out of the cavity. One problem with this is the OD of the tool, and it's being limited in how small you could go due to simple mechanical fragility. Check several of the tool catalogs and you'll see that Onsrud makes such things in carbide, which is about as rigid as you can get. The devil in this is that as you go smaller you lose chip evacuation space. Holding the bocks on the rotary table? Again, check the machinery catalogs and you'll find precision grinding vises that are ground to .0002" or less in parrallelism between the jaws and also perpendicular to the bed. Cost would be about $50 for a 5" one. One jaw is stationary and that is what you index off. You finish one cavity, loosen the moveable jaw then slide the blocks however much you need for room between cavities (having a clamped DI on the mill table reading on the end of the blocks) and then clamp the moveable jaw back. The error you will have is within the vise (.0002" max) and/or the surface of your blocks. This would be minimum to say the least, and most mould ownwers would have this accuracy beat out of their mould in a couple sessions anyway. All this is assuming you don't have a digital readout on the mill where you can just unlock the longitudnal feed and crank the whole shebang, rotary table and all over that amount. SOmehting else to think about, and this is from the beginning, is how are you going to hold the form tool? All this accuracy talk made me think of it. Say you have your tool ground on a 3/8" shank and then you what? Stick it up into a crappy 3/8" R8 endmill holder and then tighten the setscrew against it, right? You might as well not worry about how accurate your rotary table is or anything else because you probably just offset the tool a thousandth or better. At the minimum you'll need an ETM collet chuck and collet to fit the quill. | |||
|
| one of us |
My plan is to try all three methods discussed so far: lathe, double acting vice and rotary table - as each has it's own advantages. With the rotary table and an x-y cross slides mounted on top with a fixture to hold the mould blocks on top of them, one needs only to locate the first hole above the center of the rotation, mill, and then position the rotaray table such that one movement (either x or y) of the slides will correctly position the second cavity. That's my THEORY until proven that something else works better. Tim K (trk) Cat whisperer Chief of Smoke, Pulaski Coehorn Works & Winery | |||
|
| One of Us |
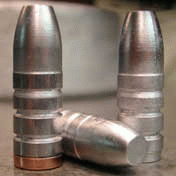
Trk, I cut some moulds on my lathe. I made a form to tool first from drill rod and tried hardening it. It didn't work as the tool bent. Mind you now I was cutting a cavity for a short 30 cal pistol bullet. Next I cut a tool out of a very hard store purchased drill bit shank. I had to use my carbide cutter. This didn't bend, but I had a hard time getting the right angle cut on the cutting edge and also positioning it in my tool holder. Then it was difficult being able to cut to the right diameter. I mean this in measuring, as I have a mini lathe and the crossfeed increments are not accurate. I was able to run the tool out of the work piece and measure with dial indicator inside measurement tool and get relatively close. I ended up making a few useable moulds. Then I ran out of aluminum stock and haven't replaced it and am perplexed about how to make a hard and stiff enough suitable cutter tool, especially for a longer bullet such as a rifle bullet. In fact I'd like to make a 6.5 rifle bullet, but heck, that's even narrower then that 30 caliber one I did, so means even a thinner cutter tool. The way I do my cutter tool is cut the bullet style, to size on my selected metal. Then looking at the tool from head on, I imagine sectioning it into four pieces. I removed the metal from three of the sections, leaving 1/4 of the orginal tool, then grind the cutting angle on the cutter face and relieving the rest of the tool to prevent it from rubbing the work piece. Any pointers would be welcomed. Joe | |||
|
| new member |
If you harden cheap old W-1 drill rod correctly it will be like glass and you can put an edge on it finishing with a hard Arkansas that you wouldn't believe. The negative to it is that when plunged into the coolant it may warp. Best to heat it while spinning in a drill press. Have your can of warmed brine solution under it and then when ready, plunge it straight down. The other negative is that if the edge gets annealing hot, it's just that.......annealed and now worthless unless re-hardened and stoned to bring the edge back. O-1 is better but more costly. Both would be just fine for aluminum as correctly tempered simple high carbon (w-1 is about 90 points of carbon) steel will cut softer steel, always bearing in mind the temperature generated at the fine edge. Cheap hacksaw and band saw blades not to mention drill bits, taps and dies are also made out of simple high carbon steel. Some people favor HC taps and dies due to the fact if they snap one off in a hole a prick punch will shatter the remnants to be removed. Won't work with HSS. You were headed in the right direction with the piece of HSS fron a drill bit. Possible problem is that not all drill bit shanks are hardened all the way to the end. Some are left soft (comparatively) so the chuck jaws can get ahold of it. Once again if you think about it you did move the right way, going to HSS. What's harder then that? How about carbide? MSC, McMaster-Carr, Rutland maybe Enco among the common suppliers carry carbide cylindrical blanks for not a whole lot of money. Backing up, they also sell drill and reamer blanks. Basicly jobber length, hardened all the way HSS rods in fractional, letter and number diameters. And like those, they also sell carbide blanks in rods, rectangle shafts, square shafts, and chips for brazing to tool bit shanks. Since you're not buying a ton of'em, the cost isn't too bad. What makes an otherwise perfect materialnot so perfect is that you have to have diamond to cut it, or a silicone carbide grinding setup, If you planned on doing a few, diamond would be the way to go. So far as cutting features into the ID of a long narrow hole (6.5mm or smaller) with a form tool you're talking very light cuts, so a bit more time is involved. On the other hand you could make a couple of individual tools to work in various parts of the hole. But then you have to be able to positively position them or you'll just turn out spendy junque. Mr Trk, why would you want to have a compound vise on top of your rotary table? The milling machine bed would do the same thing, right? If the rotary table is clamped to the mill table have just a simple accurate vise mounted to the RT. Let the mill bed move the blocks into the cutter. Eliminate as much stacking of tools as possible. Also, to drill another cavity you HAVE to move the blocks to center over the axis of the rotary table. Can't just move the RT holding the blocks to the next cavity position. At least I think that's what you'd said. I can't see the post from here so please forgive me if I mis-recalled what you wrote, so I screwed up. | |||
|
| One of Us |
Lloyd, One of the guys on the cast boolit forum cuts a cherry and then cuts the flutes in it, also alot of hand grinding. Then he chucks this in his drill press and using a double acting vise and closing it on the spinning cherry he made while squirting oil on the hole. He makes some remarkably good moulds that way. Thing is he's getting tired of making the cherries, too time consuming and if he doesn't hit the dimensions on the head, they are no good. I think I'd opt for the HSS rod that I can cut without having to resort to diamond grinding. Joe | |||
|
| one of us |
Lloyd - with a small compound on top of the rotary table I can recenter the block over the center of the RT without having to remove it from the fixture. Which for a three or more cavity mould means that it will be easy to maintain an even spacing. I agree stacking up tooling isn't good. Perhaps I could simply invert my RT. Tim K (trk) Cat whisperer Chief of Smoke, Pulaski Coehorn Works & Winery | |||
|
| new member |
Oldfeller, trk, anything new happening? | |||
|
| One of Us |
I'm busy healing up from open shoulder surgery (left shoulder, severed rotator cuff) so I won't even be typing very much for the next several weeks. Besides, the bullets vs boolits discussion -- makes it all seem kinda silly sounding, doesn't it? I hsve 3.8 molds (on average) for every caliber/gun I shoot, with at least a couple of 4 molds sitting on the shelf that haven't even been wrung out yet. I'll see after I'm shooting a rifle again. Heck, I'll be seeing after being able to ride my thumper again (now that's a bad thought -- real bad thought) Kelly | |||
|
| one of us |
Two things. The ice is melting off the aluminum bar I bought and parked behind the shop. AND I picked up a Savage 99 in 358 Winchester! 95% came with 3 boxes of brass (1/2 loaded) for $575. SO I'm going to try lathe boring first, taking a single cavity mould in some flavor of 38 wadcutter and attempt to put a bore-riding nose on it. Moulds like that one can get on ebay for under $20 including shipping any day of the week. My TIME is worth it to play with a few building my skills. Tim K (trk) Cat whisperer Chief of Smoke, Pulaski Coehorn Works & Winery | |||
|
| One of Us |
trk...you have a private message. Joe | |||
|
| Powered by Social Strata | Page 1 2 |
| Please Wait. Your request is being processed... |

Visit our on-line store for AR Memorabilia