
 Guns, Politics, Gunsmithing & Reloading Gunsmithing
 Go | New | Find | Notify | Tools | Reply |
| Fabricating ramped front sight | Login/Join |
| One of Us |
I would like to temporarily secure some round stock to a mandrel for machining a ramped front sight that will eventually be hot blued. Hi-Force has a melting point of 475* and JB Weld melts at 500*. Will either one of these work for my application? Many thanks. -- ale | ||
|
| Moderator |
I'd suggest your solder idea. At the same time, while you are machining it wear a face shield and not just goggles in case it lets go on you. Use plenty of coolant (a spray bottle with water if nothing else) and keep passes light. If you are planning on mounting it with screws you can drill those early and use a screw as additional security that it won't take a vacation on you. Personally, I wouldn't blue it mounted to the mandrel if that is what you are thinking of. for every hour in front of the computer you should have 3 hours outside | |||
|
One of Us |
What kind of a mandrel are you using, and are you planning on making the ramped sight out of the round stock? _______________________________________________________________________________ This is my rifle, there are many like it but this one is mine. My rifle is my best friend, it is my life. | |||
|
| One of Us |
I'm using a section of barrel that is turned down to .500" on one end for the mandrel. I have a spin index and homemade center for the complete fixture. I bought a rem of 12L14 round stock and bored a tapered hole matching the profile of the barrel. The actual barrel has a larger OD than the mandrel so it fits right up to the muzzle end with about 1/8" overlap. I ordered the Hi-Force solder but the flux is on backorder. I guess my real question is, can I use JB Weld instead of low-temp solder during the fabrication process? I want to be able to remove the front sight from the mandrel without messing anything up, either physically or cosmetically. Here's a couple pics of what I'm starting with.   And here's basically what I want it to end up as...   If I have to wait for the solder and flux to be shipped then I will. I was just hoping to make some chips this weekend. -- ale | |||
|
| One of Us |
Oh... a banded front sight. Why didn't you say. If it's a snug fit on the mandrel why not use a screw and some serviceable loctite to hold it in place. Determine where the sight insert will go and attach the screw there where it will later be hidden by the insert? To remove it from the mandrel you pull the screw, warm the sight and tap it sideways to break the grip and then off. _______________________________________________________________________________ This is my rifle, there are many like it but this one is mine. My rifle is my best friend, it is my life. | |||
|
| One of Us |
Yep, that is what I meant to say... Thanks for the suggestion, Westpac. By "servicable" loctite, are you referring to the blue? | |||
|
| One of Us |
Yes, blue. After you have everthing in place and screwed down, warm the sight material with a propane torch so the loctite will quickly set. If the fit is tight, it will hold. Use coolant to keep the heat and resulting expansion at bay. _______________________________________________________________________________ This is my rifle, there are many like it but this one is mine. My rifle is my best friend, it is my life. | |||
|
| One of Us |
So, I'm supposed to warm the sight material after adding the blue loctite and cinching down the locking screw? If the blue loctite will hold under the front ramp, where there is less support, then I'll be a happy bubba!! | |||
|
| One of Us |
Yes. There are other loctite's (271, 609) that would hold even better but you would probably end up having to machine the mandrel from the sight. _______________________________________________________________________________ This is my rifle, there are many like it but this one is mine. My rifle is my best friend, it is my life. | |||
|
| One of Us |
If you have read my posts on my 550 Gibbs, you will see a couple barrel band front sights my gunsmith and I made. They were milled from 1.25" X 2" bar stock 3" long. PM me with your Email address and I will send you some pictures of them. One is finished, the other I left with square on the sides to show a "Doubting Thomas" they were home made and not store bought. It is a lot easier to make from bar stock, the top of the barrel diameter hole is exactly the same contour as the barrel. Draw a rectangle the size I wrote. Draw a 1" circle about 1/4" from the bottom. Round the bottom and sides to even with the top of the circle to suit for thickness. Mill the sides roughly parallel to the width of the ramp from the top of the circle upwards. It will look like a ring with a tall slim top bar on top. Slip it on the rifle barrel after you have installed the rear express sight and put a piece of 1/2" square bar stock on the rear standing leaf and the ramp top. Put your torpedo level on top of the bar stock and mill the ramp until the bubbles line up. My 550 Gibbs is 2" high at 50 yards with the standing leaf and the 780gr cast bullet at 2300fps. This spring I'll get the two folding leaves filed in at 100 and 200. The barrel band sling swivel is more fun to make, it involves off setting the top and bottom jaws to drill an offset hole barrel diameter in a piece of 1.5" round stock and milling/hand filing the area around the stud where the sling swivel attaches. If I can do this, anybody with an IQ over 90 and enough common sense to know to come in out of a hailstorm can do it. Rich DRSS Knowledge not shared is knowledge lost... | |||
|
| One of Us |
I'm trying to decide on what operation to start with first: should I mill the area under the ramp before setting it up in my mandrel or save that section for last? If I mill it now, I'll need to mill a reciprocating flat on the top in order to find TDC when setup in the spin index. There would also be less material to remove when machining the outside radius; however, there will be less support under the ramp (which could mean chatter). Any suggestions? | |||
|
| One of Us |
I think the first thing to do is locate center so you can run all the different operations from that point. Then I would probably work on the most fragile area first while there is enough mass to keep things from becoming distorted as you remove material. _______________________________________________________________________________ This is my rifle, there are many like it but this one is mine. My rifle is my best friend, it is my life. | |||
|
| One of Us |
I finally came up with a game plan -- right or wrong. I started by cutting the top flat and drilling the hold down screw hole, then held it sideways to remove the bulk of the material under the front ramp. Holding the part so far off the end of the vise had me a little worried but the 12L14 machines like AL -- no chatter at all. I don't think I'll ever buy another rem of 4140 as long as I live.       I degreased with Simple Green, added blue loctite, cinched it down with the locking screw and heated with a Mapp gas until warm, per Westpac. The hardest part was aligning the through hole in the front sight with the threaded hole in the mandrel. I really feel that the hardest part is over. I'll be making two of these so whatever mistakes I make on this one will hopefully be corrected the next time.  Thanks for the suggestions and helpful advise. -- ale | |||
|
| One of Us |
Just to keep this thread alive for a couple more days... My setup is pretty crude but it works for me. I'll more than likely do a few things differently on my next try but so far I haven't scrapped anything. Please feel free to add your $0.02 as I'm neither a machinist nor a professional gunsmith.         I'm waiting for the sight insert to come from Brownells so this is as far as I can go tonight. The front ramp will have a 5* rake. I am undecided on the filets along the edges of the front ramp as this will require a lot of "manual CNC" machining. The good news is that the loctite and locking screw worked great! Hope I don't run into any problems taking this thing apart when I'm done on the mill. Now it's time for a cold beer -- ale | |||
|
| One of Us |
Rooking good! But I'm going to need it a touch taller... _______________________________________________________________________________ This is my rifle, there are many like it but this one is mine. My rifle is my best friend, it is my life. | |||
|
| One of Us |
Haha...very funny, Westpac This is actually for a 10/22, not a 550 Gibbs. My inspiration for this project came from looking at all the African express rifles here on AR. I want to capture the look and feel of a safari gun, but in a .22LR and .22WMR. This build is actually part of my daughter's 12th birthday present. | |||
|
| One of Us |
Hey Brother, You ain't too bad. I guess that this is what we need to do to Forrest B 10/22. Butch | |||
|
| One of Us |
Is his 12th birthday coming up, too? | |||
|
| One of Us |
Hello Aleaddict, How did you turn the lower part of the sight. Did you turn every few degrees and use the end of the ball endmill? Any pictures of that operation? Thanks | |||
|
| One of Us |
Yes, that is exactly how I did it, 2-degrees at a time. I used a 1/2" ball end mill, which was also the radius of the transition between the sides of the top rib and the barrel band. I usually don't take a lot of "in-work" photos. I'm more focused on machining and finishing an operation without possibly scrapping my part!! If I were to do anything differently the next time around, I would remove more material around the barrel band with a regular end mill, then come in with the ball for a finish cut. The upside of leaving material is that it was easier to index between cutter changes. I still have a lot to learn... | |||
|
| One of Us |
Thanks Aleaddict | |||
|
| one of us |
As a matter of fact my 12th birthday is coming up. I have an 11 year old son and my wife says we act like twins, so that means I'll be 12 in November. Better go ahead and make 2 of whatever your making. That's great work for a "non-machinist". I wish I had known about your 10/XX project before I got started with my 10/22 Mag. I should be receiving the McMillan stock next week, then I can take another shot at getting the thing up and running. Any problems at all, and I'm sending it to you and Butch. There's going to be a lot of plastic and stainless and even a monte carlo comb on this rifle. I'll be sure to post some photos so that everyone can see that I'm flexible in my taste. ______________________________ "Truth is the daughter of time." Francis Bacon | |||
|
| One of Us |
For whatever it's worth...having faced such an undersized problem, I just purchased the smallest ramp (.551 dia). spilt the band, squeezed together undersized, tig ed the joint and finished off with hand tools...tip! use copper for you mandrel and tig won't stick the whole assembly together | |||
|
| One of Us |
Duane -- That is an ingenious idea and would have saved me hours of machine time. As it is, I'm still waiting for a 60* dovetail cutter to arrive so I can finish this project. Had I known of this technique, the part would already be in the bluing tank!! Thanks again for the awesome suggestion and "Tig tip". -- ale | |||
|
| One of Us |
I ordered a Marble front sight insert for this build but just didn't like the way it looked. Having a relatively large supply of 12L14 (at least for this size project) I decided to try my hand at making one from scratch. I cut a .700" round from my stock on the lathe and then divided it into four wedges. I will be using a 3/32" bead on the top of the post so I started my cutting this hole and milled down from the top in order to create a trough.     I milled off the top until I found my through hole, then took another .67" or about 2/3rd's. I didn't draw up any plans this time but just used the Marble sight as a guide.   Eventually I'll cut it down to size, add a little scallop to the rear and serrate the front but at least this gives an idea on how it will all look.   Of course, I have no idea if this height is correct since I still need to make the q-rib and that requires another fixture. I also need to pick up a 60* dovetail cutter and can't decide on whether I should buy the .265", .300" or .375". I think the .300 from Brownells will be the most useful for other projects besides this one. In any case, I have more "wedgies" just in case I scrap this one and need to start over.  -- ale | |||
|
| One of Us |
You make a pretty fair imitation of either! "I ask, sir, what is the Militia? It is the whole people. To disarm the people is the best and most effective way to enslave them" - George Mason, co-author of the Second Amendment during the Virginia convention to ratify the Constitution | |||
|
| One of Us |
From a practical standpoint, with the .265 cutter, you can also cut a .266, .267, .299, .2995, .300, .375, .376... .500 etc., etc., etc. In an emergency, I made this one out of a Brownells screw driver bit for a police officers P220 front sight. It's still working today! Of course I have a real cutter in the event this one fails, but when faced with a "Need it right now for tonight's night shoot", necessity IS the mother of invention. 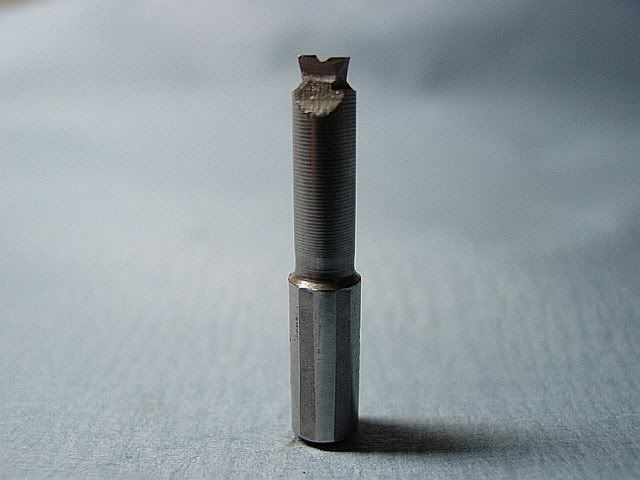 _______________________________________________________________________________ This is my rifle, there are many like it but this one is mine. My rifle is my best friend, it is my life. | |||
|
| One of Us |
Westpac -- Don't give me any more ideas! I've already been given enough rope by you and Butch to hang myself (j/k). Seriously, that is a great "invention". The one limitation of the .265 cutter is that it can only cut to a depth of .100". I measured my Marble insert and the dovetail is only .095" so I guess that's the cutter I'll buy. That should finish me sometime next week. Today I'm going to be working on the quarter rib fixture... -- ale | |||
|
| One of Us |
Brian buddy, You are doing very well. Midway has an assortment of carbide dovetail cutters starting at .265. I will finish up my bases for my Pierce receiver today. I will start another thread about them. Butch | |||
|
| One of Us |
Don't let a little thing like depth scare you. Cut it twice! That's what bubba would do. _______________________________________________________________________________ This is my rifle, there are many like it but this one is mine. My rifle is my best friend, it is my life. | |||
|
| One of Us |
After scrapping my original attempt at a front base, I made two more and so far everything looks pretty good. At least I have an extra one to practice on for this next operation. Thanks again to Westpac for helping me with the dovetail cut.  I replaced the spin index with a rotary table. Setting up this operation was a real PITA. Like most things, getting over the initial setup is the hardest part. Since this was only a "practice band," I wasn't really trying to hold my dims to the .001".   You can see that I came really close to the barrel, even hitting it once with the side of the end mill. What was supposed to be .035" in height turned out to be only .015". I'll make up for that missing twenty when I start scrapping on the real ones... It would have been easy to cut perpendicular serrations, but I wanted to follow the lines of the barrel so that's why I used the rotary table. I've never really used a rotary table before so this was a real learning experience. I used a 60* double-sided cutter (aka: UFO cutter) and milled a 50lpi pattern, ending at a point signifying, "Look'ee here!!"   Now my questions to the 'smiths: Should I carry the serrations all the way back to the bottom edge of the ramp or keep it off a tad to create a "frame." I have an engraver who can add a horizontal line to tie it all together, if that might look good. Secondly, I went a little light on the serration cuts, only about .006" at the most. How deep should I cut these serrations? I'm going to sleep on this one for a day or two. Hopefully someone will tell me if I'm on the right track or whether I've missed the boat completely. At this point I'm pretty happy with the results. -- ale | |||
|
| One of Us |
It is going to be a nice 10/22. Keep up the good work. Butch -------- | |||
|
| One of Us |
Thanks, Butch. I can already see from those last two pics that my serrations are a little off C/L. I knew that my muzzle end was .510" and the collet end around .500". Next time I'll add some shim stock under the v-block to square everything up. With all the chips covering my work piece, I didn't notice it until now. -- ale | |||
|
| One of Us |
Good job! Anybody can run the serrations to the edge. It takes a little more skill and patience to produce a "border" look, such as the one in your photo. I would say, leave it bordered... Oops, as far as depth goes, I don't believe there is any hard and fast rule. I would say go 'til it looks good, and... Rotary tables RULE! _______________________________________________________________________________ This is my rifle, there are many like it but this one is mine. My rifle is my best friend, it is my life. | |||
|
| one of us |
aleaddict..... I did not realize you were making these for sale. I must have missed this on OUR OTHER forum. I wished we could get them up here....oh well....have to try to make one when I get my machines....yah right! still think you RULE! archdlx | |||
|
| One of Us |
archdix, I don't think that we can afford one. Butch | |||
|
| One of Us |
Very sweet, aleaddict! I'm in the process of a 10/22 "makeover," too, but of a different genre - picture something like a Sharps... Anywho, I've been wanting to cut flats on the front sight band to form an octagon. Been wondering how to remove the sight band for the operation... Is it soldered on? Any tips? | |||
|
| One of Us |
Is there enough material? Are you planning on using the same barrel? Why not just cut it in place? _______________________________________________________________________________ This is my rifle, there are many like it but this one is mine. My rifle is my best friend, it is my life. | |||
|
| One of Us |
Westpac - There's plenty of material - I measured and plotted it out with AutoCAD. The only reason I can't machine it "in situ" is that my "mill" (my late uncle's Unimat) won't support the weight of a barrel. I may end up draw filing the flats (I can do it, but I'd MUCH rather not!), but I'd have a problem with the "partial" ones on either side of the sight post without milling. So, if I can easily remove the sight band it's a relief, given my situation... | |||
|
| One of Us |
The only times I've had to remove them is to thread the barrels for a silencers. A growing trend in these parts. And then I used a band saw to cut the entire barrel off right behind the sight. I have a few of these "stubs" kicking around, I will see what it takes to knock one loose. _______________________________________________________________________________ This is my rifle, there are many like it but this one is mine. My rifle is my best friend, it is my life. | |||
|
| Powered by Social Strata | Page 1 2 |
| Please Wait. Your request is being processed... |
Guns, Politics, Gunsmithing & Reloading Gunsmithing

Visit our on-line store for AR Memorabilia