 Other Topics Recipes for Hunters
 Go | New | Find | Notify | Tools | Reply |
| Pennsylvania Dutch Bologna | Login/Join |
| one of us |
Pennsylvania Dutch Bologna Entrenched within American culture are various regional populations such as the Virginia planters, the New England fishermen and the Texas cattlemen - people who are known for where they are from just as much as for who they are. Another of these iconic groups, the Pennsylvania Dutch, enjoy a rich heritage that is directly tied to the bounty provided by the region that they settled, and a deep, fundamental appreciation for the land reaching back hundreds of years; they keep the land, and the land keeps them. One of the most tangible examples of this attitude of stewardship is embodied by the food culture within the Pennsylvania Dutch community. This introduction, from Pennsylvania Dutch Cooking (author unknown), captures the culinary spirit of these hearty folk:
Reading this got me to thinking of my favourite passage from James Michener's Centennial; one of the protagonists, a Pennsylvania Dutchman named Levi Zendt, comes from a family of Mennonite butchers in Lancaster County:
 Lancaster County Winter, watercolour, 26" X 38", http://www.artbykarl.com. After a detailed and descriptive account of the making of souse, with a fairly complete recipe (a project for another day!), Michener continued:
I truly enjoy reading this book - as well as many other works by Michener - and try to revisit the story every other year or so. In fact, my hometown of Chinook, Montana is in a lot of ways very similar to the fictional Centennial, Colorado, complete with elements of the story such as strong ties to cattle ranching, dryland farming and a once-thriving-but-now-defunct sugarbeet industry - in fact, our high school athletic teams are called the SugarBeeters:  But I am getting way off topic here - my point with all of this is that a few months ago, I had just finished reading Centennial (again), and very soon after, I also stumbled upon a recipe for what appeared to be a traditional Pennsylvania Dutch bologna recipe, from Don Fasnacht - Robert M. Lesher Meats of Elizabethville, Pennsylvania: http://lpoli.50webs.com/index_...kens%20Valley%20.pdf I was pretty impressed with this recipe, and decided to use it as an inspiration to see if I could make some bologna in the Pennsylvania Dutch style. Although I had dabbled a bit with snack sticks and a few other rudimentary, sausage-like charcuterie projects, I had never really tried anything that was a bona fide, recognizable sausage product, until now. I hope that I did justice to the Pennsylvania Dutch tradition with this preparation. Let's get started! Warning: I am attempting here to do a complete, instructional pictorial, so it might get "technical" in some places; please bear with me if the narrative gets a little "dry." Also, I followed the recipe and procedures as well as I could, given my available resources, and I think the results will show that I did pretty well; however, if any sausage or charcuterie experts out there discover any glaring errors with this pictorial, please send a PM and let me know, so that I can edit in any necessary corrections. Here are the primary flavour components in the bologna:  Left to right: ground black pepper, coriander, brown sugar and granulated garlic - it's a simple profile, to be sure, but very effective for creating a wonderful, old-timey bologna aroma and flavor. Since this is a slowly-cooked, smoked product requiring long periods of time in the so-called "food-safety danger zone" (which is between 40 and 140 degrees, Farhenheit), a curing agent is required in order to preclude the possibility of food-borne illness and also, to a lesser extent, for a characteristic colour and flavour. The recipe calls for Cure #1 as a curing agent, but this product is not available to me, and I've never used it; instead, I used an outstanding and very user-friendly product called "Tenner Quack" that I got from Richtee of Mad Hunky Meats: http://madhunkymeats.com This product is basically the same as Tender Quick from the Morton Salt Company: http://www.mortonsalt.com/for-...morton-tender-quick/ I am very familiar with this product (hereafter referred to as "TQ") and how to use it, so I used it. Important note: different curing agents are used in differing amounts, so know your curing agent and the recommended amount to use per pound - and also whether that amount is for whole cuts or for ground/thinly-sliced meat. In the case of TQ, the amount to use for ground meat is 1.5 teaspoons per pound. Using another cure WILL require a different amount of curing agent, so be aware of this fact and know what you will need. It may sound complicated, but is in fact very easy - it's just a matter of knowing what you need for the product you use. If anyone has any questions at all about the amount of cure to use for this or any product, please ask! It should be noted that TQ has a greater salt content compared to other cures, so it is wise - in general - to reduce or even eliminate any salt in any recipe where TQ is used as the curing agent, which I did when making this bologna. To add any salt would risk an overly-salty final product, so it is usually best to eliminate it the first time you make a recipe and go from there. Individual tastes will of course vary, and you may decide to add salt in future preparations, so be sure to keep notes. As it turned out, I probably could have added a small amount of salt (perhaps half of the amount listed in the recipe); this is something I will do in the future, but the fact remains that finished product tasted just fine without any added salt. First, I washed and re-washed all equipment, bowls, mixing devices etc. in hot, soapy water, then dried them thoroughly and put the grinder parts in the freezer to get good and cold. Looking back, it wouldn't have hurt to have the sausage bowl in there, too. Next, I measured all dry ingredients by weight, using the specified amounts in the recipe: 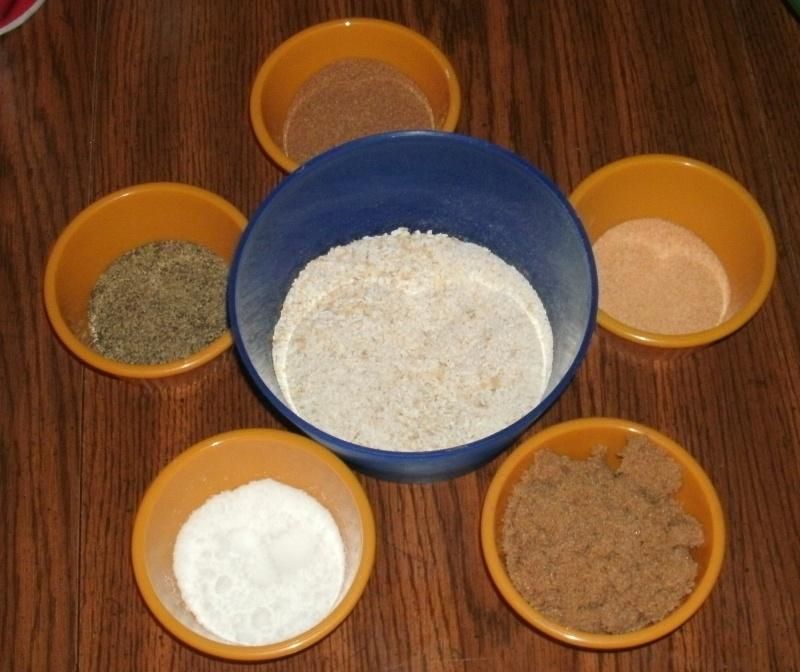 Clockwise from the top, going around the blue bowl: 15 grams (approxmately 8 teaspoons) of coriander 4 grams (approximately 1.5 teaspoons) of granulated garlic 70 grams (approximately 6 tablespoons) of brown sugar 7.5 level teaspoons (or 2 tablespoons + 1.5 teaspoons) of TQ curing agent, per package directions 9 grams (approximately 4.5 teaspoons) of ground black pepper The weighed, metric amounts are a "better" measurement to use; however, the teaspoon/tablespoon measurements will work just fine. The TQ is measured in teaspoons because that is how the package says to measure it, so weighing is unnecessary. The blue bowl in the middle contains a "binding agent" for the bologna. Where many sausage-type products are concerned, the term binding agent refers partially to help bind the meat together, for a product that will not fall apart; however, the primary use for the binding agent in this sense is in order to bind moisture in the finished product. The recipe calls for soy flour as a binding agent, which is commonly used these days; however, this ingredient is unavailable to me, and one that also didn't seem very "traditional" in my mind. Because of this, I set about looking for an acceptable substitute, and found one in the form of oatmeal. Credit for this discovery goes to member Curious Aardvark (Alex), who provided me with quite a bit of information about the purpose of binders in some sausages, and why oatmeal is a good alternative. I will post some of his notes throughout this pictorial, so that any interested parties can learn from them. 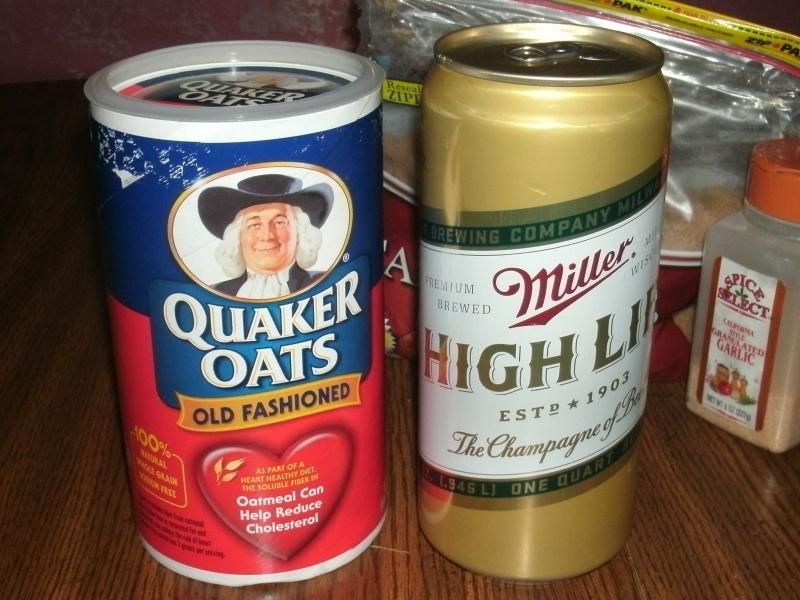 The recipe also calls for the dry ingredients (and meat) to be mixed with water, but Alex recommends beer when using oats as a binding agent:
When using the oats, you need to pulverise them down to a powder-like consistency nearly the same as flour, something easily done in a food processor: 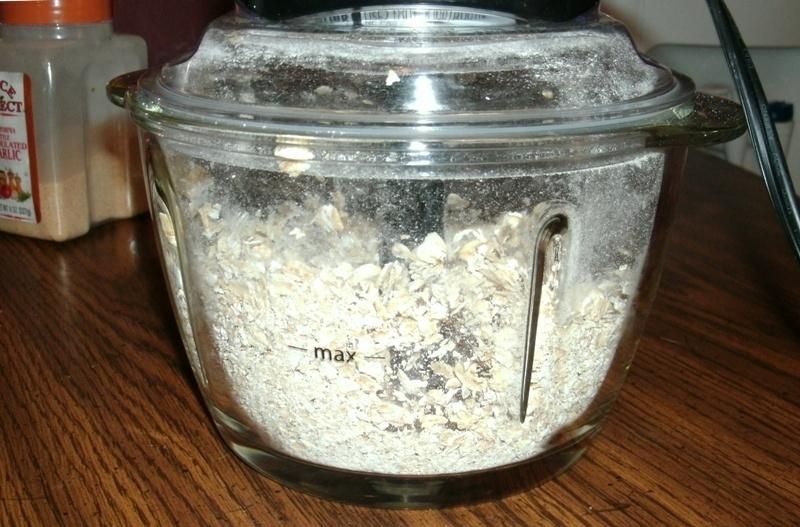 As far as the amount of pulverised oats (oat flour?) to use, the amount in a given recipe for soy flour or other similar product is just fine (in this case, 70 grams (1/2 cup): 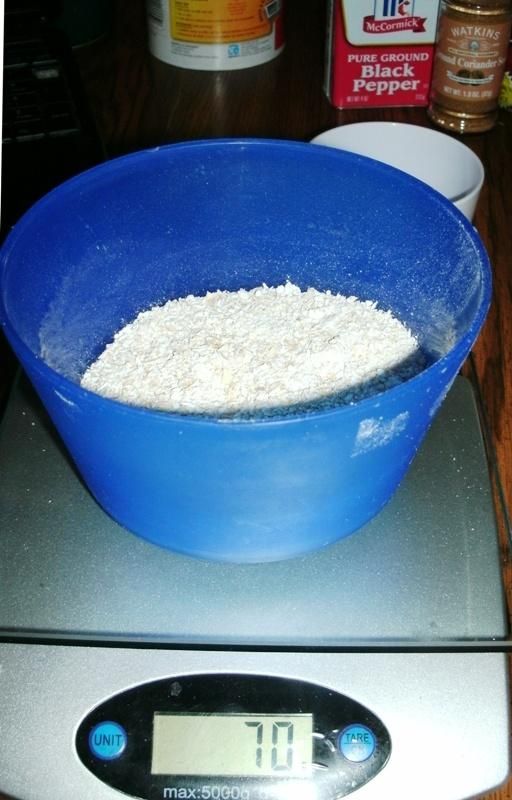 This equivalency also holds true when substituting the beer in place of water (340 grams (1.5 cups)): 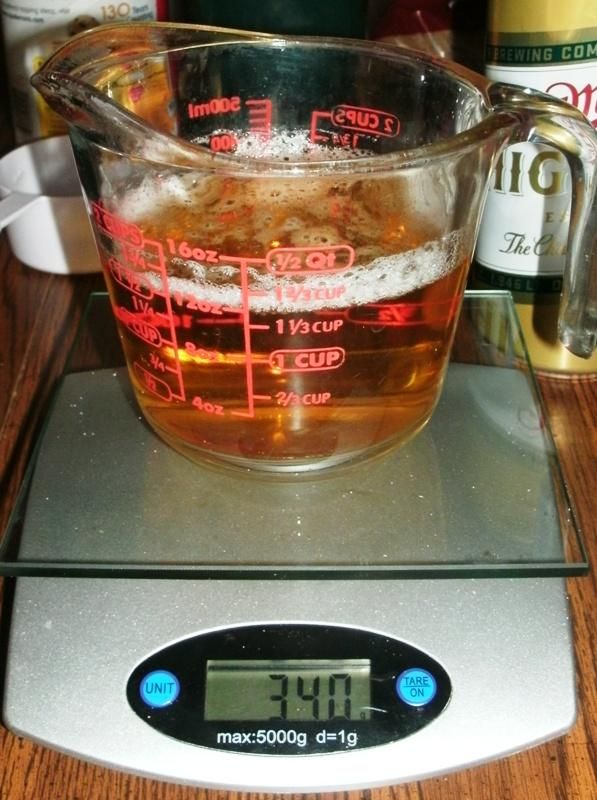 Side Note: if you are developing your own recipe for sausage, or if you are using a recipe that does not provide have any measurements for a binding agent and liquid, a good, generic rule of thumb - provided by Alex - is to use 1/3 cup of oats and one 12-ounce can or bottle of beer for every 3 to 5 pounds of meat. When I began this project, my plan was to use all of my remaining "old" (as in, "before 2012") venison for this project; and combine it with some pork, primarily in order to provide the fat that is completely lacking in venison, but also for some flavour and texture properites. Here's the freshly-ground venison (on the right) and the pork: 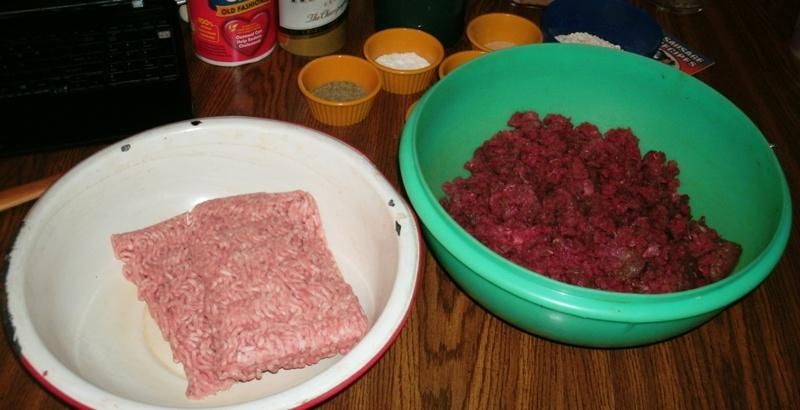 As it turned out, I had 3 pounds of venison, so I procured 2 pounds of ground pork from the grocery for this project: 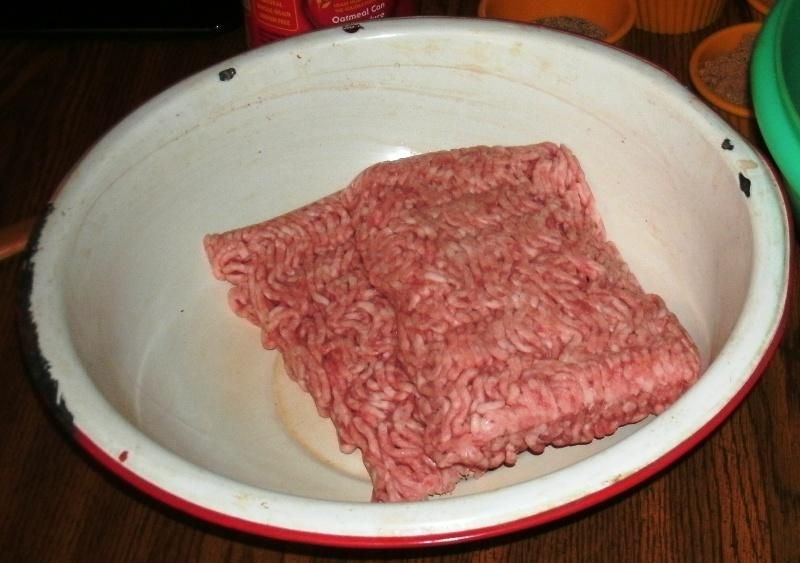 The result, of course, was a total of 5 pounds of meat; I think that the pork was an ounce or two under 2 pounds, so I added enough ground deer in order to bring the total amount of meat to exactly 5 pounds. Two pounds is more pork than the recipe calls for, but as I mentioned, ground deer is extremely lean anyway, especially since mine has no added fat, so things evened-out pretty well. The pork looked to be of a fine-ground consistency; as for the deer, it was all about 90% thawed and - thanks to careful trimming and packaging - as fresh as the day it was frozen. My grinder (a Universal #2) doesn't have a plate with the holes in it; it just has the two rotating doo-hickies (one with three blades (coarse) and another with a dozen or so (fine)). The venison went through the "coarse" blades pretty well, but when I tried to run the coarse-ground meat through the "fine" blades, I just got mush that wouldn't feed through the grinder blades, even though the meat and the grinder were both pretty dang cold. Because of this, I stuck with the original (coarse) grind, but I don't think this will be a problem, for reasons that I will explain below. I ground the meat into and mixed this bologna in a very old, well-preserved, porcelain-lined metal bowl that we "rescued" from my wife's Slovak grandmother's possessions as her children were preparing to auction everything off after her death (don't get me started). We've all probably seen one of these bowls at our grandparents' (or maybe great-grandparents') home or farm; they're white, wide, low and have a blue or red rim. This bowl is for, among other things, MAKING SAUSAGE! You can tell because there's one section along the rim that is chipped from the grinder knocking against it. It will be my "sausage-making" bowl for all of my projects, and I hope that one of my children has enough interest to adopt it as his "sausage-making" bowl when the time comes. Moving forward, I started with the dry ingredients: 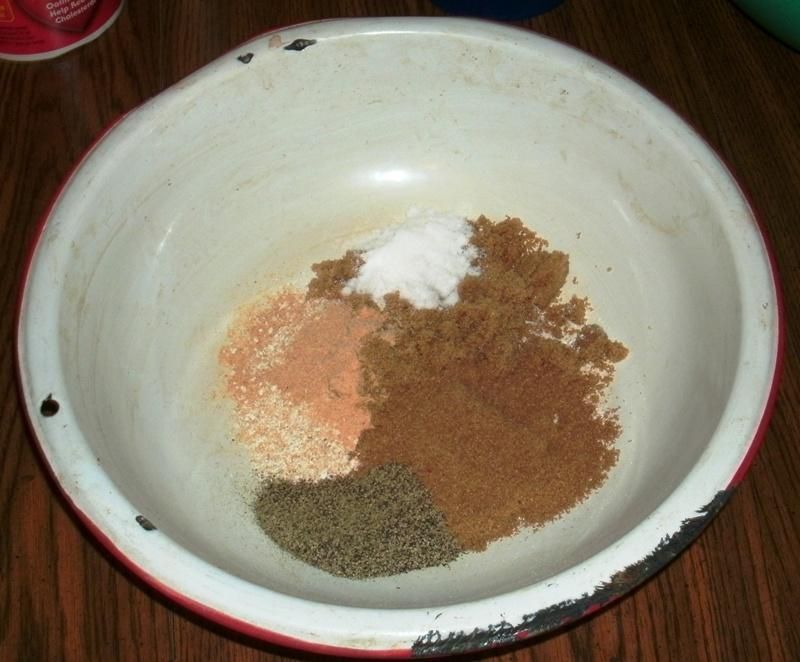 Then added the beer: 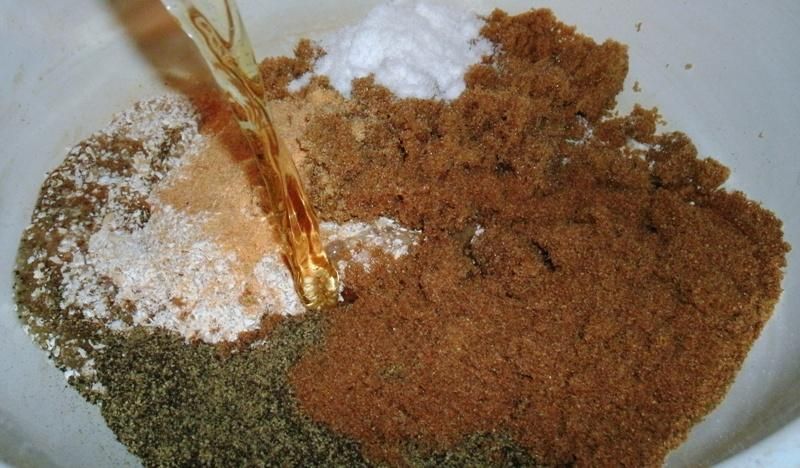 And mixed these together with a whisk into a slurry: 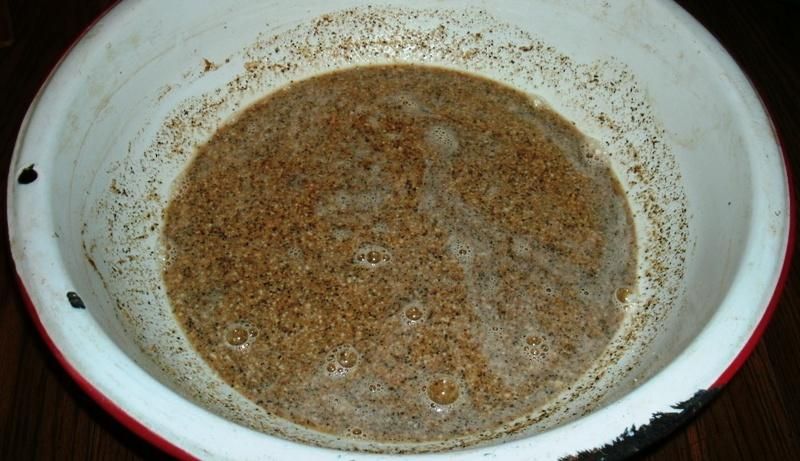 I then added the meat; a little deer at a time, then a little pork at a time, then deer, then pork and so on. I then got a plain, old-fashioned, hand-held potato masher and had at it, mashing and twisting everything together while rotating the bowl:  When using the masher, I transferred the project to a large, wide Tupperware bowl, so as not to damage the porcelain bowl with the metal masher. This mashing action seemed to have the effect of helping to emulsify and bind the meat with the cure, and the mashing/twisting seemed to pulverise it to the point where I am pretty sure I was able to compensate for the "coarse" grind, which really isn't that coarse with venison anyway, since it is a pretty fine-grained meat. A few words here from Alex about mixing meat for sausage and its effect on binding the meat together as well as binding moisture into the final product:
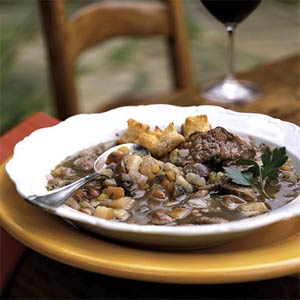
I followed Alex's advice when mixing, making sure to blend everything well and continue through the first "sticky" stage and well into the second "firm-and-spongy" stage. This worked quite well as the meats, beer, ground oatmeal, cure and spices all melded together so as to become one well-integrated mass. Right away, I noticed two things: 1) It was really starting to smell like GOOD bologna; not the cheap stuff that you buy on sale toward the end of the pay period, but the high-end stuff that goes beyond any of the boring lunchmeat brands. The spice combination and amounts seemed a little strange to me at first, but I took a leap of faith, and it paid off big time. Also, 2) This entire operation was really, really much easier than I thought it would be, and once again, as I have done so many times, I kicked myself for not trying this sooner, on the flimsy excuse that the project seemed "intimidating" or that I was waiting for all the "right" stuff, the stars to align and for conditions to be "perfect;" such a waste of time, when I could have been enjoying good food and the satisfaction of making it myself! I see it all the time and am guilty of it myself, here and elsewhere, and not just with charcuterie projects: "Someday.... when I have a fancy set-up. Or when the time is right. Or when I feel ready. Or when my skills improve....Yadda yadda yadda." Trust me on this: you're wasting time! Go to a garage sale and get a 10$ grinder; get started MAKING stuff and building your experience and skills while you save up for a more-advanced set-up. You will be glad you did! Anyway, I got everything mixed and through Alex's two stages, and I really think it came through like it is supposed to: 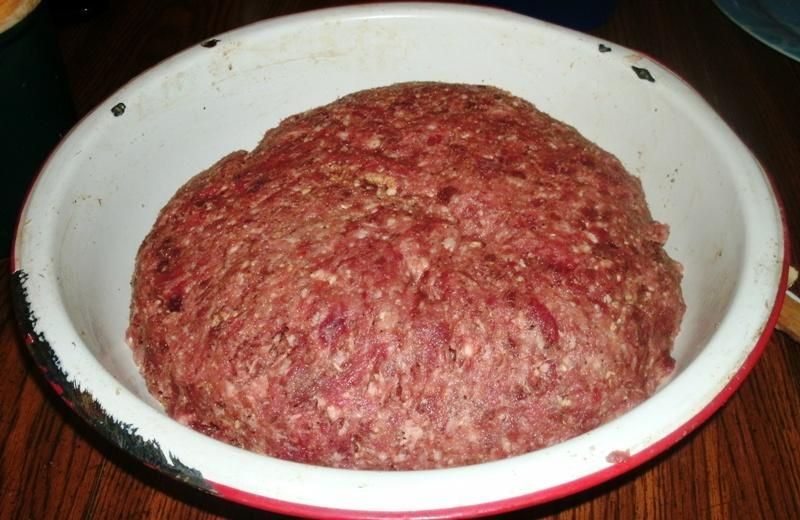 When I was finished, I covered the bowl well with three offset layers of plastic grocery bags, each tied well to make everything air-tight:  I then put the mess into the fridge, where it could cure overnight. The next morning, I weighed the cured sausage and discovered that, all ingredients in total, I had about 6.25 pounds of product. I used a little bit to fry a test patty, in order to check the salt content and over-all flavour: 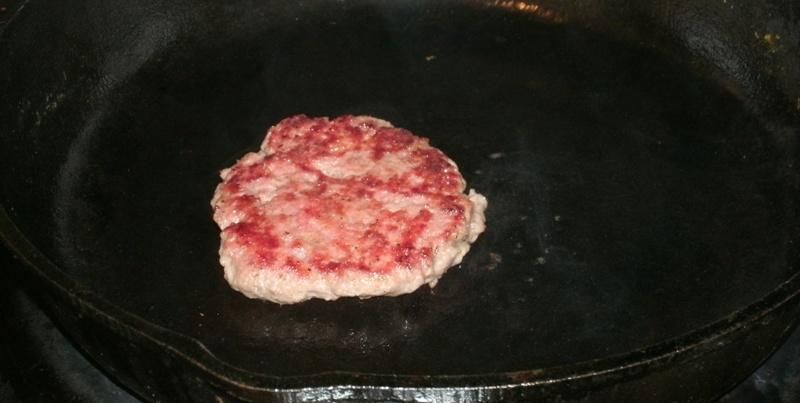 Yeah, it does look good, doesn't it? All seared and sizzling and delicious..... Let's get a closer look: 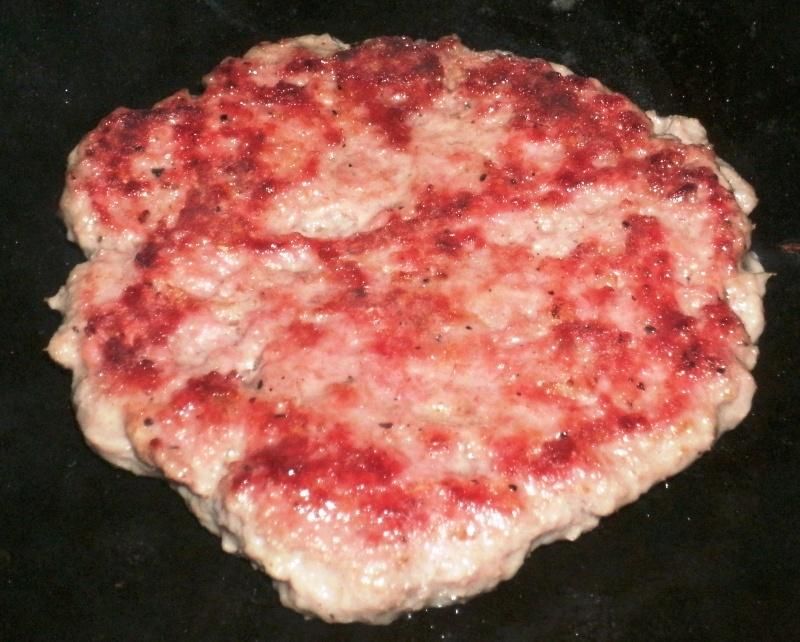 And the aroma was even better ~ truly the essence of fine bologna. But the important thing is how it tasted - was it good? I am happy to report that it was really, really good. It tasted exactly like the really good bologna you can get - not the cheap stuff, but the real thing. All the spices seemed to be in perfect balance, and the beer substitution really put a good spin on it, as well. In fact, I would go so far as to assert that, in patty or link form, it would make a pretty darn good breakfast sausage; the only thing that might have been missing for breakfast sausage would be a little bit of crushed red pepper and perhaps some sage. The texture of the patty is also worth noting; thanks to my grinder, this was almost country-style coarse - maybe just a little finer than that - with a firm-yet spongy quality due to the mixing and binding method. It held together really well, with no hint of crumbliness and no mushiness; just about right, considering it wasn't completely ground into paste ~ All-in-all, nearly perfect, with absolutely no need to adjust! Or so I thought....suffice to say that it was fine as it was in the test stage, it must have gone through a couple of transformations during the smoking stage that changed the final product a little bit. One of those changes was that the texture became more fine and even - much closer to what one would indeed expect with bologna. This was a good change, bringing it in line with the expected final product. The other change, as I mentioned way back at the beginning, was that it seemed that the final, smoked-and-finished product lost some of its saltiness. In the end, it was definitely good, but it could have been just a little better. This is why I suggest adding some salt - perhaps half the amount called for in the recipe - even if you use TQ as a curing agent. But I didn't know this at the time - so, all set to go, I commenced with my first-ever attempt to stuff sausage into a casing of any kind. Previously, I had simply rolled meat into tightly-saran-wrapped logs, where the exterior of the log would make its own "casing" while cooking or smoking (saran wrap removed, of course!); other times I would employ the same general concept with aluminum foil, cooking the meat in the foil. This time, however, I wanted to use actual casings, but I'm currently out of money (another long story), so I couldn't get any ring-sized bologna casings (which probably aren't available for a 130-mile radius around me anyway). Then I remembered that a few years ago, I had bought a "sausage-making kit" from the makers of Little Chief smokers: http://www.smokehouseproducts....ductNo=9740-002-0000  I had completely forgotten I had this! I lost the included "seasoning package" long ago, but I still had the rest of the kit, including the synthetic casings, 10 of them in all, ranging from 50mm to 52mm in diametre. Since each casing accomodates a 10-ounce "chub" of sausage, I deduced that this would work perfectly with my plans, using 8 cases for the 5 pounds of sausage. As it turned out, I forgot to take one factor into account, but it all worked out anyway, as you shall see. The kit also includes a stuffing apparatus (tube and plunger), and this would be my first opportunity to use this tool, as well. One crimp in the plan: it was bleeding COLD that day! It never did get above zero degrees (Fahrenheit) as I recall, and I was worried that this would have an adverse affect the final smoke penetration of the product, since I was not sure how well my Big Chief smoker would perform. As a contingency plan, I could have employed some judicious and prudent use of liquid smoke in order to impart the desired smokey flavour (perhaps 1/2 teaspoon per pound of meat), but ultimately decided against doing so, choosing instead to brave the cold and create an authentic, smokehouse product. Once the smoking stage was complete, I could finish the bologna in the oven to the desired internal temperature. Committed to my course, I began my work, dividing the sausage meat into 10-ounce balls: 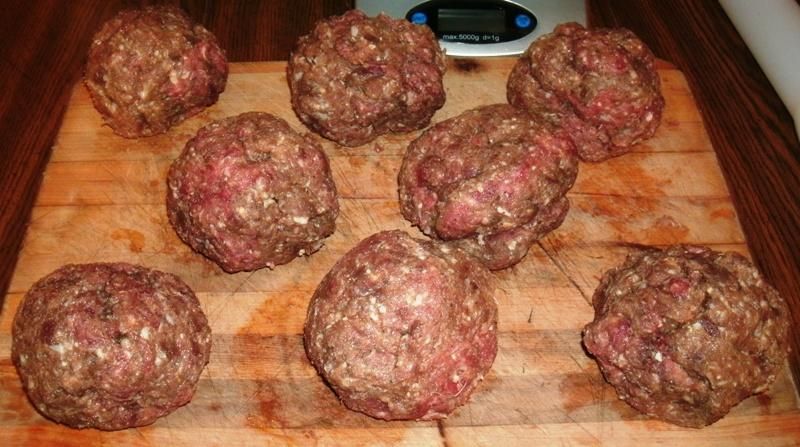 Because of the aforementioned extra pound of final weight, I was able to get a ninth, bonus ball of sausage ~ cool! You might be thinking to yourself that the meat above looks awfully...brown. This is entirely normal; the application of smoke and heat will work with the cure in order to provide that beautiful, final pink hue that is a hallmark of cured meats. Now, it is time to stuff the sausage into the casings: 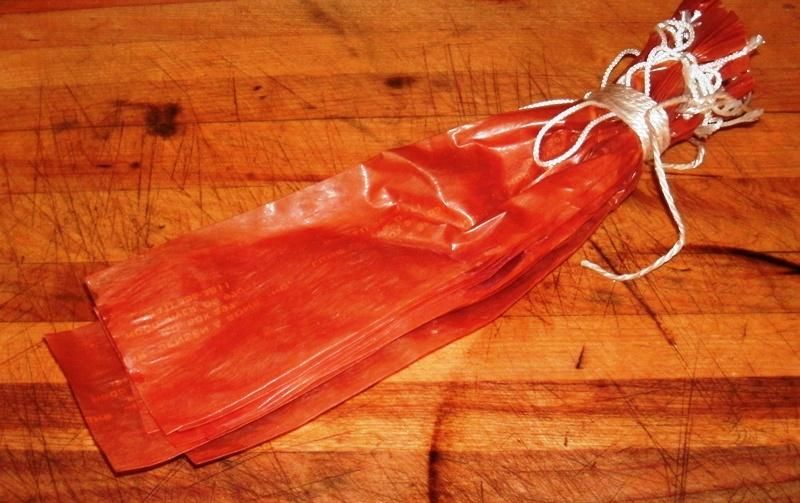 I'll warn you ahead of time: the following imagery appears to be full of innuendo, if you're immature. First, I removed a casing from the bundle, and slipped it over the stuffer as far as it would go: 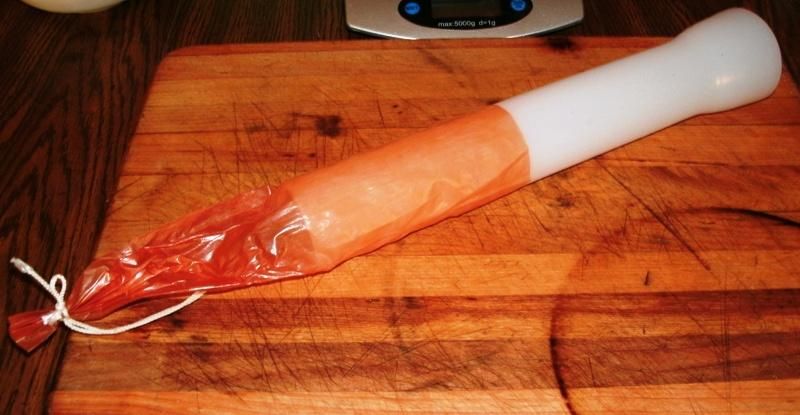 Next, I rinsed it under warm water for a minute or so, until it was quite pliant, and fitted it completely over the stuffer: 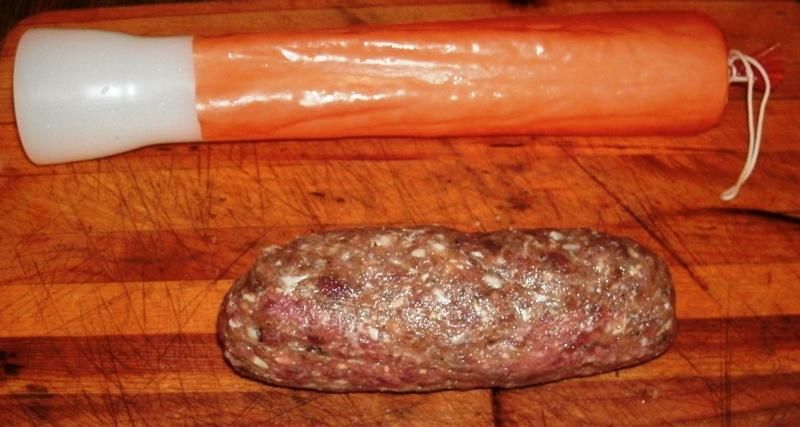 As you can see, I also rolled about half of one of the sausage balls into a cylindrical shape, so as to better fit into the stuffer. Next, I stuffed the meat in the stuffer, using the plunger to tamp the sausage down and compact it in an effort to eliminate open spaces and air bubbles: 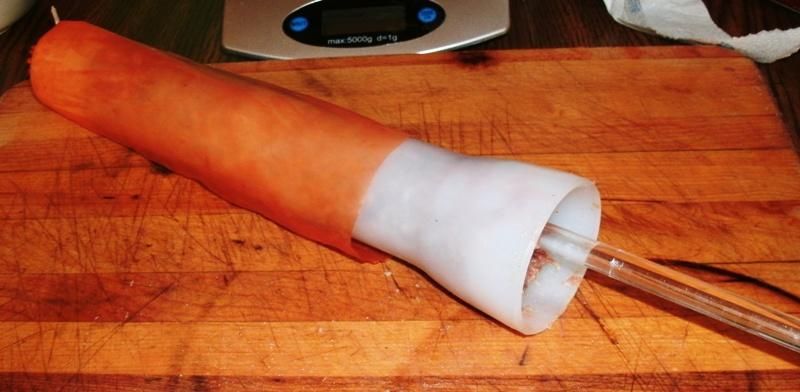 As you can see here, this tool actually works pretty well for what it is designed to do: 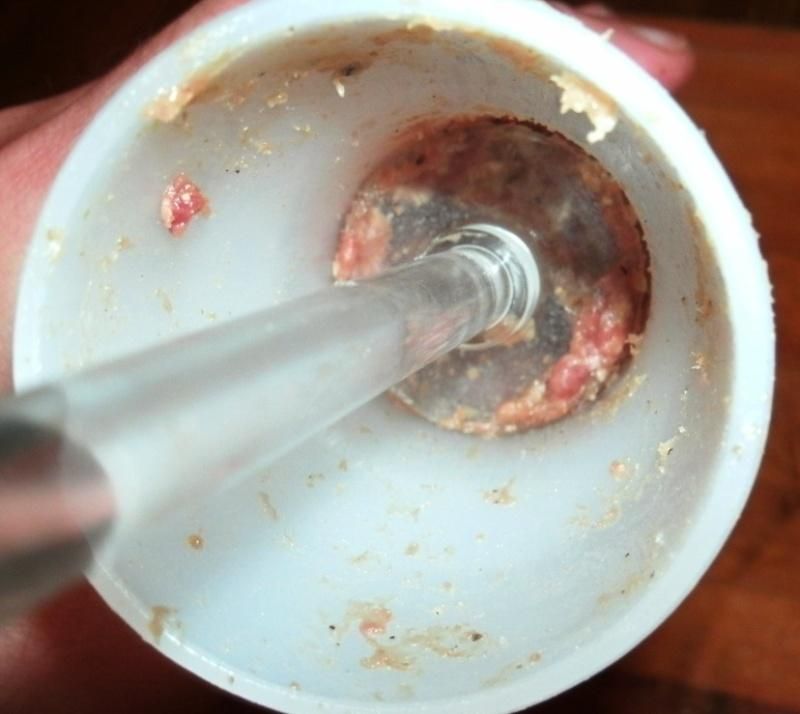 Then, I firmly and steadily pressed the sausage through the opposite end of the stuffer and into the casing, keeping everything as tight and compact as possible: 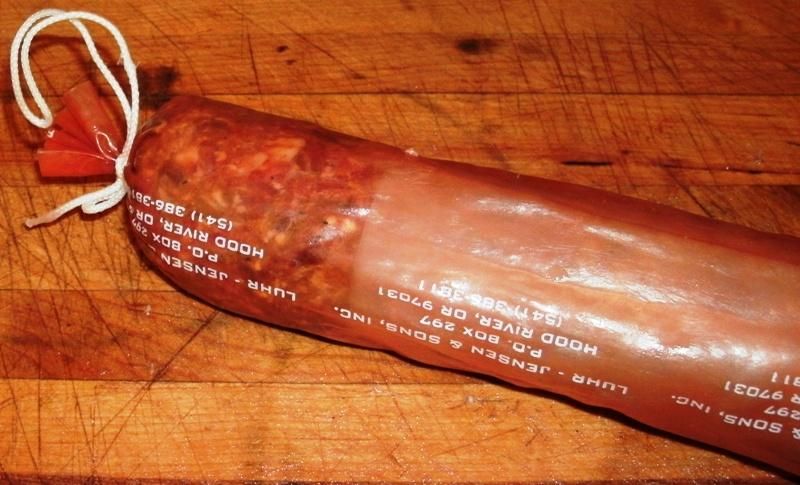 Here is the fully stuffed casing: 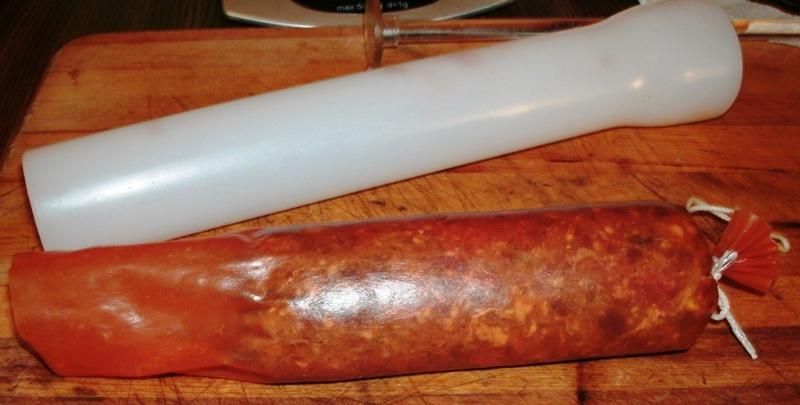 And here it is again, twisted off and tightly tied: 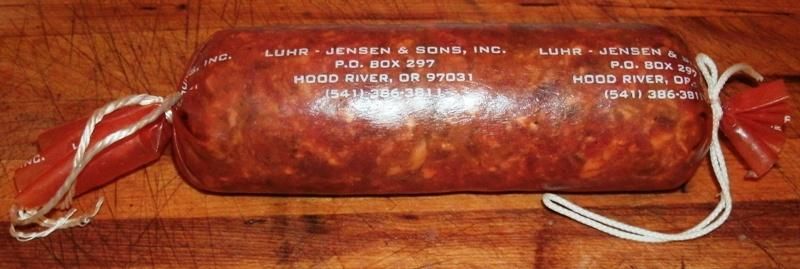 I inspected the chub - and all subsequent ones - for any air bubbles under the casings; if i found any, i pricked them with a sterilised pin and re-arranged the sausage in the chub so that the air was squeezed out. There are two reasons for this: 1) for aesthetic reasons, so that the final product is uniform is not mis-shapen; and 2) air bubbles could potentially be a breeding ground for nasty little creatures that might make you sick. The risk is very small, due to he sanitary and curing steps observed when making sausage; however, it is a simple thing to do and provides a little extra insurance in return. The casing will shrink-dry over the hole as it heats up during the smoking and cooking processes, and that will be the end of that. That's really all there is to it - much easier and less-complicated that I had imagined! I then repeated the stuffng procedure eight times, for a total of nine 10-ounce chubs. During the first time, I noticed that the sausage didn't "feed" into the stuffer very well, so on subsequent efforts, I rolled it out longer and narrower: 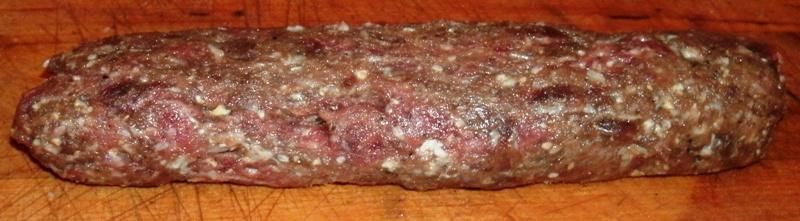 Here are all nine chubs, stacked and ready: 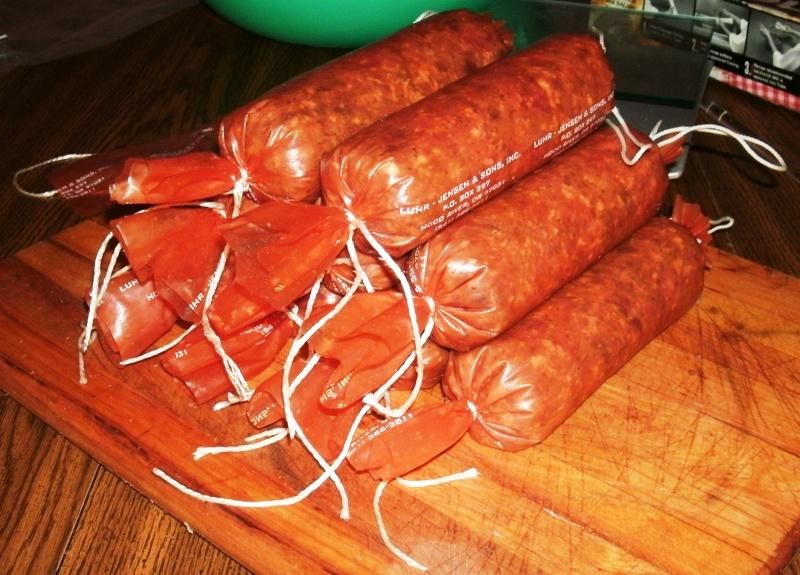 Ready for what, you ask? To be tied to the top of the smoking rack, of course: 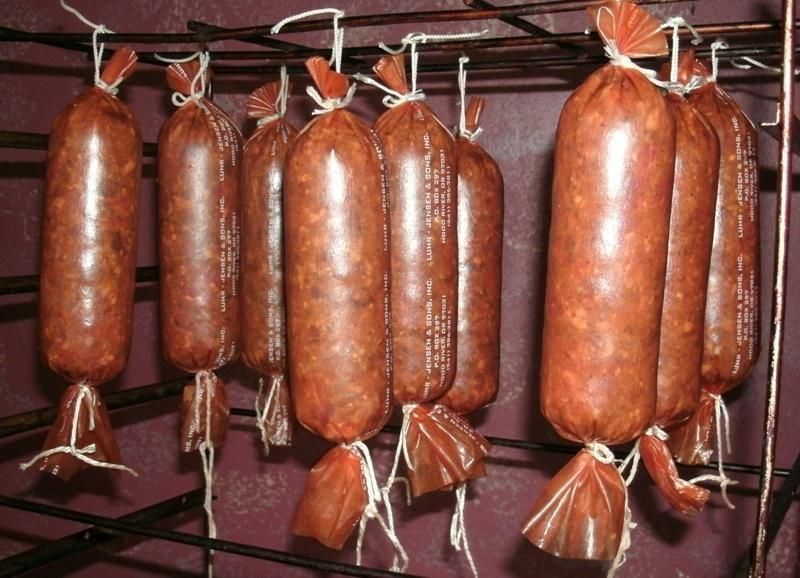 I then let them hang for about an hour in order to dry a little, so that they could develop a good colour later on. I was delighted to see that I had just enough sausage meat left over at the end to roll four breakfast-sized "links;" I spent the time frying them up for lunch for my sons and me - outstanding flavour! Next came the time to see if I could get some smoke into the meat, using my Big Chief smokehouse; it looks just like my Little Chief, pictured here: 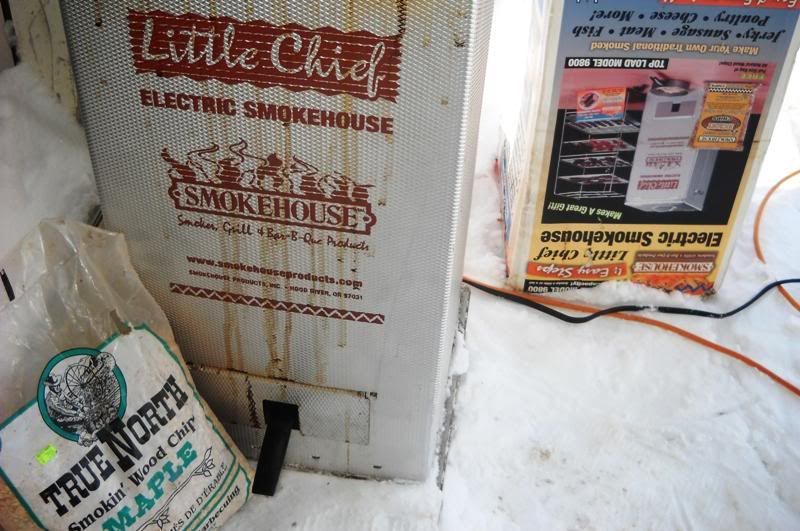 Except it is just about twice as wide, and burns a little hotter. The picture above shows a bag of maple wood chips, but for this occasion, I actually used hickory: 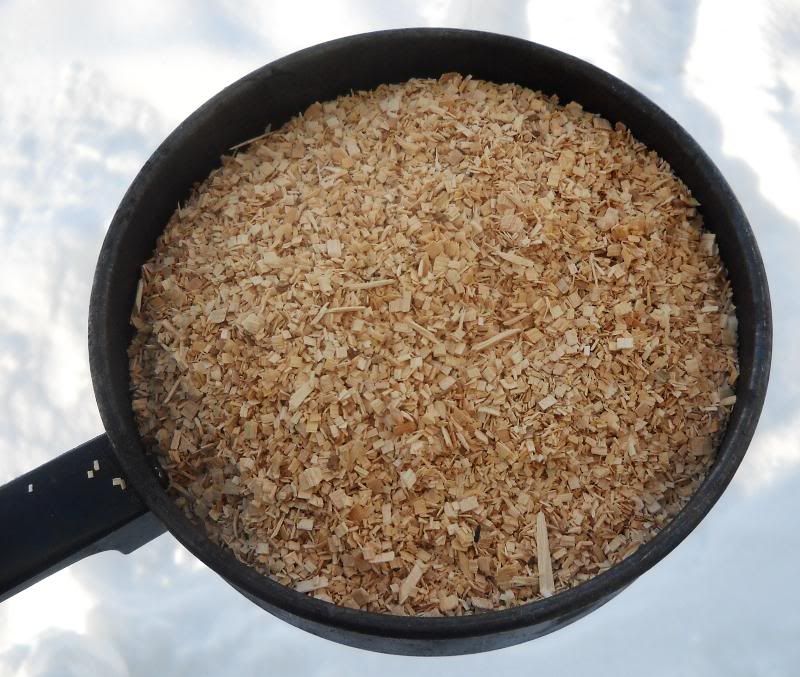 Even though the smoker and smoking chips were different than pictured above, the day was exactly the same - lots of snow on the ground, and cold! In spite of this, it seemed like it got warm enough inside the smoker to get some good action, so I gave the bologna 4 pans' worth of smoke, which took approximately 5 hours. When I judged that the smoke was probably good, I brought them in and finished them in the oven at 170 degrees Farhenheit: 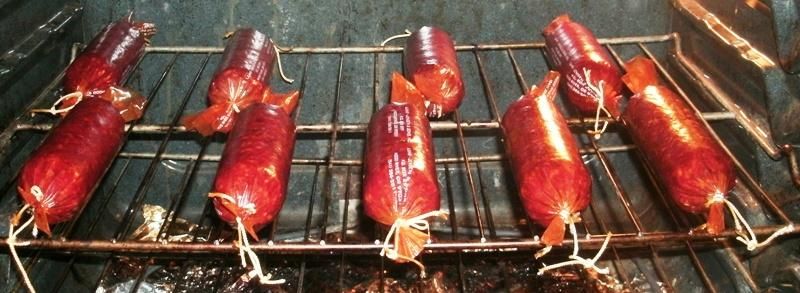 Following the instructions outlined in the recipe, I monitered the internal temperature of each chub of bologna until it reached 155 degrees Fahrenheit: 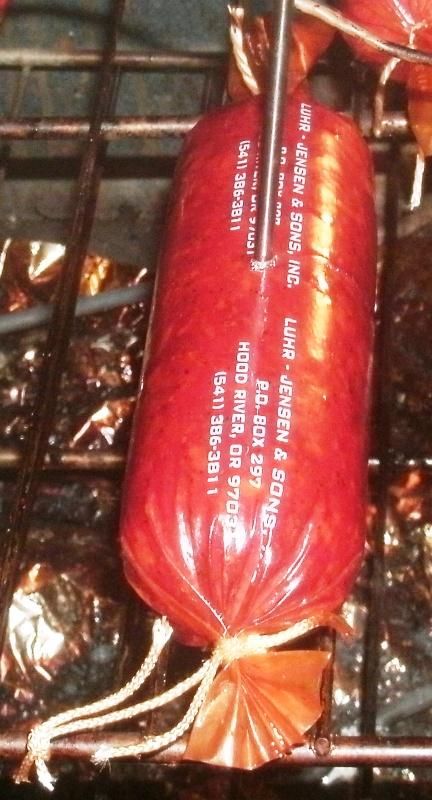 As they reached temperature, I plunged them into a 180-degree water bath: 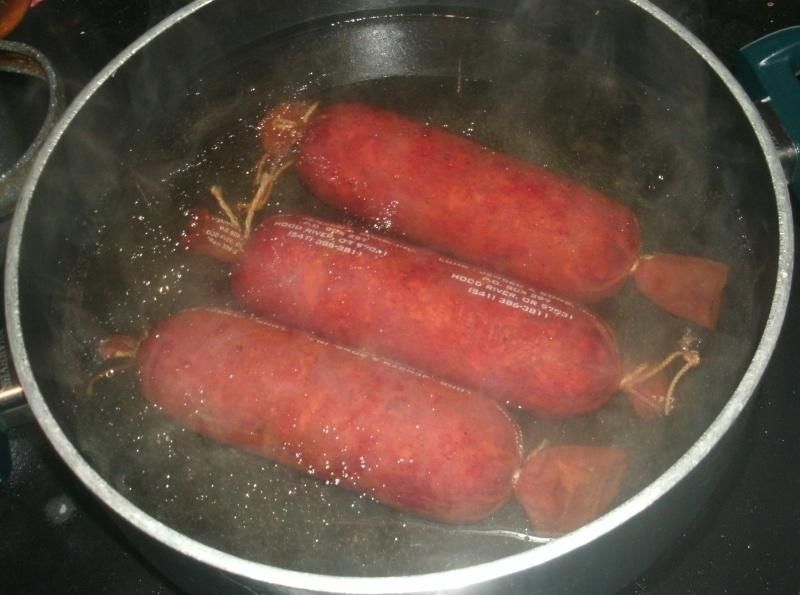 This step is supposed to ensure that the casings will not stick to the bologna. The recipe says to leave them in there until they float, but this never happened, possibly because of the weight or density of the chubs, which are heavier than the traditional "rings" that bologna is shaped into; no worries, I left them in for a few minutes, then plunged them into an ice-water bath: 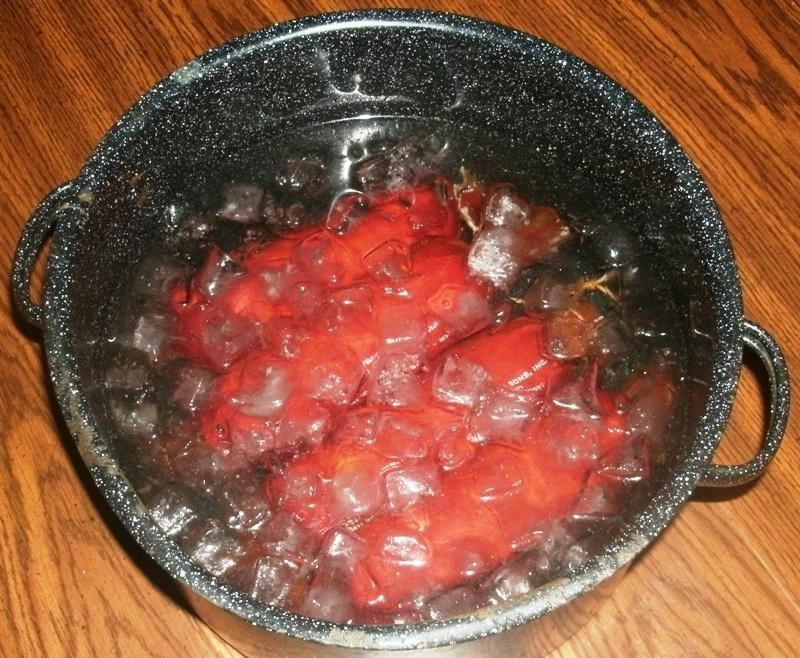 This stops the cooking process, so that the bologna does not over-cook; it also keeps the fat from melting out of the bologna. I left the chubs in the ice-water bath for about 10 minutes, then gently wiped them dry and set them in the oven (which was now turned off and rapidly cooling) with the door open: 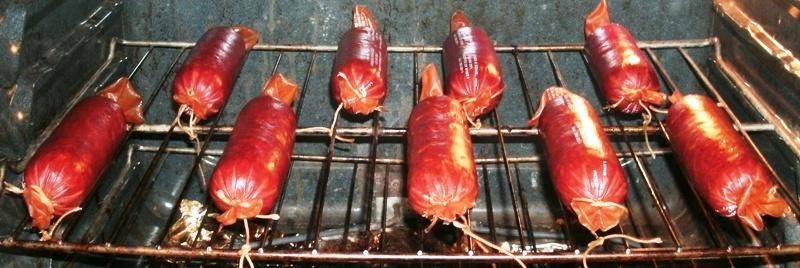 The purpose of this step was simply so that they could finish drying, come to room temperature, and "bloom" for good colour. After about an hour, I removed the chubs of bologna and put them in the refrigerator, intending to sample and evaluate them the next day, after the flavours got a chance to get acquainted. After that, they could be vacuum-packed and refrigerated. That's it! Honestly, how easy is that? The power was out the next night, so we didn't get any "sample and evaluation" pictures. The night after, we were able to break one open and get a good look (and some pictures), and it looked to me as though things turned out very well. Here's a finished chub of bologna, ready to be cut and looking pretty good: 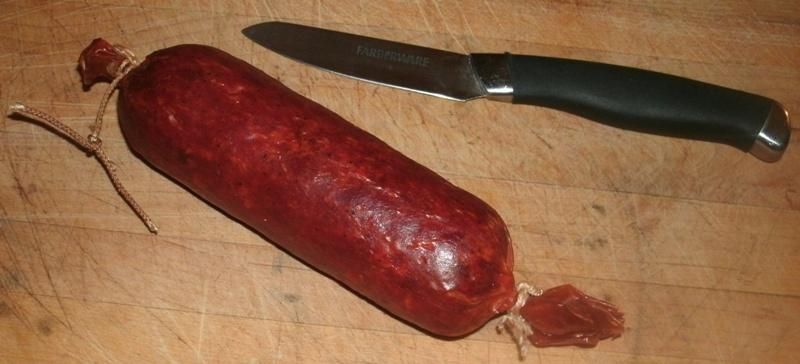 Here's a first view of the internal product, showing what I feel to be very good colour: 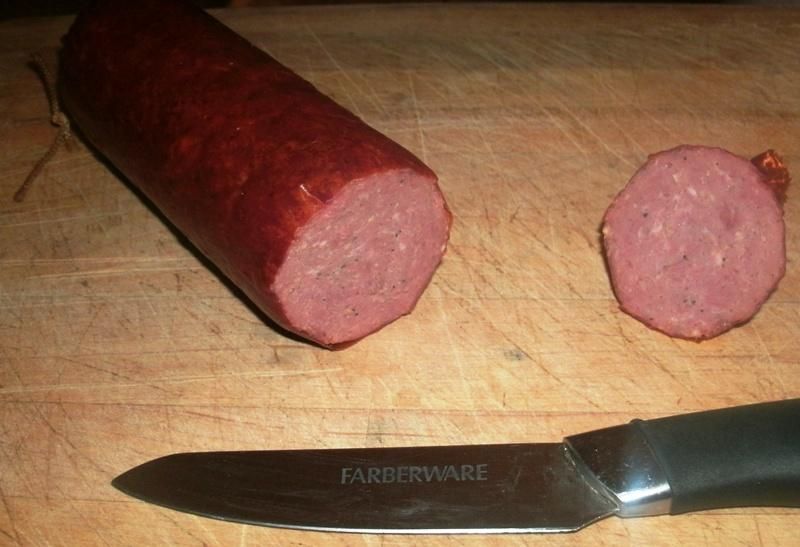 A beautiful pink, exactly like it should be, with flecks of fat and spices. There wasn't much to do except quit looking, slice some up and give it a try: 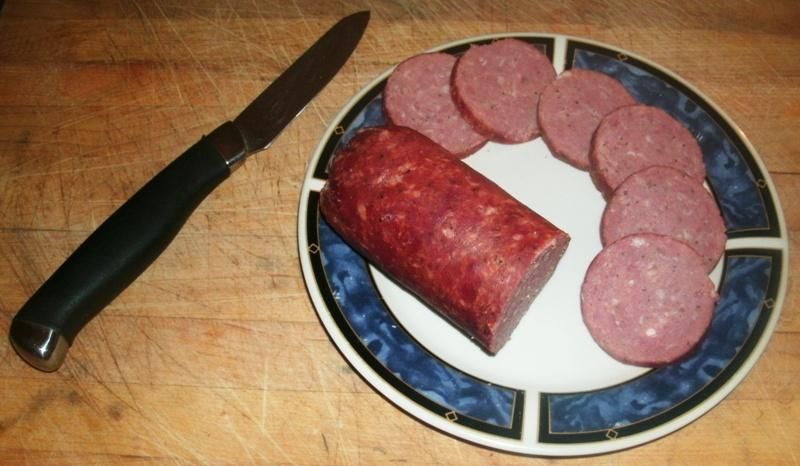 Notes and impressions: Were there any issues with the casing sticking to the bologna? Nope - it peeled right off - just like it was supposed to - with absolutely no effort. The meats were perfectly bound and quite moist - this, to me, is the final word on the oatmeal/beer issue. It works, and works very well, when done right. Not having any specialized sausage-making ingredients available to me, it is a perfect, natural, readily-available substitute. The bologna chub was firm and sliced very easily with no dryness or crumbliness at all - it reminded me of slicing a summer sausage. From what I could see, the combination of ground oats and beer worked perfectly as a binder, as advertised. The texture of the bologna was not totally smooth like commercial bologna, but it did not have a coarse texture like a commercial bratwurst or kielbasa, either; it was somewhere in-between, with very good body and mouth-feel, not grainy at all. The texture reminded me of a softer version of summer sausage, but with much less fat; another testament to the oatmeal/beer binding and careful attention to mixing during the preparation stage. The over-all flavour was very good; the coriander and pepper came through well and it had a nice, mild savoriness that was really nice. The hint of sweetness from the brown sugar was just right to bring everything into balance. The spices really make this bologna what it is, and I can't stress enough that even though it looks a little heavy on coriander (and maybe pepper), trust the recipe where those spices are concerned! The same goes for the brown sugar, which might seem strange, but it does its job of providing counterbalance and really brings this around to a superior product. The beer not only worked very well with the ground oatmeal to hold the product together and retain moisture, but also - as far as flavour goes - came through just right, adding a little extra something to the background that, to me, gave it a nice German character. The smoke flavour was not present as much as I personally would prefer; the flavour was there, but really hanging in the background - farther back than optimum, I think. I don't know if this was due to the extremely cold outside temperatures or something else, but I think the next time the temperature is below 20 degrees, I’ll simply add liquid smoke and do it in the oven, and see if there is a difference. I think "normal" people (who are not as obsessed with that wonderful, old-timey, sweet-savory hickory smoke aroma and taste as I am) would find the smoke level to be just about right, however, I believe it could definitely benefit from just a little more, and smoking in better weather might certainly help to achieve this. I personally would have liked more garlic, but that's just me. I'm not sure how much more, but this is one place where I am willing and eager to experiment. Pulverised garlic cloves or home-made granulated garlic might work better, since the commercial, "bargain-rack" granulated garlic is probably lacking in intensity. The one big issue for me was that, surprisingly, the bologna did not quite seem salty enough. Because I used TQ, which has a large percentage of salt compared to other curing agents, I did not add any salt. The resulting bologna did taste like it needed more salt, and I am not sure why. I suppose it is possible that the oatmeal soaked up the salt - or, it is also possible that the bologna simply needed salt added. The salt level seemed just right when I did the fry test, so I am guessing that the "cooking" process somehow had some effect, but I am not experienced enough to know the particulars. The next time I make this, I will add salt - half the amount called for in the recipe - and see what happens. After trying it, I do not really see any point in the "soak in 180-degree water until it floats" part of the instructions. For one thing, it never did float, and for another, I think it might have robbed some of the salt and smoke flavour away (I could be wrong about this). In any case, from now on, I will simply smoke it, finishing in the oven if necessary, then do the ice bath for a few minutes, then dry and bloom for an hour. Having said that, first impressions are that this is very good stuff, for sure! I really think this recipe comes close to nailing it; after trying it once, I should be able to tweak it right in line with my tastes and available ingredients to give me a "perfect" (for me) house bologna recipe. In fact, I’m going to see about getting some sort of longer, natural 52-55mm casing that will fit my stuffer so I can make rings with this the next time I make it. 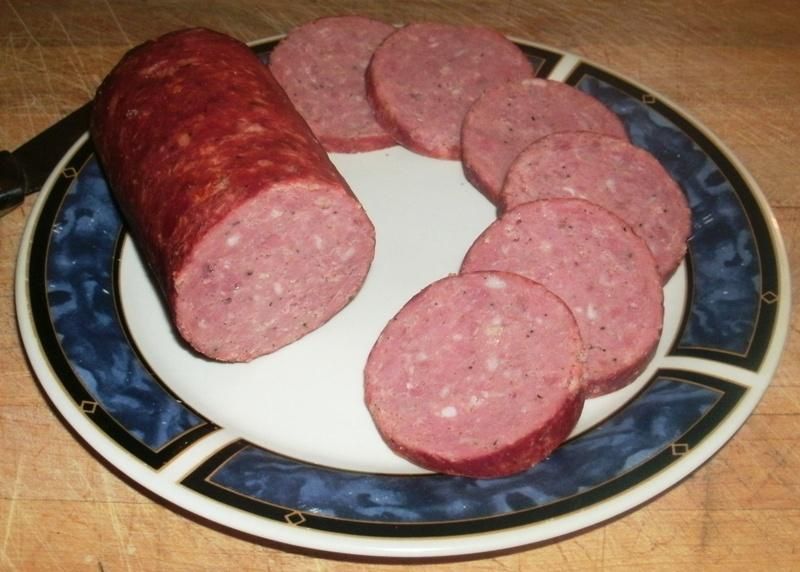 With that, I absolutely would recommend this recipe as a starting point for anyone looking for a good, traditional bologna. If you do want to try it, I suggest making it as closely to the recipe as possible the first time, adjusting for your preferred cure or binding product if necessary, so that you have a base line from which to tweak, if needed, to your individual tastes. After that, I think a person can experiment with fat, grind and texture according to their preference and it will be excellent no matter what - just stick close to the flavour profile and spice ratios, and I am sure that you will love it. | ||
|
| one of us |
Tasunka, thanks for your exhaustive report. I have never tried making sausage either. After reading your post, I may have to. I have a Lil Chief, and I know some folks build insulating boxes to get a little more heat. There is hope, even when your brain tells you there isn’t. – John Green, author | |||
|
| one of us |
Good morning, Bill - and thanks for the kind words. I am really pleased with the way this one turned out, and am glad that I am able to share it with anyone who might be thinking about giving it a try. This sausage really has an old-timey aroma and taste to it, and for some reason this nostalgic atmosphere also comes into play when you're actually making it as well. Give it a shot - 4 pounds of beef to 1 pound of pork isn't that bad at all! I think I'll also be building an insulating box, using a frame of 1 x 1s and that white ceiling tile. I've seen where this works pretty well for this purpose, and as long as one manages the air flow and smoking temperatures, it should work very well. But even without it, the Little/Big Chief smokers are perfectly designed for projects like this, and this can be done in all but the harshest weather, even if you have to finish it in the oven after smoking. If all else fails, you can use liquid smoke (as I probably should ahve, considering my weather), and the results will be AMOST as good. Anyway, get some beef (or vension) and a little pork, and try this! Any questions, just let me know ~ Ron | |||
|
| One of Us |
You did a wonderful job with explaining the whole process, in detail " GREAT JOB " PAPI | |||
|
| one of us |
thanks, papi! | |||
|
| One of Us |
Looks damn good. Would look better in a cast iron skillet fried up nice and brown with some caramelized onions. Never could like bologna unless it was fried. | |||
|
| one of us |
Agreed, mike - and based on that, you might find this interesting: Just a quick footnote to this pictorial: I took a chub out of the freezer this past weekend, thawed it in the refrigerator overnight and gave it a try. I'm not sure if the elapsed time (a month or so) gave the spices a chance to equalise, or if some other factor came into play, but it seemed to me that the flavours were in much better balance on this tasting. The garlic was much more pronounced and the bologna even seemed much, much closer to "just right" where saltiness was concerned. I still wish I would have applied a little more smoke, but once again, that'smy failure and not the fault of the recipe. The other flavours and spices - pepper, coriander; even the brown sugar and beer - were still right there, and hadn't diminished at all. I really don't have any better way to say it, except to say that everything seemed to have come into almost-perfect balance. With part of the chub, I sliced it a little thicker than "thick-cut" bologna, and fried the slices in a pan for a sandwich. The slices also browned very well, which is important; the pink, cured-meat colour went very well with the caramelised browns. This idea turned out to be very, very good, and it brought the flavours out even more, along with a slightly-crisp texture for the surface of the slices, which held together perfectly, even as little pockets of fat rendred out. Based on this, I probably wouldn't add too much garlic and salt to the amounts listed in the recipe; maybe just a pinch or two, but that would be all, and only because of my personal tastes. I think anyone trying this would do quite well using the amounts listed. | |||
|
| One of Us |
Nice write up. There are two varieties of Bologna made by the PA Dutch, one is spicier called Lebanon Bologna and the other is Sweet Bologna. These are usually stuffed in larger casings and then sliced as lunch meat. Ring bolonga is usually the spicier bologna. As a kid, I grew up just north and east of the Daniel Weaver Bologna plant. On a windy day the smell of smoke from the plant would blow past my house. My personal preference is for the sweet but my wife and kids prefer the Lebanon. At one time, there was 3 different companies producing Bologna in Lebanon county but over time they were bought out and merged into one company. The city of Lebanon actually has a Bologna drop to bring in the New Year. They use a 7 foot bologna. Now I need to fry a piece of bologna for breakfast. | |||
|
| Powered by Social Strata |
| Please Wait. Your request is being processed... |
Other Topics Recipes for Hunters

Visit our on-line store for AR Memorabilia