
 The Accurate Reloading Forums
  THE ACCURATE RELOADING.COM FORUMS
  Rifles
  Single Shot Rifles
  Dismantling a Ruger #1
Go  | New  | Find  | Notify  | Tools  | Reply  |  |
| One of Us |
I am going to dismantle my Ruger # 1 for some maintenance. Is there any "tricks" / procedures / no nos I should be aware of. TIA --- John303. | ||
|
| one of us |
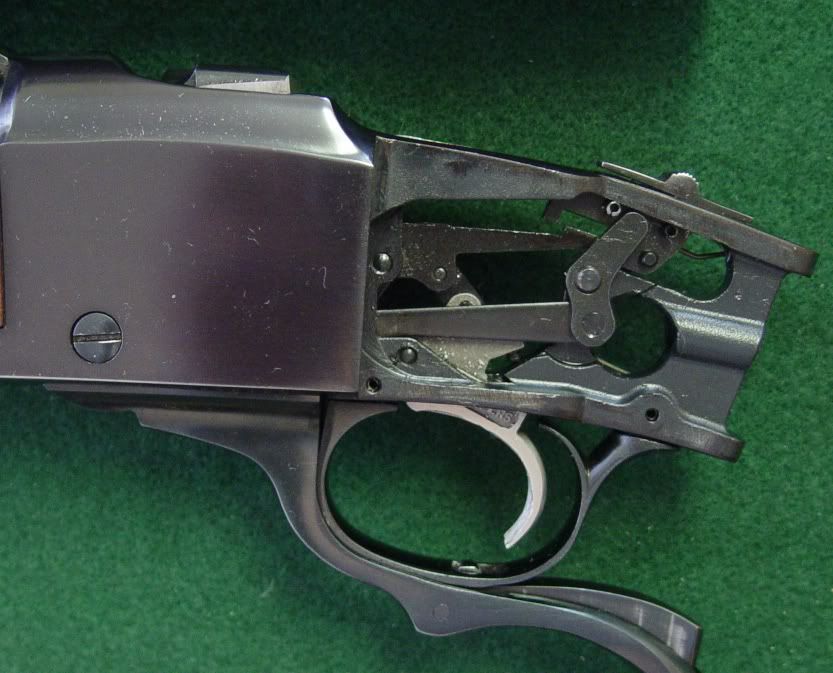
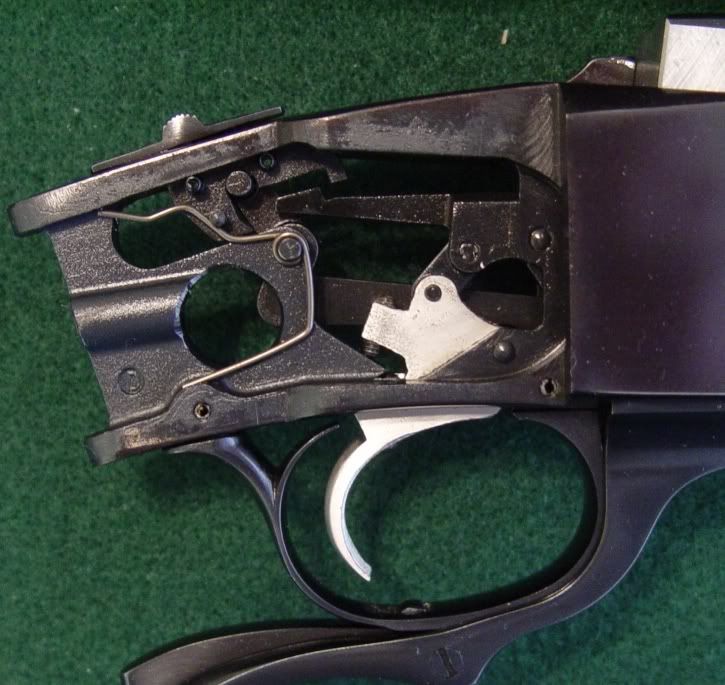
Just took one down yesterday to de-blue and send to get case colored. Do a search on Google for Ruger No 1 disassembly and you will find what you need. There are several videos showing stripping the working parts, and a couple of guides to complete disassembly regarding changing the trigger. The only problem I had was the last pin I took out. There is a relatively large pin that holds the safety bar in place. It is two diameters with a big head on the left. The small end is grooved to hold the safety spring. This is the only pin that comes out from right to left. A couple of the small pins were tight (the ones on the trigger guard) and I had to grind a punch down to fit, but no problerm. The last one mentioned above wouldn't budge. I hit it with a punch, then literally pounded on it with a brass hammer while using a plastic backing block. Wouldn't budge. The pin is really hard and tough and did't deform at all. In desperation, I put it in a 6 ton benchtop hydraulic press and put quite a bit of pressure on it, and felt it pop loose. It came right out then and seems to want to go back in normally. This is a 1976 rifle and likely hadn't been disassemble before. I suspect some heat would have helped, but I had the press so preferred that method. One thing that will really help is having a second rifle to use as a reference on reassembly. There are several small hidden springs and a several small parts. I could do it today, but likely not when the action returns. If you are not going to disassemble the trigger group, it is easy. Be sure and notice which way the two pieces of the link are oriented. | |||
|
| One of Us |
If you’re not changing out the trigger I wouldn’t take the trigger assembly apart. As Art S. points out, that assembly can be a pain in the butt to get apart and back together. To pull the falling block, follow the directions in the manual. It’s going to be a little bit of a struggle to get it back together the first time but you’ll get it. There’s nothing magic about it.   | |||
|
| one of us |
Been there, done that. Paul B. | |||
|
| One of Us |
My proceedure goes like this....remove stock and forearm, drop block, spray liberally with WD-40 or something similar, let drain, wipe off excess, close block, replace stock and forearm, put back in cabinet. Done. DRSS | |||
|
| One of Us |
MidwayUSA has some take down videos posted on UTube.. NRA Life ASSRA Life DRSS Today's Quote: Give a man a fish and he eats for a day. Give a man a welfare check, a free cell phone with free monthly minutes, food stamps, section 8 housing, a forty ounce malt liquor, a crack pipe and some Air Jordan's and he votes Democrat for a lifetime. | |||
|
| One of Us |
I have one in 458WM that I'm recessing the safety on. The only hassles are: #1, Getting the trigger assembly pins back in. There's 2 VERY small springs that are surprisingly stiff that are working against you. DON'T DROP THEM!!! You'll play hell finding them. Ask me how I know. #2. Getting the hammer spring assembly back in can be a real PITA. Pay attention to how it's oriented when you remove it. The "knob" goes toward the bottom of the action (facing outward). It helps (at least for me) if the action is turned bottom up. Insert the "knob" into the slot in the hammer and tilt it up. The other side will then slide right in. This gave me fits for about 45 minutes the first time I tried it. Last but not least...#3. This is the biggie. Sometimes when removing the breechblock from the action it just comes out unexpectedly and ends up on the floor in pieces (ask me how I know this too). Some of them are quite small. I wouldn't recommend disassembling the breechblock unless absolutely necessary or unless you're just a glutton for punishment. Getting the firing pin and spring, and hammer transfer block back in could make the Pope cuss. It usually doesn't need complete disassembly anyway. Just spray it out with some solvent (brake cleaner works very well) and oil it. When you go to put the breechblock assembly back in the action, I find it helps to have the action bottom up and stick a finger through the top of the action and help keep all 5 parts of this assembly (breechblock, breechblock arm, lever, and lever links plus the ejector roller) in place and oriented with each other as one piece. Having a 3rd hand helps too. The bottom of the extractor sticks out away from the action (due to it's spring, be careful not to lose it either) and has to be moved aside with a small punch or something. It's all pretty easy once you do it a few times. You just have to get inside it and pay attention to how everything comes out and don't get in a hurry. The Gun Digest Book of Firearms Assembly/Disassembly Part 4 (Centerfire Rifles) details the whole process as does many videos on youtube. | |||
|
| One of Us |
Ruger's web site, Technical Tips, has video on the No.1. Does not go into the trigger mechanism, but overall good instructions on taking down a No.1/3. Have rebarreled three in last year and found that the tolerances are much closer on some than others. | |||
|
| One of Us |
I thought I had to dry out the insides after I sat in the rain all day, waiting for deer to come by. It took me a while to get it back together, and I decided I would never take it apart again!!! How do you dry out the action when it gets wet? Use a blow-dryer?? | |||
|
| One of Us |
If you sat in the rain all day, take the butt pad off, unscrew the stock bolt, take the stock off and let the action dry out, spray it down with a spray lube/anti-rust product. this is not hard. WD-40 works just fine. | |||
|
| One of Us |
I have done it, and prefer not to do so again. If I remember correctly a third hand would have been a great help. I have changed out triggers on all that I have, the lighter calibers up through 30-06 have Kepplinger set triggers. My two tropicals have modified Moyers 3 screw triggers. Those two were rather rough castings, so I ground and filled off the grooves on the front face, then contured and polished to feel best, like the rounded trigger face on a high grade shotgun JJK | |||
|
| Powered by Social Strata |
| Please Wait. Your request is being processed... |
|
 The Accurate Reloading Forums
  THE ACCURATE RELOADING.COM FORUMS
  Rifles
  Single Shot Rifles
  Dismantling a Ruger #1

Visit our on-line store for AR Memorabilia

