30 March 2009, 03:17
buffybrI use Dem-Bart tools and do 20 lines per inch patterns. The stock is held in a homemade checkering cradle. I also use one of those magnifying lights to help me see the work.
To answer Arigun's questions, I first cut the borders to about 1/2 depth. Then I line the pattern with two layers of masking tape, trimmed on the borders with an exacto knife. This reduces over-runs. I use a tooth brush throughout the checkering process to remove wood dust from the checkering, and to apply finish to the completed pattern.
I completely finish a new stock before I start checkering. This keeps my sweaty little hands from staining the rest of the stock while I am doing the checkering. Then I draw the pattern onto the stock with a Ultra Fine Point Sharpie pen. I also mark the first two guide lines using a flexible straight edge.
Here's one of the stocks that I checkered this winter. This picture shows the borders and guidelines for one side of the grip. Note that the center point of the front of the pattern is drawn but not cut.

This shows the tape protecting the borders and the parallel cuts started in one direction. Do not make these cuts too deep until all cuts are made in both directions.

Here I've made all the initial cuts in one direction.

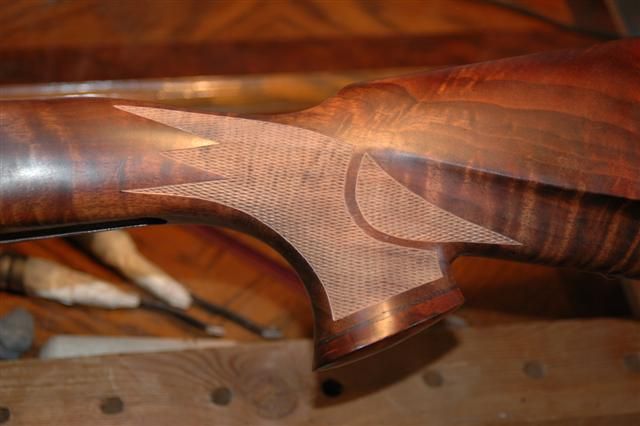
Here all the cuts have been made in both directions, and the center point of the front of the pattern was formed by extending the parallel cut lines to the desired location.

Here's the completed grip pattern with the tape removed.
And with two coats of Tru-Oil, applied with a toothbrush.

Here's the forend pattern with the borders and guide lines. That light colored piece of wood has two sharpened nails that I use to scribe the top of the pattern parallel to the top of the stock.

Here's the forend with tape protecting the borders.

Here's the finished forend checkerng with two coats of Tru-Oil.

