
 Guns, Politics, Gunsmithing & Reloading Gunsmithing
 Go | New | Find | Notify | Tools | Reply |
| My gold inlay technique for lettering. Photo heavy! | Login/Join |
one of us |
Duane Wiebe approached me with the idea of doing a funeral style engraving job on his client's shotgun. The client is a professional hunter who has been using the shortened 10ga. Aya double for many years as his backup gun for cats. He decided to have Duane turn it into a proper African stopper. Duane restocked the gun, added extended tangs and false sideplates along with a new triggerguard. My job was to inlay the clients name into the sideplates with Old English lettering, border and stipple the top of the action and engrave what seemed like a shoe box full of various sized screws. Here's the finished sideplate: 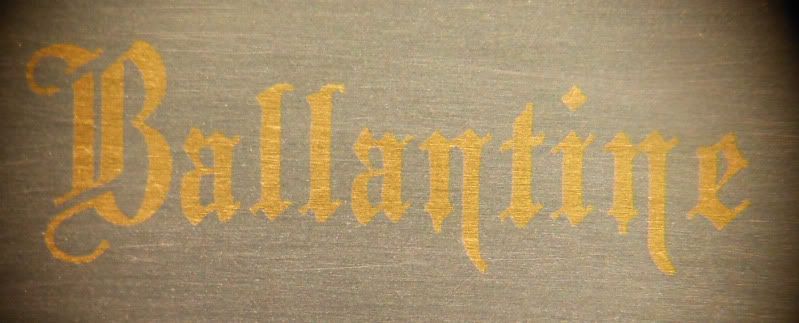 Roger Kehr Kehr Engraving Company (360)456-0831 | ||
|
| one of us |
First thing after layout is cutting the fine lines and the outline of the thick stems. The fine lines are about .008" across and the thick stems are roughly .020" 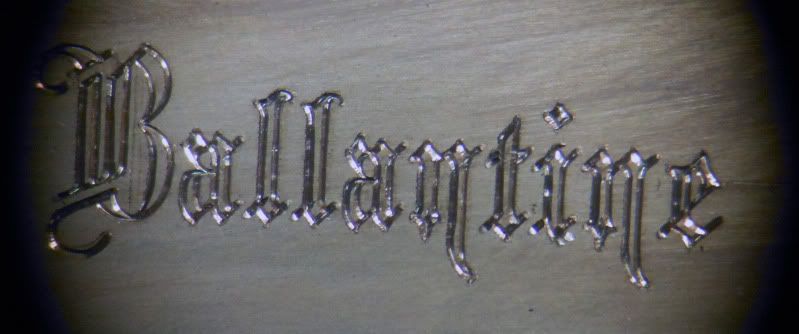 Roger Kehr Kehr Engraving Company (360)456-0831 | |||
|
| one of us |
The gravers I use for this work are the 110 degree V cutter for the bulk of the cutting. I use this wide graver to get the clearance I need to cut the tight radii without tearing up the side walls of letter stems. The cutter with the long face is a 60 degree graver with the point dubbed off to make a very small flat. I use this tool to knock in the keys that mechanically lock the gold into the cavity. I normally cut the dovetails, but the turns are just too tight to allow cutter clearance in lettering. 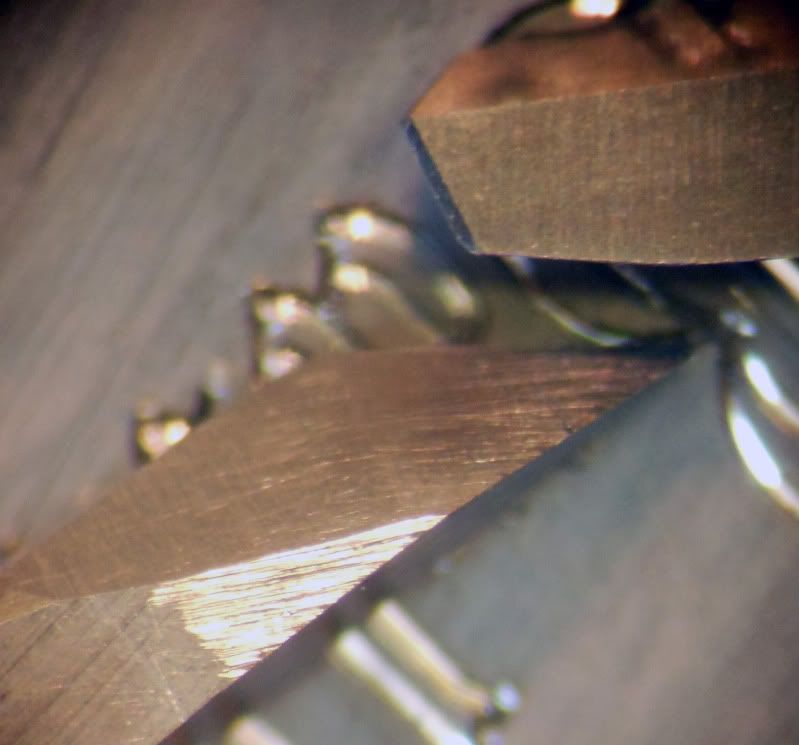 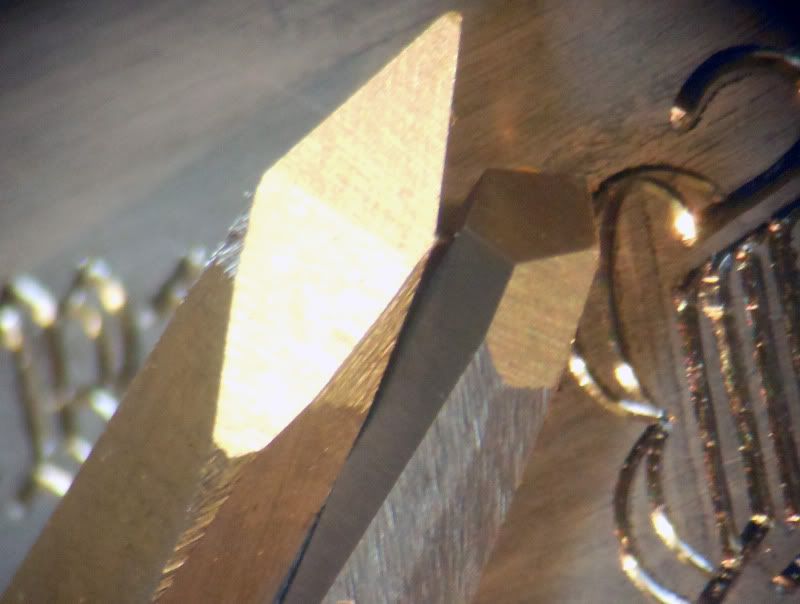 Roger Kehr Kehr Engraving Company (360)456-0831 | |||
|
| one of us |
Here's the lettering with the cavity cut for the thick stems: 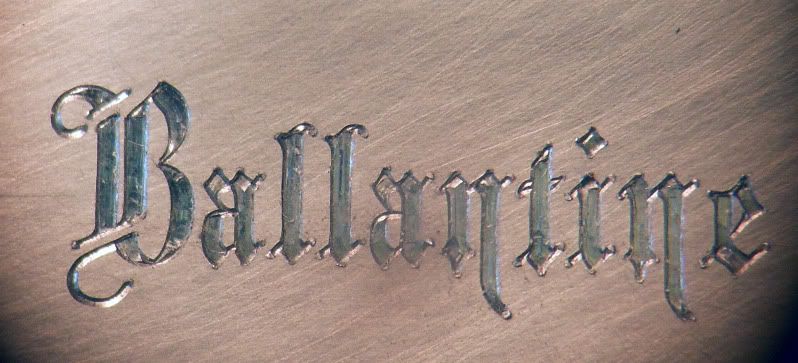 Close up of the same with the flat graver: 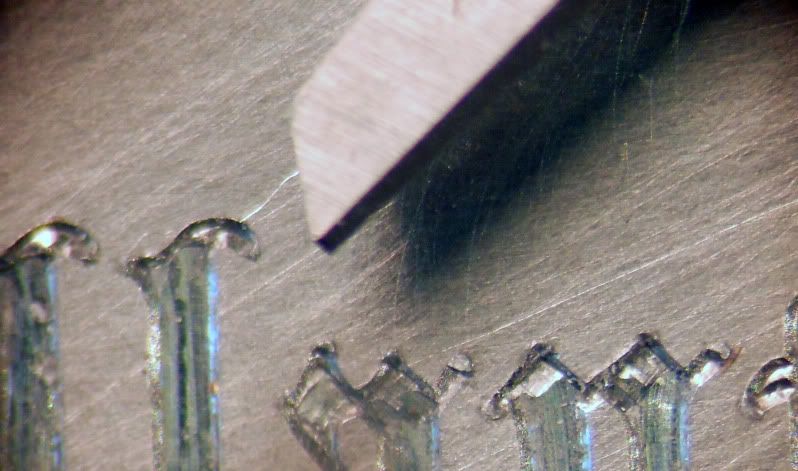 Another close up with all the corners and edges cleaned up and ready for the dovetails. Clean up was done with the 110 degree V graver. 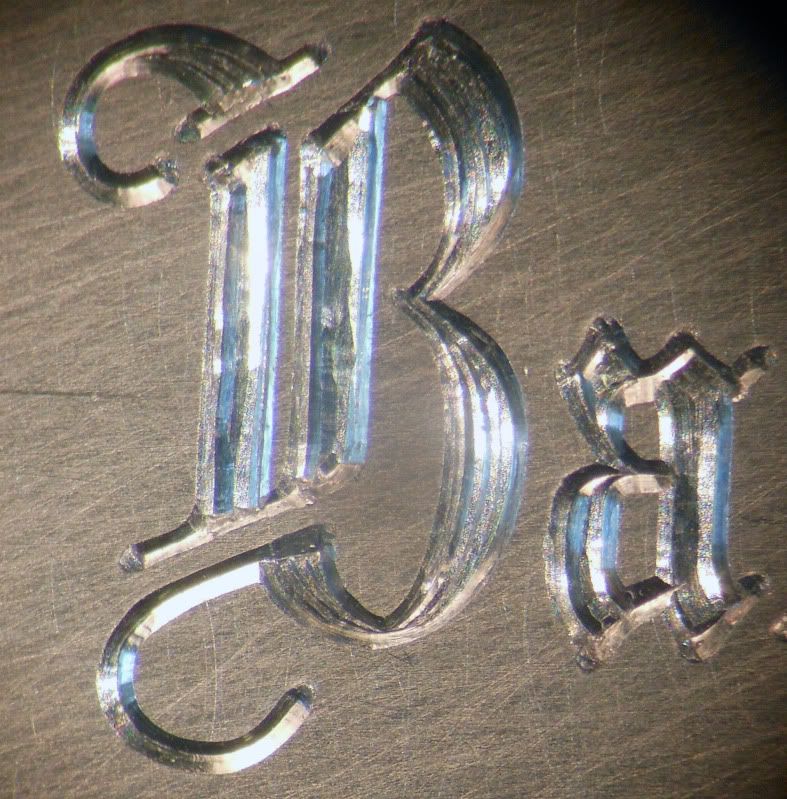 Roger Kehr Kehr Engraving Company (360)456-0831 | |||
|
| one of us |
All the dovetails hammered into the lettering with the 60 degree graver: 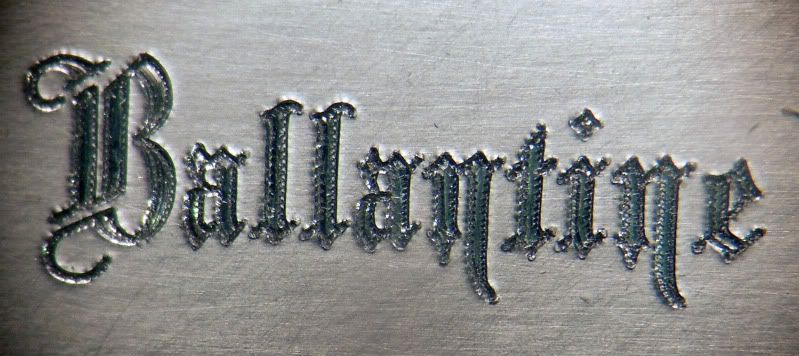 Close up for more detail: 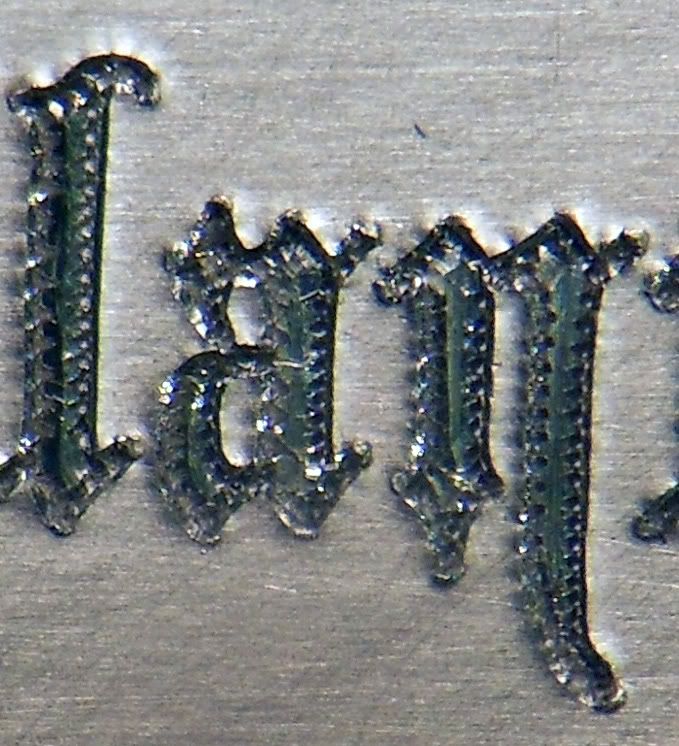 Roger Kehr Kehr Engraving Company (360)456-0831 | |||
|
| one of us |
This photo shows the begining stages of inserting the gold. The inlay requires that the wire fits the cavity fairly closely. Otherwise, it won't fill the cavity or flow into the dovetail properly. Here's 3 different sized wires used in the space of about .040". 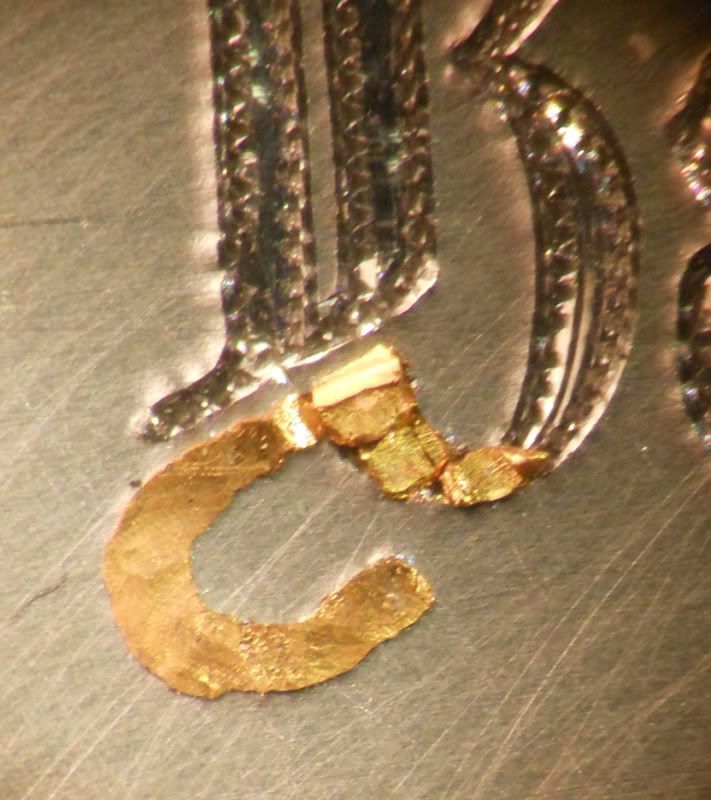 With this pic you can see that all the segments are started. Where the individual pieces meet, I cut a shallow V so one piece won't flow over the other as I'm hammering the gold. 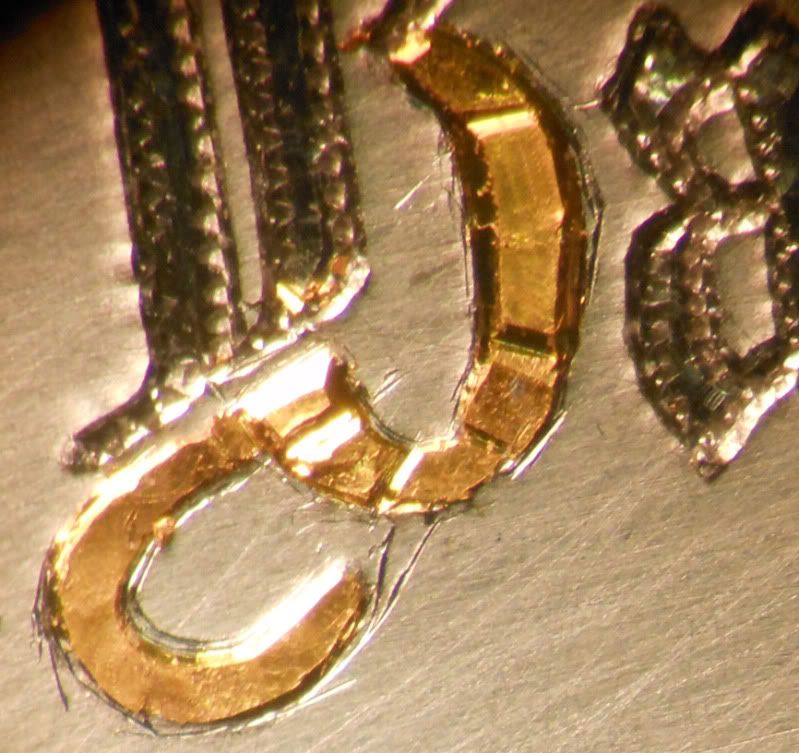 Roger Kehr Kehr Engraving Company (360)456-0831 | |||
|
| one of us |
Gold all hammered in except where it will meet a new piece of wire. It's important that all new segments are seated at the same time so there won't be a joint line. 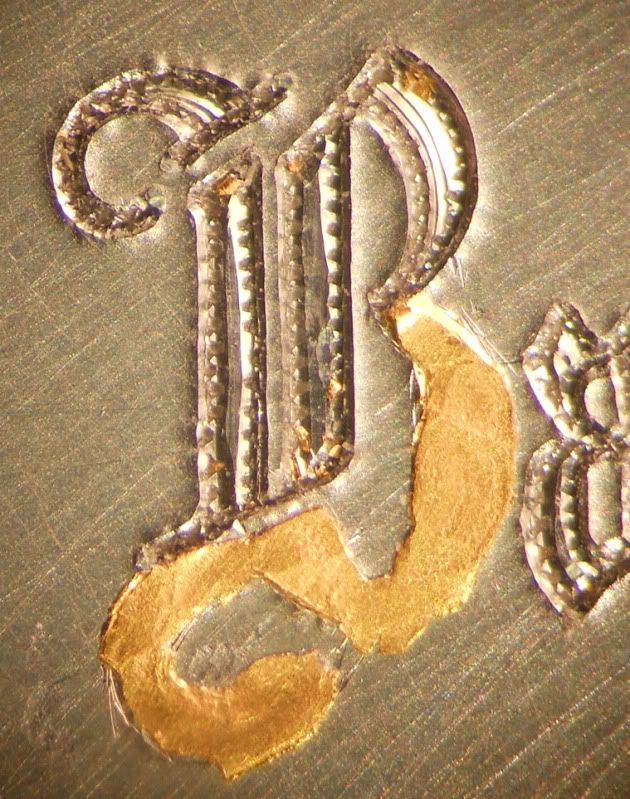 All the overflow cut off with a wide flat graver. I lean the graver toward the edge so it leaves the gold domed in the middle. I do this to confirm that the gold has completely filled the cavity. If there's a void, I have enough gold domed in the center to completely fill the inlay with a bit more hammer and punch work. 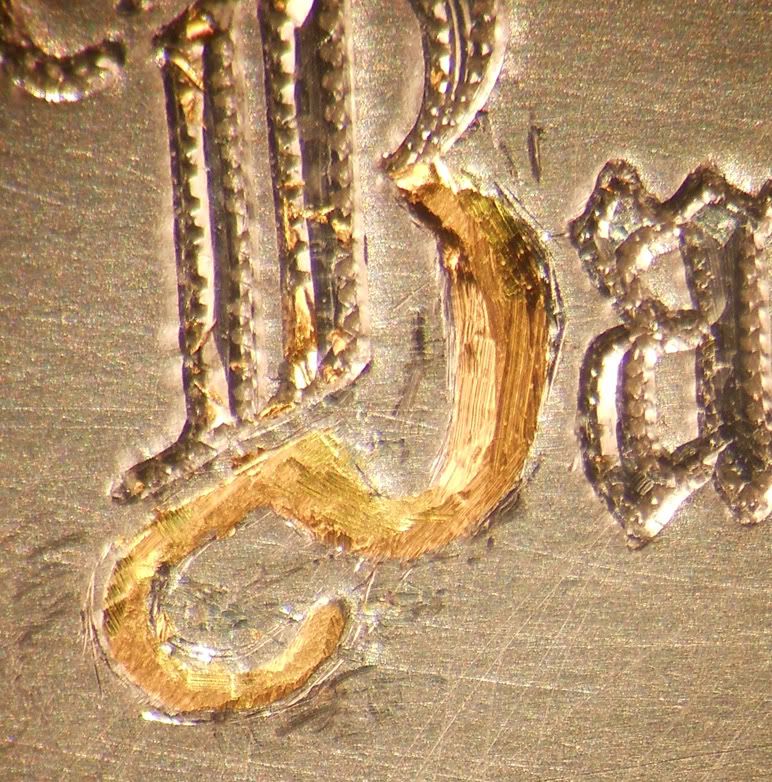 Roger Kehr Kehr Engraving Company (360)456-0831 | |||
|
| one of us |
All in! In this pic, I've gone over all the gold with my punch one more time just for the assurance that it's all seated. Then another once over with the wide flat graver to flush the gold with the base metal. Makes for less stoning work. 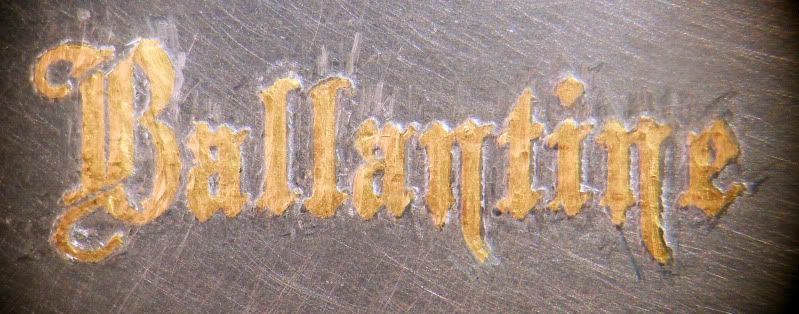 Roger Kehr Kehr Engraving Company (360)456-0831 | |||
|
| one of us |
Polished with a 400 grit stone and oil: 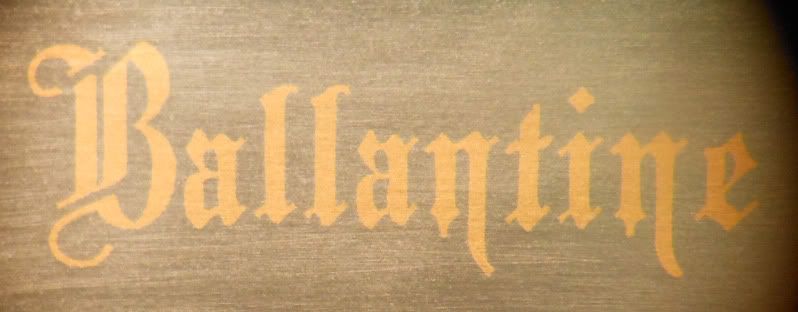 Now it's polished with a very soft water stone. This stone breaks down very quickly and doesn't load up with gold. The stone is known by various names. The label says Tam O'Shanter. I call it a scotch stone (They are made in Scotland). 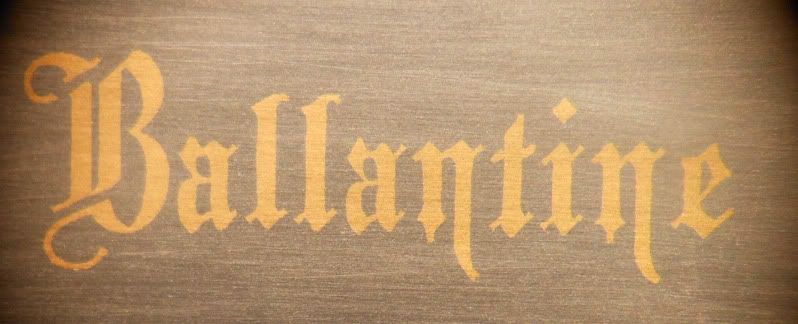 Finally, polished with 2000 grit wet or dry and oil. Roger Kehr Kehr Engraving Company (360)456-0831 | |||
|
| one of us |
Done! 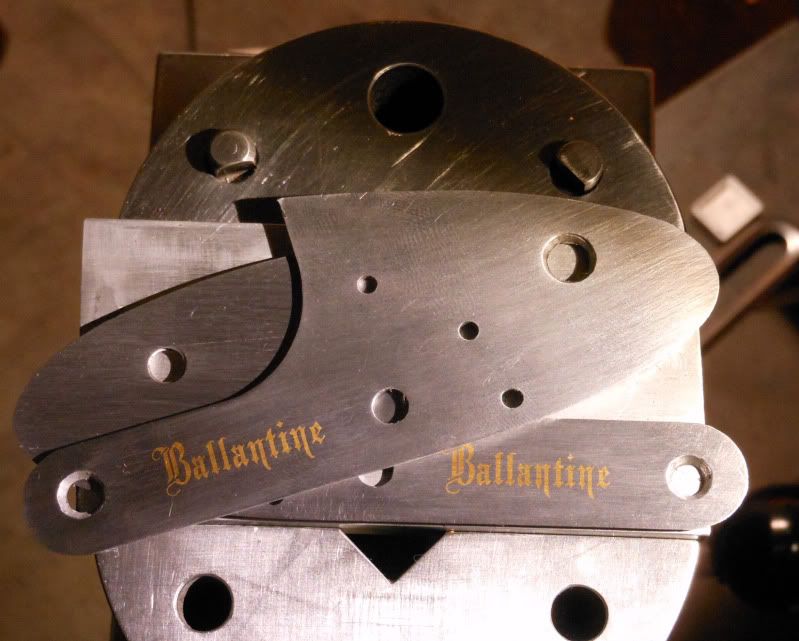 Roger Kehr Kehr Engraving Company (360)456-0831 | |||
|
| one of us |
Wow! Great photos and one heckuva tutorial. Thank you. | |||
|
| one of us |
That is a dump truck load of work. What magnification optic do you use to see such fine work? I am very impressed.  | |||
|
| one of us |
5-6x for the general work and 10-15x on the detailed work. Roger Kehr Kehr Engraving Company (360)456-0831 | |||
|
| one of us |
OK, I used to use 8x for fine surgical work. Much more would cause a headache. Thank you so much for sharing your work and technique - fascinating. | |||
|
| One of Us |
The owner hasn't even seen this yet...Wow! Roger...are you going to show the balance of engraving? This is fantastic stuff!! And...not a bit bashful about showing the technique. Hell... how many could do it anyway? | |||
|
| One of Us |
I'll keep my day job...that is amazing! | |||
|
| One of Us |
Roger, that gives me a better appreciation for my bill! Beautiful. Mike | |||
|
| One of Us |
Masterful work! | |||
|
| One of Us |
Amazing, I take it you don't drink coffee! | |||
|
| One of Us |
My head hurts. | |||
|
| one of us |
Roger this is a great tutorial!! I was in one of John Barraclough's class at TSJC years ago and he taught very similar to your tutorial. What Microscope are you using? It would be good for you to show your setup. I hope someone young enough will take an interest in engraving and maybe become a great engraver in say 10 to 15 yrs. Les Brooks, retired gunsmith | |||
|
| One of Us |
Thank you roger! I appreciate your work even more! Rusty We Band of Brothers! DRSS, NRA & SCI Life Member "I am rejoiced at my fate. Do not be uneasy about me, for I am with my friends." ----- David Crockett in his last letter (to his children), January 9th, 1836 "I will never forsake Texas and her cause. I am her son." ----- Jose Antonio Navarro, from Mexican Prison in 1841 "for I have sworn upon the altar of god eternal hostility against every form of tyranny over the mind of man." Thomas Jefferson Declaration of Arbroath April 6, 1320-“. . .It is not for glory, nor riches, nor honours that we are fighting, but for freedom - for that alone, which no honest man gives up but with life itself.” | |||
|
| One of Us |
Thanks for sharing Roger. Posts like these generate greater appreciation for the time and attention to detail it takes to do custom projects right the first time. The gold lettering looks pretty "simple" from a finished prospective. Seeing the behind the scenes sausage making really sheds some light on how much work is really required. | |||
|
| one of us |
I would like to see a picture of the whole gun | |||
|
| one of us |
James, Works out to an hour per letter. Almost 2 for the cap. I think Duane will post photos of the completed gun when he gets it assembled. Roger Kehr Kehr Engraving Company (360)456-0831 | |||
|
| one of us |
Mr. Kehr - Your work is truely amazing. Reminds me of a quote I heard recently: Talent is what you are born with, skill is earned. You have both talent and a huge amount of skill. When it comes to engraving, I have neither, but can appreciate that of others. Thank you for sharing. ______________________ Ken A society grows great when old men plant trees whose shade they know they shall never sit in. --- Greek Proverb | |||
|
One of Us |
Roger, there is a vast difference between a mechanic that replaces parts and a true CRAFTSMAN. You sir are a true Craftsman! The sad thing is that we are loosing our Guild quality Craftsmen faster than the next generation coming up to fill their shoes. That truly is a sad day. I am grateful for the privilege of seeing your kind of skill in my lifetime. You don't get this kind of skill punching computer keys like this next generation. Craftsmen are like flowers, it's been a privilege to enjoy your garden! Olcrip, Nuclear Grade UBC Ret. NRA Life Member, December 2009 Politicians should wear Nascar Driver's jump suites so we can tell who their corporate sponsers are! | |||
|
One of Us |
You are blessed with a real talent...Bravo! I pray for mud on my boots the day I die... Go see the nights of Africa..... | |||
|
| One of Us |
Roger, I know I speak for others here who really appreciate not only showing pictures of your beautiful work, but also sharing how you do it. Question: how long did it take you to learn to do really good engraving? Thanks! MK160 MK160 | |||
|
| Powered by Social Strata |
| Please Wait. Your request is being processed... |
Guns, Politics, Gunsmithing & Reloading Gunsmithing

Visit our on-line store for AR Memorabilia