
 The Accurate Reloading Forums
  THE ACCURATE RELOADING.COM FORUMS
  Guns, Politics, Gunsmithing & Reloading
  Gunsmithing
  Anyone use a Cervellati recoil pad
Go  | New  | Find  | Notify  | Tools  | Reply  |  |
| One of Us |
| ||
|
| One of Us |
They look good especially the red pads. Worth trying. If not then I always use Pachmayr pads, they don't distort or go sticky like many others. | |||
|
| One of Us |
Fitted one recently, not too bad.  | |||
|
| One of Us |
Metal.. Very nice job. got them today.   | |||
|
| One of Us |
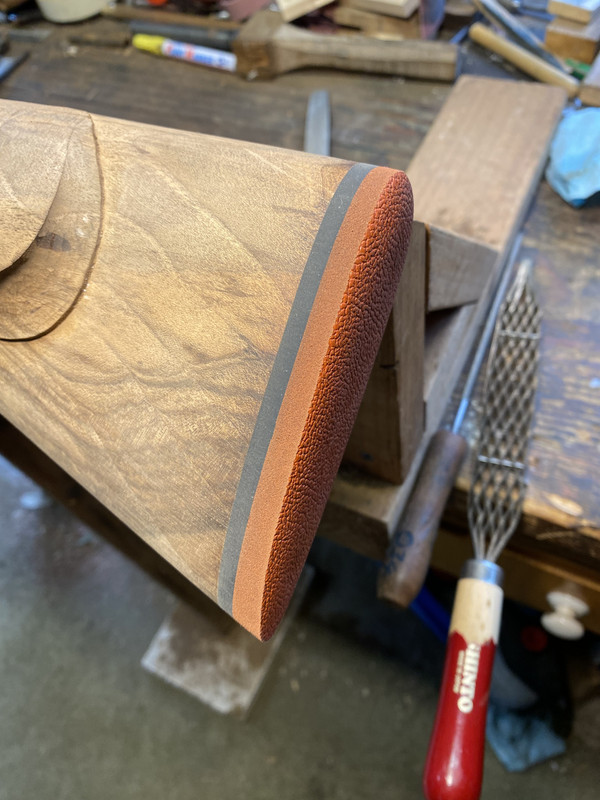
I hope that marker pen comes off that red pad | |||
|
| One of Us |
Armorall | |||
|
| One of Us |
Not sure why the marker pen was used in the first place and likewise why they feel the need to mould those little screw position dots into the pads. Hope they don't intend them to be used as guide to drill (and butcher) through the pad for the mounting screws | |||
|
| One of Us |
He did the marks with his phone. The 3 dots are not noticeable, I didn't even see them and I'm a fussy bastard. I think the light reflection makes them look worse. Most pads seem to get the screw holes mashed up to some degree anyway. | |||
|
| One of Us |
Do they all have a black base after sanding? | |||
|
| One of Us |
photo shop | |||
|
| One of Us |
If done carefully and correctly screw holes should be invisible. The text below is from Pachmayr pad installation instructions and the photo of an Old English Decelerator pad I mounted on the butt of my Oberndorf Mauser. I use a fine sharp surgical knife to carefully cut the slits and vaseline on the screw heads and screw driver shaft. "Prepare to mount the pad by cutting slits in the pad for screws. To do this you must first find where to make your cut. Push a piece of wood dowel of appropriate size through the screw hole in the pad. When you push the dowel through, it will raise a dimple on the pad face. All that is needed is a cut with a razor knife across the dimple made with the wood dowel. You now have a through hole that is not visible for a clean appearance. Note: when inserting the screws through the slits cut in the pad use a light grease (or Armor All®) to keep from tearing the rubber."  | |||
|
| One of Us |
Yeah I do all that, I get mine pretty well invisible. | |||
|
| One of Us |
I tried one...nothing espeially negative but a bt difficult to finish nicely. Had to beatg Pachymayr or...for a classy look with the knib, Galazan | |||
|
| One of Us |
Geez Eagle you did a nice job on that, I’ve never done one that good. | |||
|
| Powered by Social Strata |
| Please Wait. Your request is being processed... |
|
 The Accurate Reloading Forums
  THE ACCURATE RELOADING.COM FORUMS
  Guns, Politics, Gunsmithing & Reloading
  Gunsmithing
  Anyone use a Cervellati recoil pad

Visit our on-line store for AR Memorabilia

