

 The Accurate Reloading Forums
  THE ACCURATE RELOADING.COM FORUMS
  Guns, Politics, Gunsmithing & Reloading
  Gunsmithing
  How do I take good gun pics?????
Go  | New  | Find  | Notify  | Tools  | Reply  |  |
one of us |
I am having a hard time taking good photos of my guns. I spent this afternoon trying to take decent photos and the ones below are the best I could manage. I tried many different settings on my camera but no matter what I tried the wood always seems a little washed out and does not show the true colors well. The setup I am using is a simple Nikon digital camera and using a tripod. I used the ambient light in the room as well as a lamp at each end of the couch. I tried with and without a flash and without gave me the best results which are below. What am I doing wrong? It seems to me it is a lighting issue but I dont know enough about photography to really know. My wife thinks it could be my background color as well. Some of you have posted some top quality pics that really show off your rifles. Could you please share some suggestions? 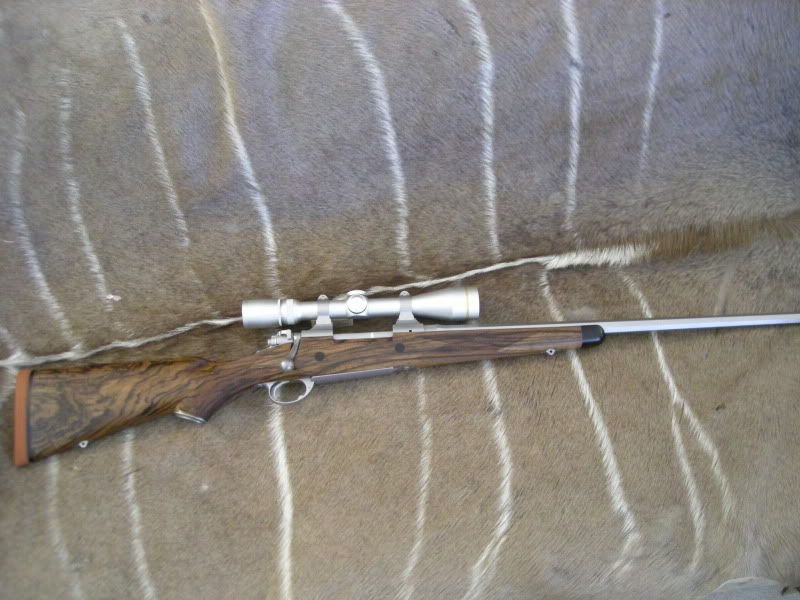 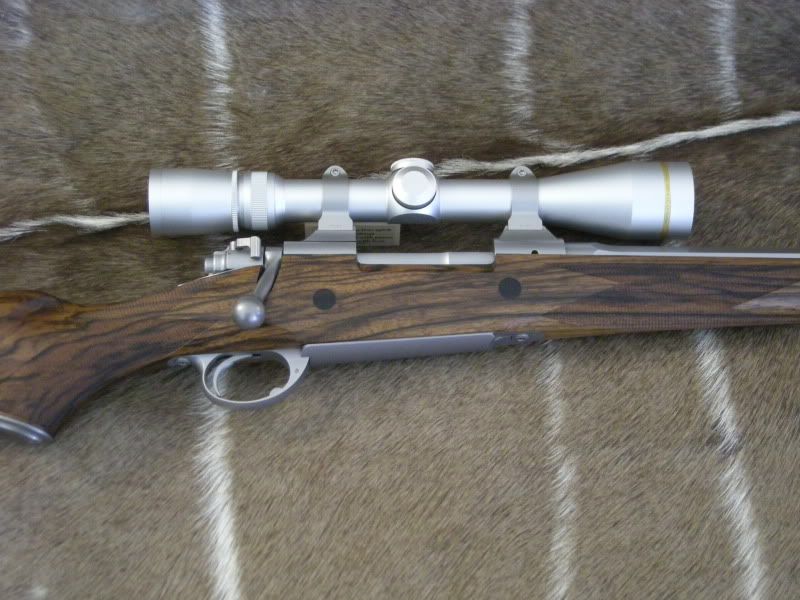 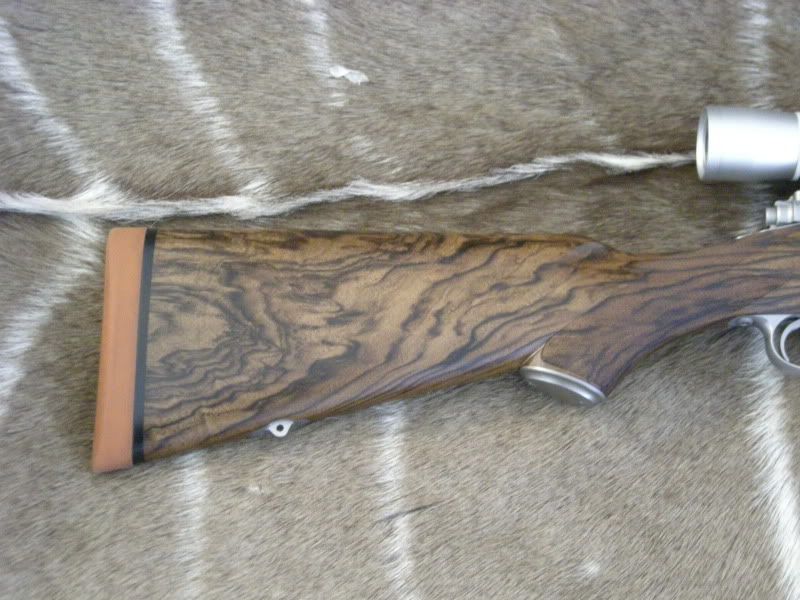 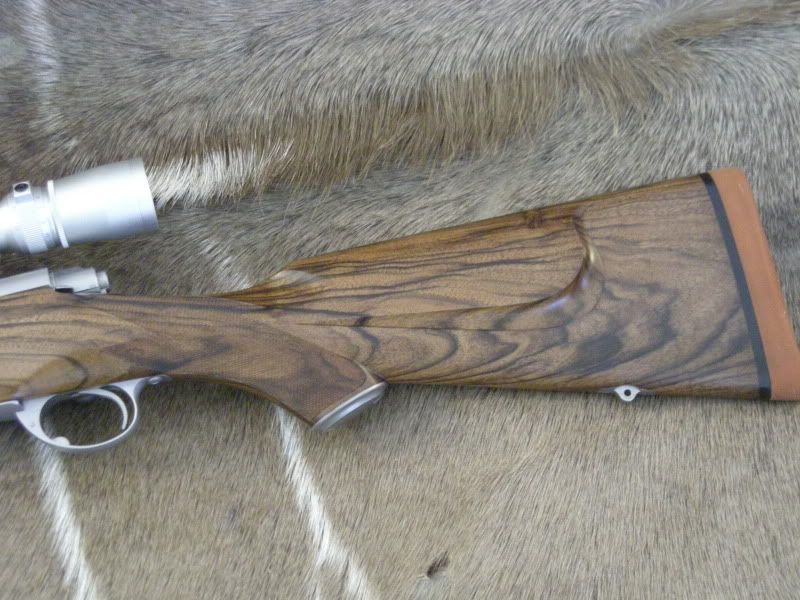 William Berger True courage is being scared to death but saddling up anyway. - John Wayne The courageous may not live forever, but the timid do not live at all. | ||
|
| One of Us |
Good lighting, best light is cloudy bright sunlight. Depth of field at F8 or F11 Good contrasting background is very important. Your photos look pretty good but they would really pop if you laid the rifle on a dark, plain background drop cloth. My biggest fear is when I die my wife will sell my guns for what I told her they cost. | |||
|
One of Us |
Yup The above gun might look a lot better with a bright red or blue towel behind it....tablecloth etc. Your tactical gun looked fine with the Kudu hides but the gun wasn't brown IIRC. Try a different background color. /////////////////////////////////////////////////////////////////////////// "Socialism is a philosophy of failure, the creed of ignorance, and the gospel of envy, its inherent virtue is the equal sharing of misery." Winston Churchill | |||
|
| one of us |
Go to Walmart and look at the cloth material for a good contrast in color. Get about a 1 1/2 yds of the best color that will match a small piece of wood which you have finished like you want a stock to look. I like a light grey color of fake fur which will go with any color of wood. The brown tones and the stripes of the skin are too much to have in a fine stock picture when you are trying to show the wood. A royal blue would be my choise for the background. SDH and others have shown their setup if you can find the posts. I take photo's just for myself and try to get the best shots possible with my limited camera. Inside cheap lights are the newer bulbs with the pig tails. The correct color for a natural looking piece of wood is K6500. | |||
|
| one of us |
I find a medium gray background is best, busy backgrounds like the skin take away from the rifle itself. Indirect lighting, bounce it off the ceiling if at all possible. Make sure your camera's "white balance" is set for the light source you are using. | |||
|
| One of Us |
It always helps to put a good looking girl in the picture, preferably in a bikini | |||
|
| One of Us |
What you are describing would be known in professional circles as FLAT lighting. Remember, you are attempting to show a three dimensional object in two dimensions. To make your photo more interesting do the following. 1. have the background away from the object. If you don't want any shadows to show on the background make sure it is of sufficient distance from the object so that shadows do not show. 2. have the light stronger on one side of the object than the other side 3. put other interesting things in the photo besides the object that you are trying to show, but in a less prominent fashion. A very simple way to make light stronger on one side than the other is to set up near a window so that the light is coming from the window. That will give you directional light. Then, look to see if the shadows are too dark. if they are, set up a large white board on the opposite side of the window near the object. that will relflect some light back into the object and lower the contrast. good luck | |||
|
| One of Us |
you can never have enough light. I've come to the conclusion that the best pics are taken under a flash but that is also the most expensive way to do it. a solid background will also keep the file size small. this pic is lit by about 8 flour. bulbs.   this is lit by 1 flash unit and 2 2x3 white cards.  | |||
|
| One of Us |
Tanker I can see why you would want good photo's of your rifle. Lovely piece of wood very nicely done. Maybe a few details on the rifle would help the pic along. Von Gruff. | |||
|
| One of Us |
Processing your images with Photoshop or similar software helps too. Below, approximately 40 seconds of very basic enhancement.  Philip | |||
|
| One of Us |
Tanker As long as you are showing your custom I would like to ask you a question about it. You have Blackburn bottom metal on there. And its a Classic Model 70. Their triggers are quite wide, and the Blackburn metal has a very narrow slot for the trigger. Which did you do. Did you reduce the width of the trigger or did you increase the width of the trigger slot?? Also, is the new bolt knob made from Stainless. If so do you know what type of stainless it is made from? | |||
|
| One of Us |
Photo's are about subject matter Lighting and shadows . Back ground should be neutral absorbing colors not white or silver reflects to much ,nor should it be near the subjects color as it fools the camera by blending pixels on Electronics cameras . Sun gun strobe natural light or flash fill is best . For electronic photo's of less than stellar quality equipment I E ( cell phones inexpensive cameras or wrong lens applications ) there are computer Photo enhancement programs which again manipulate pixel configurations focus color saturation on and on . | |||
|
| One of Us |
M1 Tanker, What is the pixles/resolution of that camera? The pictures dont look real defined. I know I need to get a beter digital camera with higher pixle rateing, cause my pictures look terrible on close ups | |||
|
one of us |
Thanks everyone for your help and suggestions. I tried a few of the suggestions and the quality of the photos improved drastically. The first thing I did was have my wife buy me some dark green and dark blue cloth for the background. That alone made a huge difference in how the colors of the wood appeared. The next item I tried working with was lighting. It is obvious I have to improve how my lighting is situated - but in playing with lamps and having my wife hold some white poster board as reflectors also made a big difference. Tomorrow I am going to scrounge some shop lights from work and try again. I also want to try some different positioning of the rifle and adding some associated items and see how that works. William Berger True courage is being scared to death but saddling up anyway. - John Wayne The courageous may not live forever, but the timid do not live at all. | |||
|
one of us |
Kevin, Dean Zollinger did the trigger work and the bolt handle. Dean narrowed the trigger to give it a classier look and to also fit the Blackburn trigger slot. The bolt handle is stainless but I do not know which type he used. William Berger True courage is being scared to death but saddling up anyway. - John Wayne The courageous may not live forever, but the timid do not live at all. | |||
|
| One of Us |
William one other suggestion that works very well is to use a pint or better yet a 1 quart soup container, like chinese food comes in, to diffuse the flash. cut a hole in the bottom and slide it over the flash. a couple of white boards for reflectors also helps. If you have a hi-end flash they will have power settings (EV). 1 flash unit, diffused, bounced off the ceiling, white card under the camera at 45 deg.  | |||
|
| One of Us |
just take pictures of ugly plastic guns and nobody will know the difference | |||
|
| Powered by Social Strata |
| Please Wait. Your request is being processed... |
|
 The Accurate Reloading Forums
  THE ACCURATE RELOADING.COM FORUMS
  Guns, Politics, Gunsmithing & Reloading
  Gunsmithing
  How do I take good gun pics?????

Visit our on-line store for AR Memorabilia

