
 The Accurate Reloading Forums
  THE ACCURATE RELOADING.COM FORUMS
  Guns, Politics, Gunsmithing & Reloading
  Gunsmithing
  .338-06 Guild rifle update
Go  | New  | Find  | Notify  | Tools  | Reply  |  |
one of us |
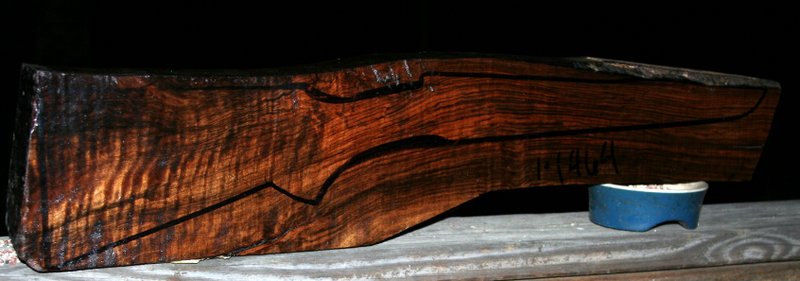
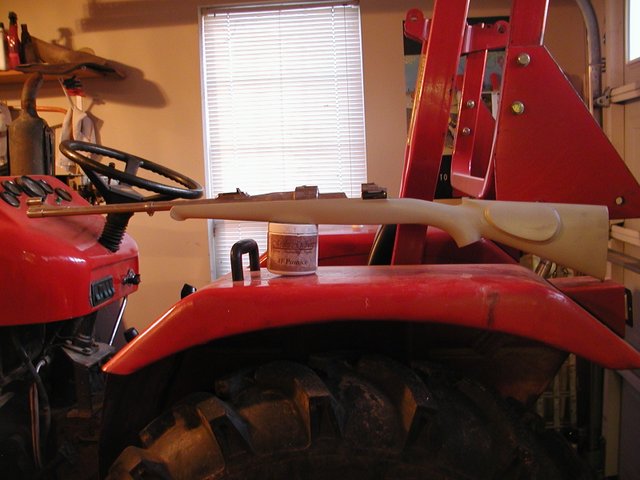
I've been looking and I can't seem to find the light switch that turns this thing off! I never thought a stock could have too much figure, but this one scared me. I've gotten use to it now and I think I'll be happy with it. The blank came from Adam Freeman over at Luxus walnut. Adam is as nice as they come and has thousands of these blanks. If you ever need a nice piece of Turkish walnut he is the man to talk to. I got the stock back from Shane Thompson last week. This was the 1st 1-to-1 duplication I've ever had done. It cost a little more, but I must say, it was worth every penny. The barreled action slid about 3/4 of the way into the stock and within an hour it was in there and the shaping was under way. I didn't get a chance to fine tune the pattern because Shane had "window of opportunity" to do the stock and he owed me a favor Anyway, here are pics. I'm having a lot of fun with this one and thought I would share some of it with you. Here is the pattern after I "finished" it.  Here is a picture of the blank I got from Luxus  Here is where I'm at with it now. Mike McCabe (AKA: z1r) is doing the bolt handle for me. As soon as he finishes it I'll be able to move foward.       Terry -------------------------------------------- Well, other than that Mrs. Lincoln, how was the play? | ||
|
one of us |
Very nice and a helluva balancing act on that brick. You're a brave soul ______________________ Always remember you're unique, just like everyone else. | |||
|
| One of Us |
Terry Talk a little bit more about the process that you went through to get a pattern ready to send to Mr. Thompson. Maybe you have mentioned it before, but where did you get your pattern (did you do it yourself from a blank, or what) and did you glass the metal in, and in general what else did you do to get it to the state its in now. Beautiful piece of wood. It Will keep you awake on the deer stand!!!!! | |||
|
one of us |
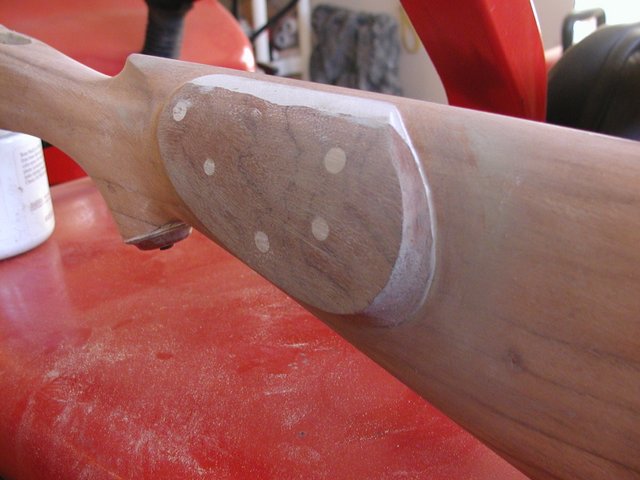
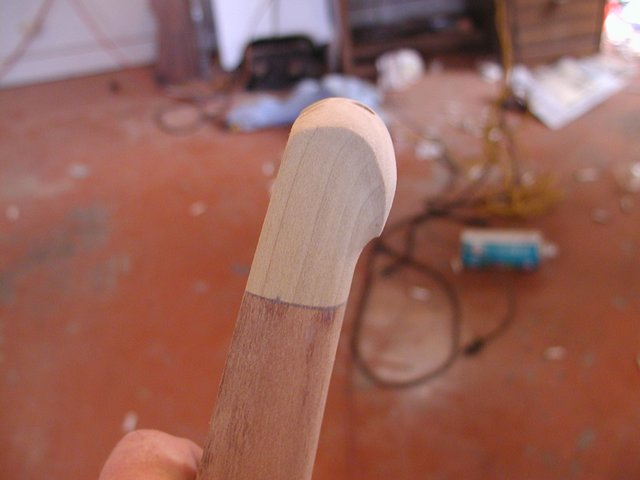
Yea, it's busy I got the pattern a few years ago when I had two stocks duplicated. One turned into the stock on that 9.3X62 Mauser that I bore you guy's to death showing pictures of it. The other one came back with a sprig knot in the magazine area. I could have used it, but my eye would have been drawn to that knot every time I looked at the rifle. Here is a picture of it before this all started. It's the one on the far left.  It was a long drawn out process of how this pattern came to this point, but the pattern has evolved over time and is a little different every time I use it. It's grown a check piece the grip has changed geometry several times and on this one the schable tip changed and the forearm got shorter. The way I do a pattern is I just "hog" out the inletting and glass it back in. On the exterior I'll glue, screw, bondo, JB weld things in place till it looks like I want it. If I don't get the desired result I'll cut it off and try again. Here is a neat picture of a check piece I added to a pattern stock that didn't have one.  Here is a schable tip  Some times I'll spray paint the pattern so it's all the same color and any mistakes will show through.  Terry -------------------------------------------- Well, other than that Mrs. Lincoln, how was the play? | |||
|
one of us |
The grip line will come down a little. I'm waiting for the the bolt to come back. Then I'll bring the wood down even with the metal and that problem should be solved. The Schanable needs to be a little smaller. Great tip. OK, will do You don't like my pedestal? Dang it. That was the only artsy fartsy thing I did to it Yes, I'm very open to constructive criticism. Thank you! Terry -------------------------------------------- Well, other than that Mrs. Lincoln, how was the play? | |||
|
| One of Us |
Terry, That's a georgeous hunk of Walnut. You're doing great work. Man, I could sleep with that stock. Don | |||
|
| One of Us |
I agree completely with SDH...file off the pedestal. The wood is fancy, but are you concerned about the way the grain droops in the fore end? Check back in a couple years, can almost guarantee there'll be a big gap under the tip | |||
|
| one of us |
Terry- I know I have said this on a couple of occasions already, but, I am going to make it my life mission to follow you around and with the hope of picking up your cast-offs. I all seriousness, that's one helluva stock!!! Even if you have to wear sunglasses, Congrats, that's beautiful. May the wind be in your face and the sun at your back. P. Mark Stark | |||
|
| One of Us |
Boy now there is a peice of walnut with plenty of figure! 338/06... Sweet round also, i sure like my 338/06. Looking good! _____________________ Steve Traxson | |||
|
| One of Us |
Terry, Looks great, you're moving quickly! Glad the inlet worked out for you. How did your camo job turn out? This blank was like many that are this figured and had a few things to work around. Knot holes bark inclusions and IIRC a little sap wood. It was also a bit short. Andy was very upfront with Terry and said turn it and see what it ends up like. We pulled it off and I think it was well worth it. I did everything I could within the limits of dodging things to get the fornend dropped for the straightest layout but this was all I had to work with. It was a very stable piece of wood and had almost no perceptible move between pre turn/stress relieve and final machining so hopefully the wood doesn't pull away. If it does you can just use the gap for a place to store extra ammo! Shane Thompson | |||
|
| one of us |
Terry , ..... "the man who is actually in the arena".... Nice work! | |||
|
one of us |
Well, if I get a gap under the tip I may just cut the tip off and glue a piece of ebony on and shape and finish it. I can fit it so no gap will show. No big deal, I have no problem cutting my own work. The forearm is only 8" long. I personally don't think it'll be a problem. Shane, the camo turned out great! I sent you a PM with pictures. My kung fu is strong Terry -------------------------------------------- Well, other than that Mrs. Lincoln, how was the play? | |||
|
| Powered by Social Strata |
| Please Wait. Your request is being processed... |
|

Visit our on-line store for AR Memorabilia

