
 Guns, Politics, Gunsmithing & Reloading Gunsmithing
 Go | New | Find | Notify | Tools | Reply |
| Cleaning up a receiver | Login/Join |
| One of Us |
This one: 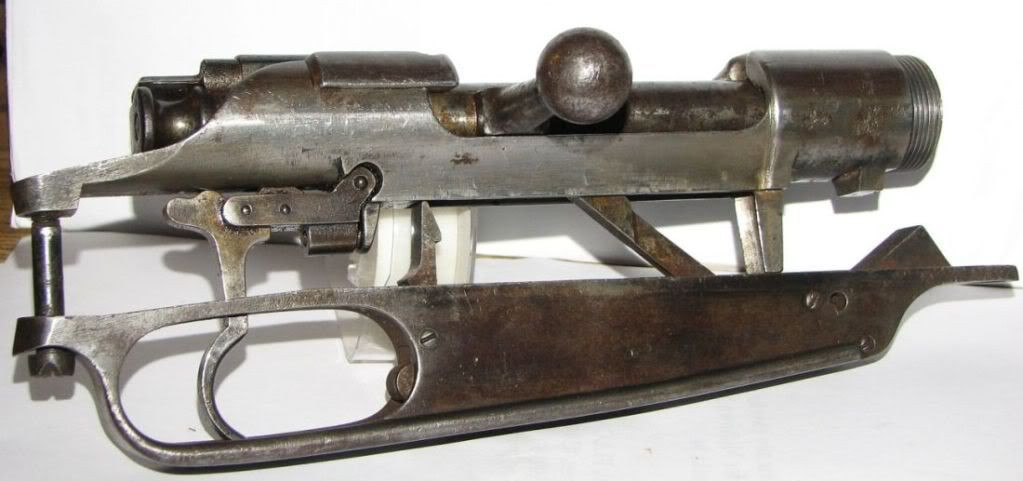 Emery cloth, wet/dry, stones- how would you approach it? Thanks. | ||
|
| One of Us |
I'd probably begin by removing the clip guides on the rear bridge. They are strictly military and I believe they're soft-soldered. I would then begin to use India stones in a coarse grit; with a VERY few receivers I've had to begin with coarser carborundum stones but I don't like to use them because they're soft and so will quickly wear. The India stones are hard and stiff, so they keep the flats flatter and the rounded parts more ripple-free. Then on to finer-grit Indias and then emery cloth with a backer to even-up the surface finish and polish lines. Some of these old Mannlichers look mighty spiffy when case-colored. Brownell's sells 3 different shapes of butter-knife bolt handles and the one I used welded very well. Most of these old military rifles have a comparatively stiff bolt lift as-issued but they can be made to be just as smooth and easily-operated as any commercial Mannlicher-Schoenauer. Simply lap the cocking cam(s) with increasingly-finer grades of garnet lapping compound, and I PROMISE that you'll be amazed and gratified at the difference! Regards, Joe __________________________ You can lead a human to logic but you can't make him think. NRA Life since 1976. God bless America! | |||
|
| One of Us |
Got an opinion on placing this aperture sight on top of the bolt shroud?  In order for the windage function to work (it pivots on the front mounting screw, the rear screw rides in a slot) it would have to be mounted on a milled flat, or a contoured "table" to fit the shroud. So it seems to me, anyway. thanks. Also- can I take the above-line pitting out on this one without compromising the receiver ring strength? -and, to case the receiver the clip guides would have to go, yes? &thanks again. | |||
|
| One of Us |
HTH, regards, Joe __________________________ You can lead a human to logic but you can't make him think. NRA Life since 1976. God bless America! | |||
|
| One of Us |
I'm mourning the loss of my clip guides already... | |||
|
| One of Us |
Tin Can You have some mis-matched parts I believe. The receiver with the clip guides should have a slot in the left side for the cartridge feed rail. That I think you have. The trigger guard magazine assembly should have slats on each side to take up the lateral space left by the packet clip on each side of the cartridges. The slats project out of the magazine well and up into the bottom of the receiver. So you need a different receiver or trigger guard assy. Let me know if you decide to replace one or the other. Your trigger guard should look like this. You rifle was modified to use the stripper clips so it has no need for the packet clip latch.  | |||
|
| One of Us |
This receiver looked much like yours when I started. I pretty much used the method Joe suggested. 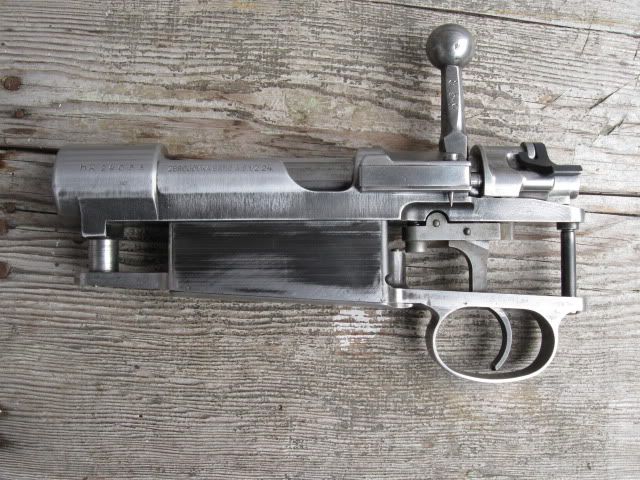 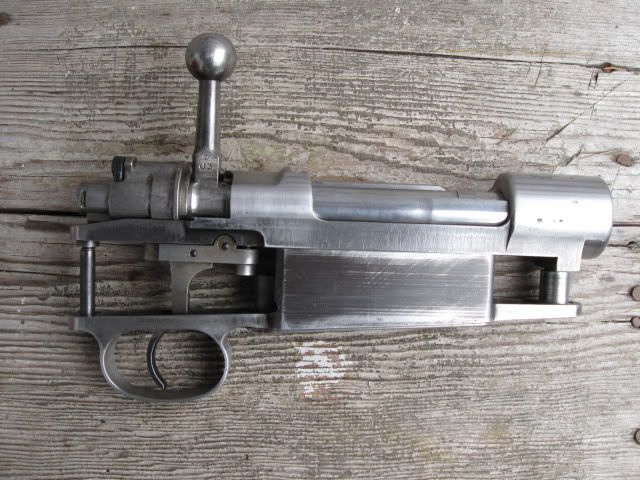 | |||
|
| One of Us |
So- when you were stoning it, it's long strokes with the stone parallel to the bore, radii &curves use round stones, crannies can be got to with soft stones that conform, then finer and final work with emery? Nice job. | |||
|
| One of Us |
Thanks. That's pretty much it. When I get to the "sanding" point I use wet/dry paper and mineral spirits for the wet. | |||
|
| one of us |
A cutting torch? John Farner If you haven't, please join the NRA! | |||
|
| one of us |
So let me get this straight. If you rub that thing lengthwise long enough it will turn into a M98?  Doug Humbarger NRA Life member Tonkin Gulf Yacht Club 72'73. Yankee Station Try to look unimportant. Your enemy might be low on ammo. | |||
|
| One of Us |
No, but it puts hair on your stones. | |||
|
One of Us |
Just don't go blind. | |||
|
| One of Us |
How I cleaned it up , would have something to do with the finish that was going to be applied ! If you're using anything other than blueing , there's no need to polish . Into the cabinet it would go . You could beadblast and go with a flat blue . Many options ! Don't forget to have your Liberals spayed or neutered ! | |||
|
| One of Us |
I am not a gunsmith or even very competent with DIY projects. I have wanted to try rust bluing and have been trying to clean up my old Remington 22 scoremaster for over 3 years. It has a fair amount of surface rust and some fine pits. I first took the barrelled action off and removed the sights. Then I tried to scrub it with steel wool but it failed to clean up all the pits. Then I tried a 240 grit wet & dry but again it was not really tidy enough. It did remove most of the rust but it looked so rough and the pits were still dirty. Scrubbing with steel wool just polished it up and exposed the pits even more. Then I got this idea of using a brass / steel wire brush attachment to my drill. This worked well in removing the rust from all the pits and the letering on the barrel. Now the rifle looked "white without any rust but it was very scratched up. Polishing with 240 grit wet & dry helped. Finally I got an idea to polish the whole thing with finer wire wheels on my Dremmel tool Here are the pictures 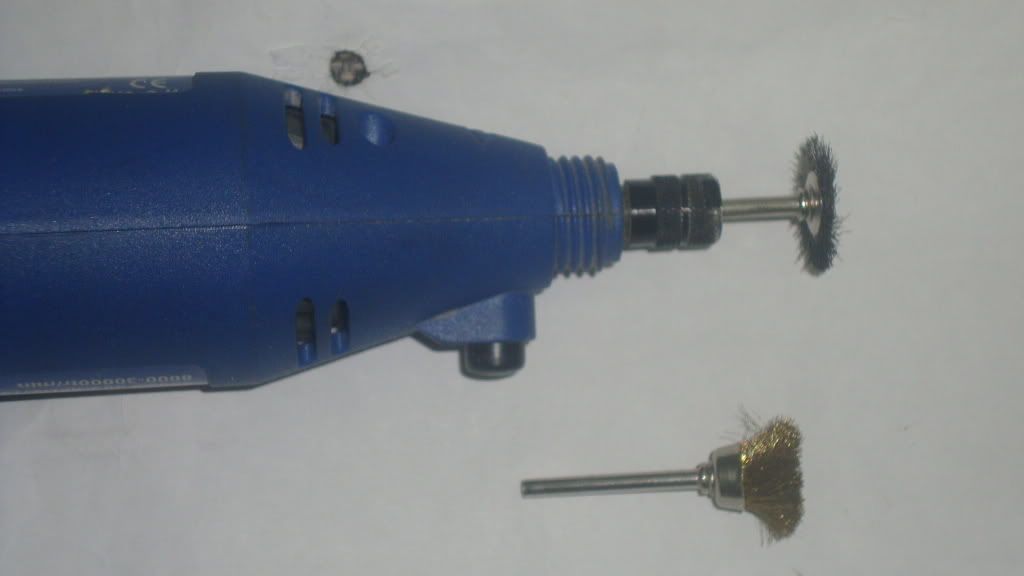 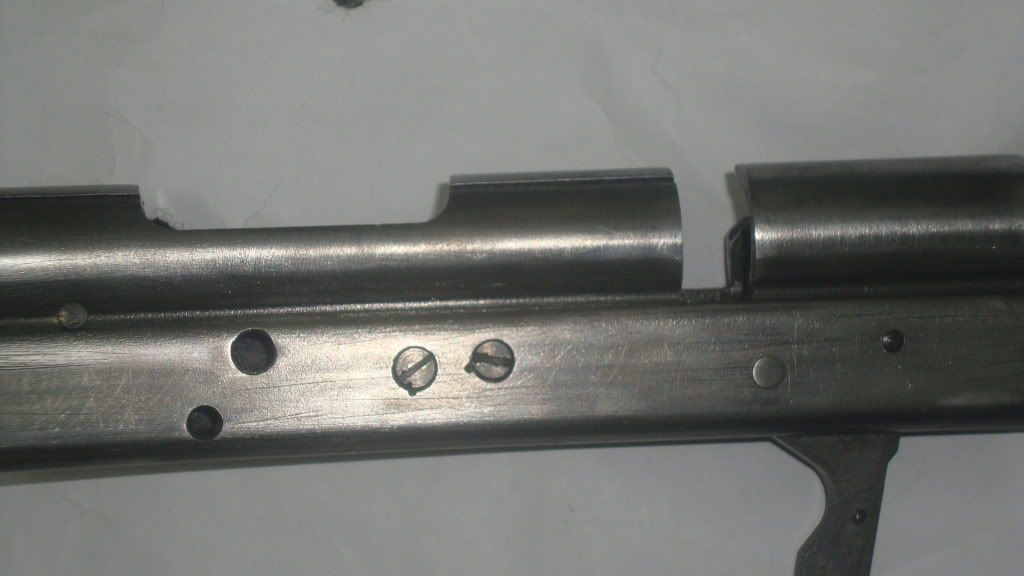 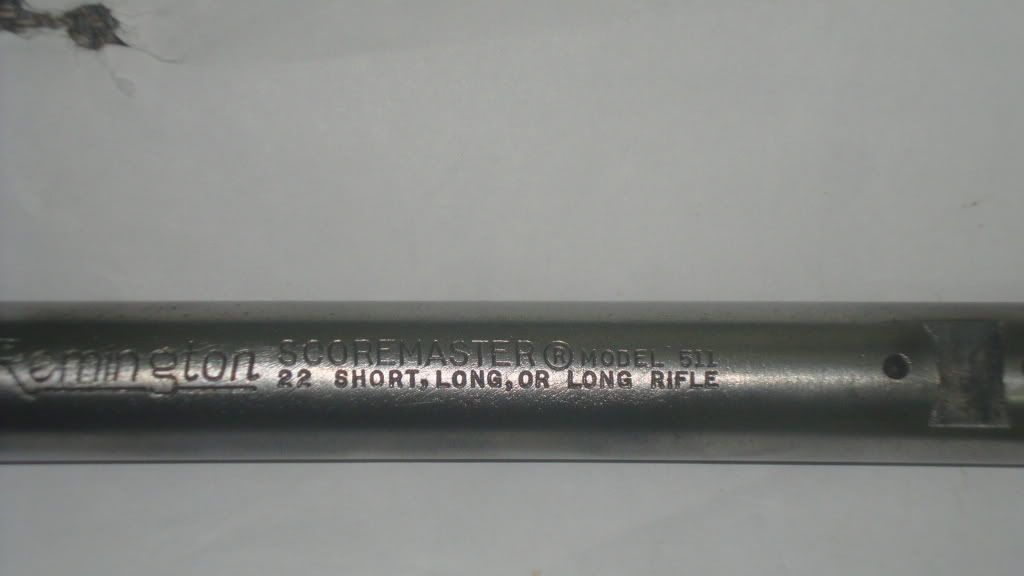 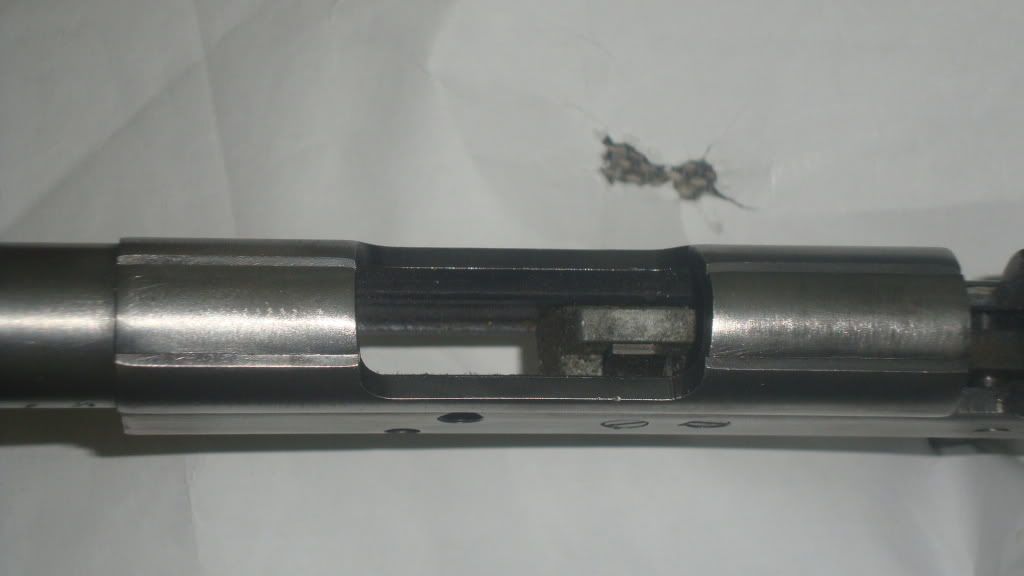 Now the pits are a lot smaller and not as obvious. The wire brush / wheel does get into all the corners and nooks. it also does not leave spots as long as I keep moving it and am uniform in appluing it to the barrelled action. I'll give it another wet & dry scrub and a stell wool polish to remove all the streaky marks and then I'll wash it with soda bicarb before trying rust bluing. I would appreciate any comments on this idea. Should I try this on my good rifle? "When the wind stops....start rowing. When the wind starts, get the sail up quick." | |||
|
| One of Us |
See how it turns out and then decide what you want to do on your "good rifle". | |||
|
| One of Us |
Slick over the curves with 800 emery and grind the straits. Earl. | |||
|
| One of Us |
Step away from the Dremel. Stephen | |||
|
| One of Us |
There's nothing wrong with a Dremel if you know how to use one. | |||
|
| One of Us |
Elbow grease and EDM stones www.KLStottlemyer.com Deport the Homeless and Give the Illegals citizenship. AT LEAST THE ILLEGALS WILL WORK | |||
|
| One of Us |
My suggestion would be to observe someone who already has knowledge and "control" of the tools polish a receiver as there is already a sufficient supply of screwed up receivers available on the market. | |||
|
| Powered by Social Strata |
| Please Wait. Your request is being processed... |

Visit our on-line store for AR Memorabilia