
 Guns, Politics, Gunsmithing & Reloading Gunsmithing
 Go | New | Find | Notify | Tools | Reply |
| Bedding a Ruger Ultralight in 257R. | Login/Join |
| one of us |
OK, I am going to take the plunge and try this myself. I have done a few searches on the topic and haven't found much, so any help would be appreciated. I am going to use Devcon (I have some from way back), and probably use the pillars from Brownells. Any advice or links to useful topics would be appreciated. Thanks, Peter. Be without fear in the face of your enemies. Be brave and upright, that God may love thee. Speak the truth always, even if it leads to your death. Safeguard the helpless and do no wrong; | ||
|
| One of Us |
get online and go to Russ Haydens at www.shooters-supply.com and you can down load or print the instructions. Good Luck | |||
|
| one of us |
Thanks Curly-Bud! Excellent summary. I found something specifically on the Ruger, so I should be good to go. Peter. Be without fear in the face of your enemies. Be brave and upright, that God may love thee. Speak the truth always, even if it leads to your death. Safeguard the helpless and do no wrong; | |||
|
| one of us |
If you go here to Score-High web site and navigate to their section on adjustable bedding pillars I think you'll find a lot of info that will be helpful. John Farner If you haven't, please join the NRA! | |||
|
| one of us |
Thanks Toomany, it doesn't look like their adjustable pillars are available for the Ruger, however. Peter. Be without fear in the face of your enemies. Be brave and upright, that God may love thee. Speak the truth always, even if it leads to your death. Safeguard the helpless and do no wrong; | |||
|
| one of us |
Search this site (pillar bedding a ruger) there are a ton of posts on this  | |||
|
| one of us |
Peter, I've found the same problem. Heaps of info on the Rem 700 & some on the M70 but very little on the Ruger 77. Well after practising on a Sako & M70 I tackled the Ruger & I think it turned out quite well but that angled screw is certainly fiddly. When I searched I found very few picture of Ruger 77 bedding so I'm hoping that a picture telling a 1000 words applies. Unfotunately I did not take enough pics of the action prepped for bedding. What I learned is this: 1. Get a copy of Richard Franklin's DVD "Stress Free Pillar Bedding" best investment you could make & its only a few bucks. It's on Rem 700 type actions but you'll learn a heck of a lot. 2. Devcon Steel Putty is the perfect bedding medium & Kiwi Neutral Shoe polish the perfect release agent. See above video. 3. You need to keep that angled screw hole free of bedding material & that is hard. I used a wooden dowel & put several layers of masking tape around it to fit and kind of threaded it in. This dowel plug has to be quite short or you'll have difficulty putting it into the stock because of the angle. So tape some string while you are wrapping the masking tape on the dowel feed it through the hole when you have applied the expoy then you can withdraw it. 4. Put 2 layers of tape around the bottom of the recoil lug. Then put some modelling clay(I used plasticene) around the front & sides of the recoil lug then trim with a blade flush with the front & sides of the action. 5. I'd put lots of release agent drown the recoil lug screw hole & then plug the bottom 1/3 of the hole with a plasticene. Regardless of what you do you are likely to get epoxy in there. The last bit of the hole is the thread of your rifle barrel & you do not want to epoxy that in. When you screw into the recoil lug the plasticene will push out the epoxy. 6. I did not use pillars but after I did the top then I bedded the bottom of the action. Remove the pin that hold the floorplate then you are left with the hinge fitting that is screwed on. Put some tape & of course release agent all over this. Don't worry that the screw hole gets plugged up you can redrill it from the top later. If you don't put tape over the openings then epoxy will come out of all the holes and you will not have a flush surface to bed on. When I tension the action screws it now locks up just like pillars instead of that mushy wood feel. 7. Most important. When you think you have put release agent on everything. Do it one more time, then buff to get a nice thin coating. Remember lots of release agent on all screws. 8. Do not screw down too much on the front action screw after you have applied epoxy. Just finger tight. 9. In relieving the stock its useful to find out where it contacts now. I used cheap lipstick put it around the barrel, recoil lug, the flat area behing the lug and the tang. Then I assembled it all up & could see where I should relieve the barrel channel (& where not to) 10. Where the rear face of the lug contacts the stock you need to leave some material there as a refence point so the action does not move backwards in the stock. Sorry perhaps not the most logical information but I have tried to point out the problems I encountered so you don't have to go through them. Good luck. Regards JohnT 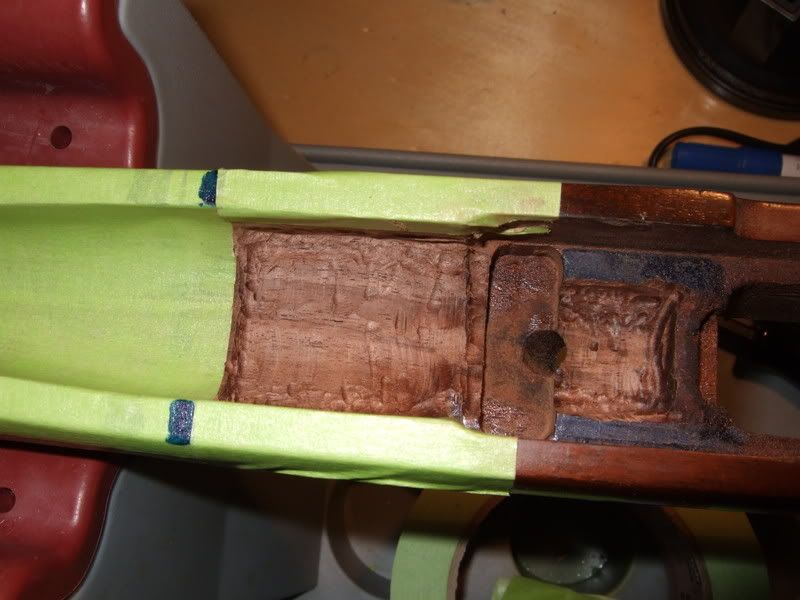 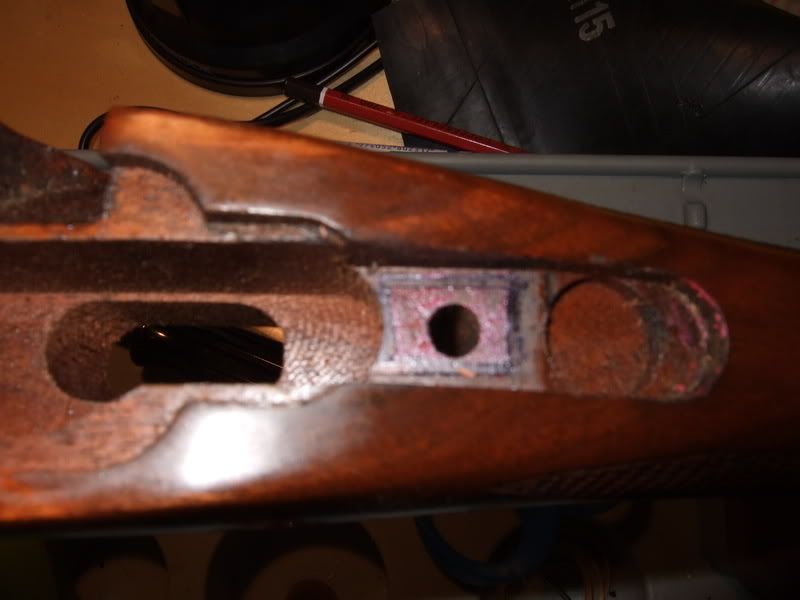 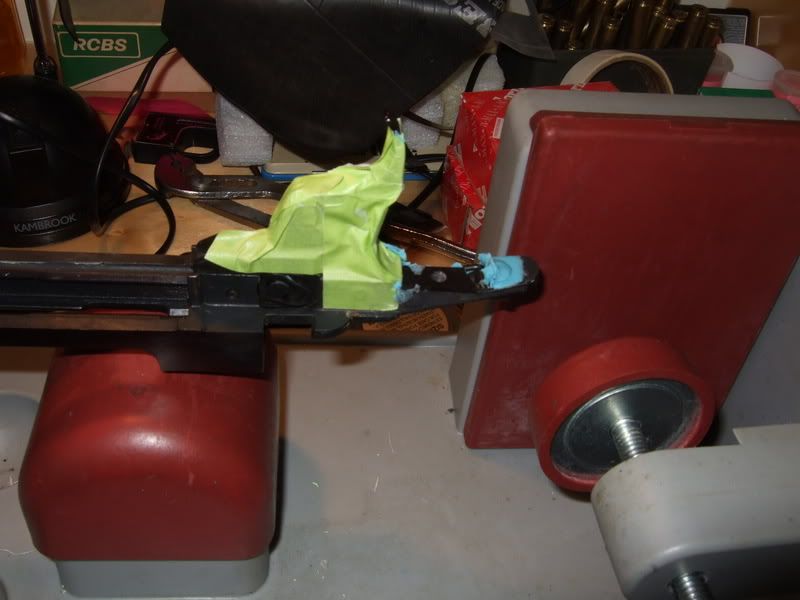 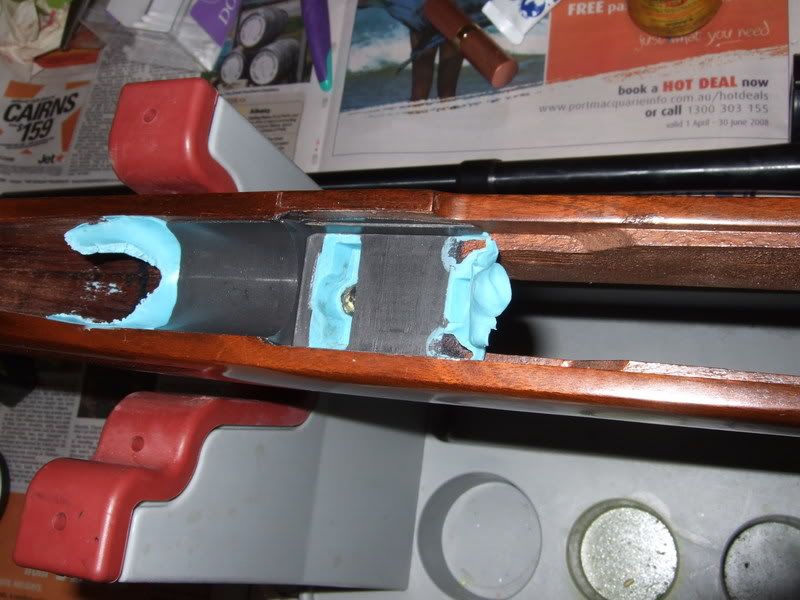 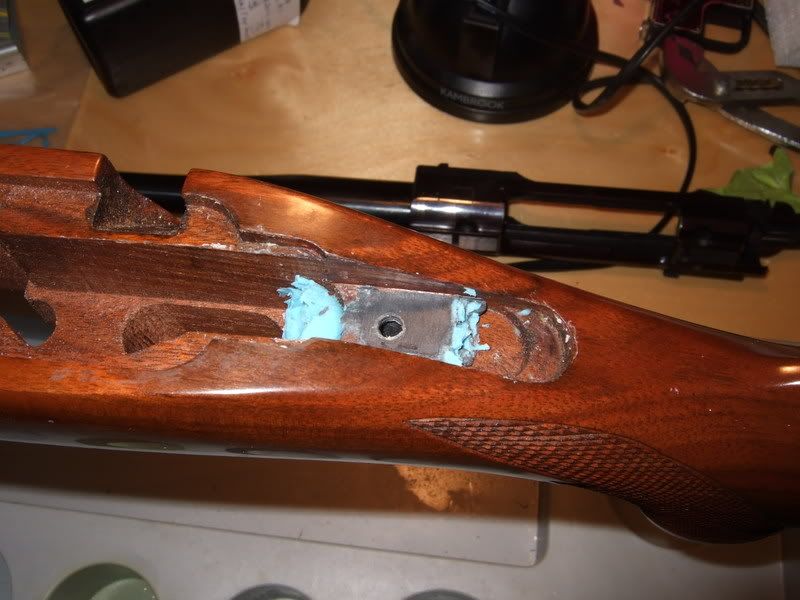 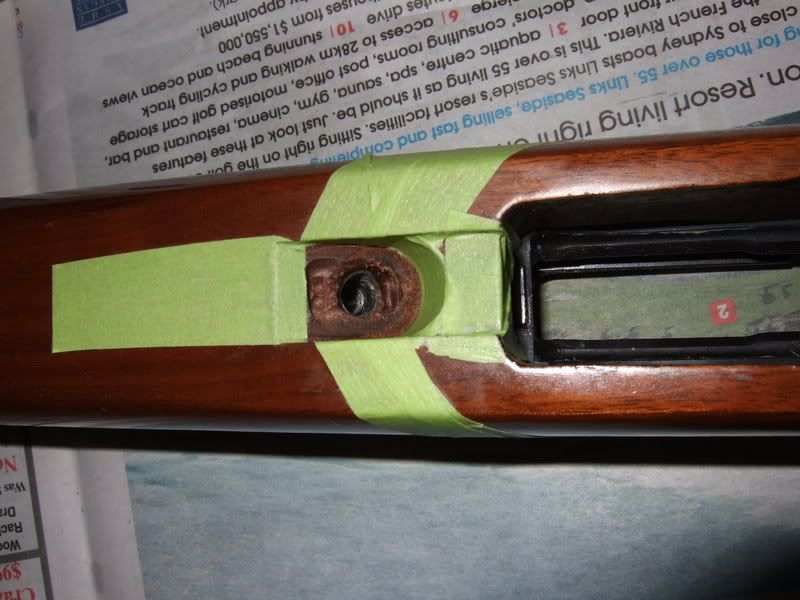 | |||
|
| one of us |
John, thanks very much! I knew where you were from when I saw the word "plasticene"! haven't seen that since I was in England. I noticed that you did not fully bed the action, just the front and rear. Any particular reason for that? In any case, excellent advice and photographs. Peter. Be without fear in the face of your enemies. Be brave and upright, that God may love thee. Speak the truth always, even if it leads to your death. Safeguard the helpless and do no wrong; | |||
|
| one of us |
Hi Peter, Yeah from the convict colony of the mother country! As Richard Franklin says in his DVD only need to bed the critical areas being the ones around the bedding screws. The rest is for "looks" won't make it shoot any better & if done badly will make it shoot worse. I also bedded part of the barrel shank - some debate over whether this is good or not. Quite frankly I am not skilled enough to do the whole action bedding and not game to try. I may on a Rem 700 though but not on a Ruger 77. You'd also need to remove the trigger, bolt stop, ejector & I again tried to avoid that. Basically tried to keep it simple. Lots of "guides" say use modelling clay. I found some & it was the worst stuff. It dried real quick and became powdery, wouldn't stick to the metal. Then I thought hey maybe they still make plasticene from my pre-school day. No they don't it was probably toxic! But I managed to find the modern equivalent, made in Malaysia, soft, sticks & never goes hard, stays pliable. Nice bright colours too. Good luck. Take your time in the preparation - saves time later. Great feeling the first time you do it when the action comes apart and not glued to the stock. Huge relief! Like a kid unwrapping a Christmas present. Regards JohnT | |||
|
| Powered by Social Strata |
| Please Wait. Your request is being processed... |
Guns, Politics, Gunsmithing & Reloading Gunsmithing

Visit our on-line store for AR Memorabilia