

 The Accurate Reloading Forums
  THE ACCURATE RELOADING.COM FORUMS
  Computers, Hi-Tech & Product Reviews
  Practical Photography For Hunters
  Cheap Studio
Go  | New  | Find  | Notify  | Tools  | Reply  |  |
| One of Us |
Over the past few years I've tried to turn my basement workspace into a simple photography "studio" for firearms, etc. and in the process have tried lots of different lighting, backdrops, and angles etc, without really feeling satisifed with the results. I recently tried a couple new of tricks that I think work really well. Nothing new for the seasoned photographers, I'm sure, but this is just fun for me to discover. There's still things I'd like to improve on these photos but I think they're better than most "studio" shots I've previously attempted. 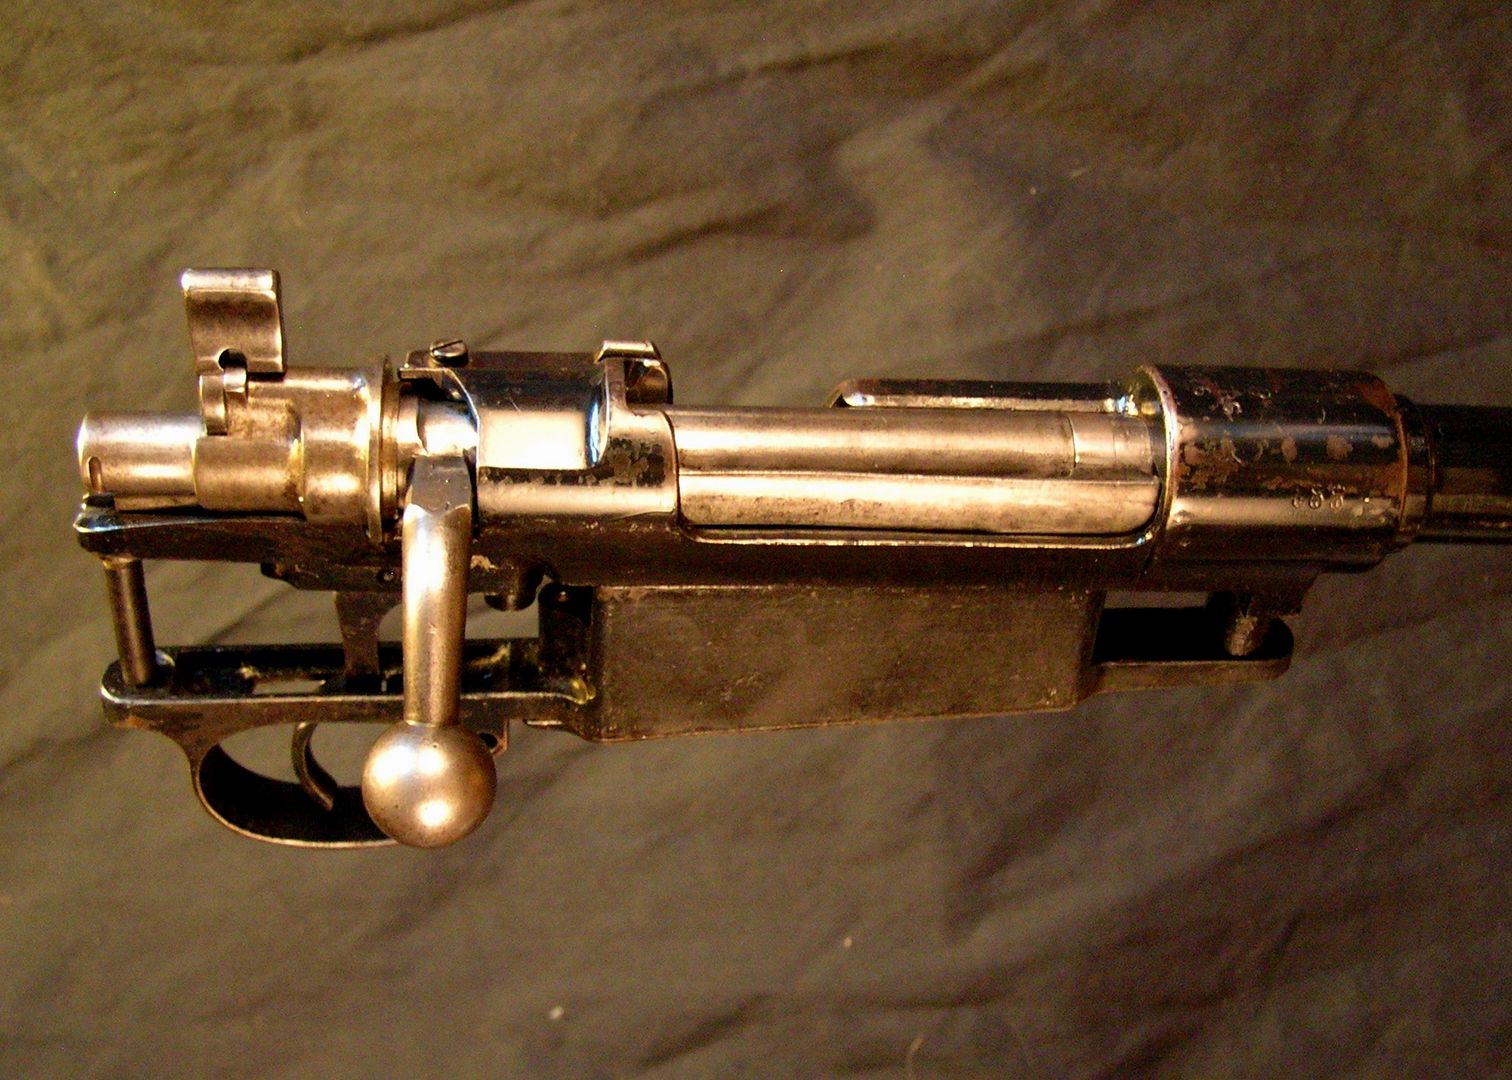 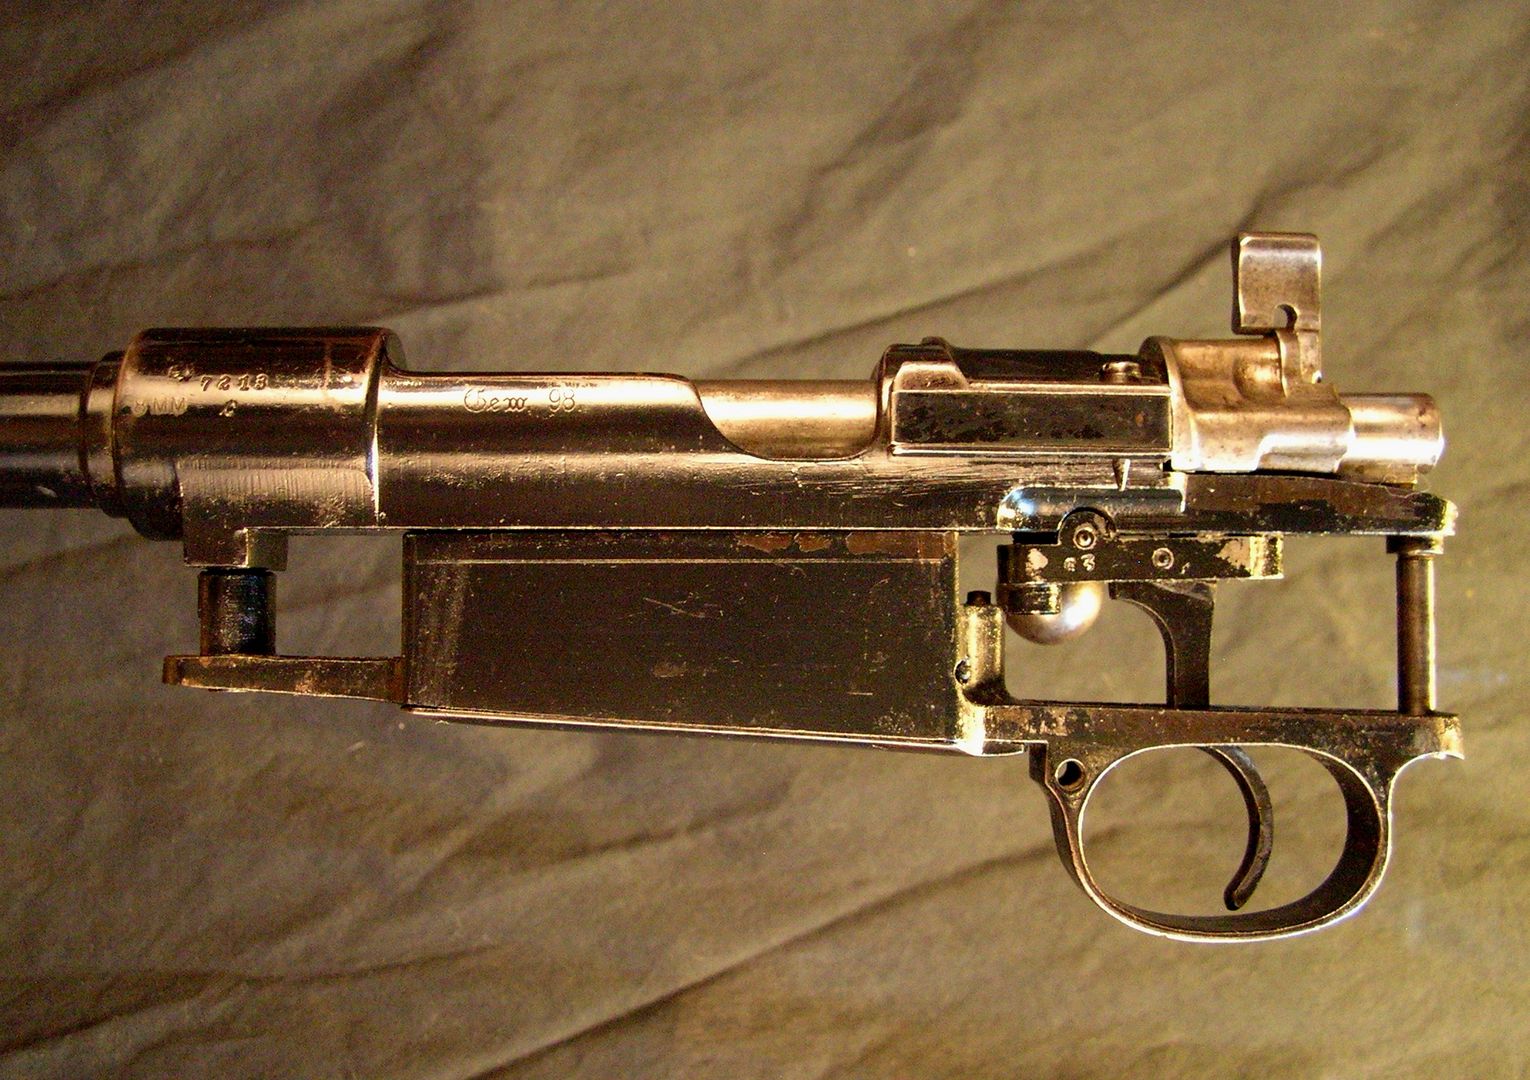 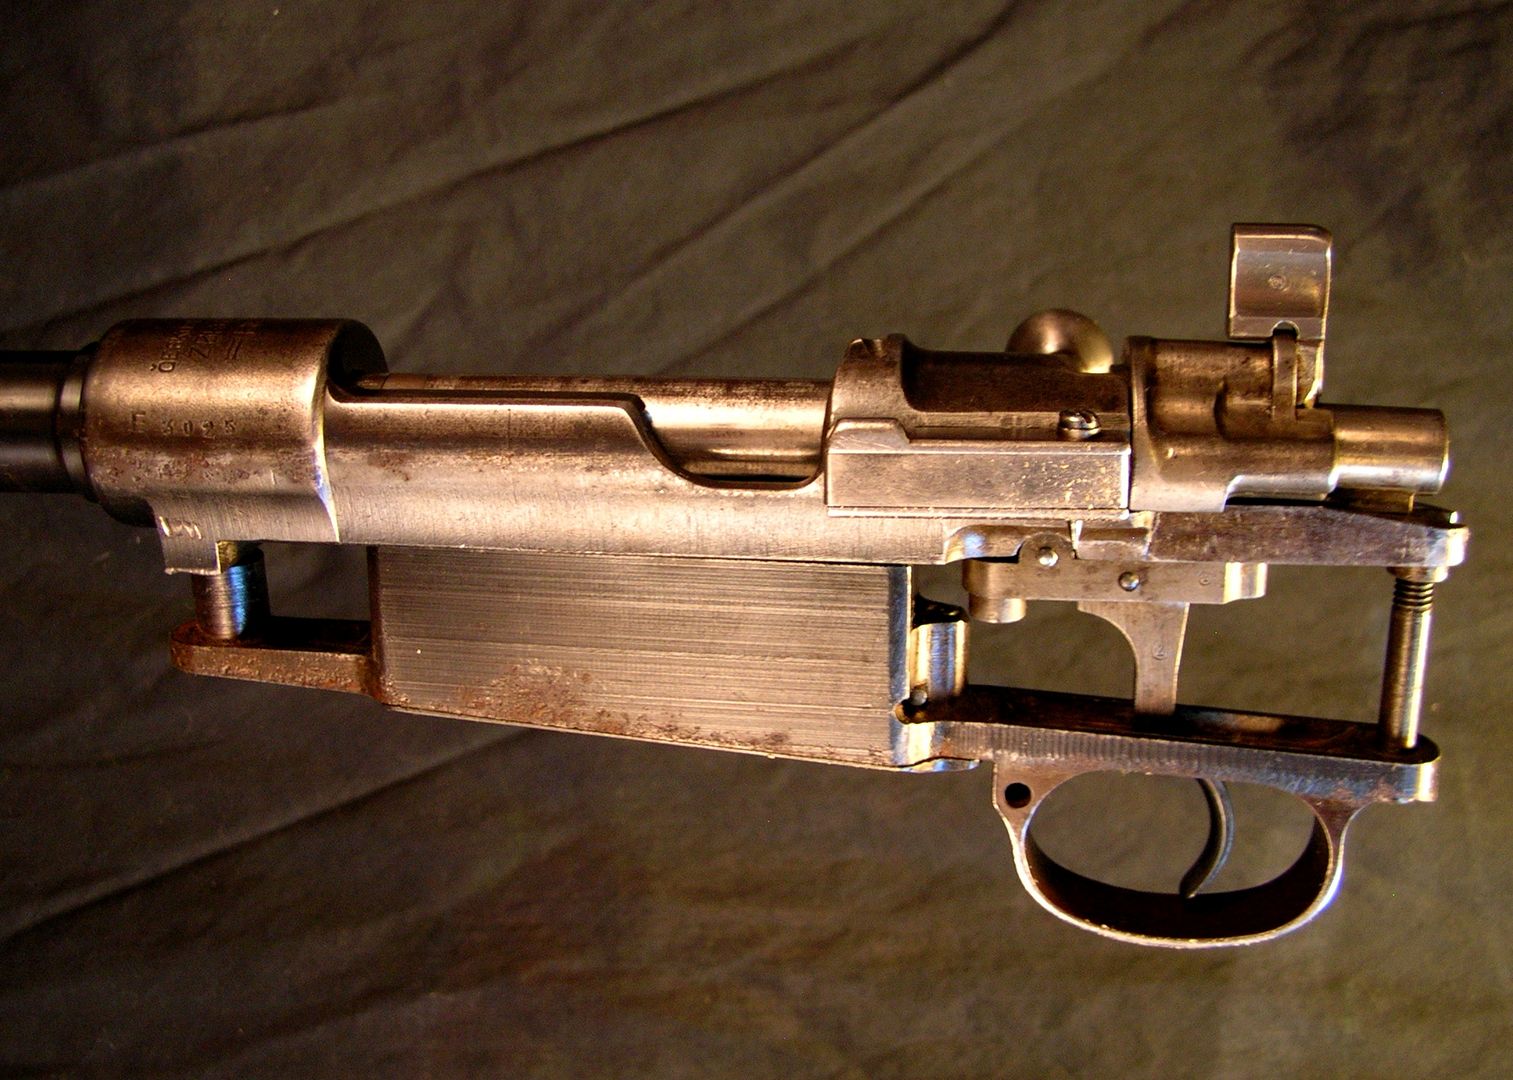 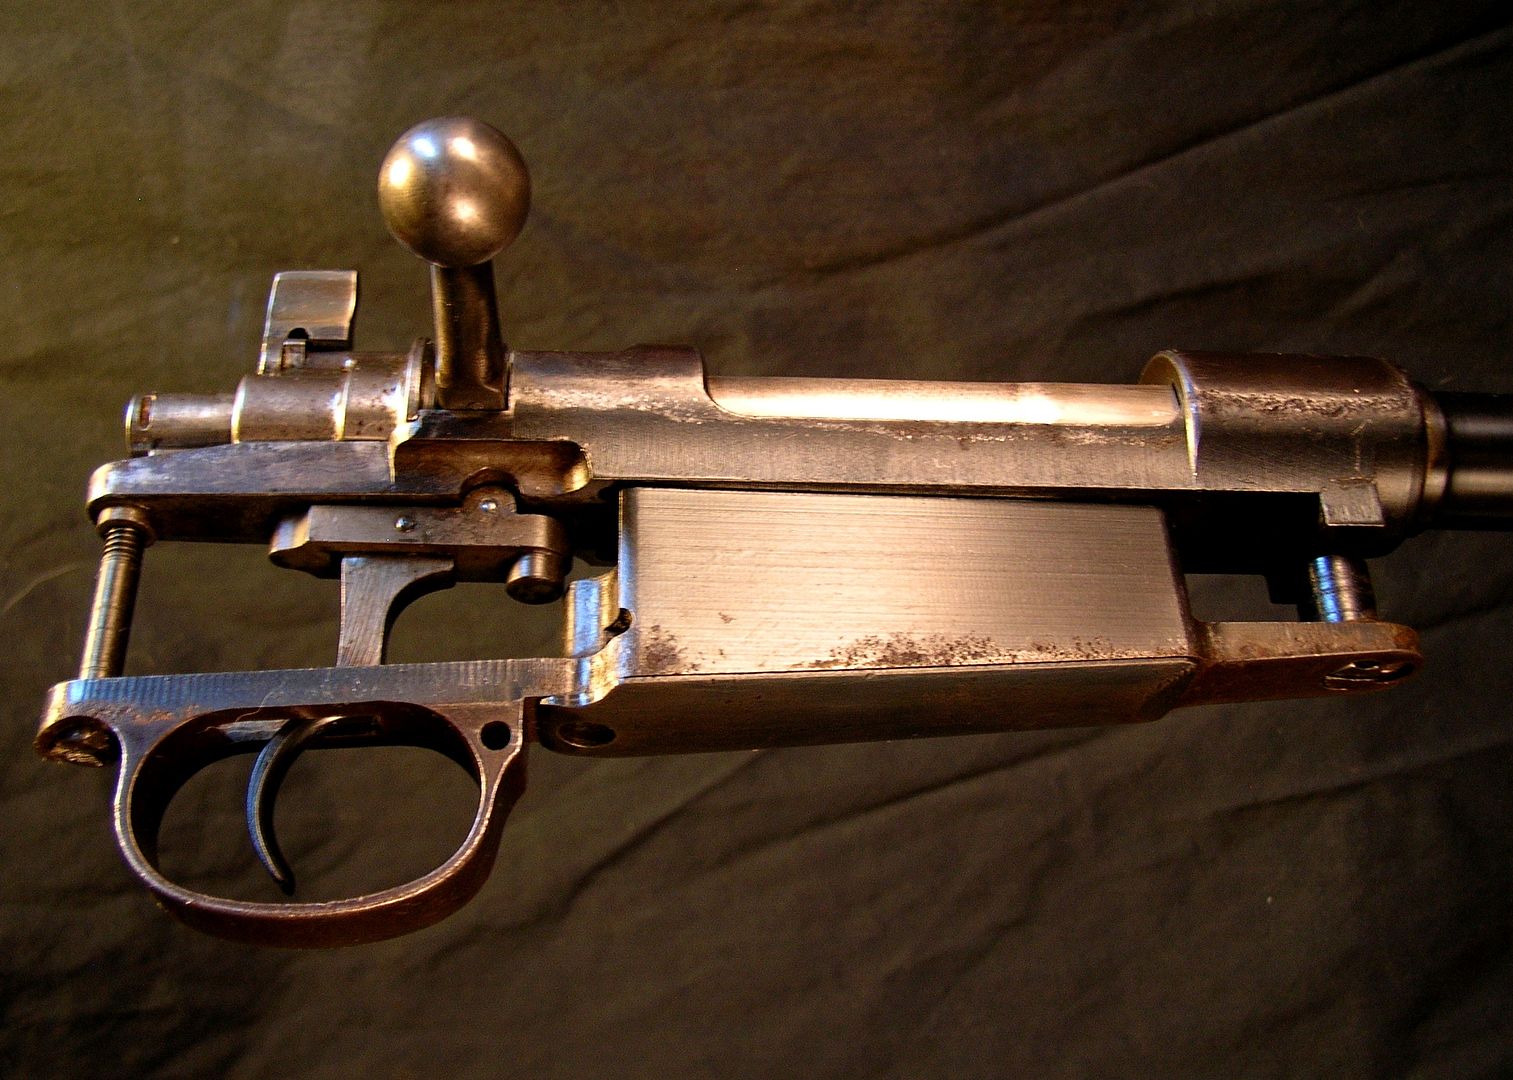 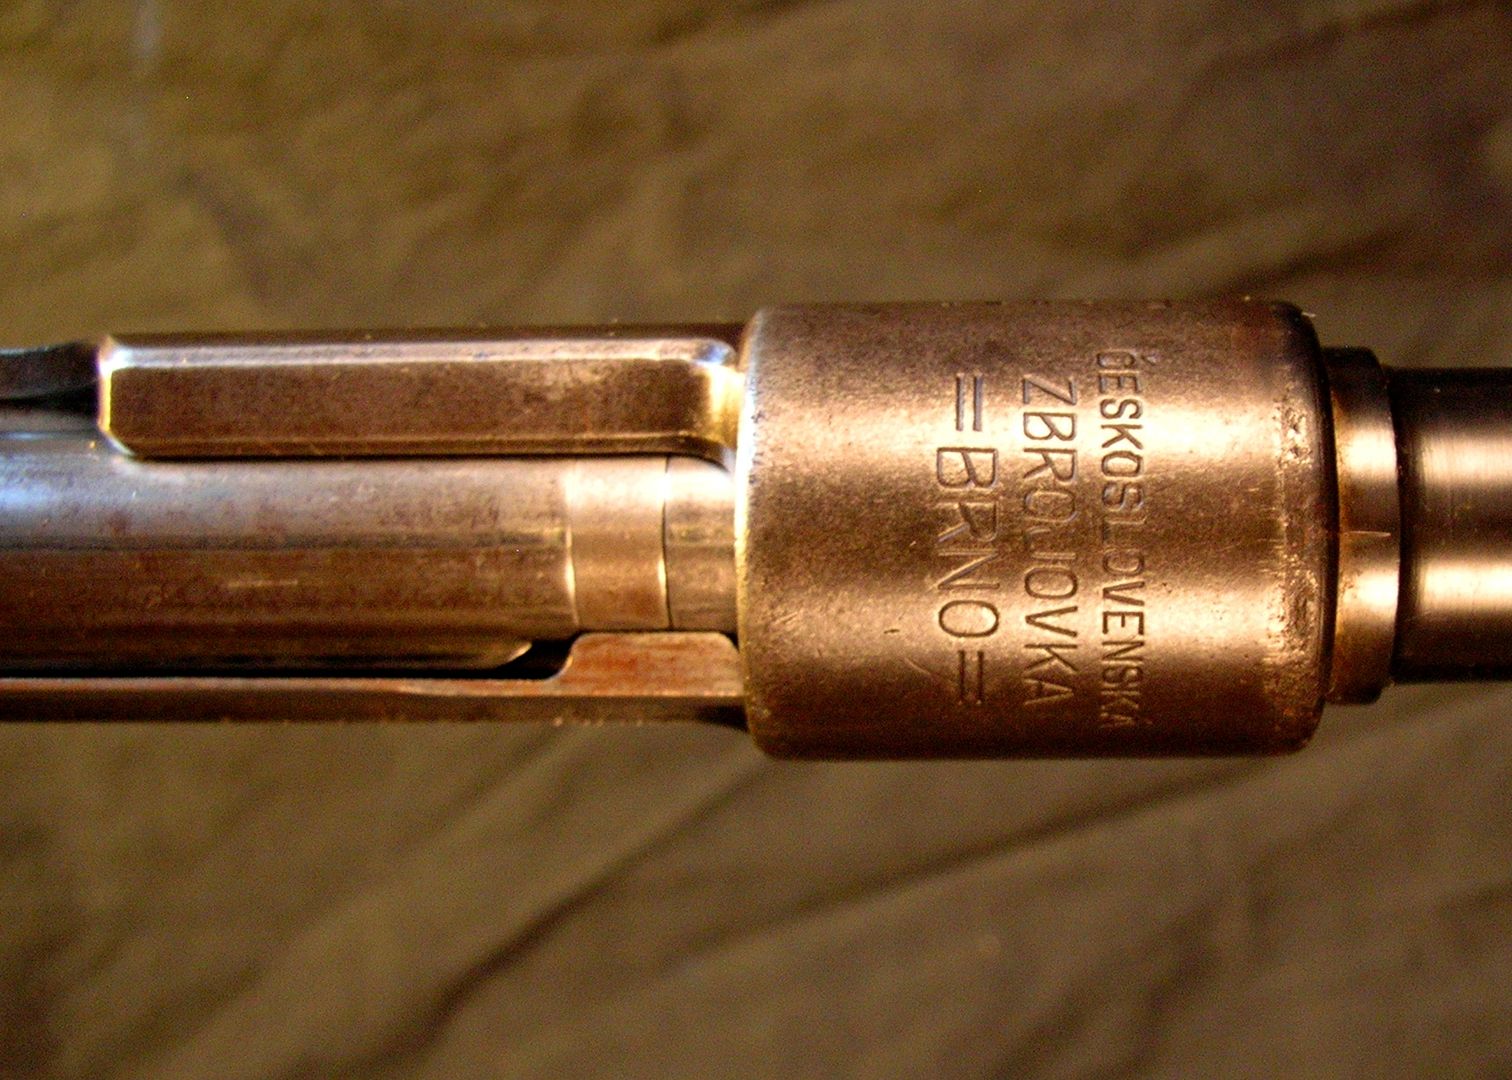 Now here's how I had the backdrop, subject, camera, and lighting set up, with "help" from my assistant and his tail... This could also be "If Red Green had a photography studio": 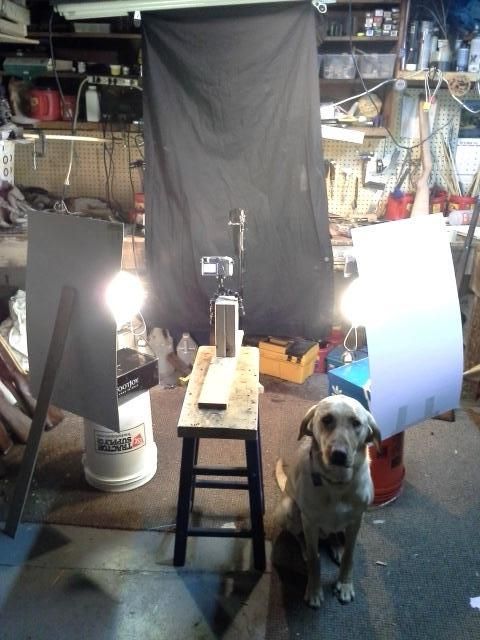 Sorry about the small photo... I'd just got a new cell phone and hadn't updated the photo settings. The total cost of the new stuff I bought (not counting camera and tripod): the steel rod, lighting, backdrop, etc- is about $20. I learned several things I'm doing there from Steve Hughes in his Montana shop while I was there for a seminar this past September. His book cover and magazine photography is the kind of stuff I'm trying to emulate: finegunmaking.com The subjects are a pair of old Mausers I recently bought, a 1916 Amberg Gew.98 and 1925 BRNO 98/22. The sculpted metal and contours meant the light could be reflected differently if I barely rotated them, which was interesting. You can't see it in the photo, but I was holding the barreled actions upright with a simple "stand" I made. I screwed a 2x4 block onto a 2x8 square base, and drilled a 1/4" hole through it with my drill press. Then I took a 1/4" rod, cut a 12" long section, rounded off one end and polished the crap out of it. Then I glued it into the base with the rounded end pointed up, and put a layer of electrical tape around the top and base. This way I could easily hold the barreled actions upright by very carefully slipping them onto the rod. One reason I tried this method first with a pair of old military rifles is the fact that I'll be discarding the barrels so if the rod somehow damaged them, it won't be a big deal. I don't see myself doing this with a hot target rifle's pristine bore quite yet but for sporting rifles I'll need to get some drill rod and make different bases to fit rifles of different calibers. A nice advantage I found this gave me was the ability to easily rotate the barreled action to get a different shot, while keeping it perfectly steady. The backdrop is just a black sheet clipped to a flourescent light (off). I should have washed it first. The lights are 60-watt lamps set about 12" from a white poster board. How can the local Office Max not have a larger sheet? Anyways I taped a stick to one end of a shoe box and the board upright to the other end (convenient spacing) and sat them on 5-gallon buckets at approximately 120 degrees relative to the subjects and three feet away. Previously I was just aiming the spotlights directly at the subject, then trying to cast them just nearby, then drying various diffusers, and now I see why reflectors are used. I see the professionals are using much more powerful lights and bigger reflectors (?), but this was my first time trying something like them. I set the camera (an old back-up Nikon 4800, soon to be replaced!) on a block I'd made for an odd checkering job using a small $10 Gorillapod knock-off, and set that on a shop stool. It was sturdy enough, but barely. The Gorillapod is much better suited for the odd photos I take afield and in the woods on excursions, which is what I bought it for. I shot in macro mode with zero zoom, just snuck in real close to the subjects careful to avoid disturbing the light. On cameras, I've previously used just Nikon point-and-shoot cameras (and my dad's much nicer D5100, man that is fun) and will likely continue with them. I'll do my best to limit my budget to $150, and I know that is not a lot but I will be taking the camera on canoeing, backpacking, hunting, etc. trips and do not want to abuse/expose to risk a pricier camera. Anyways, after a long-winded post, I have some questions and would simply appreciate advice and constructive criticisms... I really like this new setup with the rod-rifle-holder and bounced light but obviously there's improvements that can be made. If you didn't have much of a budget, how would you boost the lighting? Also, any suggestions for a cheap tripod? It won't leave my shop, won't see too much use. Any other comments and notes would be appreciated! Thanks for looking. "If the women don't find you handsome, they should at least find you handy." | ||
|
| One of Us |
Evan, You are doing good work. The last photo of the roll mark on the ring is well done in terms of composition and contrast. Though they are all pretty good. I think that you could soften the lighting a little more and it will reduce the hot spots. Maybe try spraying the white board with flat white paint, or with white tree flocking. I've used both to get softer light. For different light, silver paint, or gold paint can be interesting. Another thing to try is pointing the lights at the subject, but put a white cotton sheet or pillowcase in between to spread the light. i.e. a cheap light box. Try non-uniform lighting. Lights at different angles, or distances. Also experiment with moving the background further away from the subject so less light hits it and it disappears more. Keep in mind that your subject and camera are stationary, so long exposures are fine. Softening the light will reduce it some, but it doesn't matter much since you can compensate with exposure. Use the self timer on the camera to trigger it and that will eliminate camera shake. Noise will creep in at some point, but digital photos are cheap so you can see what works best. You can also move the lights closer to the subject. With a point and shoot it will be tough to blur the background due to lens limitations. You could iron the backdrop to smooth it. A smooth background brings the eye to the subject and focuses you attention. Amazon, office max and walmart all sell $10-20 tripods that will do what you need. I've seen the Canon S100 on sale lately for close to 150. Great P&S camera. My personal opinion is that Canon and Sony make the best P&S cameras, but that is just an opinion. Others have their gems as well. Truthfully, the technology is pretty mature, so it is hard to get a stinker if you do a little research. Jeremy | |||
|
| One of Us |
Hey Jeremy thanks for the nice words and advice, much appreciated. I have some experimenting to do with the light setup, at least now I feel like I'm on the right track. I agree, that last photo of the BRNO front ring is my favorite too. "If the women don't find you handsome, they should at least find you handy." | |||
|
| One of Us |
Hopefully a few others will chime in. Every photog that I have worked with has their own bag of little tricks. A good resource for cheap tricks and techniques are Tony Northrup's youtube posts. Actually, youtube in general is a great resource and it is easily searchable. Keep the posts coming. Critiques are valuable. Jeremy | |||
|
| One of Us |
My dad has suggested a Nikon P330, knowing what I do pretty well. He likes his Nikons and Audis. I can't say photography is something I've really seriously studied yet, but I'd like to read more. I've bookmarked Ming Thein's blog but haven't started delving into it yet. I'm sure I could spend a few minutes (or hours) on Youtube too- thanks for the suggestion on Tony Northrup. I suppose one advantage to the "highly mobile" lights I set up for downstairs is I can easily move them around to adjust the light- something I didn't do while taking those photos. I've thought about posting some of the other photos I've taken but most are landscape and wilderness shots, not studio stuff. I suppose they can always use improving too- okay Jeremy I'll start another thread, why not? I would like to keep figuring out new ways to get the best out of the point-and-shoots. "If the women don't find you handsome, they should at least find you handy." | |||
|
| One of Us |
I suggest looking at small cameras that allow you to shoot RAW files. My Canon S95 allows that and it can make a great difference in adjusting both exposure and white balance in post processing with very simple software. I think your studio could work just fine, but to be able to use a short telephoto setting with a very wide aperture would allow the background to be a blur and less noticeable. If you can adjust white balance you'll get your blacks to be black and your whites to be white. It'll give the photos more "punch" as well. Last suggestion, you are still getting a lot of bright glare points on the metal. You might try hanging a white sheet, or even a white t-shirt, between the two light sources and the subject and see if that diffuses it a little more. Have fun with your experiments. _________________________________ AR, where the hopeless, hysterical hypochondriacs of history become the nattering nabobs of negativisim. | |||
|
| One of Us |
Secon wink . your lighting is to hard . use soft light .shoot raw . and use perhaps a pol filters . shooting metal is a difficult job. Take care of the bag ground . hunt safe wisent | |||
|
| One of Us |
Thanks much for the advice, sounds like I have some work to do on the lighting. I could cobble some diffusers together. "If the women don't find you handsome, they should at least find you handy." | |||
|
| One of Us |
I tried taking the same photos of my BRNO 98/22 again today but with my new Canon S110 on a tripod and some adjustments with the lighting. I tried diffusing the lights with cheesecloth but that didn't do much, but found a random old curtain in a garage sale box that was slightly translucent and seemed to work well. The camera was set at f/2.0, 1/4 sec. exposure for these photos, and I had the white balance on auto. No zoom or flash, just used the auto macro focus setting or had fun moving the camera around and manually focusing. I also took the photos with a 2 second delay so there was no risk of me moving the camera. I did a little cropping on these photos and minor adjustments to contrast and brightness. I was pretty happy with how they looked right off the camera, especially since this was the first time I've looked at photos taken by my new Canon on a computer. 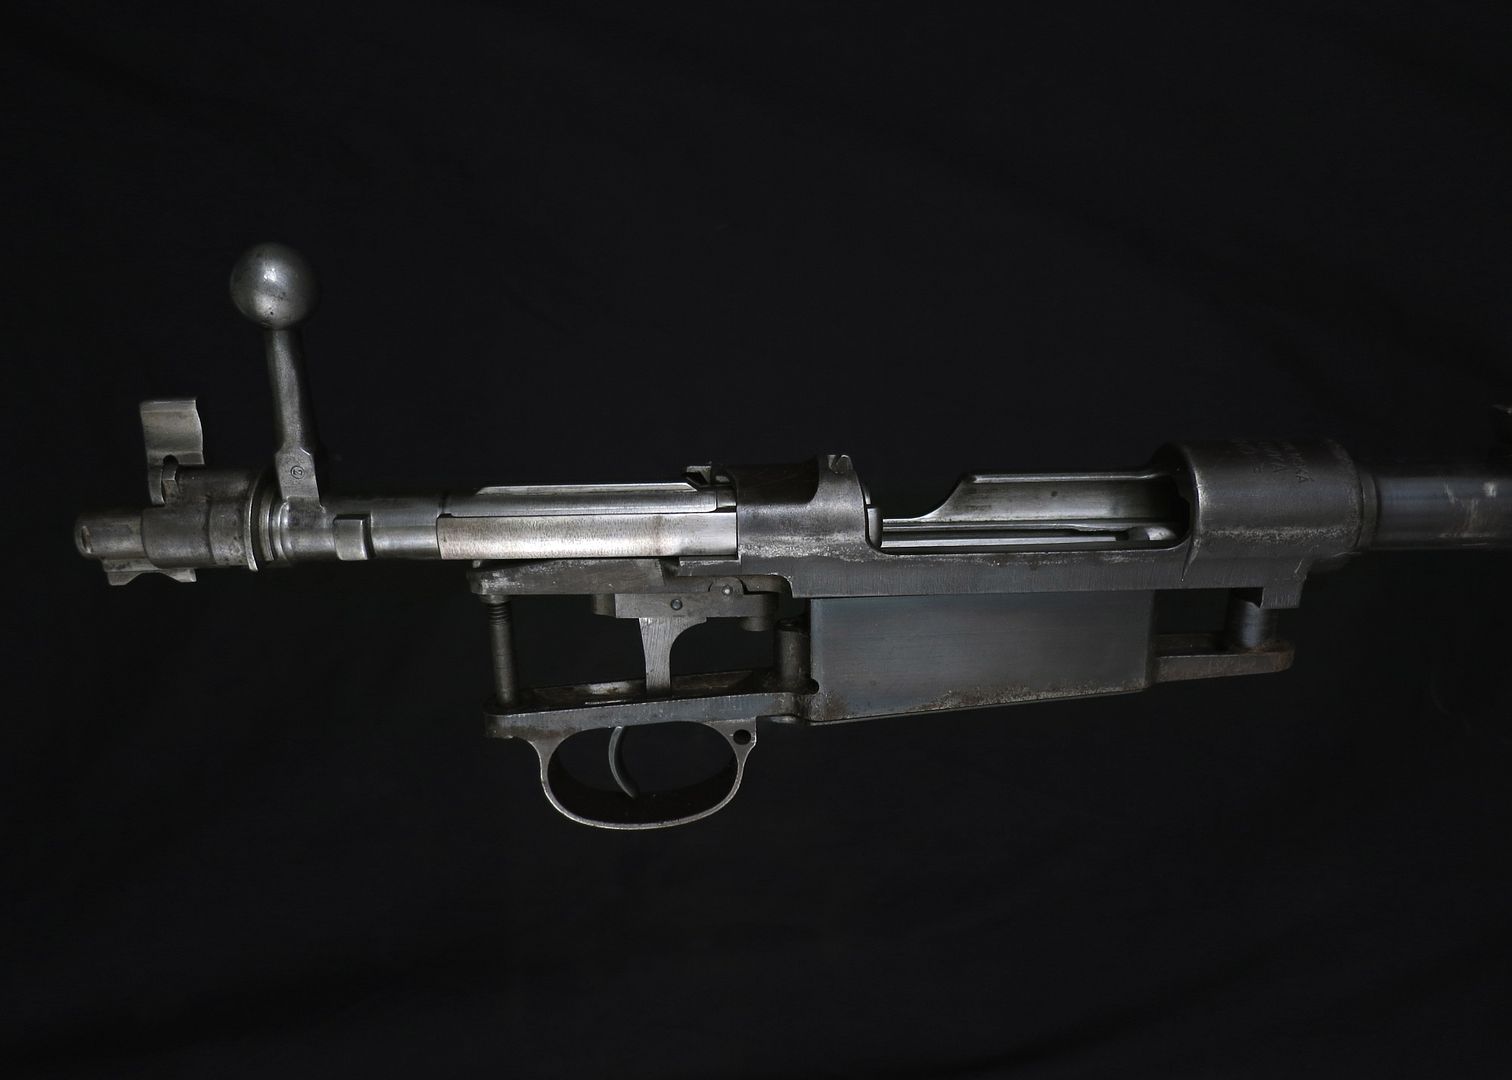 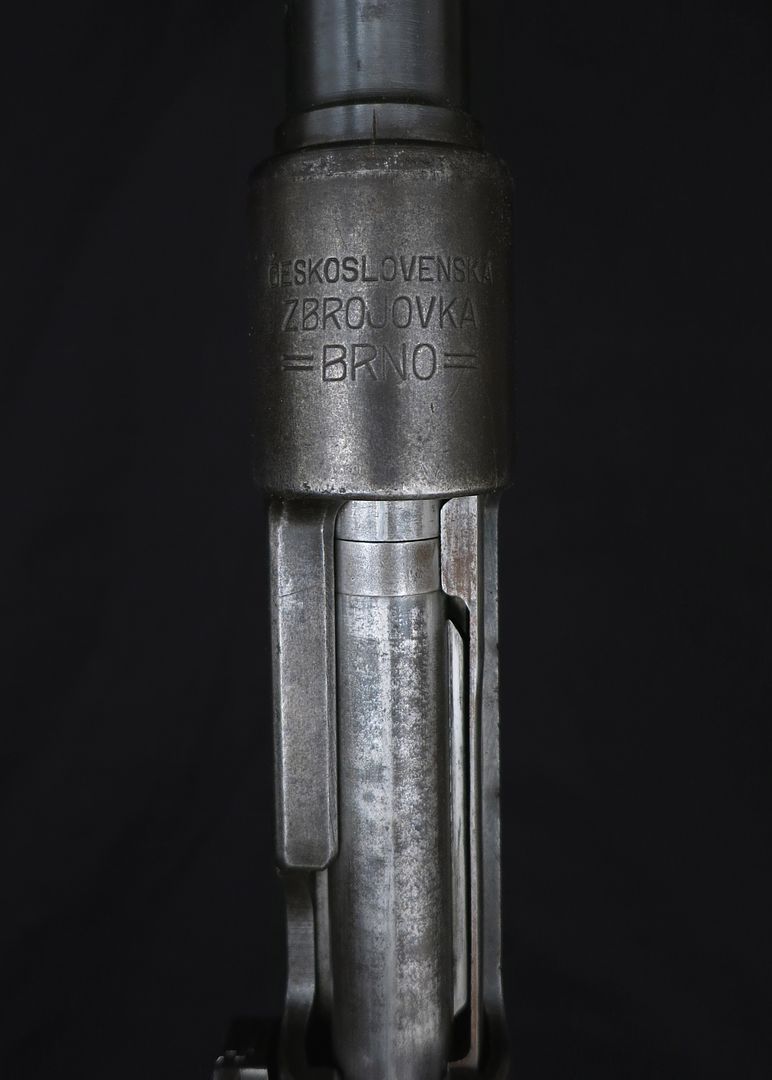 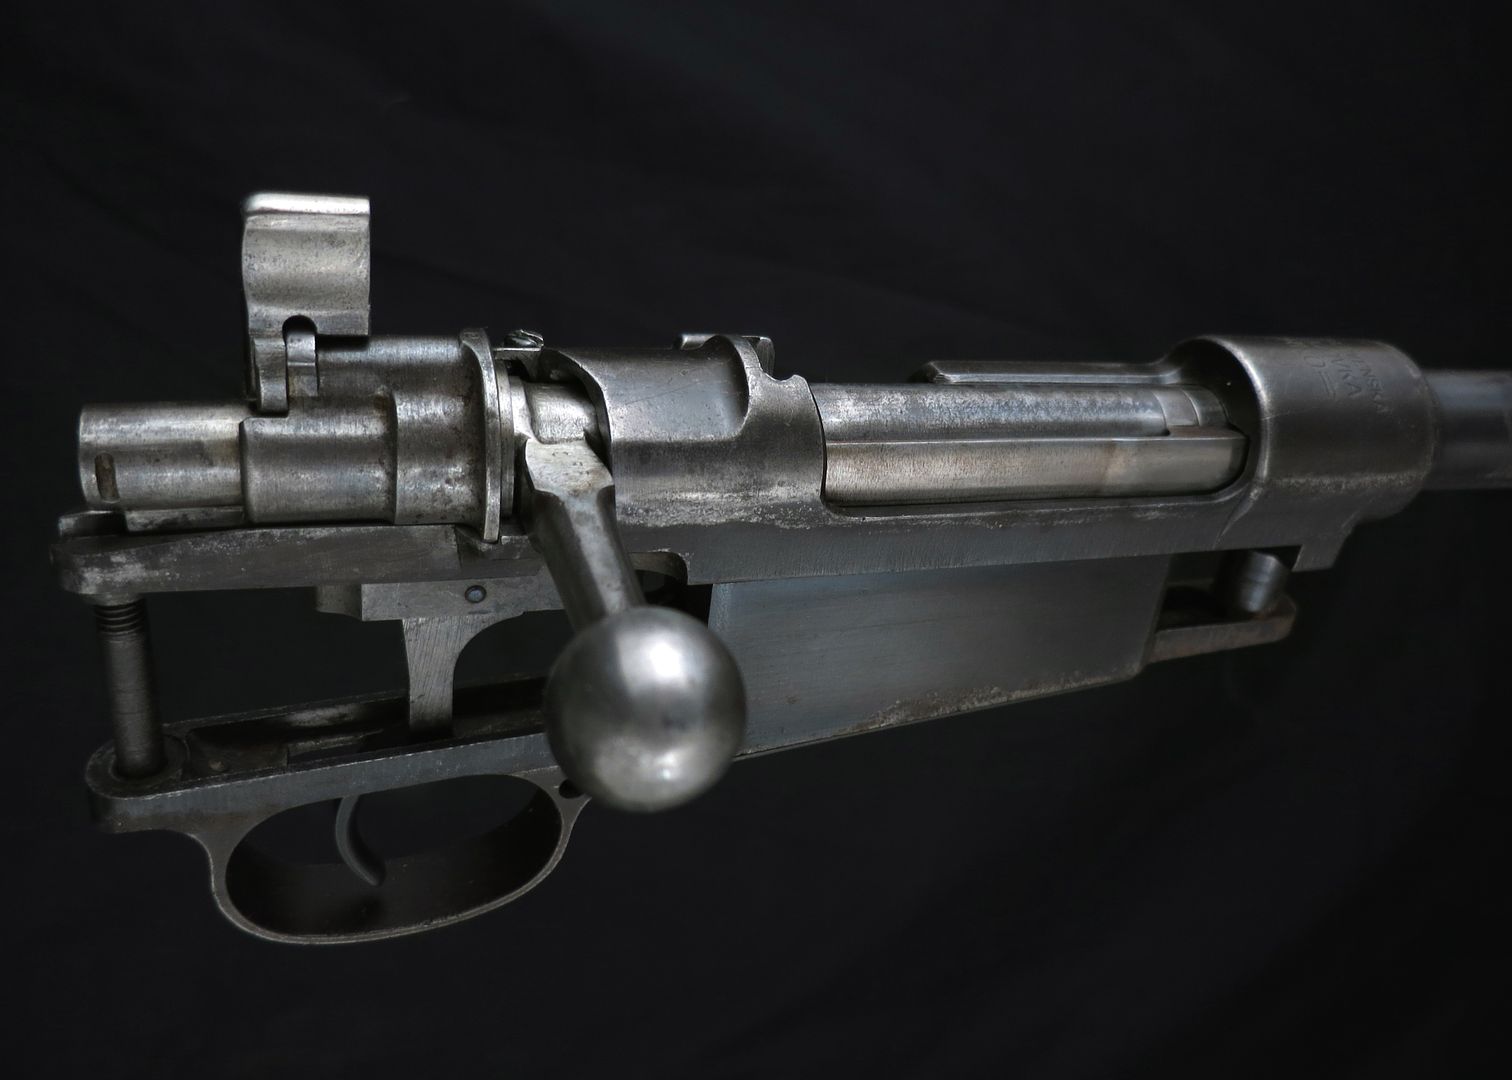 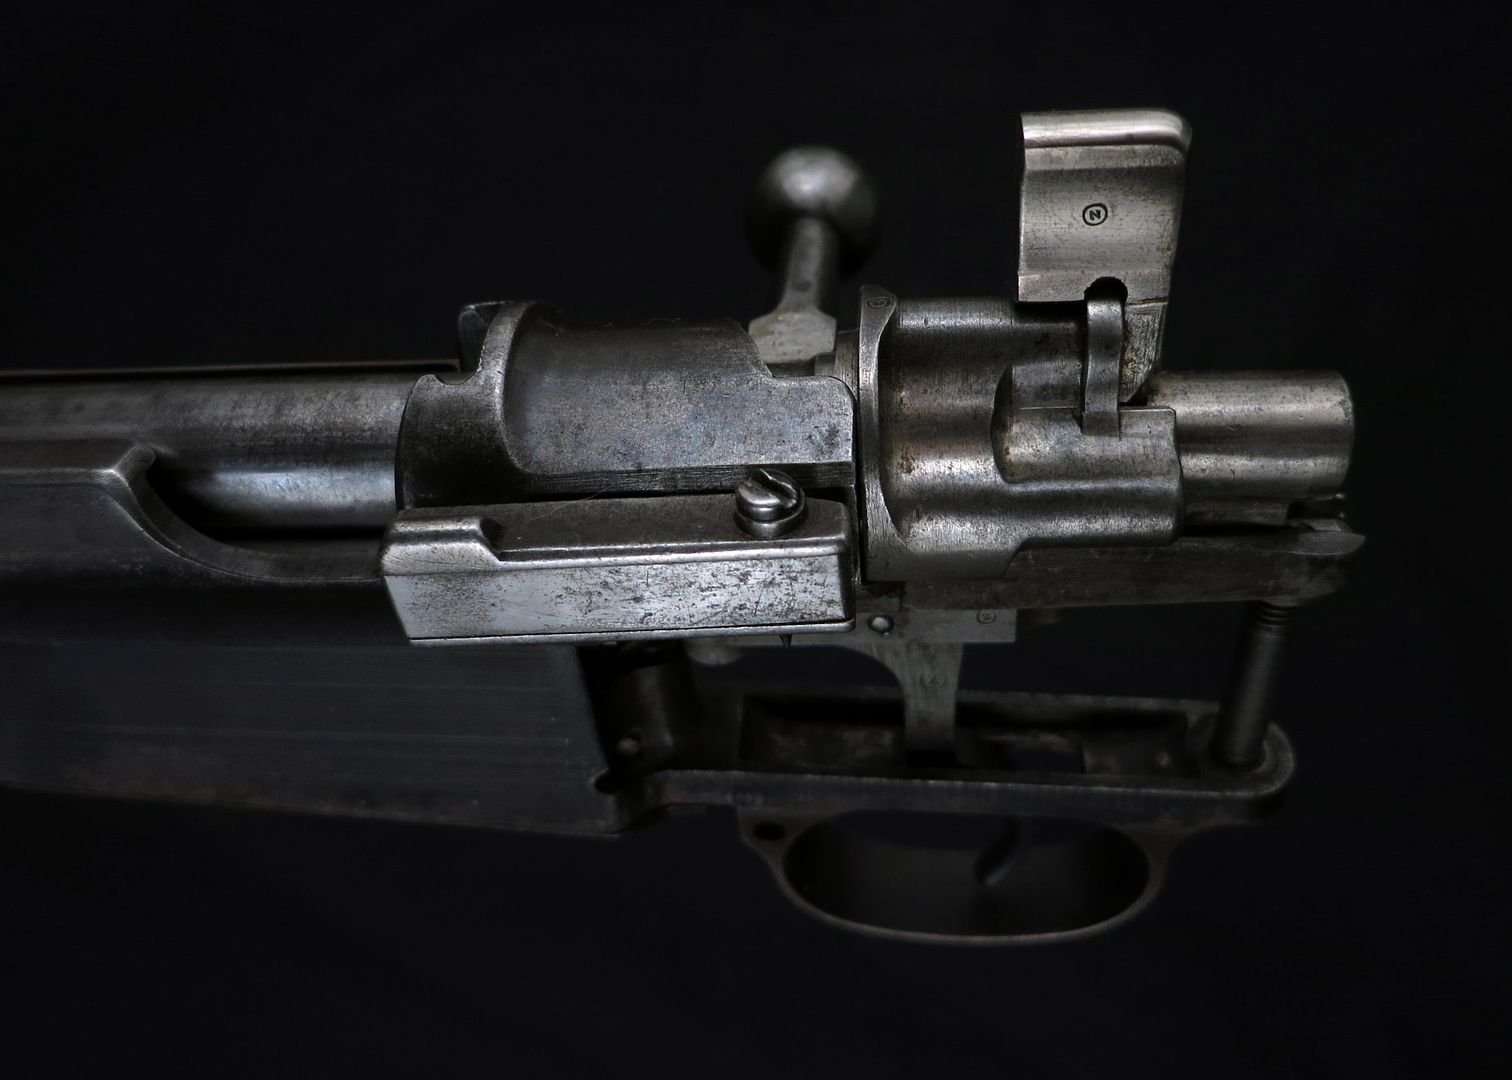 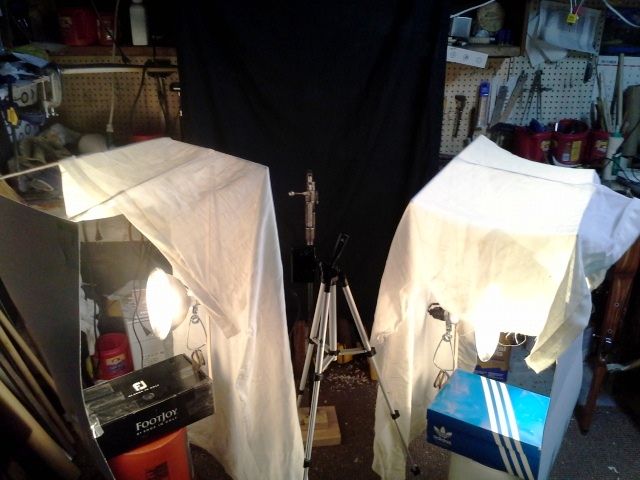 "If the women don't find you handsome, they should at least find you handy." | |||
|
| One of Us |
I took some photos of my Suhl 150 rimfire benchrest rifle today too. I had to adjust the lighting and tripod to get full length shots of the long rifle. The two diffused lights beside the rifle weren't covering the entire thing top to bottom so I added two more spotlights above and below the rifle.    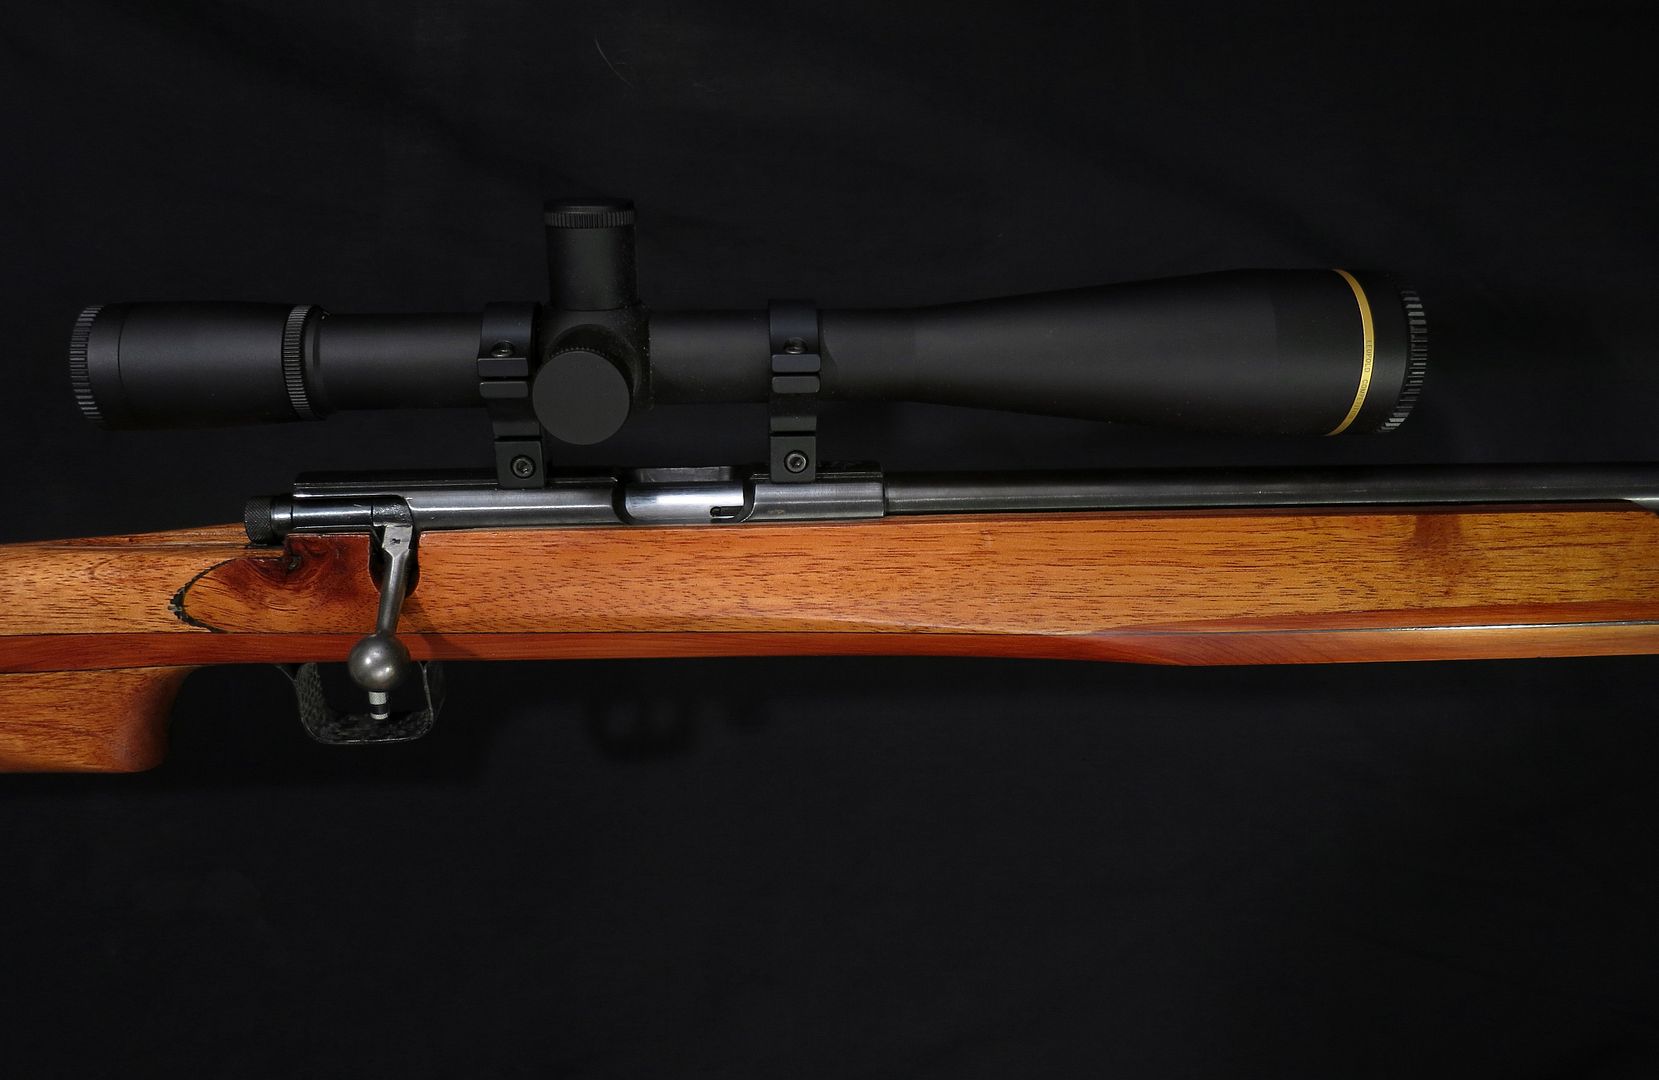 The additional two lights aren't in this photo but you can see how I adjusted the existing lights and backdrop. 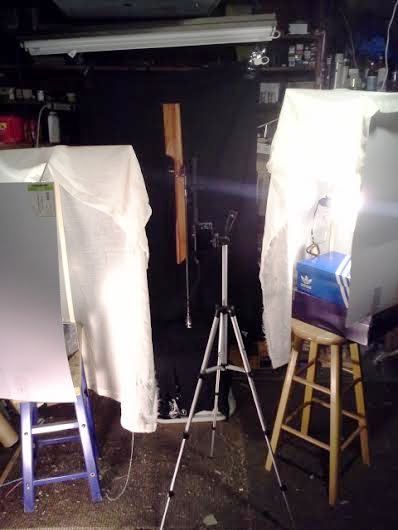 "If the women don't find you handsome, they should at least find you handy." | |||
|
| One of Us |
Evan, I think that you have about nailed it. Even lighting, minimal hot spots and little to no background to draw your eye off of the subject. Great work. Jeremy | |||
|
| One of Us |
You have to put a longer distance between the gun and the bag ground to get the bag ground total black with no shadows . Otherwise it is Ok. Hunt safe wisent | |||
|
| One of Us |
Or use a background light. _________________________________ AR, where the hopeless, hysterical hypochondriacs of history become the nattering nabobs of negativisim. | |||
|
| One of Us |
Thanks fellas... I really wasn't aware of those shadows until I saw the photos again online. Another thing to be aware of- I appreciate the suggestions. "If the women don't find you handsome, they should at least find you handy." | |||
|
| One of Us |
Evan, Are you aware of bare bulb slave flashes? They screw into any regular light bulb socket and go off when your camera flash fires. Because they're pretty much omni-directional they don't cast harsh shadows. When I see your two spot lights in their make-shift light boxes I cringe thinking about the heat and possible fire danger. http://www.bhphotovideo.com/c/...e_Bulb_Screw_In.html You'll want to do some internet searching for tutorials on how to use them, but they aren't hard to use. _________________________________ AR, where the hopeless, hysterical hypochondriacs of history become the nattering nabobs of negativisim. | |||
|
| One of Us |
Thanks Wink, and to answer your first question no I'm not aware of them. I also feel the same about the light boxes too, they are a real hazard. I don't intend for that equipment to be used much longer- I just threw together what I had on hand to get a feel for using such lights without pulling out my wallet, before I spend more money. The slave flashes look interesting, probably something I could use. I'm also curious about a basic light kit like this one: http://www.ebay.com/itm/Cowboy...&hash=item27dfaa6db6 Someone on another site suggested I take a look at that kit when it was lower priced this past weekend. Looks similar to my current setup minus the shoeboxes and tape all over everything. What are your thoughts? "If the women don't find you handsome, they should at least find you handy." | |||
|
| One of Us |
Evan, I don't think you should rush out and buy anything at this point. I think you should spend time looking at lighting tutorials on the web. It's free, there are a lot of them and you will start to get an idea of how to use light. Then you can start thinking about equipment. Personally, I've got no sophisticated equipment because I don't do product photography. I've got two Nikon SB900 strobes and a reflector. So far I haven't needed anything else, for what I do. Watch Karl Taylor shooting a bottle of scotch: http://fstoppers.com/amazingly...-on-product-lighting _________________________________ AR, where the hopeless, hysterical hypochondriacs of history become the nattering nabobs of negativisim. | |||
|
| One of Us |
I watched the video, interesting food for thought. Thanks for sharing. I have to admit I haven't used Google much yet too, and I don't have professional needs either but do want to get the most out of my camera. One little note, after zooming in on the photos and looking at them in finer detail, the ability of my yellow lab's hair to stick to things amazes me. I found a couple in the Mauser and Suhl photos. Gotta pay closer attention next time. "If the women don't find you handsome, they should at least find you handy." | |||
|
| One of Us |
"food for thought"??? Evan, the video that Wink recomended gives ALL of the basics for studio photography! These are: #1 you position and adjust each light independently (with the other lights off). Then you step behind the camera to see the results. Do this for each light. #2 Turn on all the lights View the results and make any adjustments. #3 Add reflective cards to highlight specific areas and flags to block unwanted light. ...Evan you seem to want to run before you've even learned to walk. I've seen this in both your stockwork and your photography. When a knowledgeable person gives you good advise you need to follow it, not just go on your merry way and continue to do it your way. Listen when people try to help you. ...I've looked at the lighting set that someone recomended. You will need 4 lights to evenly illuminate full length shots and white umbrellas instead of silver(which reflects a harsher light). You will also need additional difusers to further soften the light. Go to an arts supply store and buy a role of tracing paper and use it as shown in the video that Wink suggested. Wink gives good advise, listen to him and learn to walk before you try to run. ...Dave Wesbrook | |||
|
| One of Us |
Hey Dave thanks for the reply, maybe I misphrased my response to Wink but I didn't mean to sound dismissive or anything, I'm just trying to understand all the information before moving forward. I watched the video last night, did some more research on lighting, and went back to it again. I do appreciate both of your advice and suggestions. "If the women don't find you handsome, they should at least find you handy." | |||
|
| Powered by Social Strata |
| Please Wait. Your request is being processed... |
|

Visit our on-line store for AR Memorabilia

