 Rifles Custom Built Rifles
 Go | New | Find | Notify | Tools | Reply |
| Customizing a Whitworth Express 375 (Pics of Hunt added Aug 29) | Login/Join |
| one of us |
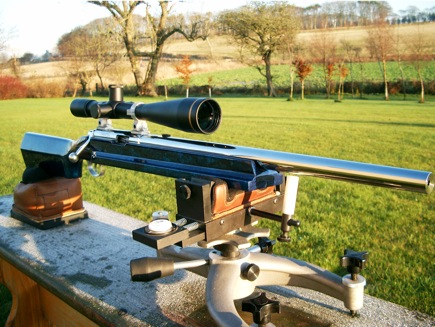
I bought a late-model Whitworth recently, as a backup Dangerous Game rifle to my current Winchester. After researching the origins of the Whitworth, it was clear it didn't hold any great value as a collector's item, so I don't feel bad altering it to fit my desires. I'll get the stock nearly finished and then send it off for the metalwork. Here's the rifle in it's original condition:  Use enough gun... Shoot 'till it's dead, especially if it bites. | ||
|
| one of us |
Step 1: Buy a stock blank I bought a nice blank from Cecil Fredi in Las Vegas. It's a dark piece of Bastogne walnut with nice Fiddleback and some figure, just what I was looking for. Here's the blank I bought 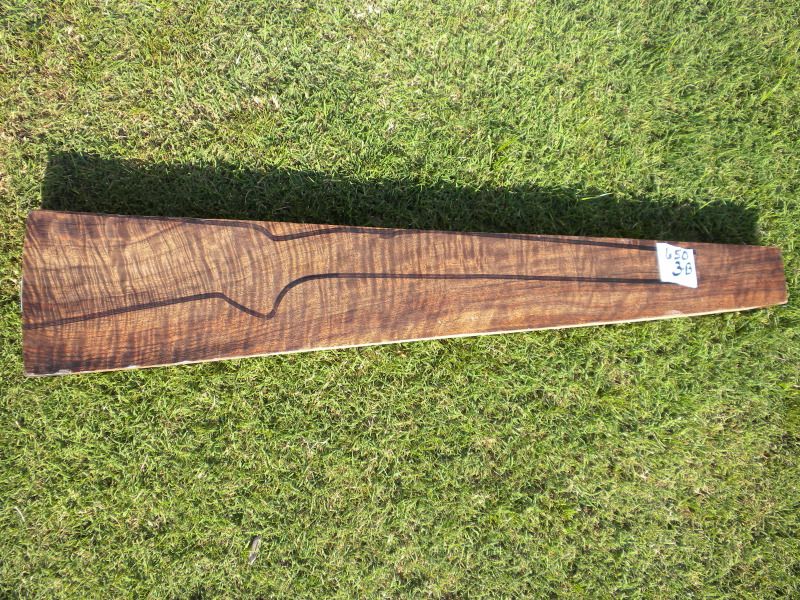 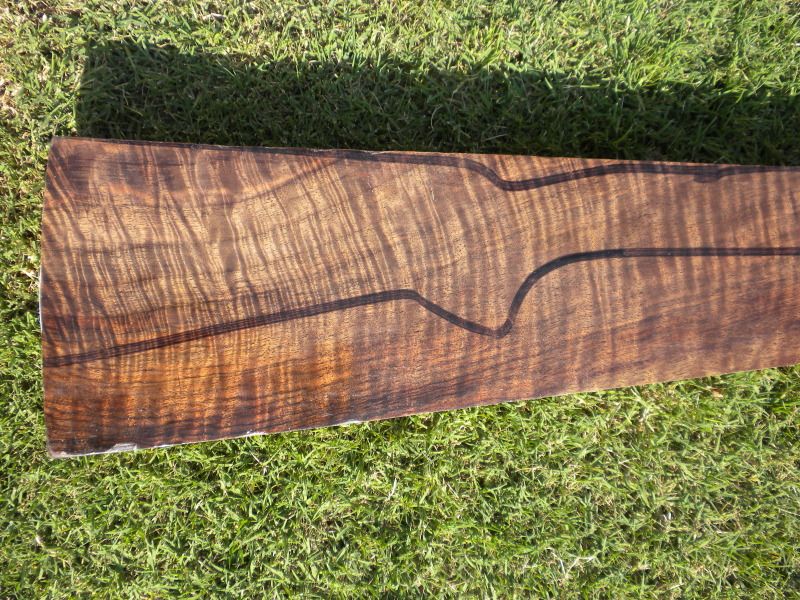 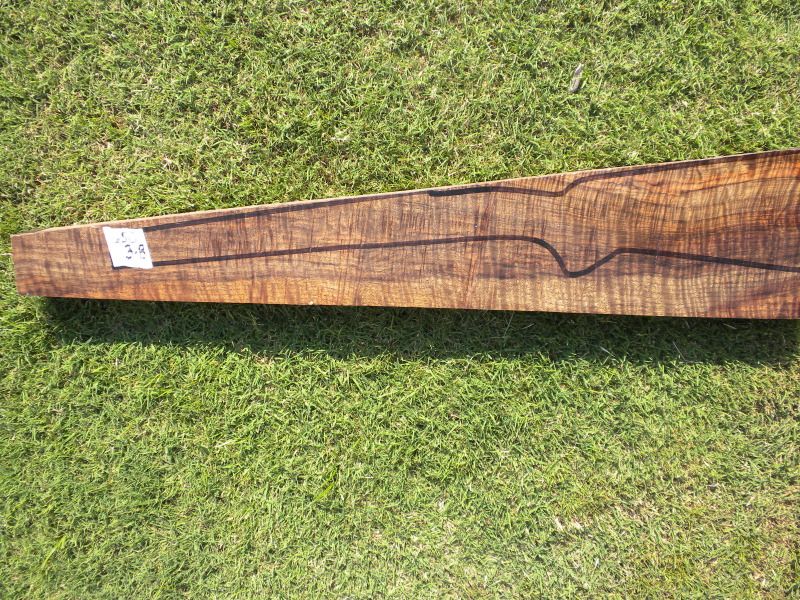 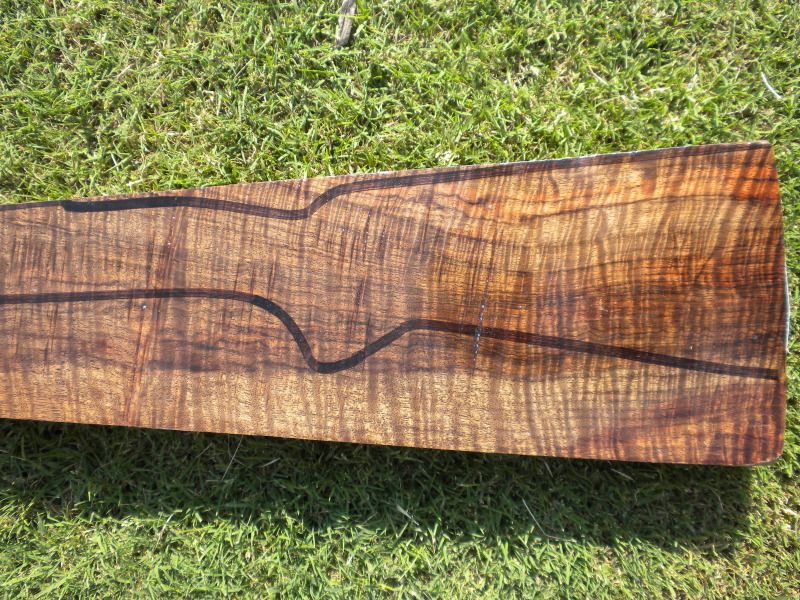 Use enough gun... Shoot 'till it's dead, especially if it bites. | |||
|
| one of us |
Step 2: If you want to save some time, send the blank to someone with a stock duplicator to turn the blank into a rough shape and inletting. This results in a stock called a "semi-inlet." I sent the blank to Al Lind in Washington State to do the turning. He had a very quick turn around, and saved me weeks of work. Here's what the stock looked like when I got it back from him. 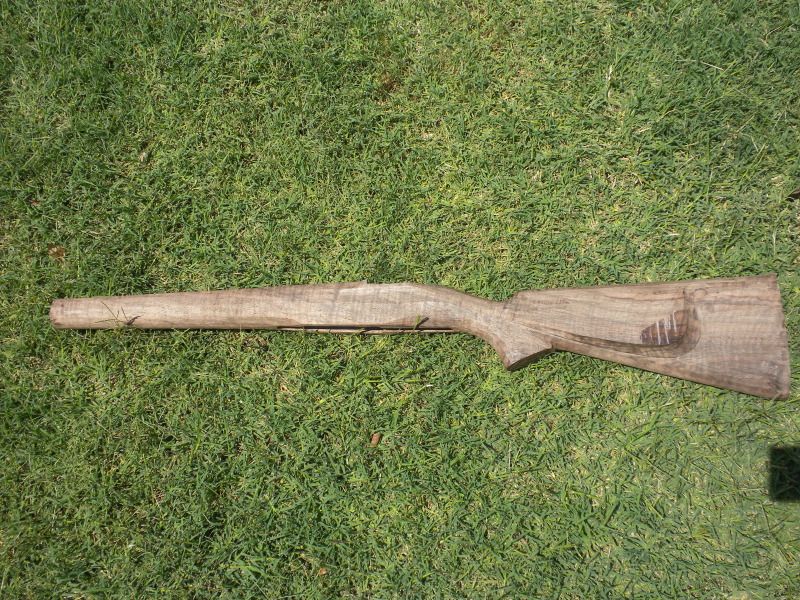 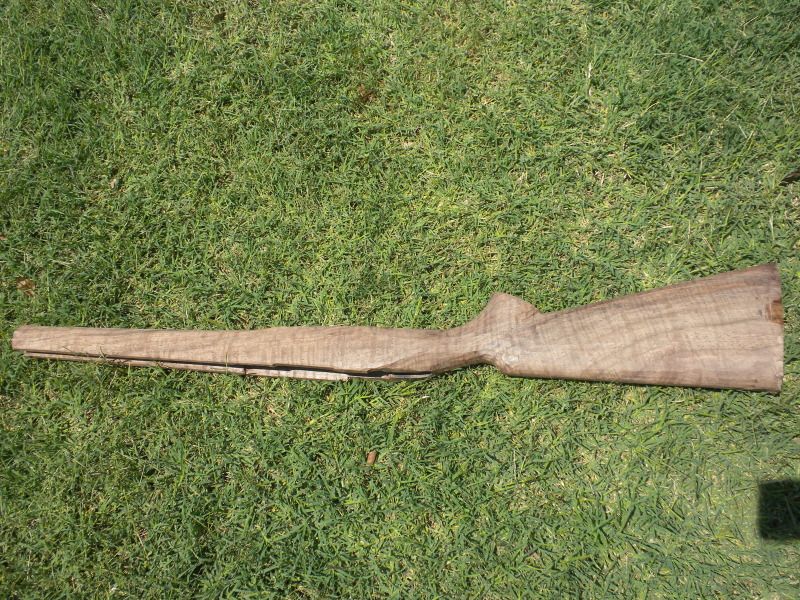  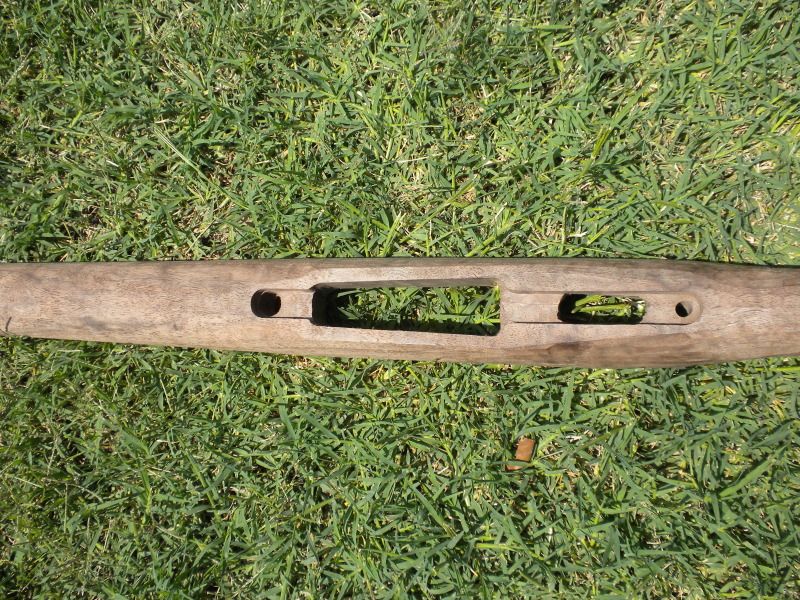 Use enough gun... Shoot 'till it's dead, especially if it bites. | |||
|
| one of us |
Step 3: Start inletting the metal into the stock. The Semi-inletted stock leaves a few thousands of an inch of extra wood, which has to be removed for the metal to fit into the stock. Here's my setup - nothing fancy, just a workbench and couple of clamps. 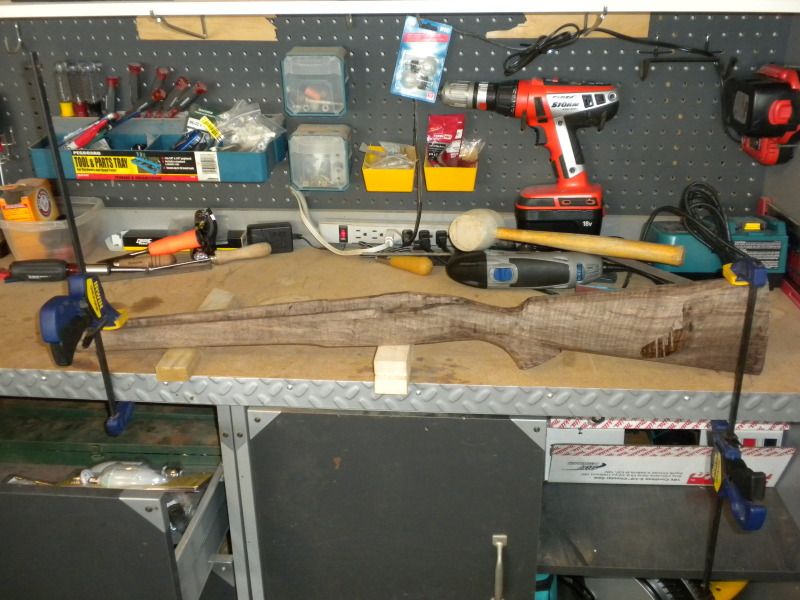 And tools of the trade - File, Chisels, Scrapers. As we get closer to the final fitting, sandpaper becomes the primary tool. 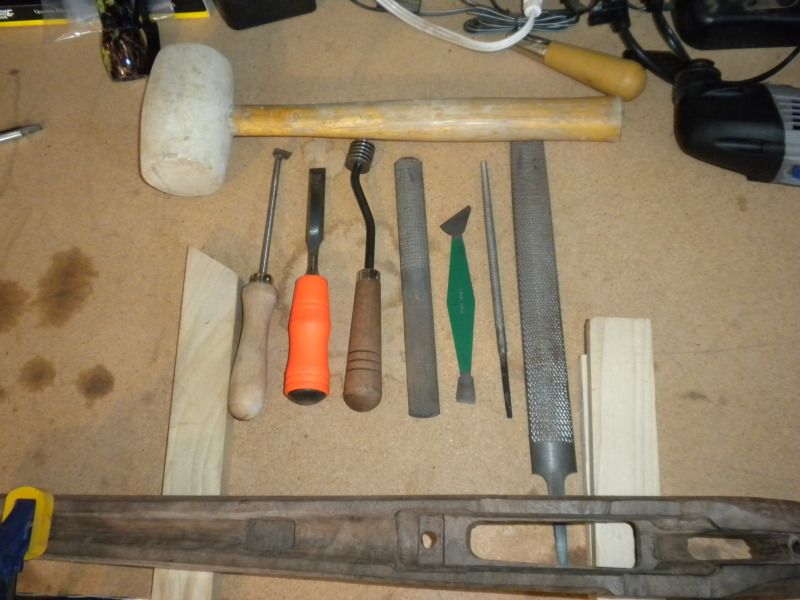 Use enough gun... Shoot 'till it's dead, especially if it bites. | |||
|
| one of us |
After a few days putting in a couple of hours a day when I can, the metal is starting to 'grow' into the wood. Here you can see the action area is about to "full-depth" and the barrel is still sticking up quite a bit. I'll just keep hitting the black spots until the barrel fits all the way into the barrel channel. 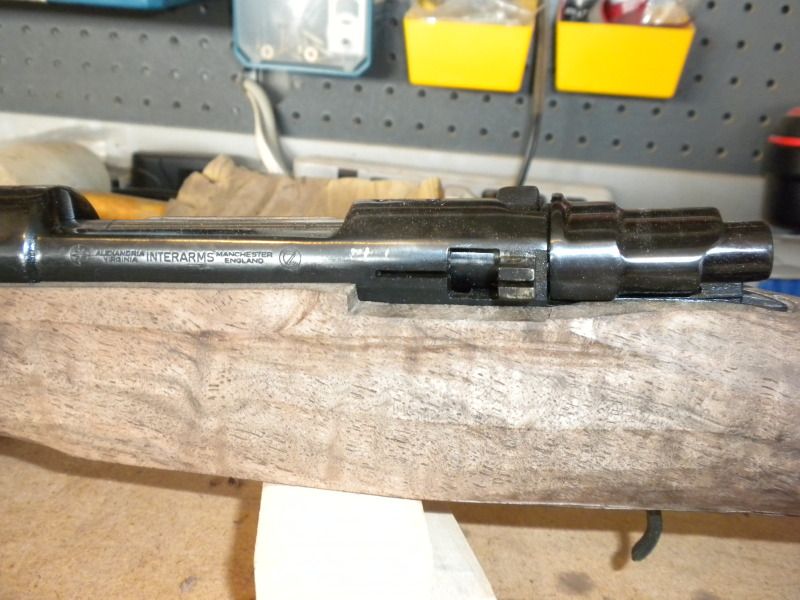  Use enough gun... Shoot 'till it's dead, especially if it bites. | |||
|
| One of Us |
years ago this was done to a whitworth in (if i remember right)guns magazine it took a whitworth and added a barrel band sling swivel ,reshaped the stock some to a more british look restained it etc, i wondering if its worth the whole new stock as there is enough meat on the existing one to spuce things up sort of !!...paul | |||
|
| one of us |
Paul, there's certainly enough meat on the Whitworth stock, but no amount of reshaping can do anything about plain wood I figured if I was gonna spend the hours to make a stock for a rifle I'll (hopefully) be hunting with for 3 or 4 decades, I could afford to spend a little $$ to get wood I would be happy to look at Use enough gun... Shoot 'till it's dead, especially if it bites. | |||
|
| One of Us |
Looks good! If you want to sell the original stock then a mate might be interested as he split his one.  | |||
|
| one of us |
I'll keep that in mind, thanks! Use enough gun... Shoot 'till it's dead, especially if it bites. | |||
|
| one of us |
Well I pretty well got the barrel and action inletted to full depth last night. It's really hard to get the light right for decent pictures. I'll try taking it outside and see if the light is better. The area around the rear tang is not very good...I got a little careless in my haste and will have some gaps in the wood to metal fit. The bolt shroud hides it though so I'm not losing any sleep over it (the bolt shroud is actually what was hiding it from me, until I decided I should remove the bolt so I could see what I was doing...too late). 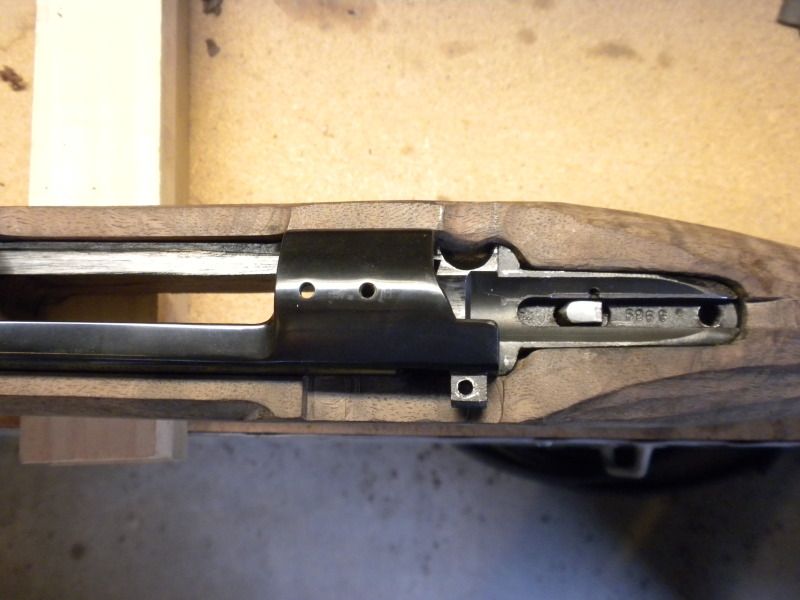 The fit around the action ring and along the barrel is very good - I'm happy with it. 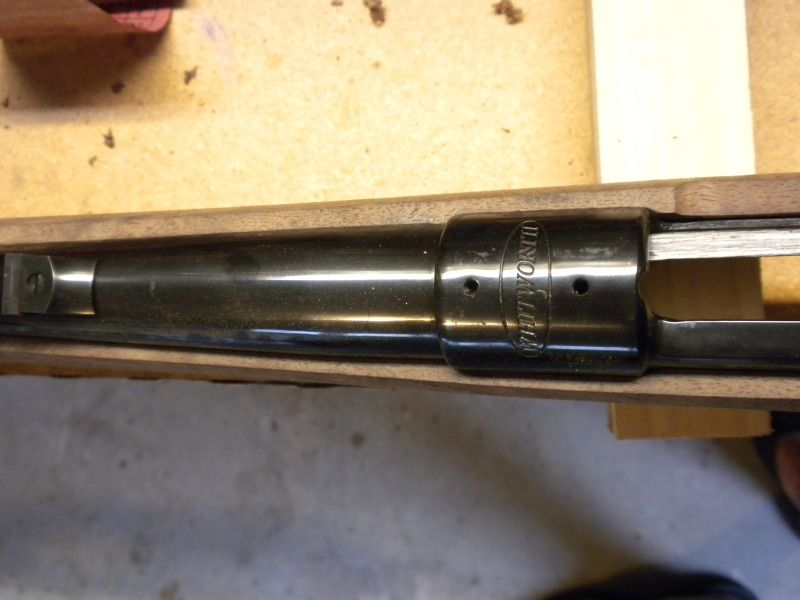 A view from the side...I also cut the forend to length; I like a very short forend, more in the English Express Rifle mold. That's kindof the look I'm going for. 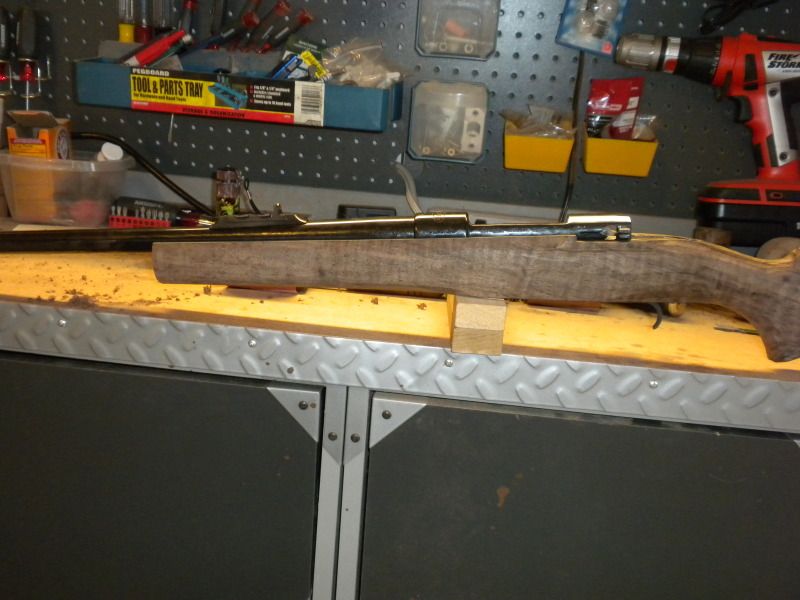 Use enough gun... Shoot 'till it's dead, especially if it bites. | |||
|
| one of us |
Here's a look inside the action and barrel channel.  This is a good shot of the inletting black telling the story. At this point I'm not sure if I'll let the barrel and action in any deeper, so I'm stopping here. 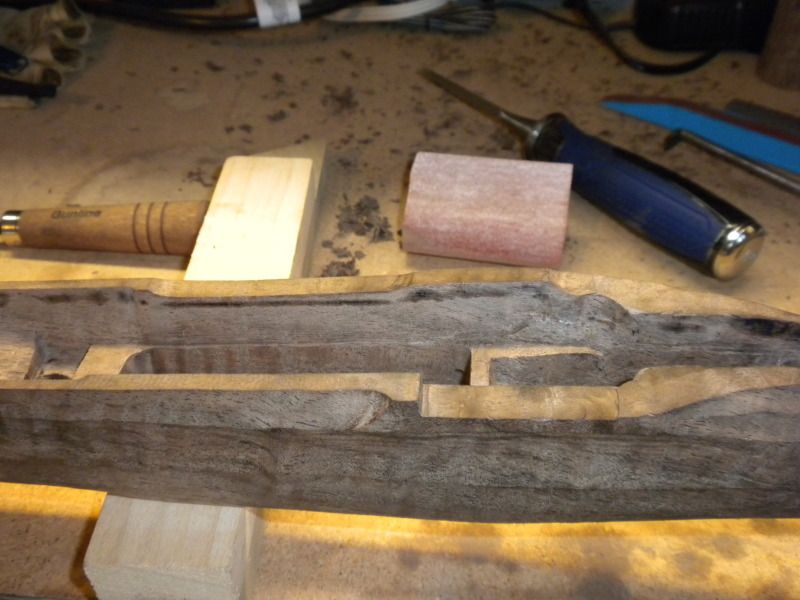 The next step is to inlet the bottom metal, but I need a set of Forstner Screws to make sure it goes in aligned with the action, and those were on backorder at Midway's, but should be here today or tomorrow. Use enough gun... Shoot 'till it's dead, especially if it bites. | |||
|
one of us |
Don't worry too much about the gap. Use powdered bronze mixed in with Acra-Glas and brown dye. Once you apply the finish of your choice the Glas will practically disappear. When done you'll take a small scraper and remove just a thin layer so the rear of the tang isn't wedging the wood apart. It will really look good. Great spirits have always found violent opposition from mediocre minds. The latter cannot understand it when a man does not thoughtlessly submit to hereditary prejudices but honestly and courageously uses his intelligence. Albert Einstein Better living through chemistry (I'm a chemist) You can piddle with the puppies, or run with the wolves... | |||
|
| one of us |
Thanks Nitro. First I've heard about the bronze...any more details? How does it make the glass blend better than just using the dye? Use enough gun... Shoot 'till it's dead, especially if it bites. | |||
|
| one of us |
Let me take some pix and I'll send them to you. I had to use a bunch of it because the stock on my .500 A-Square was self-destructing. By using a little alkanet root oil to stain, it just doesn't stand out. Great spirits have always found violent opposition from mediocre minds. The latter cannot understand it when a man does not thoughtlessly submit to hereditary prejudices but honestly and courageously uses his intelligence. Albert Einstein Better living through chemistry (I'm a chemist) You can piddle with the puppies, or run with the wolves... | |||
|
| one of us |
Thanks! Use enough gun... Shoot 'till it's dead, especially if it bites. | |||
|
| one of us |
I got the action screws Monday but haven't had a lot of time this week. The Forstner screws are just long bolts without heads that screw into your action like the normal action screws would. They help guide the bottom metal down so when you get finished the holes line up and your gun will go back together Here's the screws: 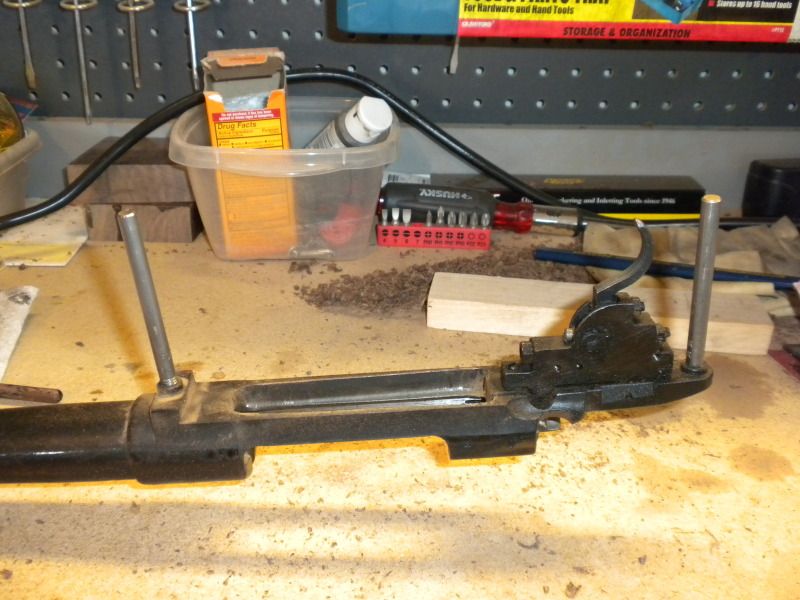 Here's what it looks like when you put the action in the stock and turn it upside down to start inletting the bottom metal:  Use enough gun... Shoot 'till it's dead, especially if it bites. | |||
|
| one of us |
The bottom metal has been the most tedious step so far. I probably spent about 10 hours this week going from this:  To this: 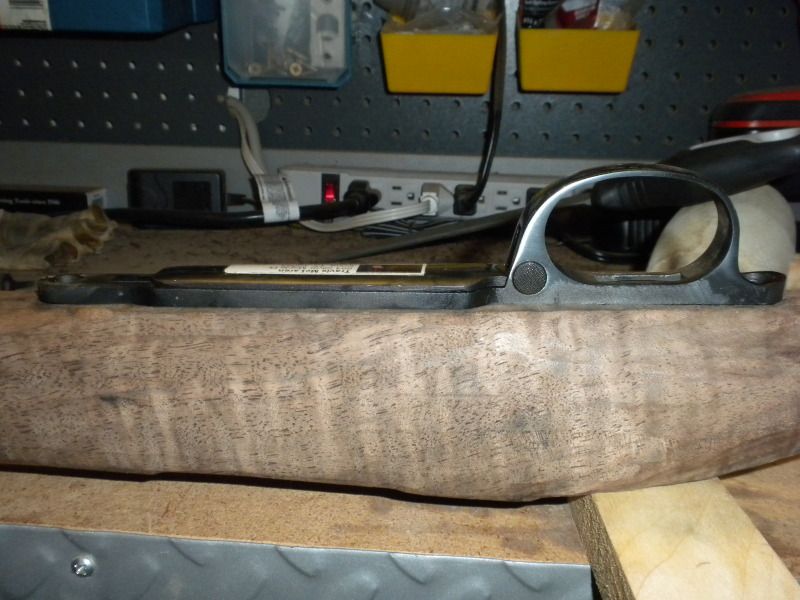 I've got about 30 hours total into it now. I'd really like to get that bottom metal in so I can bed it all together! Use enough gun... Shoot 'till it's dead, especially if it bites. | |||
|
| one of us |
I just want to note that I'm not a gunsmith, expert, or even skilled craftsman. I just like working on things and doing things myself. I know most of the folks on here know more than I ever will about this, so I please don't take my very low-level explanations as though I'm trying to state how things should be done! I don't intend to make anything sound like I'm trying to teach how to do this, I'm just documenting my process and reasons why I'm doing it that way, in case someone reads this some day and wants to do it themselves. I welcome any and all feedback Use enough gun... Shoot 'till it's dead, especially if it bites. | |||
|
| One of Us |
Thanks for posting this here, I am doing a similar project (7mm-08 thread in the same forum) and it takes quite a bit of courage to post your results on this forum with all the professionals, masters and decreeing viewers. My work is not perfect and I make mistakes, but I post it here because I learn from all the information on this board and I see it as a way to give back. Keep posting, I am following your thread and appreciate your posts. | |||
|
| one of us |
Thanks Brad. I've been following your tread also and it was the inspiration that caused me to get off the couch and get started on mine! Use enough gun... Shoot 'till it's dead, especially if it bites. | |||
|
| one of us |
I got the bottom metal inletted to desired depth this week. I should be able to do the bedding this weekend. 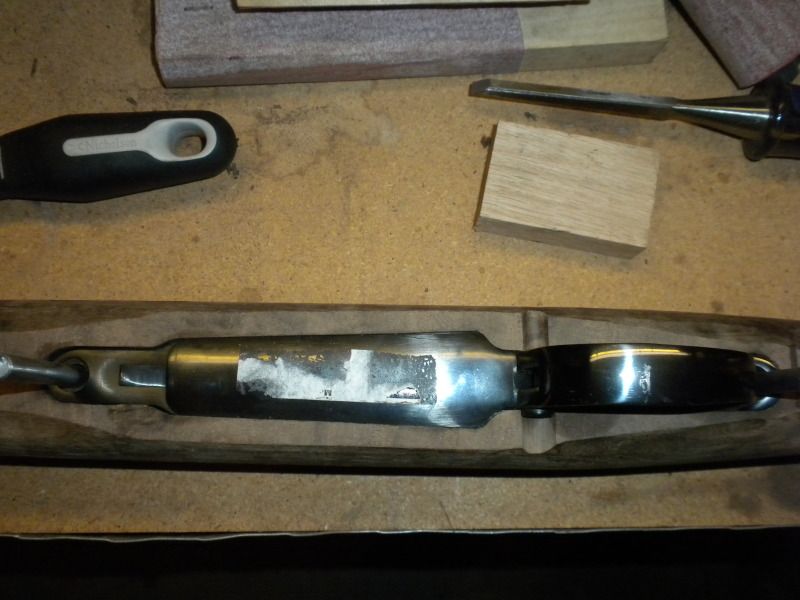 It's starting to look like a rifle now  Use enough gun... Shoot 'till it's dead, especially if it bites. | |||
|
| one of us |
I did take a break from the tedious job of inletting and started laying out the cheek piece and shaping the comb: 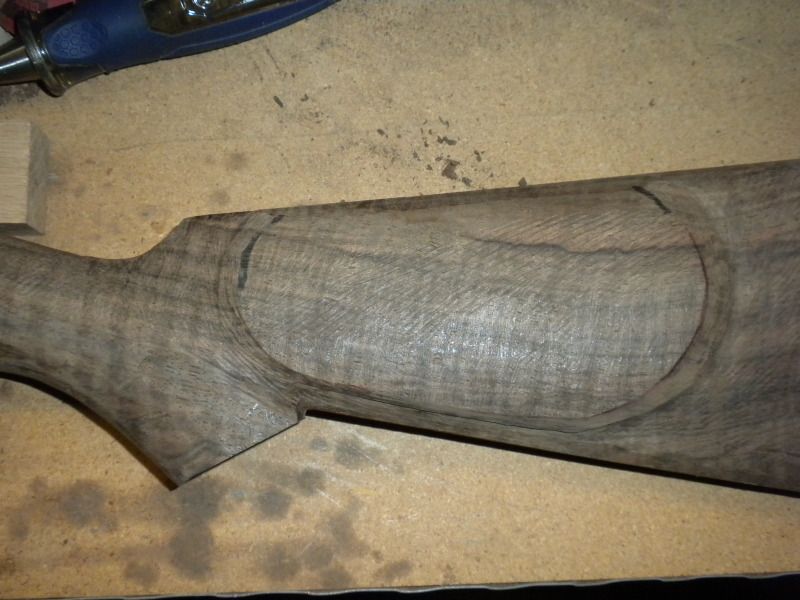 And also located and drilled holes for the grip cap and started shaping the grip area:  I used a half-round rasp for all the shaping and then sandpaper with a sanding block as I get close to the line. I have about 45 hours in so far...I'd probably go hungry as a gunsmith Use enough gun... Shoot 'till it's dead, especially if it bites. | |||
|
| One of Us |
Yep, I know the feeling! Looking good keep us updated. | |||
|
| one of us |
A few pictures of recent progress. I did the bedding this weekend. I'll show pictures of the process in the barrel channel area. You can see from the first picture I already did the main Recoil lug area: 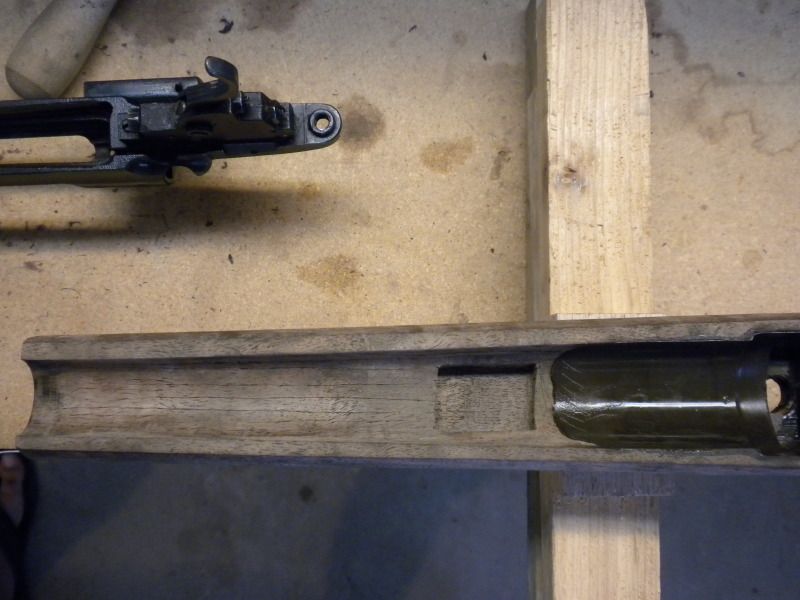 I taped off the bottom, sides, and front of the barrel-mounted recoil lug. I also used modeling clay to make sure the bedding compound didn't ooze into any recesses between the recoil lug and barrel. Then, I applied a coat of release agent and mixed a batch of bedding compound: 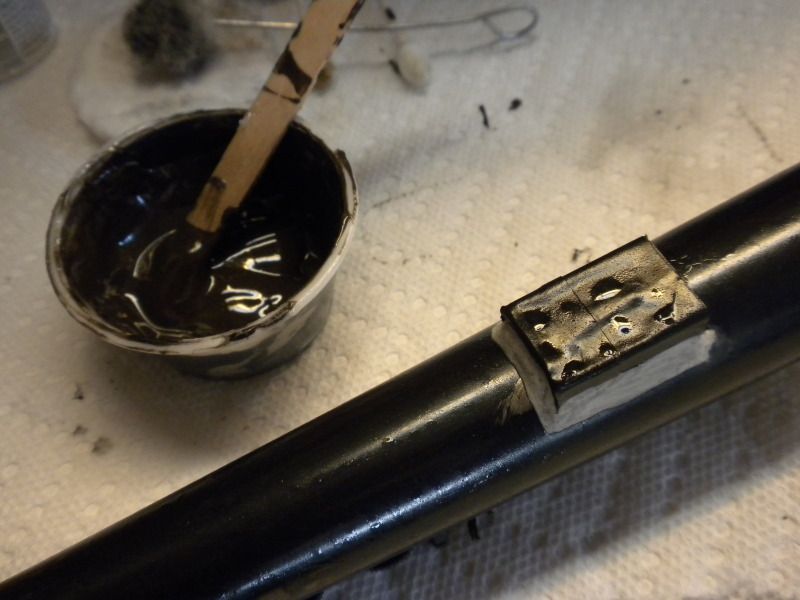 Next I used a popsicle stick to apply the compound into the barrel channel: 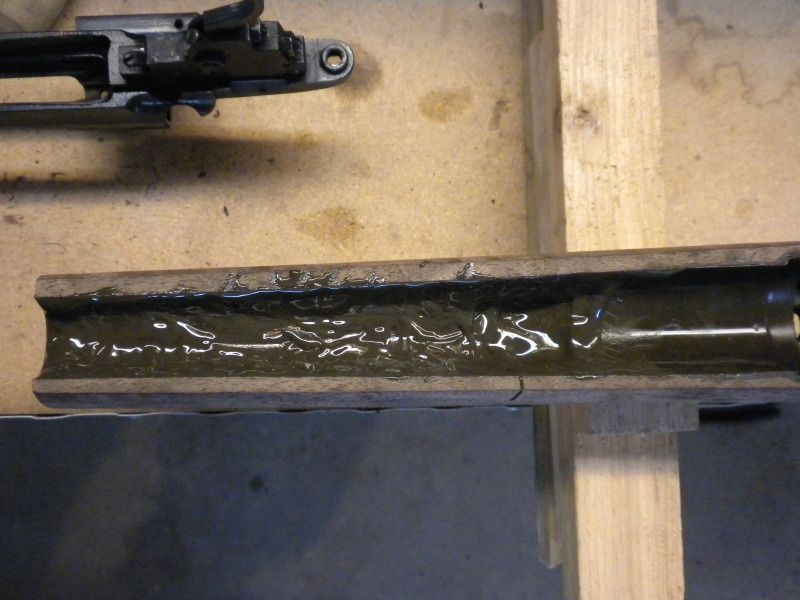 Then I set the barreled action into place and used surgical tubing to pull it down snug: 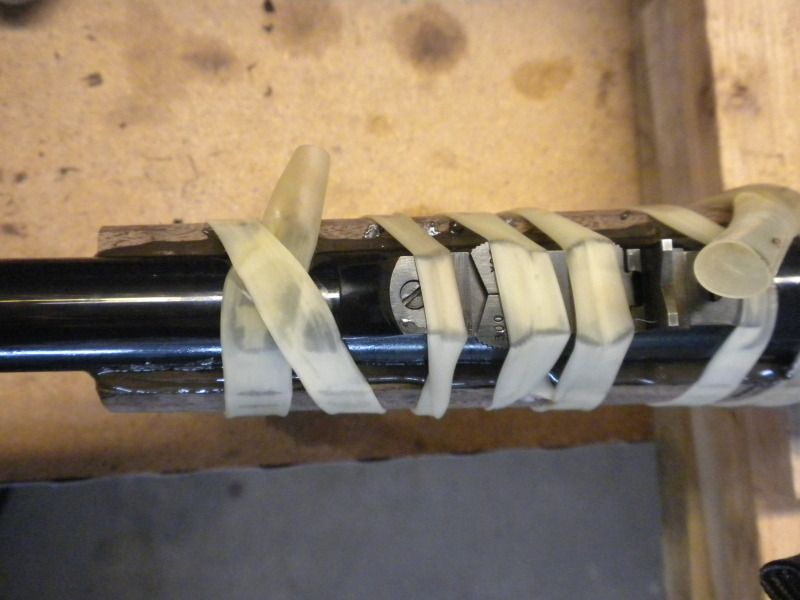 Use enough gun... Shoot 'till it's dead, especially if it bites. | |||
|
| one of us |
You can see I had quite a bit come out the top, which means I used more than I needed, but it's hard to tell for sure how much is enough:  But, it's not a big deal. I waited 1 hour for the compound to set up enough that it stuck to itself rather than the metal but not so hard it couldn't be cut. I then used a razor knife to cut it off at the wood line. **Note: I messed up here using the razor knife. I didn't realize I was using enough pressure to actually put a pretty good scratch in the metal. After this round I sharpened a plastic picnic knife and used that instead...live and learn 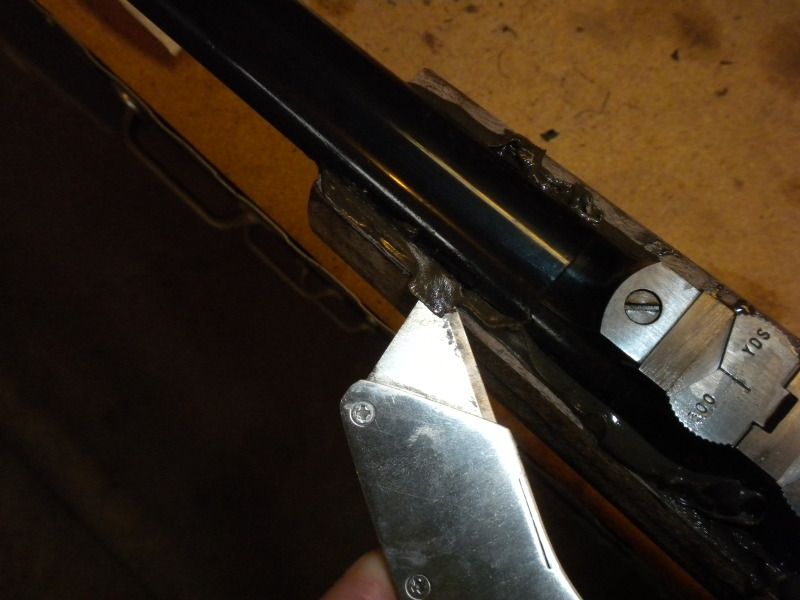 Use enough gun... Shoot 'till it's dead, especially if it bites. | |||
|
| one of us |
Besides the scratches it cleaned up nicely. 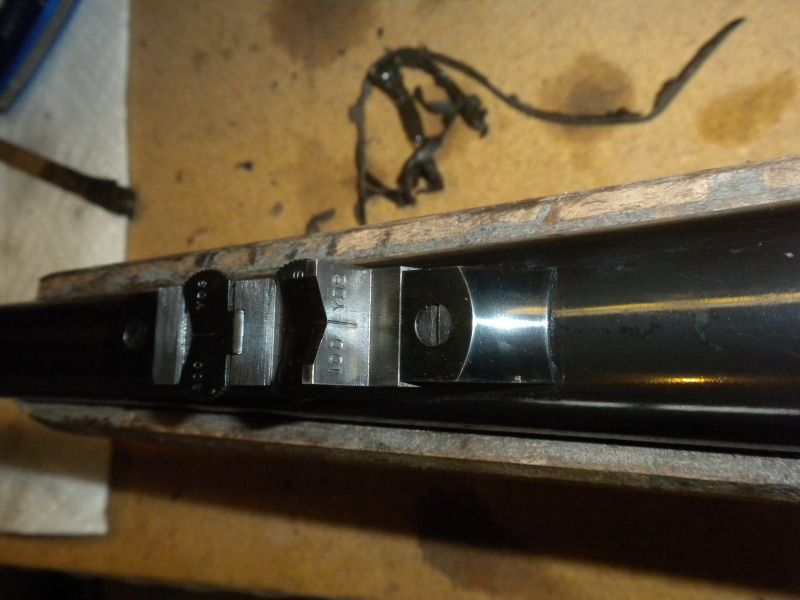 After removing the excess I let it sit for the prescribed time in the bedding directions and pulled the stock. This always produces a "pucker factor" for me, wondering if it will come out. I have one rifle I bedded years ago that never came out. This one did, though, and the bedding looks really good. 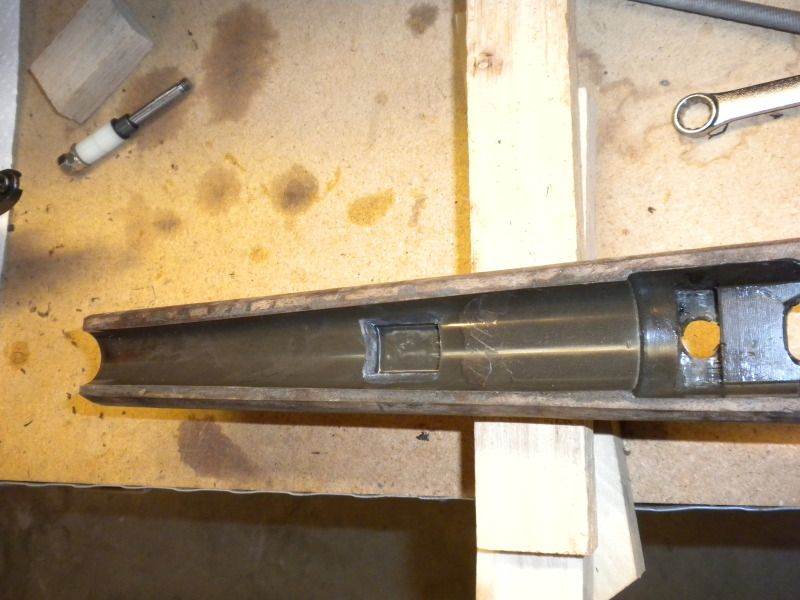 Use enough gun... Shoot 'till it's dead, especially if it bites. | |||
|
| one of us |
I spent this week working on the cheek piece, grip, grip cap, rear tang area, ejection port, and bolt slot. Cheek piece: 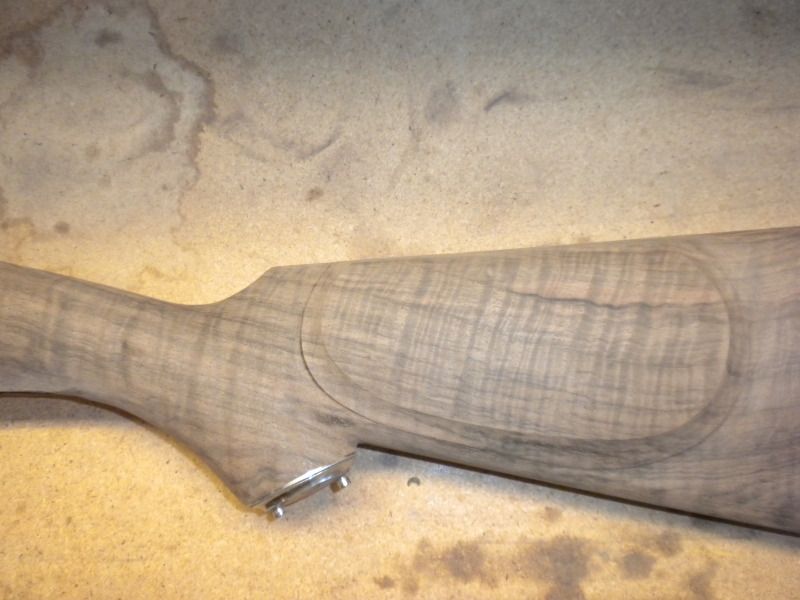 Grip cap:  I didn't take pictures of the rest, I'll add those later. Use enough gun... Shoot 'till it's dead, especially if it bites. | |||
|
| One of Us |
Your project is coming along really well. Glad to hear that it did not stick in the stock. Did you use the paint on release agent or a wax? I really like how the pancake cheek piece is coming out. | |||
|
| one of us |
I used the release agent that came with the kit. It's a paint on that stays a liquid, not like some I used before that dries to a film. It works really well from what I can tell. I'm really liking the cheek piece also, I think it will turn out nice. Use enough gun... Shoot 'till it's dead, especially if it bites. | |||
|
| One of Us |
What brand is the bedding epoxy? Did you use anything to get the neutral brown color of the epoxy? | |||
|
| one of us |
I used the Miles Gilbert Bedrock kit from Midways. It comes with brown and black dye to mix with the epoxy. Use enough gun... Shoot 'till it's dead, especially if it bites. | |||
|
| One of Us |
Could you tell why you bedded the whole barrel lenght ? I have heard it´s not either useful or essential... | |||
|
| one of us |
Since it has a barrel-mounted recoil lug I'd be bedding 60% of the barrel anyways. Since floating the barrel beyond that wouldn't have any practical purpose, I'd prefer to have that wood grain sealed and not have the gap in the wood to metal fit. Bedding the entire barrel solves both. I don't know if it's "proper" or not, but I've done another the same way and liked the results. Use enough gun... Shoot 'till it's dead, especially if it bites. | |||
|
| one of us |
Here's the latest progress: I mixed up some more bedding compound and bedded the grip cap. 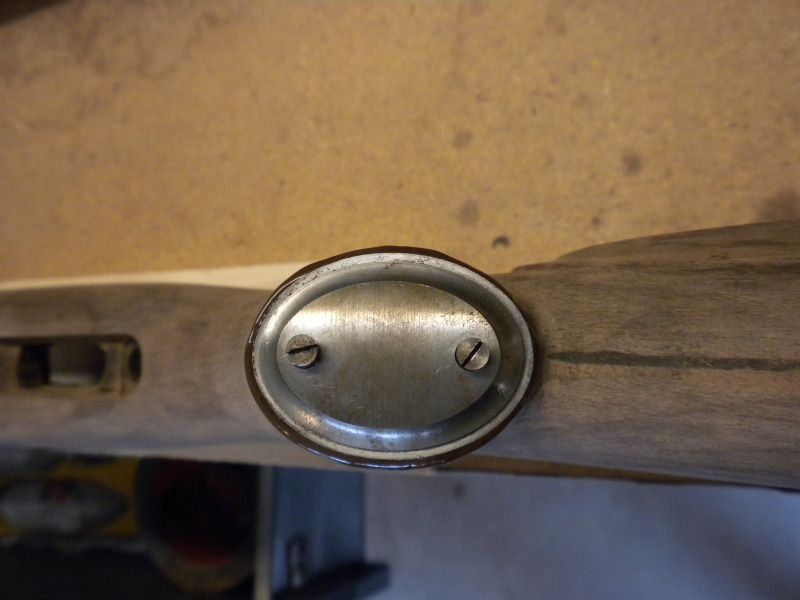 Then when that dried I sanded the grip right up flush with the metal to give a perfect fit 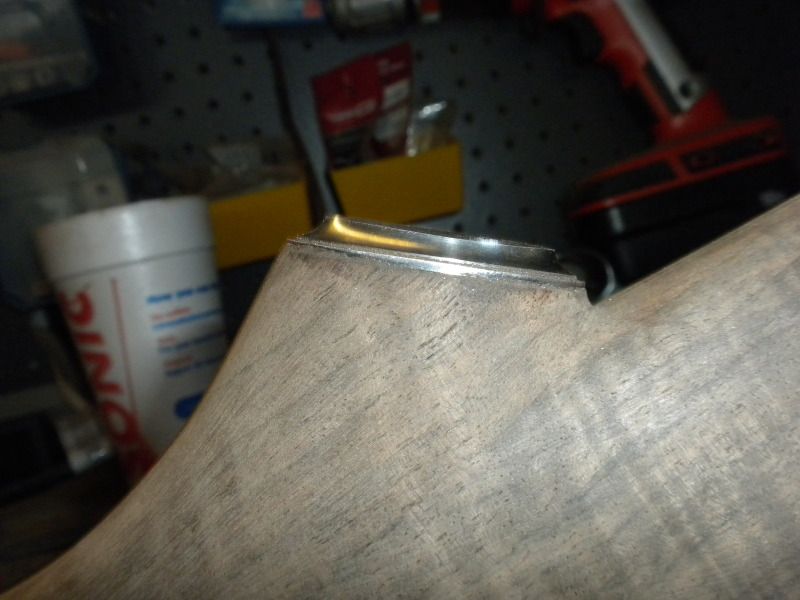 And filed the screw heads and top of the grip cap down smooth 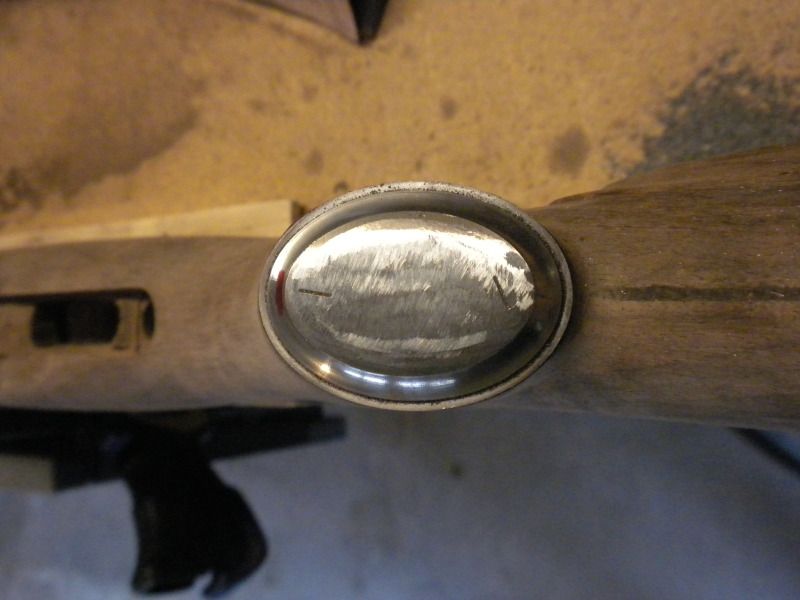 Use enough gun... Shoot 'till it's dead, especially if it bites. | |||
|
| one of us |
Also worked on the wood around the rear tang, sanding it right down to the metal 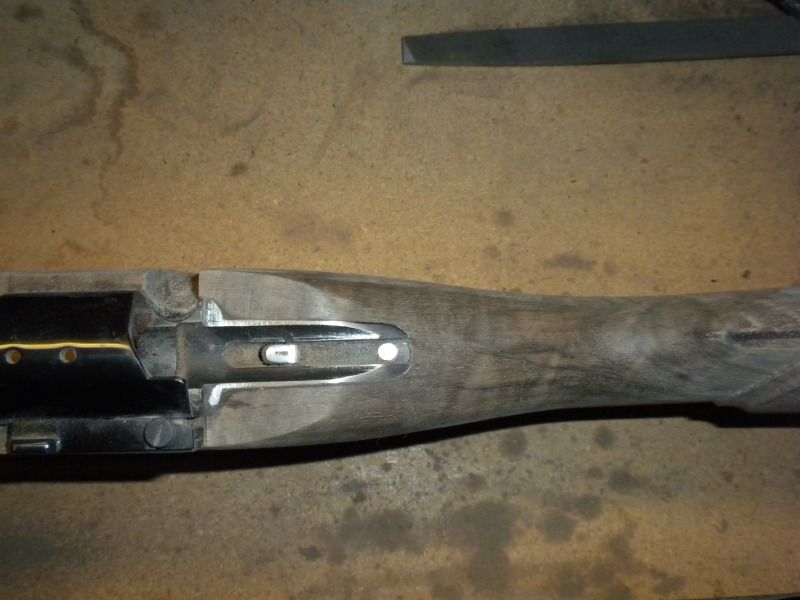 And cut in the ejection port and bolt handle slot 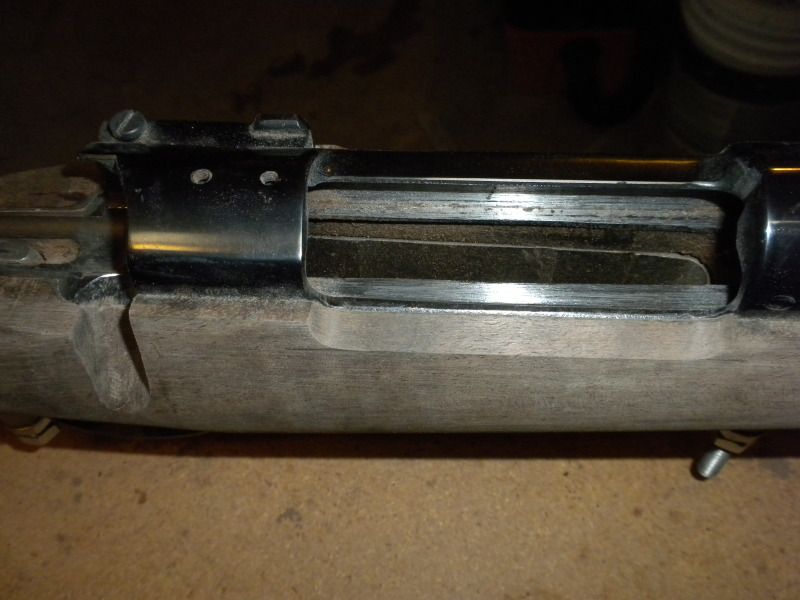 Use enough gun... Shoot 'till it's dead, especially if it bites. | |||
|
| one of us |
This week I cut off the buttstock to the desired length 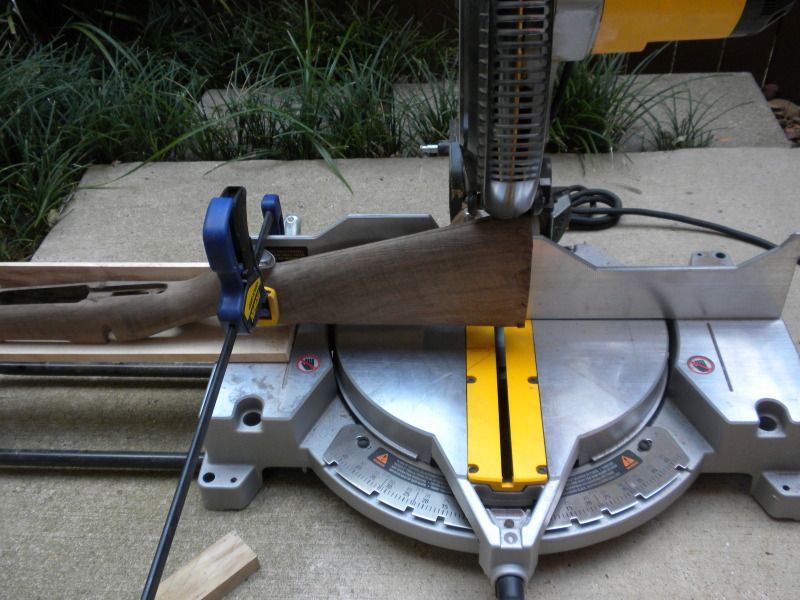 I spent a lot of time sanding the buttstock and refining the cheek piece, then started inletting the rear sling swivel stud. 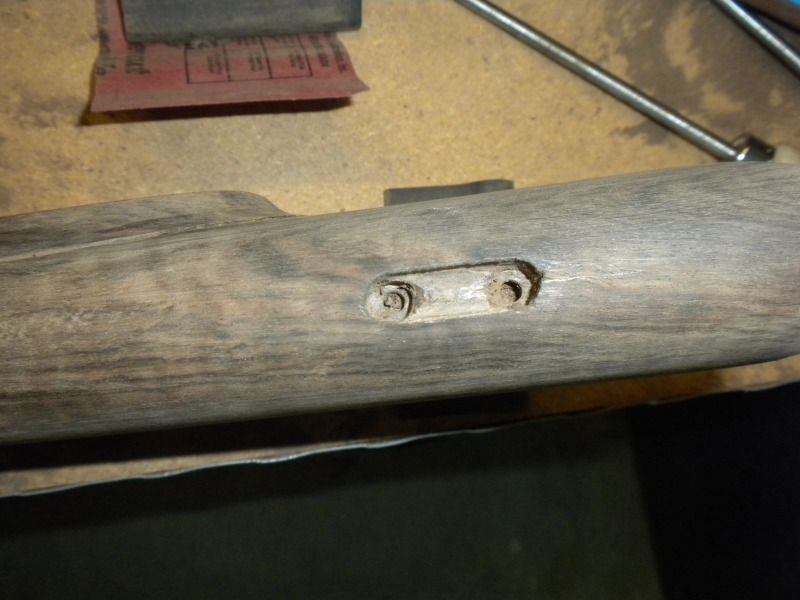 Use enough gun... Shoot 'till it's dead, especially if it bites. | |||
|
| One of Us |
This is a very cool thread, keep the pics coming! You're doing great work. Love shooting precision and long range. Big bores too! Recent college grad, started a company called MK Machining where I'm developing a bullpup rifle chassis system.  | |||
|
| One of Us |
Looking good! I hate cutting the buttstock, I always think that I am going to screw it up. Thanks for sharing, keep them comming | |||
|
| one of us |
I fussed over it some but in the end I just got it where I thought I wanted it and let er rip. I'm always surprised how cleanly walnut cuts with a standard saw blade. I did leave it a little longer than I really wanted it, so if I messed it up I could try again. I'll used at that length and if I need to shorten it later I can. Use enough gun... Shoot 'till it's dead, especially if it bites. | |||
|
| one of us |
I finished inletting the sling swivel. This is before it was bedded: 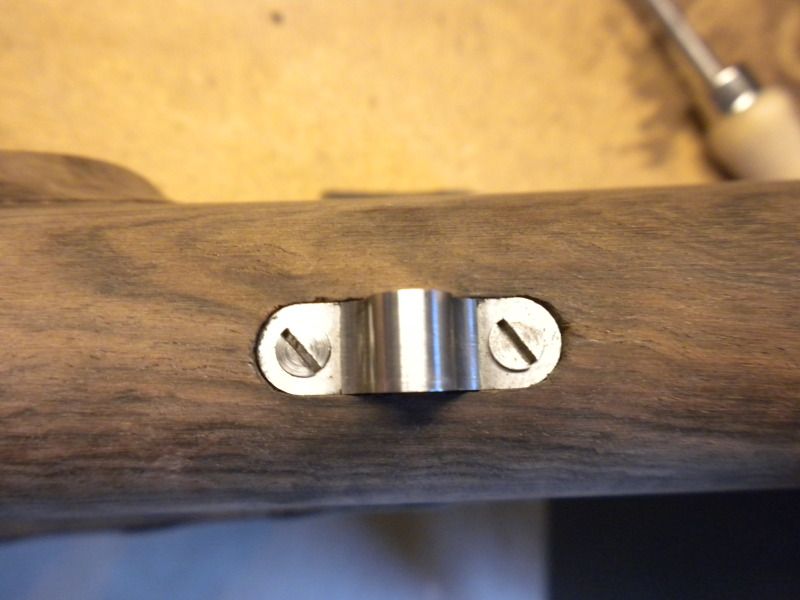 This is after bedding and dressing down the wood to the metal:  Use enough gun... Shoot 'till it's dead, especially if it bites. | |||
|
| Powered by Social Strata | Page 1 2 |
| Please Wait. Your request is being processed... |
Rifles Custom Built Rifles

Visit our on-line store for AR Memorabilia