
 The Accurate Reloading Forums
  THE ACCURATE RELOADING.COM FORUMS
  Hunting
  Taxidermy
  ? for Grafton : kudu horn 'doctoring'
Go  | New  | Find  | Notify  | Tools  | Reply  |  |
| One of Us |
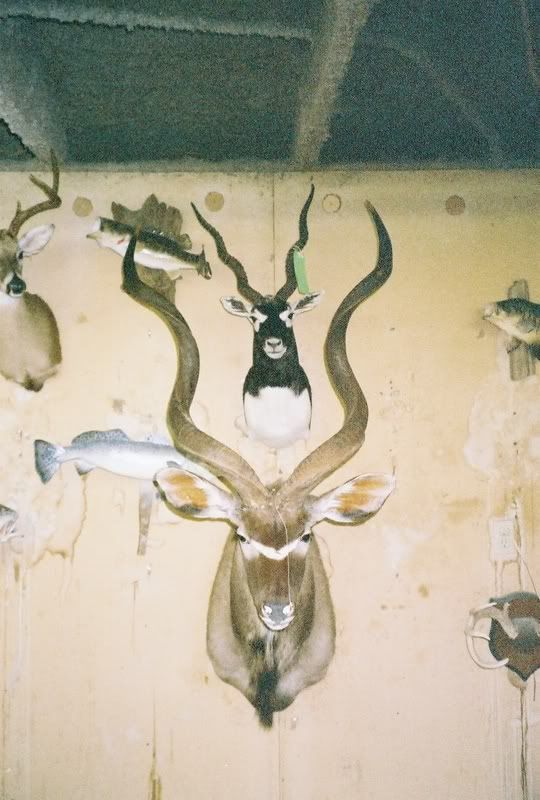
Loved the recent pedestal mount! My question, for you and other experienced African taxi's at AR : "Can you doctor up an already mounted kudu's horns? Let me explain, so it doesn't sound like I want to make him longer than "in real life". My trophy is shield-mounted and the shoulder mount is for my own daily viewing pleasure, not for bragging. My recent mount used my own cape plus a second pair of horns almost identical to the European-mounted set my first bull grew (read blackened and therefore not natural color). I purchased them (the natural colored ones) from another local taxi who never got around to doing it as a project. Bruce Gotcher did his best to make it all work, everything with my okay and constant review, doing what I asked so I could have a kudu for my living room. Seems the skullcap and horns weren't quite mates, so he had to do a little shaping before calling it time to glue/nail/etc. Not complaining, just want to know if I can do anything to make a right-horned looking bull come out more even in length. My idea is to use an Ebay "shofar" right-side horn purchase to fiddle with. I want to fit a little cap over the shorter horn to get a more "even" look like my original bull's horns have. I'd like to blend it in as much as possible without necessarily gluing it on, and I have time to sand/fiddle/imagineer a solution. I don't really want to sand down the left horn because that would seriously distort things (as I see them). Many thanks to Grafton and anyone else with a tip or two. No harm done at any rate as I can live with him just as he is, but need a project. BNagel _______________________ | ||
|
| One of Us |
Forgive me for butting in I know this question is for Grafton. The horn can be modified to match the other horn with a 2 part epoxy. It can be made permanent or detachable. With care the texture and color can be matched. Are you wanting to do this yourself? Steve | |||
|
| One of Us |
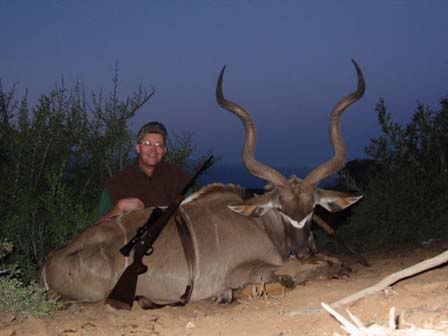
WA Yeah, I'd be doing the fiddling meself. I suppose the mold release approach would be taken for "detachable"? Kinda don't want to 'booger' anything up.. My short experience is with bedding compound where appearance isn't so vital. Guess you'd have to try brown dye packet with the Accraglass or whatever? Oh, and there's ivory tips to consider. First bull (no ivory tips, 45" both sides)  European mount(s) : blackened by boiling process, but I like the presentation  Second bull (with my cape) : natural color horns, but this bull was "right horned", ivory tipped, 45" right, 47" left  Opinions and comments widely sought. Again, I'd not want to mislead about having shot the shoulder-mounted bull. Kinda like to be able to take the extension off if I need to. Barry _______________________ | |||
|
| One of Us |
BNagel, I think I understand what you are wanted to do. I would think that a "cap" from another horn would be difficult to blend where the two horns meet without the use of sculpting epoxy and paint. Let me start by saying that I have never tried to do this. I do know that a broken tip can be repaired with epoxy and colored to match with good results. The scuplting compound is not like the bedding compound but more like a clay that is mixed 50/50. It is not difficult to work with and is not runny like a fiberglass resin. Kudu horns are available on ebay and you would not need a big horn to try what you want to do. However by simply slipping the cap over the horn and not making the horn tip permanent, my guess is that the seam would be noticable. Sorry I am not much help with this. I say give it a try. I have learned alot of little tricks by just trying new things like this. Perhaps it is just the photo but I notice a slight symmetry problem with your mounted kudu that may be the cause of why one horn appears longer than the other. In the photo you posted it appears that the skull cap is cocked slighty to the left as you view the kudu from the front. The blackbuck behind it appears to suffer from the same problem. If you imagine a vertical line that runs straight down the center of the "v" of the horns and ends at the center of the nose pad, you can see what I mean. Just an observation. Good luck with the project. | |||
|
| One of Us |
Grafton You have a good eye -- bang on observation(s). The skull cap isn't a mate to the horns, apparently, and the left horn needed to be rotated clockwise a bit more for symmetry. However, Bruce said if he "worked" that side down any more it wouldn't have had enough left for a stable base. Visually the "extension" will solve my little problem. The right horn is actually still 2" shorter, a situation quite natural I believe. Although natural, I still want to fiddle a little to see if I can't make it look "even". MUCH obliged, sir!!! Thanks for the expert advice, and I'll get busy trying my hand at this. BNagel _______________________ | |||
|
| One of Us |
Grafton et al After fiddling...  Basically, I bought a right side horn off eBay and worked it to a point (sorry) where the "cap" would give a better over-all visual effect once I had (a) affixed it in the right place / orientation to offset the original off-balance presentation (b) followed Bruce G's advice, given once he saw my "extension"-to-be, which was to use auto Bondo for the joining and follow with sculpting epoxy "clay" (which he supplied) smoothed / worked into final shape using water. Let me say it would indeed take either a mould or a fitting genius of stockmaking caliber to make a removeable "extension". It was a true project, and I may decide to take Bruce's third step later -- use horn dye, like you do with naked furniture staining, to get the final color match. Actually it looks pretty good "as is", but I may have to get some more super-fine steel wool and do a little more prep before I try dyeing. (Heh, heh. Spelling counts.) Cheers! (and hats off to real taxidermists) BNagel _______________________ | |||
|
| One of Us |
Straight-on view  Detail (up close) of final  I opted to sand-stain-resand-restain and so on with walnut stain from a Hoppe's stock finish kit, leftover from another project. Used Dremel tool with various fittings, synthetic steel wool 000 replacement pads and sanding block. Once I acheived the right color with minimal (but still obvious) transition zones between sculpting epoxy vs. horn, I called 'er good. Thanks for the project, and thank God for AR (literally) BNagel _______________________ | |||
|
| One of Us |
Glad to see everything worked out. | |||
|
| Powered by Social Strata |
| Please Wait. Your request is being processed... |
|
 The Accurate Reloading Forums
  THE ACCURATE RELOADING.COM FORUMS
  Hunting
  Taxidermy
  ? for Grafton : kudu horn 'doctoring'

Visit our on-line store for AR Memorabilia

