
 The Accurate Reloading Forums
  THE ACCURATE RELOADING.COM FORUMS
  Hunting
  Taxidermy
  skull mounts
Go  | New  | Find  | Notify  | Tools  | Reply  |  |
| One of Us |
Hello to all. I recently boiled and fleshed three bison skulls and need to know what the next steps are to preserve them. They are being kept from 30-40 degrees farenheit. Thanks for your help. Blake | ||
|
| One of Us |
Did you remove the horns? After removing the horns 1. The skull might need to be degreased 2. Peroxide 3. Sealer 4. polish horns and remount them on the skull | |||
|
| One of Us |
What degreaser and sealer have you had success with. Are they commonly available? Blake | |||
|
| new member |
| |||
|
| One of Us |
Dawn or any good laundry soap in the boil works well for degreasing but I would not use paints to seal with as they tend to yellow over time. Elmers glue and water, it is cheap and works the best. | |||
|
| One of Us |
The peroxide that is being referred to here is an industrial strength and concentration type - I think at 40% concentration. You will not get what you are after using drug store peroxide. Be very careful with the high strength peroxide. It will take the skin off your fingers at the slightest touch. If you need this professionally done, I have used Skulls Unlimited in Okla. City over the years. They insects to clean the bones, then use peroxide and other stuff to get the skulls creamy white and smooth. They are expensive but do a super job. Another option is to use a reproduction skull and attach your horns to that skull. The skulls are relatively cheap, never yellow and never smell. You can get them via VanDykes or McKenzie taxidermy supplies. I do this on all deer, antelope and elk skulls. http://www.mckenziesp.com/taxi...9J5LEDPE9QGJV0T27BFC http://www.vandykestaxidermy.c...02866/antelope-skull | |||
|
| One of Us |
Ive just finished working on some of my own for the first time.Here's what I've learned.... Degreasing in the clear Dawn dish detergent at a simmer works good for degreasing.You don't want to cook them.Colored dish detergents can sometimes tint the skull color.I did this 2 times replacing the water.Used a turkey fryer kit,$40 at Lowes. Then I've bleached two ways.... 1 Using 40 vol (which is NOT %) hair salon peroxide mixing this with activator.This is what is used in salons to brush on hair.The mix is applied to the skull and wrapped in plastic food film to keep it on the skull.24 hrs in a warm area,the sun is better.Wash with HOT water. Then you may have to resimmer and do this 2 times depending how well its going. 2 I like this way;Use BO, that is pool peroxide,super concentrated stuff!You have to be very careful!You submerge the entire skull in this.I use a cheap aluminum foil turkey pan,crushed up around the skull.BUT you must line this with heavy plastic.You cannot let any peroxide (H2O2)touch metal.I paid about $9 gallon and you can reuse this till it stops working. Sealer prefered by pro's who do museum work is Acryloid B72 it is a clear copolymer I bought from a company in NYC called Talas.1 pound,which is alot,for $16.I like this stuff,it fills the small pores and is easy to dust the skull. I learned lots of this on Taxidermy net,there is a section devoted to skull cleaning. Next time I will not boil the fresh skull at all,but macerate it.Basically letting the flesh rot in warm water.Stinky but it is supposed to yeild easier degreasing and a better product.You need a tub with a heater to keep 90 temp.Iwill use a small stock tank and heater,many use aquarium heater in small tubs for little projects. Dan | |||
|
| One of Us |
I'll add this; NEVER use clorine bleach.It will wreck your skull and once applied cannot be reversed! Dan | |||
|
| new member |
You don't need 40% peroxide, I use the stuff from the dollar store, here's one i did yesterday , First i use a power washer to remove the brains, then into the pot with dawn simmer for 30 mins, then powerwash every thing that will come off , back in the pot for 30 mins. then powerwash again. By now the skull is almost done i use an air nozzle and hemos to finish cleaning, once done i put the skull in peroxide don't submerge the burrs, tear an old hand towel in strips and lay it over the exposed parts of the skull and wet it , let set overnite and hang to dry, then seal with a clear coat, the krylon won't yellow thats why i use it. If i can firgure out how to post pics i'll post the one i did yesterday | |||
|
| One of Us |
This is a great forum. Thanks for all the help. Blake | |||
|
| One of Us |
Just went out the door  | |||
|
| one of us |
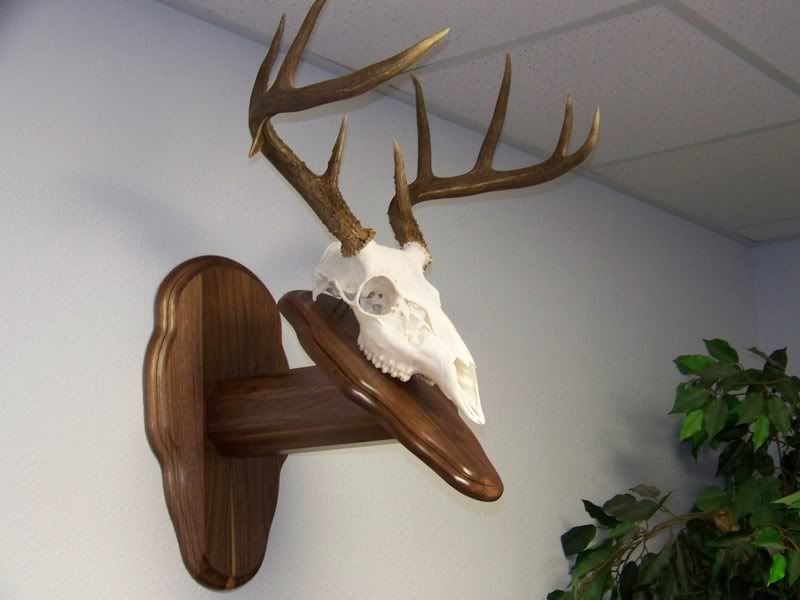
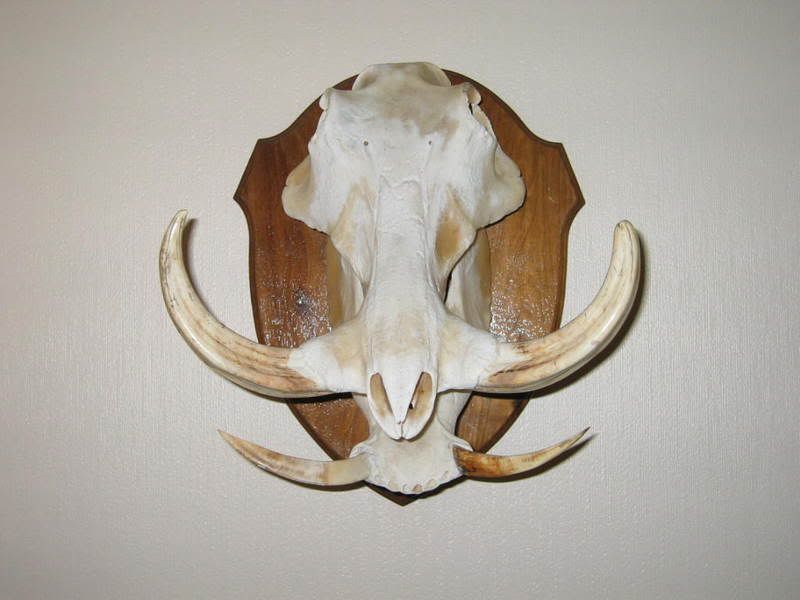
My Blue Wildebeest made in RSA, not bad actually, but a tiny bit to muck cooking, the "gluing on the seams" have disappered.  My Warthog skull. This one is a bit discoulored, because of what, I don´t know. I think this kind of mounts are great, especially when lack of space in the house/apartment is an issue.  Arild Iversen. | |||
|
| One of Us |
Swine are very greasy in general. When a skull is boiled or simmered, the "pores" in the bone open up and tend to soak up the greasy water causing it to discolor. I think the only way to get one really white is to have it beetle cleaned and whitened, but not really an option in africa I guess. Euros are pretty cool looking. | |||
|
| One of Us |
I am not a taxidermist, but have fiddled around with cleaning skulls since I moved to Fort Nelson 17 years ago.What I have learned form local taxidermists and experience is this: 1. if it is a record book animal, find a place that cleans with beetles, and pay them. 2. if you want to practice this yourself, try to find trappers who you can talk to for skulls to practice on, even though they may have .22 holes in them. 3. this is a time consuming process, and using the method I'll describe generates a smell like a pot roast simmering in soapy water. If this offends you or anyone in your house, talk a friend into doing it in their garage or outside. If no luck with talking friends into it, either suck it up and try it yourself, or pay a taxidermist. My first try at this 17 years ago was 2 bear skulls the local CO pressure washed the decaying tissue and maggots off before I got them. Being keen to do this I carried on, luckily having a strong stomach. Rotten "pot roast" simmering in soapy water is not a smell I have ever forgotten or duplicated. If it has already started to decay, you might as well go the maceration route. the method I've fine tuned to give results I like WITH FRESH SKULLS 1. flesh out the skull as much as possible, remove the eyes, and as much of the brains as possible before it goes anywhere else.I have found you can freeze them, but make sure they are totally thawed before going in the water. If they have been frozen prior to you getting them, it is best to thaw flesh them and put into the water. This seems to lessen the chance of teeth cracking later. 2. you'll need a metal pot and a heat source to do this in the garage or outside. A metal wash tub and a propane burner for a deep fryer works fine. 3. mesh bags or a mesh basket to set the skull(s) in is a good idea, so if any teeth fall out, they are easily recoverable. As well, if doing several of the same animal, it helps with what teeth go with what skull should any come out. 4. I use arm and hammer washing soda in the water. put the skulls in the water, and bring it up to 50-60C, and keep it there. The washing soda has an enzyme in it that turns tissue to a snot like consistancy, making for easy removal with a stiff plastic bristle brush.This is the longest, most time consuming part. When the water starts to darken and look like broth, change out the water. You may do this several times depends on the amount of material you are simmering.Try and skim off any of the fat that rises to the surface. A dissecting kit with long nose tweezers and forceps helps out substantially.If the animal has antlers, wrap the bottom portions with plastic wrap to try and prevent removing the colouration. 5. Once you are satisfied you have removed all the tissue you can stand to remove, and quit questioning yourself for trying to do this, remove from the water and let dry slowly. 6. find a 5 gallon plastic pail with a lid and place the dried skull(s) in.Pour in coleman camp fuel( commercial white gas) enough to cover the skull(s) and close the lid on the pail.(I found out places like Skulls Unlimited use acetone, but it is much more expensive, flammable, and harder to find.) Keep this pail in a cool place away from heat or the sun. The fumes will soften the rubbery seal in the lid, and you will need a new lid after one or two soaking sessions.I generally soak for 1-2 days depending on the amount/size of skull. This is to remove the bone marrow that has been rendered during the simmering, and any other fat that is in/on the skull. This step tends to finish the degreasing started in the simmering step. I have used this on older skulls I did( black bear and wolf) that discoloured like the warthog in the previous post and worse. The white gas removed the grease after 1-2 day soak. If the skull has antlers, you will need to fabricate a lid and soak outdoors. The white gas can be poured off into its original container, leaving the bit in the pail containing the grease removed. This makes excellent firestarter in the fire pit. Remove the skulls and let them dry in a well ventilated place, slowly. 7.Another 5 gallon pail with a lid is needed for the whitening step if you want to immerse.I buy the commercial grade 35% hydrogen peroxide and cut it down to about 10%. Takes longer to whiten, but safer to work with and less likely to cause the bone surface to flake. Immerse the skulls and let them soak until them bubbling subsides and they look white. This can take hours or a day.Remove, pat dry and let dry slowly. I have never put them in direct sunlight as I feel this dries them too rapidly and can cause cracking. The dilute peroxide solution can be sealed up and reused. If the skull has antlers, you will need he peroxide and magnesium carbonate .Mix the two until similar to tooth paste, and apply with an old tooth brush to all parts you want whitened. Let sit overnight, brush off dust in a well ventilated area. If not white enough, repeat. 8. Any teeth that are loose or have fallen out need to be glued back in place, I use elmers white glue. 9. the skull needs to be sealed, to help preserve your hard work, and try to prevent any cracking due to humidity changes. I use two thin coats of matte or satin spray lacquer.Cover the antlers entirely, so not to overspray onto the antlers. Personally any shine antlers have, should be natural. 10. If the skull has antlers, remove the wrapping around the base looking for any discolouration, you may have done despite your best efforts.I have been lucky not to have done that, so I don't know the recipe/method for colouring in the mistakes. This method produces results that I like, and I have done some for friends and the local high school when I taught there.I have only done one skull with horns( road kill bighorn sheep) and did it like an antlered animal ( horns not removed).Having done only one horned animal, I don't have enough experience to comment, so that is why no reference was made. Hopefully those of you that read this will find something useful. | |||
|
| One of Us |
nice post! I send my skulls to a beetle cleaner cuz i'm lazy and don't want to do all that work | |||
|
| new member |
| |||
|
| Powered by Social Strata |
| Please Wait. Your request is being processed... |
|

Visit our on-line store for AR Memorabilia

