30 October 2020, 00:00
jpl$100 Homemade Induction Annealer
This is one of the few remaining gun related websites that has not succumbed to the facetube-intsatwit commercial nature of the modern web. The subject of homemade induction annealers can also be found on other sites. One site in particular has set a new record on my adblock of over 1400 blocked scripts, ads and other items antithetical to my purpose in attempting to view their webpage. That site won't even load anything beyond a blank screen without cookies and scripts. Rant aside, altruism and philanthropy are not completely dead so this is my contribution to a good website and fellow enthusiasts:This parts list is current as of this posting date, but there are multiple sources for most of these parts and I've included pictures below to help you locate what you need. The URLs will probably go dead in short order but if you search for the items it should be no trouble collecting the parts you need. Also, prices are approximate and will be different depending on the source, shipping, taxes, etc.
$30 ZVS circuit board
$40 24v DC power supply
$ 5 water pump
$ 5 Cu tubing
$ 2 silicone water tubing
$ 2 power cord
$ 1 button
$ 5 timer board (optional)
$10 misc wires, wood, etc.
______________
$100
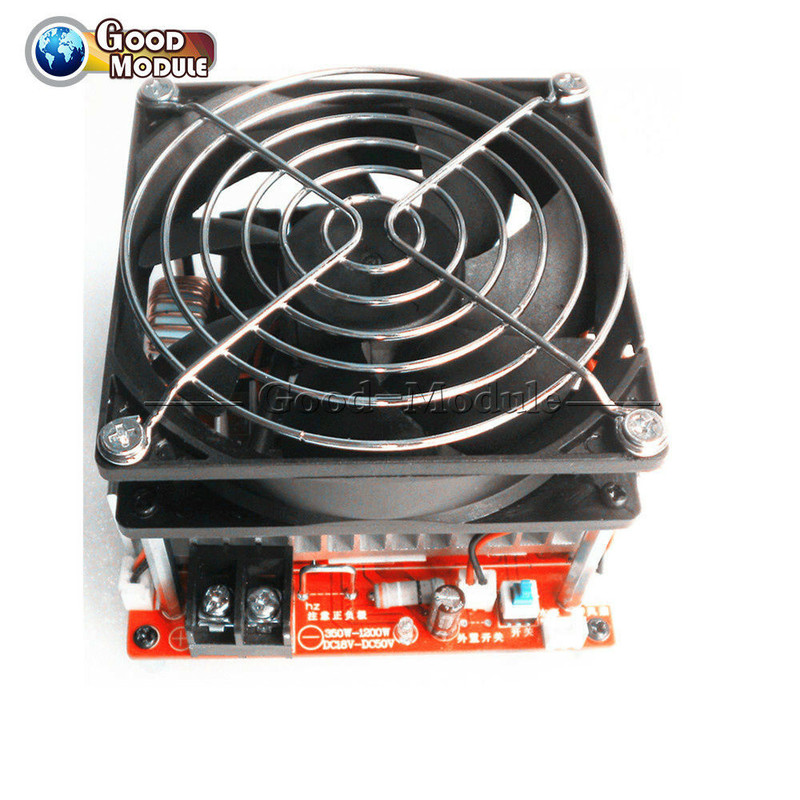
There are many versions of the chineze "ZVS" circuit boards available on ebay, amazon, etc. This is the core component in most DIY induction setups, and not all of the available boards are the same. My suggestion is to get one specifically like this:
https://www.ebay.com/itm/112499374541
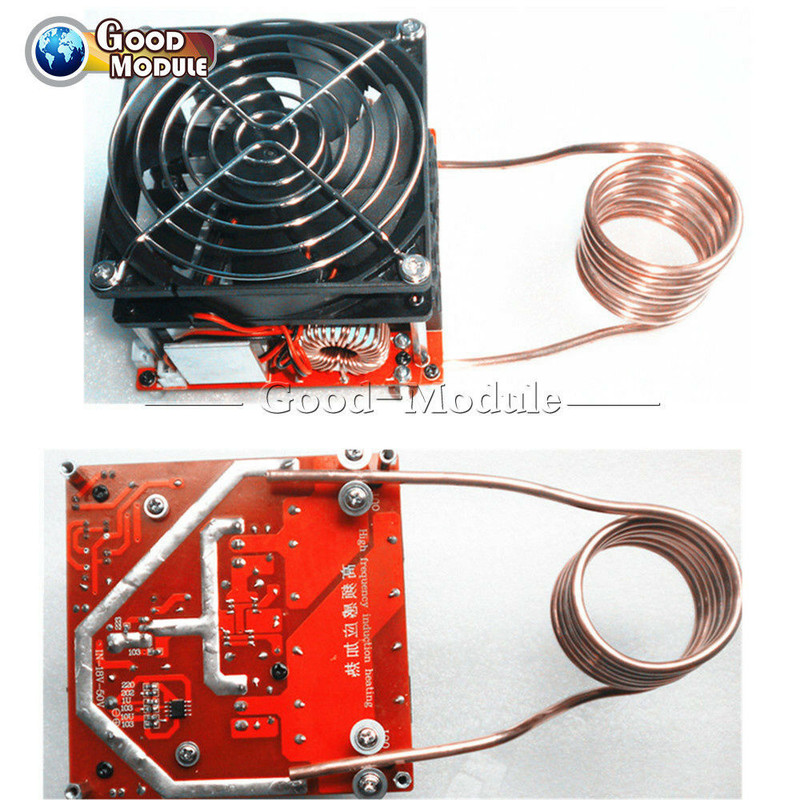
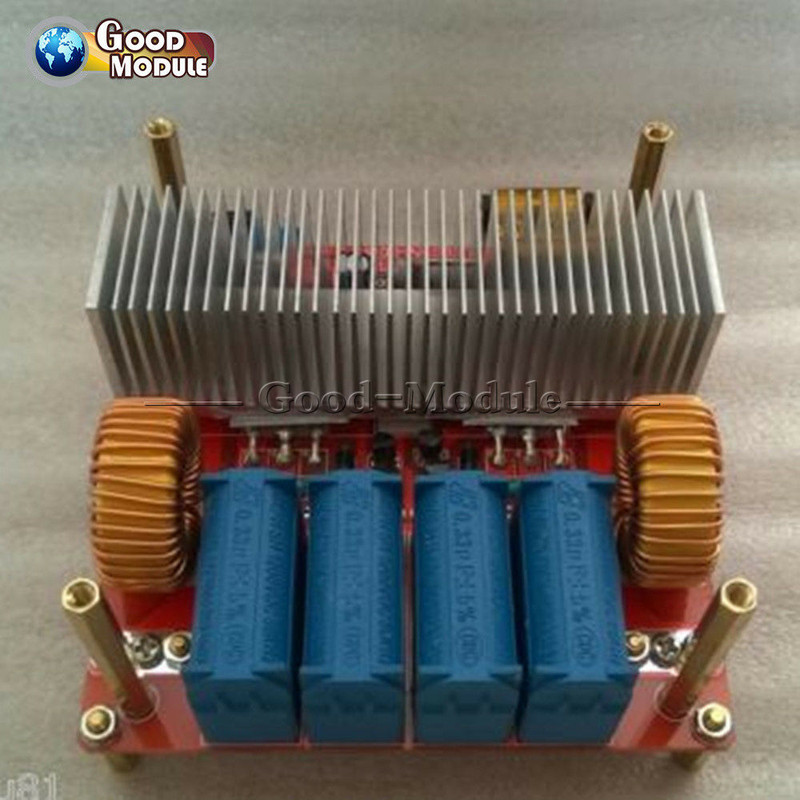
There are even different versions of boards that look similar to this one, but note the orientation of the capacitors (older versions have the capacitors mounted 90 degrees different) and the on/off switch on the rear of the board near the DC input. To find it, search for things like ZVS, 20A, 1000W, induction, etc. Then carefully compare pictures to get the right one.
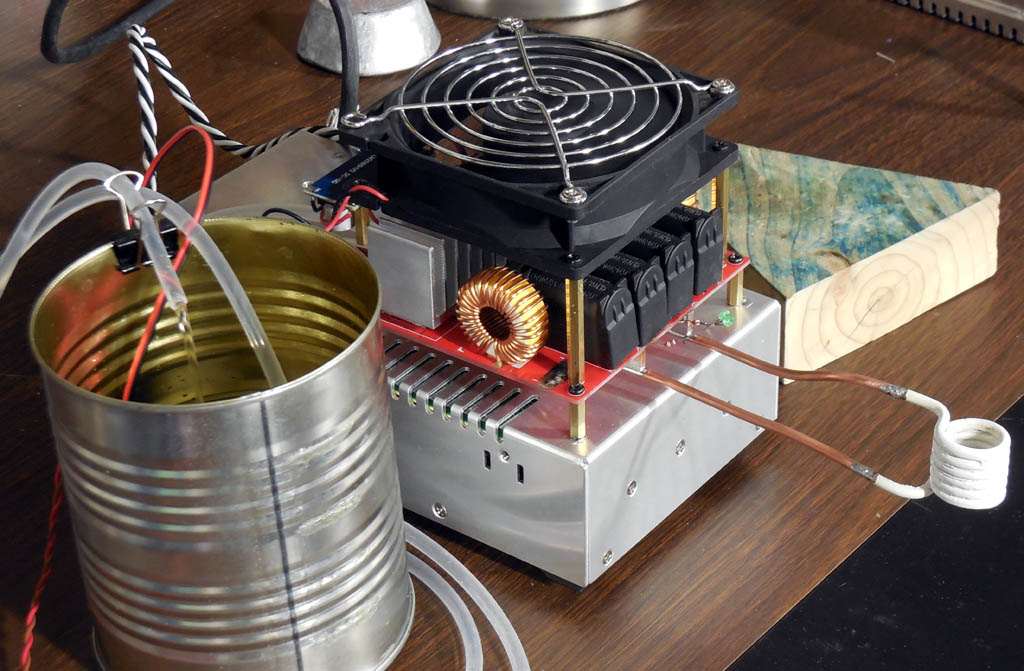
This board is not the most powerful available, but it has some features which are useful for our application of annealling brass. It has an on/off switch that can be easily hooked to a manual push button or a timer circuit. It has over-current protection so it won't destroy itself under a high load or work coil short/fault; and it has a 12v converter and output which is useful for running a small water pump and timer. The on/off switch controls the mosfet transistor gates directly, so you only need a small low-power switch or timer to control the circuit. Most other DIY setups I've seen use a giant (expensive) relay to switch the main power to the whole board, which means you would also need a separate source of uninterrupted power to run the pump, fans, timer, etc. Also, the capacitors are lined up under the fan so they tend to run cooler than in other designs.
The next most important component is the power supply. You need a good source of high power DC, and here again there are a variety of options. For this application I would suggest a 24v supply that can deliver a lot of current. Two car batteries in series would work. There are inexpensive used telecom/router/server supplies that can be used, but the simplest option I've seen is something like this:
https://www.ebay.com/itm/203055109022
To find these, search for things like: 24v power supply, 30A, 33A, 720w, 800w, 1000w, etc. These power supplies are also somewhat adjustable, usually between roughly 19v and 28v. This can be used to adjust the power level of the annealer.
Next up is a pump to circulate water through the copper coil, and again there are a number of options. You could hook it to a faucet and let it run out on your garden. Elevate a bucket and let it drain, etc. I've found that these little pumps work well:
https://www.ebay.com/itm/293700830146
To find this, search for things like: 12v pump, 240l, 3m, DC, brushless, submersible, etc. These pumps are quiet and small enough to be powered straight from the 12v output on the ZVS board.
Next you need some copper tubing to make the work coil. You can get this from a variety of places, and you want something close to 1/8" diameter, or in metric 3mm OD with a 2mm ID. You need only around 20" to make the coil, so 50 feet is way more than you need, and a couple meters is enough to make a few. Search for 2M Soft Copper Tube Pipe 3mm, ID 2mm, 0.5mm wall, Refrigeration, Plumbing, etc.:
https://www.ebay.com/itm/114336685292
To complete the water circulation you need a non-conductive hose, and I've found that silicone tubing is nice and flexible. Some with 3mm ID 5mm OD allows plenty of flow and is easy to route. Search for things like 3mm 5mm Food-Grade Silicone, Tube, Hose, Pipe, etc. A meter or two should be plenty:
https://www.ebay.com/itm/324292963858
Then you just need a power cord, button, wires, wood for mounting, etc. You could source this stuff from a number of places. Timer circuits seem to be very popular, so you can search for simple 12v digital timers to find things like this:
https://www.ebay.com/itm/DC-12...ion-New/283981760598
You can also get simple panel meters to show voltage and current (like a dedicated volt meter). There are thousands of options for these too:
https://www.ebay.com/itm/DC-4-...Ammeter/261350247162
To assemble, hook the power cord to the DC power supply. Set the switch for 110 or 220v input as appropriate. Everything past the power supply is relatively low voltage, but take care working with the utility power. Hook the output of the power supply to the input terminals on the ZVS board. Use pretty heavy gage wire for this (at least 12awg), or multiple thinner wires. If you get a long power cord from an old UPS or computer, you can cut off a couple feet of this to go between the ZVS and power supply. Make sure to not hook up the power backwards. Plus (+) to plus, etc.
The ZVS board has a connector for the pump. Some pumps have a matching connector that pops right in. If not, you can solder the pump wires straight to the ZVS board. One trick is to solder to the back side of the board and leave the connector in place.
Same thing for the on/off button. The button on the board latches, so you push it once and it will stay on until you push it again. There is a separate pair of terminals to hook up another switch, so connect that there and then turn the switch on the ZVS board to off. This is a low power switch so you don't need thick wires or a massive switch.
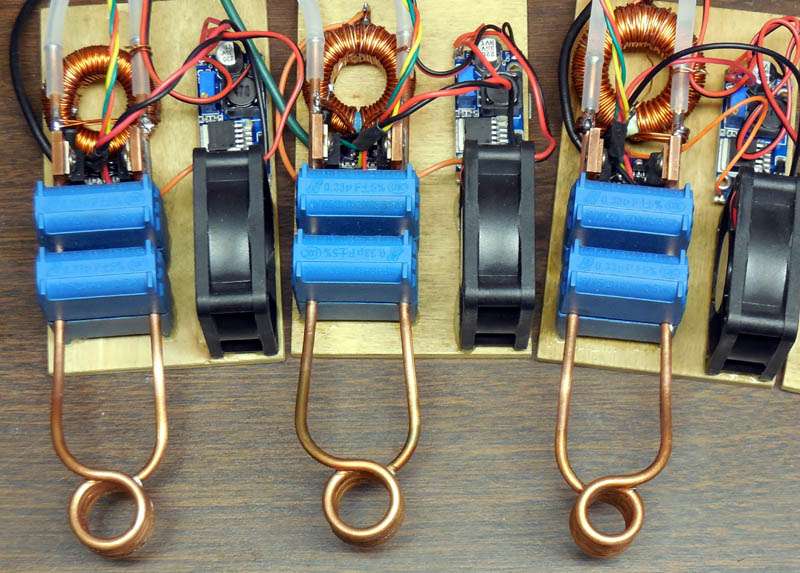
The work coil can be adjusted to your application somewhat. I would suggest 5 turns around a 5/8" mandrel (like a bolt). Separate the turns of the coil slightly so that they don't touch each other. This is important. You should be able to easily slide a piece of paper between the turns. If it's tight you can leave bits of paper or mica (something non-conductive) between the turns then dip the coil in varnish. You can try slightly smaller coils (~1/2") with 6 turns for smaller cases. The tubing caries a lot of electric power between the coil and the ZVS board so leave the "legs" of the coil as short as practical and wind the coil as shown below where the legs double back instead of coming straight off the coil (as above).
Hook up the coil to the ZVS board. As just mentioned, the coil caries a lot of current, so a good connection is important. Buff the connection points with sandpaper, or if you can, solder the copper tubing straight to the ZVS board.
Connect the silicone tubing to the coil and pump. A 17HMR case works as a reducer from the pump outlet to the smaller 3mm ID silicone tubing.
Upon applying power (plug the power cord from the power supply into an outlet), the fan on the power supply should come on, along with a little green LED. The ZVS fan and water pump should also come on and run continuously (you may need to prime the pump). If the on/off switch on the ZVS board is off, then nothing else should be happening. A handheld volt meter or one of those little panel meters could be useful here to tell what's going on. Then you should be able to turn the annealer on with your button and you're up and running. Try different types of brass, different power settings, etc. Burn some holes in things and have a grand old time. You can replace the button with a timer, make case feeders, and generally customize to your heart's desire. Note that conductive objects, especially iron, will heat up in the vicinity of the coil. So for example you would not want to put the ZVS board inside a steel box with the coil going out near the metal.
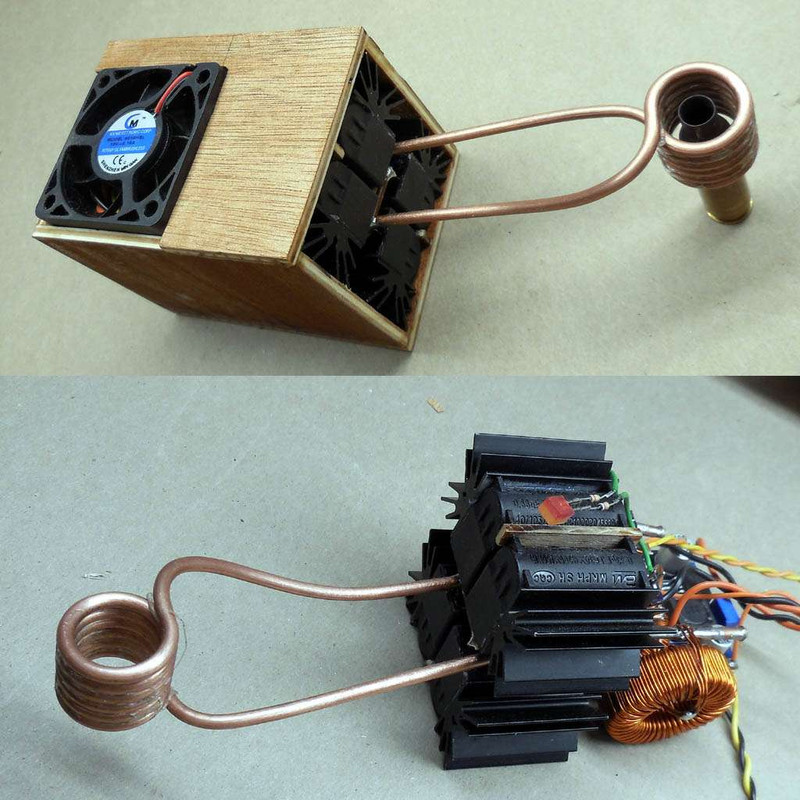
Here are examples of a similar setups:
Note in this one that the capacitors are bent slightly apart to let more cooling air between them. Also, the tubing is connected more directly to the capacitors, soldered to small blocks of copper. The power cord was only 14awg, so the connection between the power supply and annealer is 4 strands taken from the power cord (two for + and two for - ).
Along with some videos showing basic operation:
https://vimeo.com/391700531
https://vimeo.com/279384452
https://vimeo.com/382987020
There are plenty of other sources for information on these, and I can try to answer questions here too. Good luck and pay it forward.