The Accurate Reloading Forums
The Silver-Lining Scholarship Rifle
28 June 2007, 06:32
J BennettThe Silver-Lining Scholarship Rifle
Duane
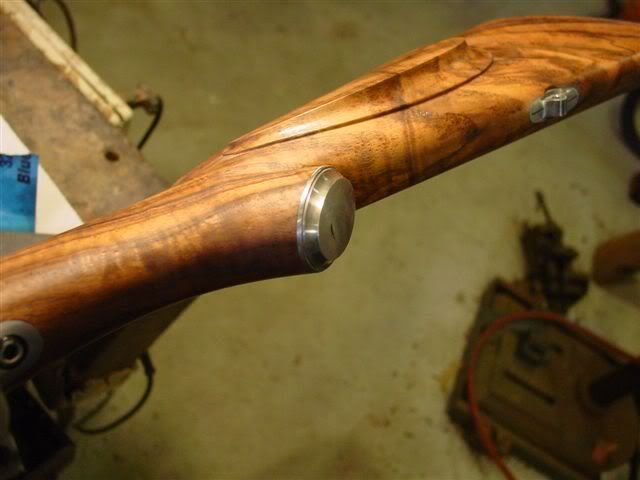
Do you by any chance have any pictures of how you contoured the rear tang?
Please add my name to the list for a copy of your CD if you make it.
Thanks
James
28 June 2007, 07:10
CraftsmanDuane
If you do make a CD of this, I would buy one.
You are not only a fine gunsmith but pretty darn good at shooting photos and documenting your work.
How about another article down the road on a mannlicher stock?
One small question. When inletting and using a leather mallet to get a good impression with the lamp black. I know some gunsmiths who hit the barreled action as if it were their mother in law. Do you hit yours lightly or do you hammer on it pretty hard?
Craftsman
28 June 2007, 07:56
Duane WiebePretend it's an 8d nail
28 June 2007, 08:00
Duane Wiebequote:
Originally posted by J Bennett:
Duane
Do you by any chance have any pictures of how you contoured the rear tang?
Please add my name to the list for a copy of your CD if you make it.
Thanks
James
James: I'll take a photo next time and post it...Duane
28 June 2007, 19:07
gunmakerMr Wiebe
Great pics and comments on the stock. I like your slim-trim profile. Very classy. Layout of the wood couldn't be better. Are you going to keep posting pics through the finishing & checkering process?
28 June 2007, 20:30
Duane WiebeJames..Yes! Everything I know...won't take very long...
29 June 2007, 09:29
ThaineThis is simply too much for words. Thank you very much for posting the pictures and the narative. I am ready for the DVD. I have seen the finished results of several artisans on this site, but to see and have explained to me how you create such a masterpiece from scratch is priceless. Thanks again, I gotta go check the piggy bank to see how many tickets I can buy!

Thaine
"Begging hands and bleeding hearts will always cry out for more..." Ayn Rand
"Life may not be the party we hoped for, but while we are here, we might as well dance" Jeanne C. Stein
Duane,
Just felt the need to echo all the comments of appreciation for your posting of the step by step. Pretty great in the spirit of this thing, and you are teaching as you contribute to the memory of a teacher. A whole lot of us are getting an education from your efforts.
Many Thanks
HBH
29 June 2007, 22:53
ScrollcutterI went up to Duane's yesterday to get some smoke pulls of the metal.
The pictures don't do the rifle justice. One has to hold the rifle to see the real value in Duane's work.
Roger Kehr
Kehr Engraving Company
(360)456-0831
30 June 2007, 07:53
Duane WiebeWell, here are the first progress photos from when Roger (Scrollcutter) came by to take some "smokings" of the rifle. He’s making sure there will be no time lost in design
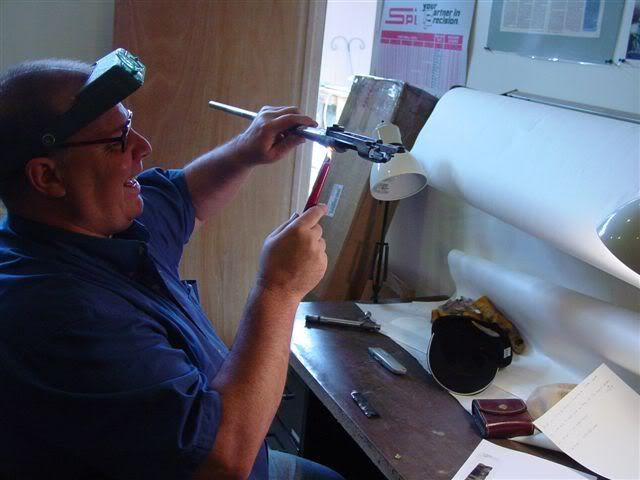
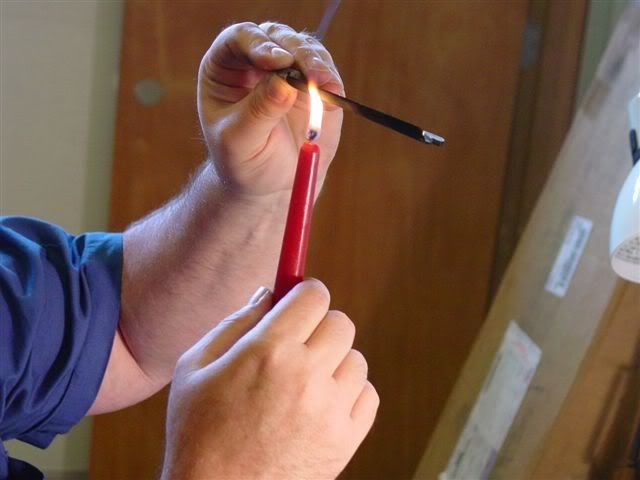
Tell us what "smokings" are.
30 June 2007, 22:51
jeffeossoI dunno what that is, but from the pics i'll guess it's getting carbon on the items, then using tape to pull it off to have a 2d perfect image of a 3d item, that will allow one to do layouts with?
anywhere close, roger?
30 June 2007, 23:35
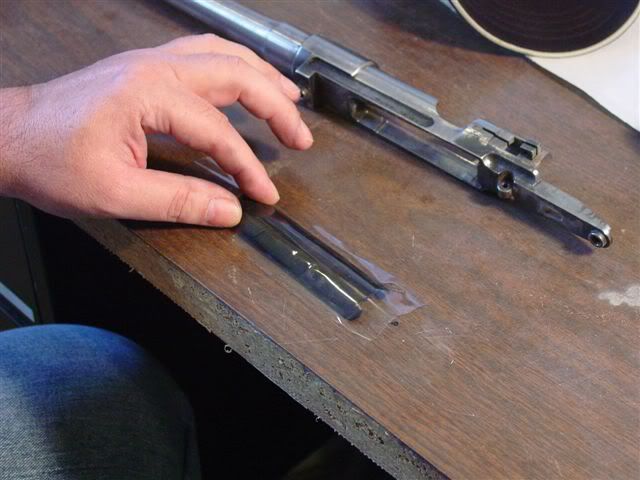
Duane WiebeRemember that goof? I just gave the edge of the cap a little radius...easy fix!
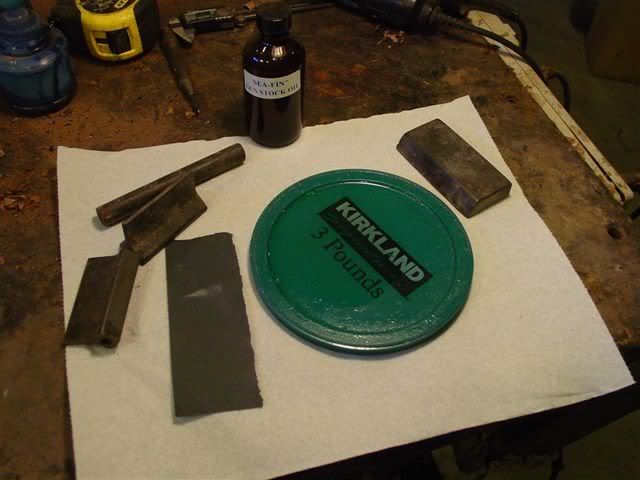
I like to put a little finish in a shallow container, makes it easy to dip the sandpaper for wet sanding. I use "Sea-Fin Teak Oil" by Daly's in Seattle. This was formulated many years ago for use on wooden boat furnishings, decks, railings, etc. Figured if they can come up with something that works well on wooden boats in Seattle, should be pretty good for gunstocks...used it for years. There are other many fines products, "Velvit Oil", Plastic Oil, etc. I would stress that you read the label contents carefully...Lots of dangerous chemicals are widely used, i.e. "toluene" (really bad stuff) or anything containing the "zenes"… benzene, for instance. Sea-Fin contains linseed oil, tung oil, varathane, thinners...mostly stuff that won't cause health problems if used with reasonable care. Wash hands thoroughly before and after use. OK....on to the project...
Put the metal back in the stock so you won't round off edges

I like to start off with 320 wet or dry paper …work up a little "sludge"
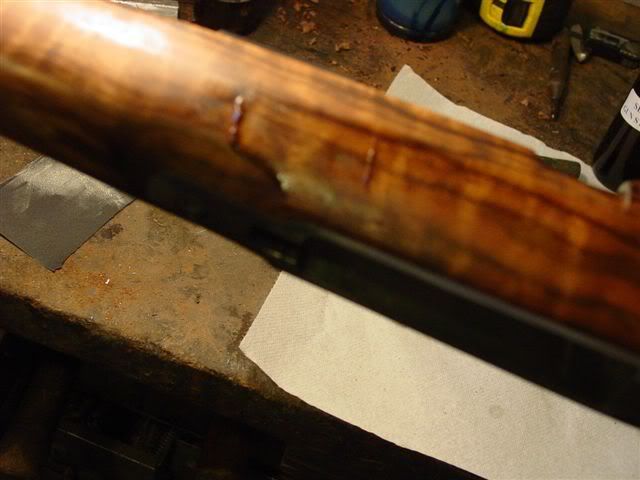
When it sets up a bit, wipe off across grain with paper towel. There's nothing remarkable about this technique. I find that with most woods, a couple sandings each with 320, 400, 500, 600 and 800 will do the trick...some woods will benefit clear up to 1500. I won't be posting any more about stock finishing until we get to the final treatments

01 July 2007, 01:12
Scrollcutterquote:
I dunno what that is, but from the pics i'll guess it's getting carbon on the items, then using tape to pull it off to have a 2d perfect image of a 3d item, that will allow one to do layouts with?
anywhere close, roger?
On the mark, Jeffe.
I will be posting photos of the engraving in progress.

Roger Kehr
Kehr Engraving Company
(360)456-0831
01 July 2007, 07:34
J BennettDuane
Thank you for the picture of the rear tang.
You did not taper it as much as I had envisioned.
Whose/manufacture rear swivel base did you use?
James
01 July 2007, 08:10
Duane WiebeThis is my own..kinda like a smaller version of he super grade M-70
01 July 2007, 19:18
J BennettDuane
Thanks
You have a PM.
James
This is far and away the best thread on any forum I've ever read!!
Thanks for taking the time to post pictures and make cmts.
Don
01 July 2007, 20:15
Duane WiebeThanks, Don...I'm personaly looking forward to Scrollcutter's posts...I should be able to get the metal to him in about 3 weeks...maybe less
02 July 2007, 02:36
butchlambertI hope that was mine. I've been waiting a little bit.
Butch
05 July 2007, 05:08
Duane WiebeI need the barrel in the stock while I’m finishing the stock…so I can’t turn the barrel loose to Mark for a while yet. I also have a lot of “down-time†between finish coats. This, coupled with the fact that Mark’s backlog of paying customers kept building while he was sidelined, prompted Forrest to tell me to keep on the rifle without any breaks. You can look over my shoulder while I do some metal work…I was hoping to learn a few tricks from Mark.
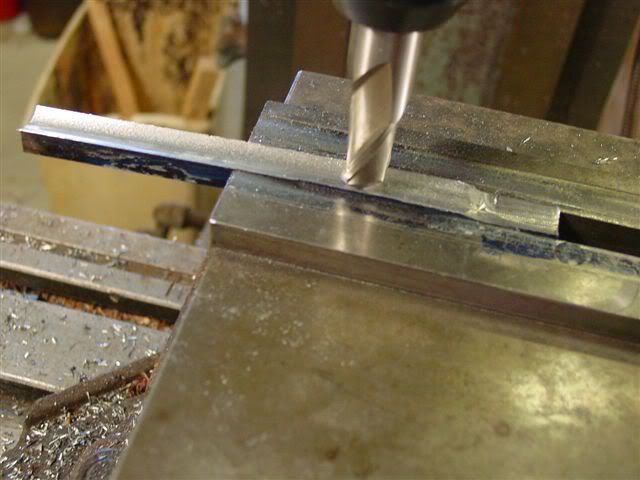
Using a hermaphrodite caliper, transfer barrel contour to the steel stock. Keeping in mind light weight, we're using 1/2" stock rather than the usual 5/8".
Find exact center with a wriggler, then lock table
We rough out most of the bottom side with a 3/4" ball end mill, then the cylinder section with a 1" ball end mill
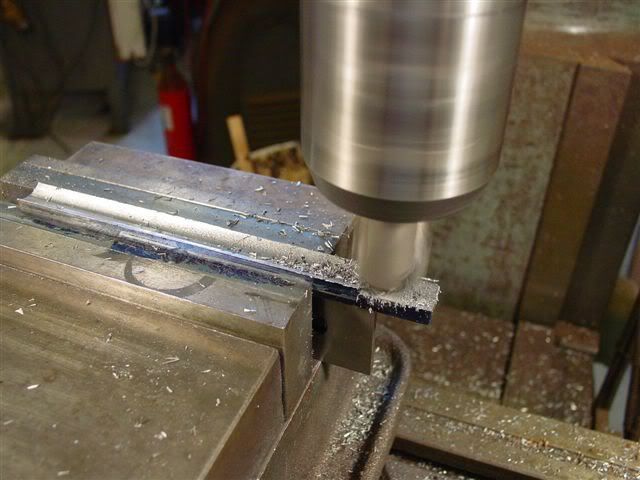
We can do a little "tipping" to come closer to scribe lines..
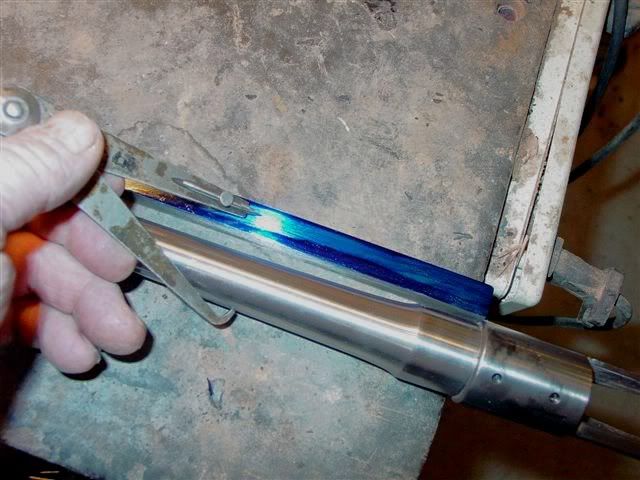
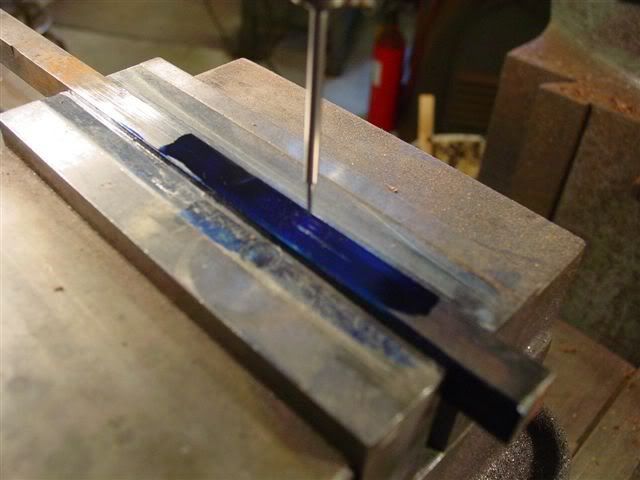
We paint the barrel with bearing blue...use the action as a "stop" and find the high spots
Using a Dremel and bearing scraper, keep working on the high spots..until...
....it's fitting pretty close
05 July 2007, 05:21
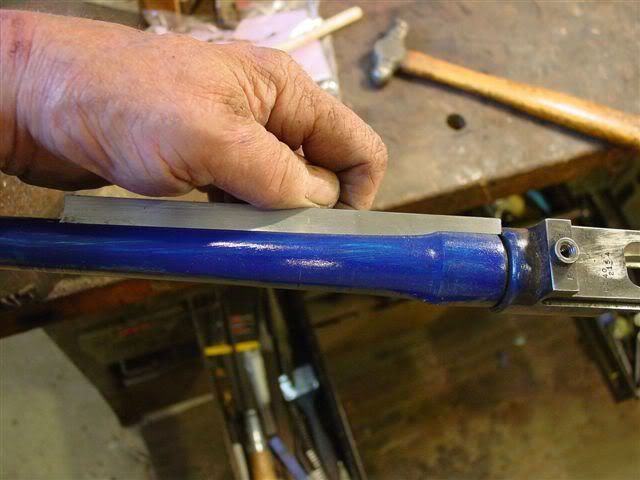
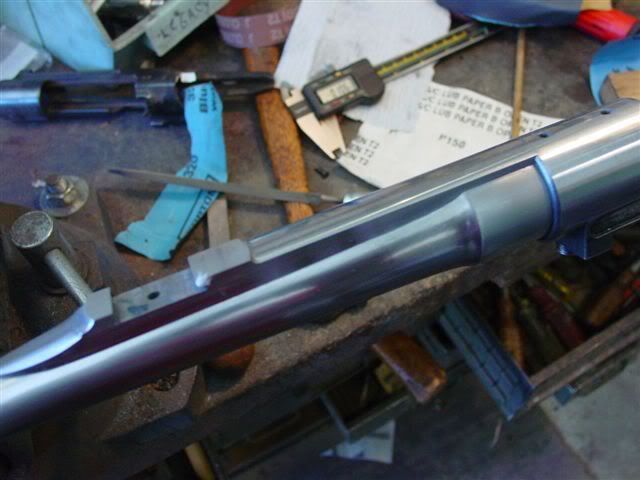
Duane WiebeThe closest diameter front ramp available was almost .020 undersize...this is little too much to "peen", since the tail of the ramp will end up standing away from the barrel...so...using a small boring bar, we open up to muzzle diameter
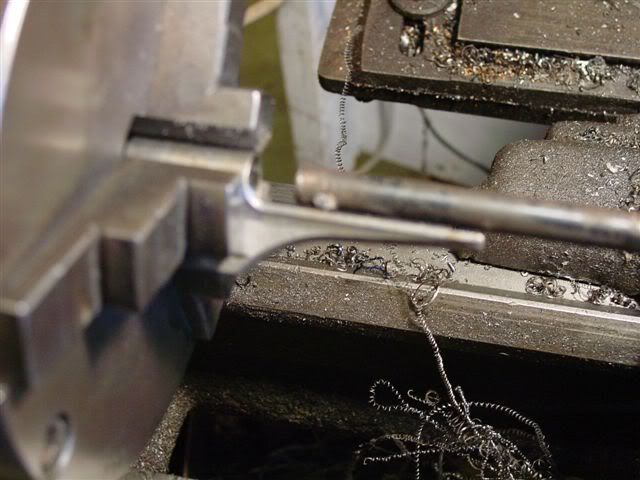
Guess I don't need to stress that light cuts with a very sharp tool is called for here

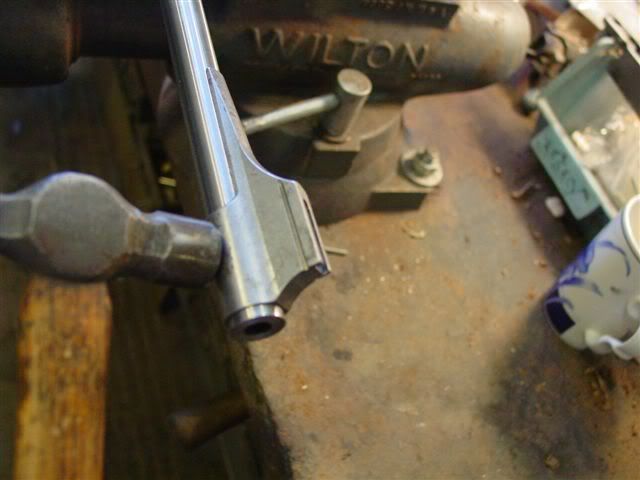
Only light peening is necessary to form to barrel taper for a perfect fit...
05 July 2007, 05:24
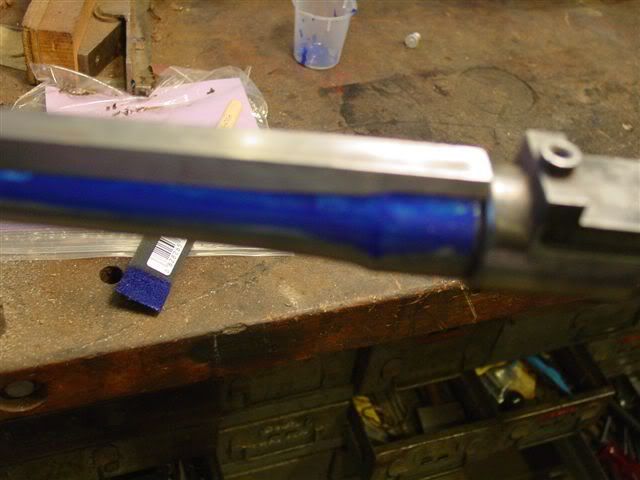
Duane WiebeHere, I'm tinning both rib and barrel with "Stay Brite"by Harris Co.., containing a fairly high dose of silver and would hold up to caustic bluing....we'd probably use causic blue if there's gold inlay. Barrel nicely tinned…
Here, the rib is soldered in place

In the mill, we make the rib parallel with the bore and do some rough shaping

Final shaping…
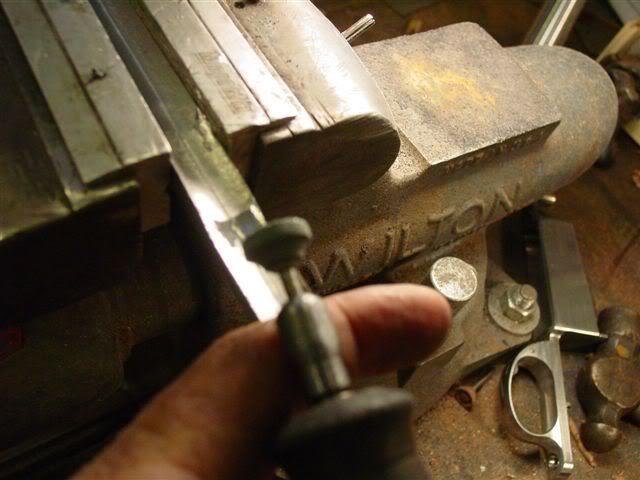
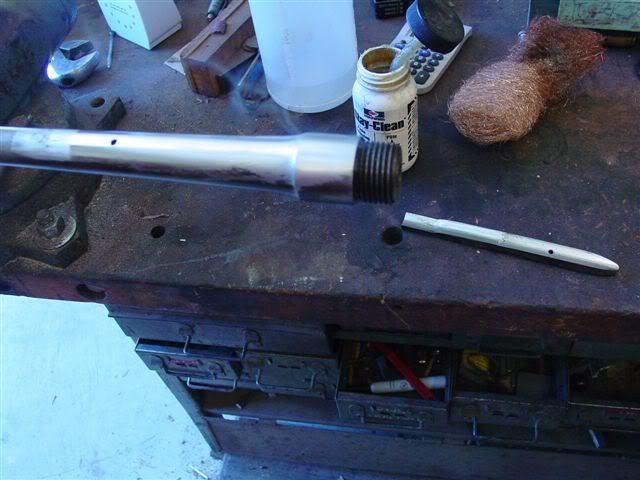
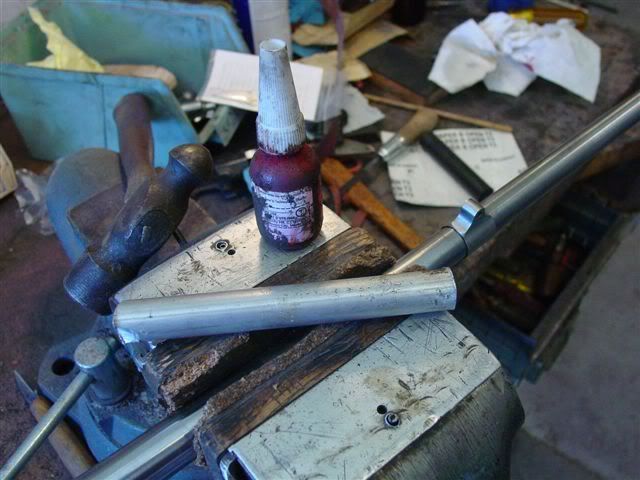
Here are the tools I use to install the swivel base after stretching. The swivel base and the front sight are locked in place with red "Loctite". Dave Talley first got me wise to using Loctite and I've developed complete faith in the product. I had to remove a swivel base that I had installed....couldn't budge it even with outrageous heat! Had to turn it off on the lathe.
Using two bars to get front sight exactly plumb with rear is a time honored method. Having already painted on Loctite, you need to move with hasty precision.
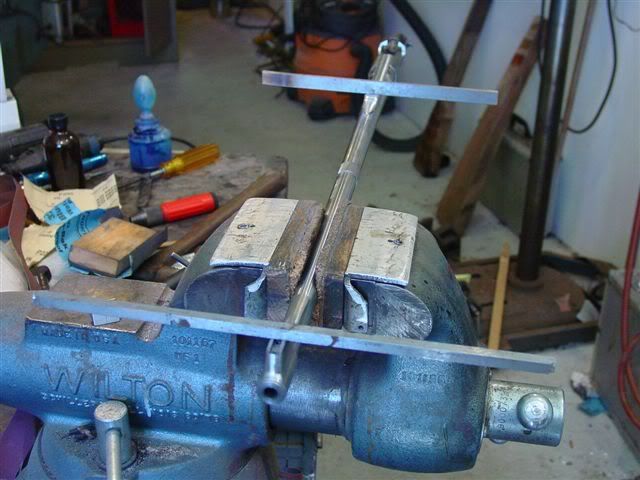
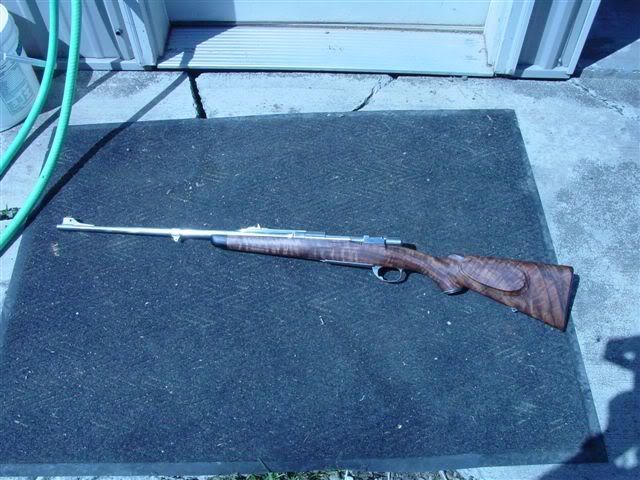
Sneak preview!
05 July 2007, 05:30
ForrestBDuane, It's good to know you're not taking a day off!
I can not believe how fast you're working. You're going to regret showing your clients just how fast you can work when you have to.
______________________________
"Truth is the daughter of time."
Francis Bacon
05 July 2007, 05:32
ForrestBBy the way, that Q-rib is SWEET!
______________________________
"Truth is the daughter of time."
Francis Bacon
05 July 2007, 07:57
Duane WiebeIt has fallen on me to give the metal final polish...OK.....got nothing else to do....Shipping to Scrollcutter the week of July 9...gonna go into deep cover for a while!
Duane, how do you clean the excess solder off the barrel?
05 July 2007, 16:57
jeffeossoDuane,
amazing.... makes me want to take ALL my tools out in the rain, just amazing
jeffe
06 July 2007, 02:02
Duane Wiebequote:
Originally posted by GSP7:
Duane, how do you clean the excess solder off the barrel?
Wipe off all you can while still molten, if you miss a glob, scrape off and then 400 grit. Important that you wash parts in hot soapy water to clean off flux
06 July 2007, 06:20
Duane WiebeJust a point of interest...the barrel...with all the bells and whistles...weighs in at 2 lb 7 oz...realistically, a "light weight sporter" will tip around 8.5 lbs, with scope..This will "feel" much lighter...weigh your "featherweights" on an honest scale...you may be surprised. I never liked super lightweights. since they just don't balance and don't "settle down"...If you really feel the need to avoid carrying another couple pounds...skip the third glass of wine at dinner
quote:
Originally posted by Duane Wiebe:
If you really feel the need to avoid carrying another couple pounds...skip the third glass of wine at dinner
Duane, this doesn't seem to work in my neck of the woods. Since locals seem to skip the potato chips, dip, burritos, and cheeseburgers instead I'm still in the worst of both worlds.
_________________________________
AR, where the hopeless, hysterical hypochondriacs of history become the nattering nabobs of negativisim.
07 July 2007, 07:15
Shane ThompsonDuane,
Very interesting pics and narrative. Where did you get the horn butt plate?
Shane Thompson
07 July 2007, 19:42
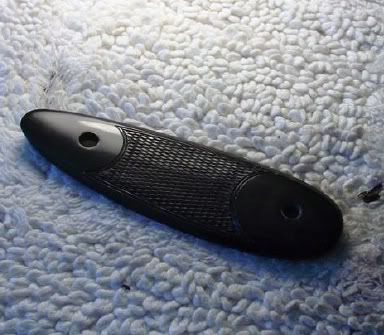
Duane WiebeYes, horn buttplate is installed..it's smooth but I'll do some checkering
07 July 2007, 19:44
Duane WiebeRe Buttplate...sorry I over looked your question...from Galazan
10 July 2007, 18:23
Aspen Hill AdventuresWhat an education this continues to be and a very beautiful firearm! Good job all!
~Ann


11 July 2007, 07:54
Duane WiebeCan't put it off any longer...we're going to checker the horn buttplate. Here, I crazy glued scrap together to hold the plate in my checkering cradle
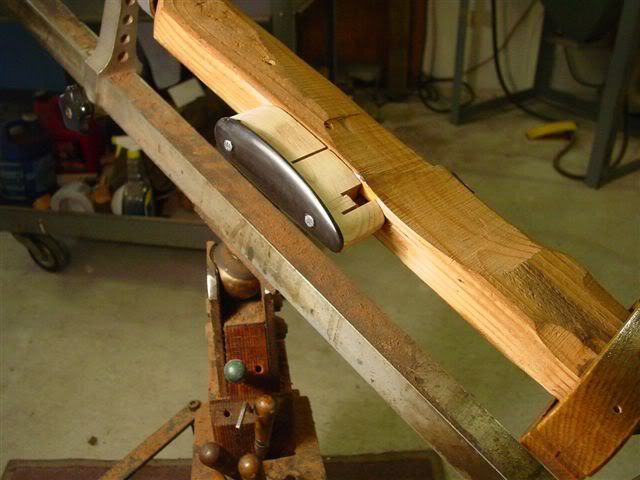
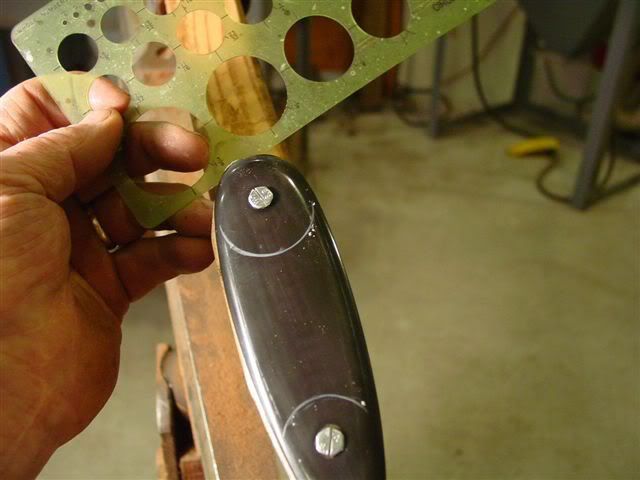
Checkering horn is a real...pain... Here, we've laid out a relatively simple pattern,,,using drafting templates for the curves
I'm using an electric checkering tool, making fairly large diamonds, to fom flat top or "English" checkering. Depending on the grain of the horn, pointed diamonds can be diffucult to form and keep.
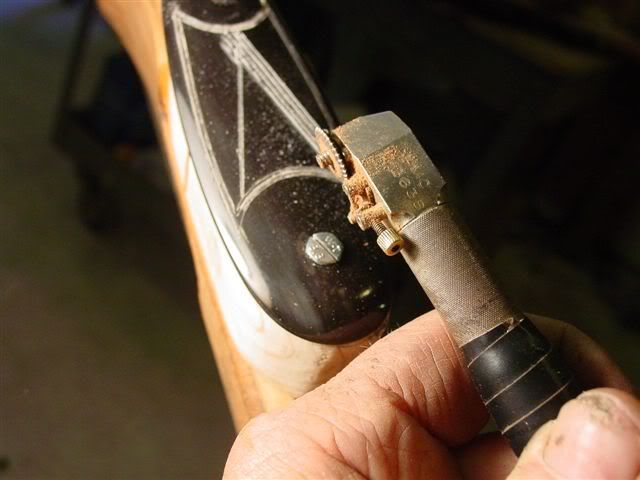
When done, polish with a soft buff and chrome compound
12 July 2007, 01:02
ScrollcutterReceived the metal work from Duane today.
Impeccable quality, peerless polishing and exquisitely handsome.
Do I need to say I'm a fan!
Roger Kehr
Kehr Engraving Company
(360)456-0831
12 July 2007, 05:17
Duane WiebeOh boy...this is gonna cost! Thanks, Roger, really looking forward to your posts
14 July 2007, 04:20
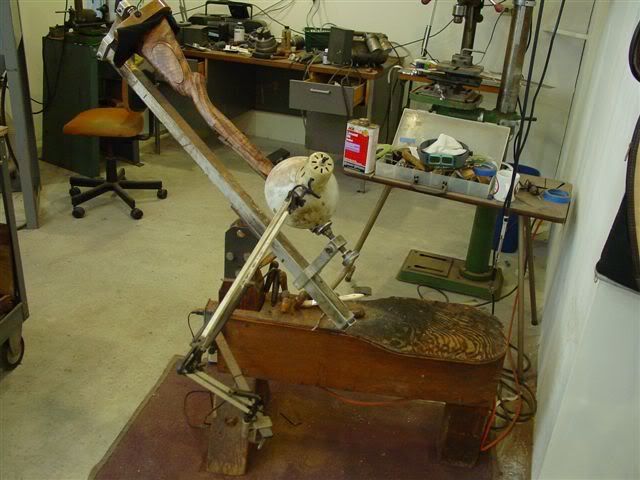
Duane WiebeI've wet sanded to 1000 grit, wood has a nice glow, so it's time we got on to checkering. The most important part of checkering is a nice, steady and comfortable checkering cradle. I built this about 35 yrs ago and still haven't gotten around to padding the seat. The pivoting ball is made of brass 2 1/2" in diameter, sandwiched by hand contoured steel plates...Brass on steel...nothing wears!
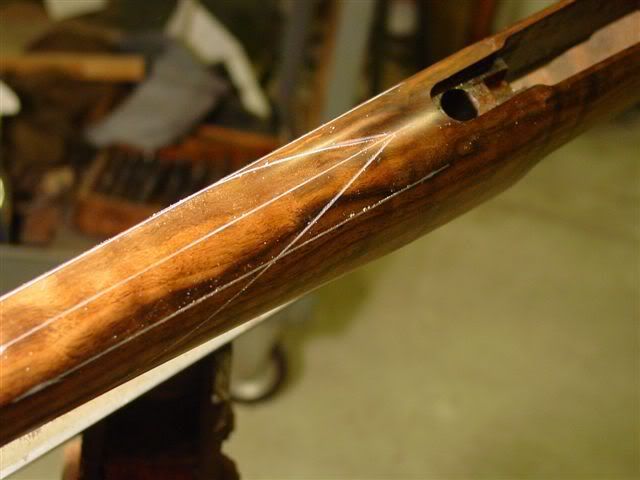
We'll be using a classic one piece point pattern (No room for cutesy pie here). First step is to lay out the top line parallel with barrel channel. Though this tool is home made, a commercial variety is now available
Using some paper tape, we can wrap around the forearm and then divide into three parts. This will leave three equal spaces, the reason will soon be clear. Since the forearm tapers, do the same layout near the action
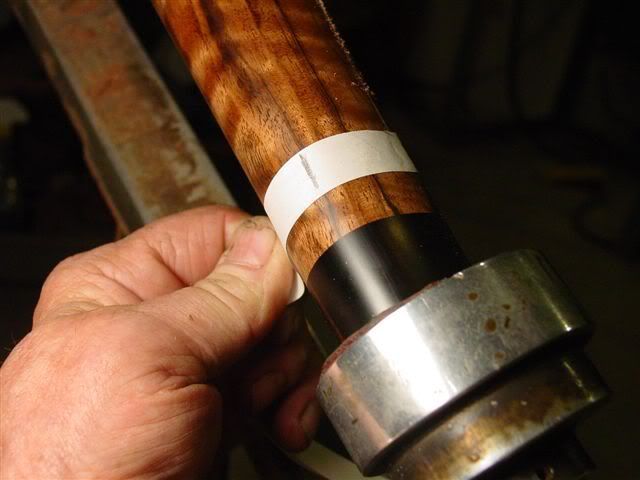
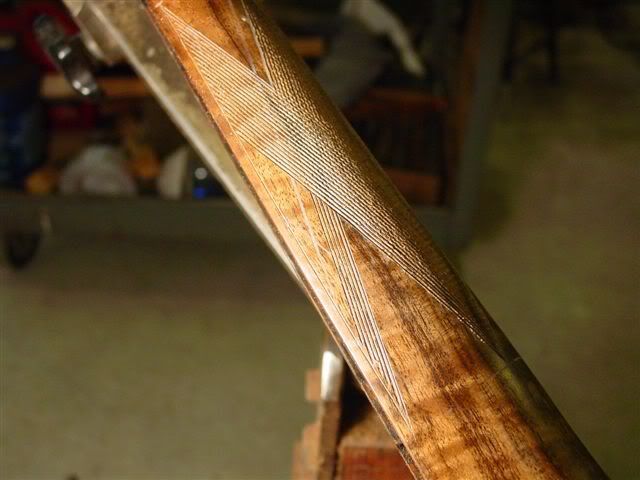
Now, make some marks where those equal divisions were and that will position our points as the pattern develops. Using a plastic template, I kind of like the looks of a 3.5 to 1 diamond proportion. So, now finding the EXACT center of the forearm, lay out the diamond angle. I like to use a "Stabilo" pencil, which is something like a grease pencil, but a lot finer and can be sharpened. The marks are easily removable and will not scratch or dent.
All part of the primary layout, those parallel lines indicate location of "points"
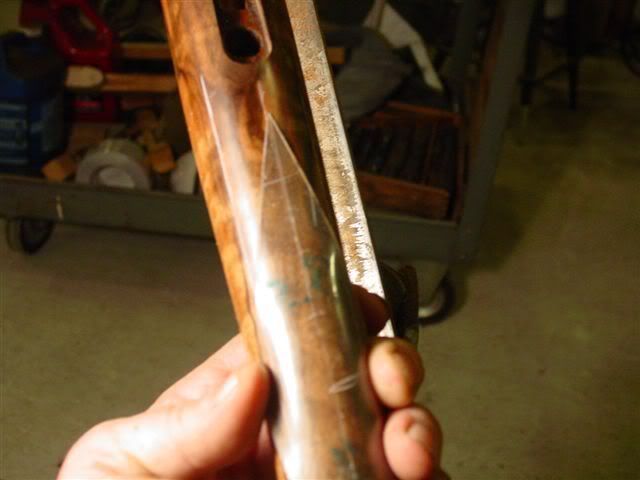
I use a piece of 1/2" wide flexible ruler tape about a foot long and line the backside with electrical tape to protect the wood. Mark parallel lines all across the pattern...they will act as a visual to maintain straight checkering lines.
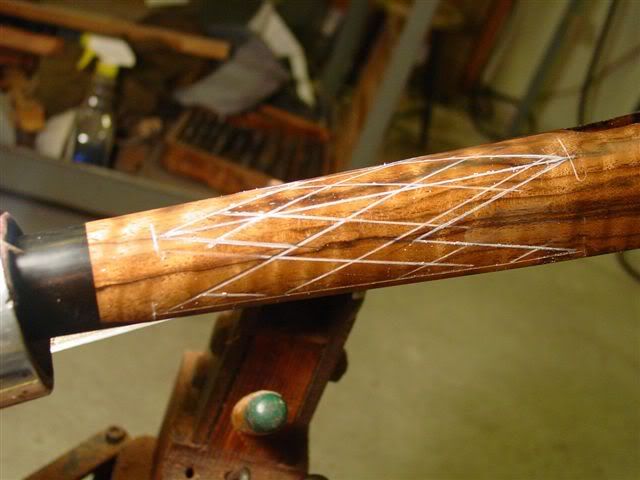
Using that same flexible rule material, scribe and deepen the master lines
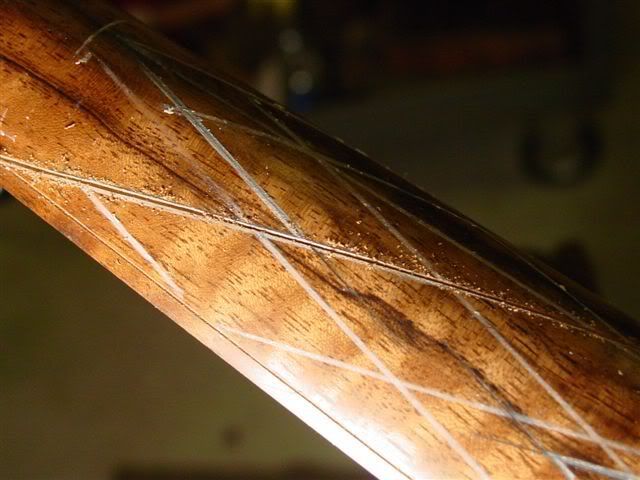
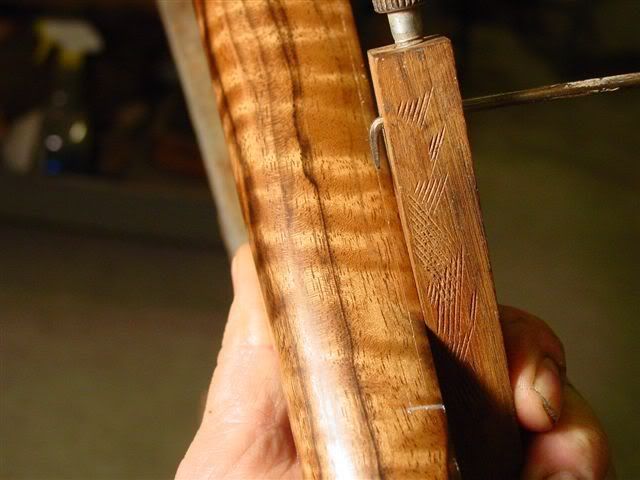
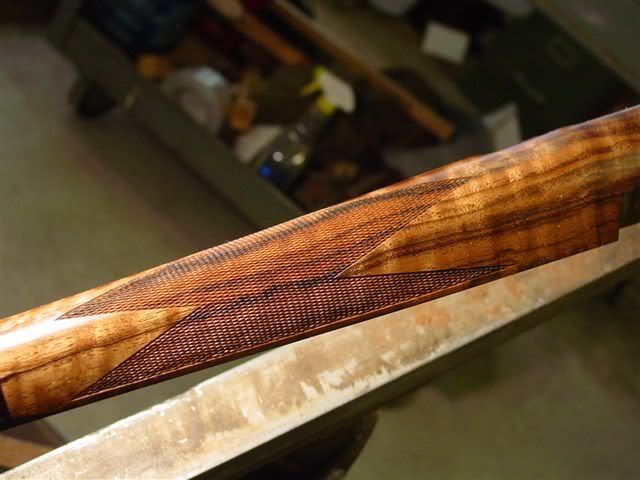
I'm using an electric tool here and soon find out that the grain is causing a bit of trouble (tool ends to follow the grain). Every couple of lines, I find it necessary to straighten out with what Monte Kennedy called a "jointer", which is merely a hand held tool with an inch long cutting surface. It tends to leave straight line…no matter the grain
Can't stress how important it is to maintain straight lines so the borders will be a simple extension of a checkering line...were this a fleur de lis pattern or similar "fill in" these parallel lines are not quite as vitally important, though one must get in the habit of always keeping the lines parallel and straight
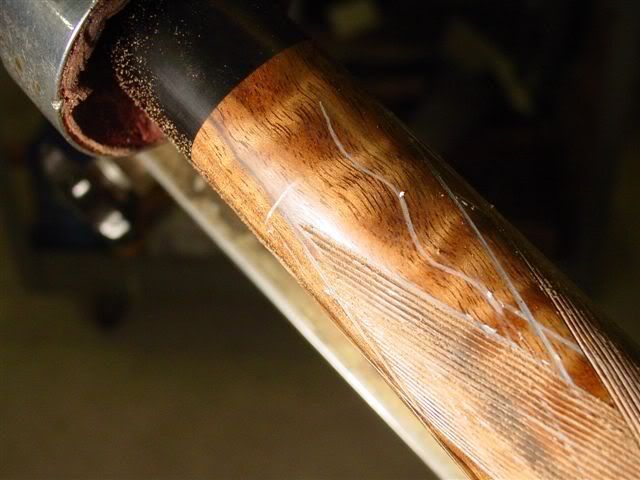
After we’ve deepened as much as called for, use a little linseed oil, which will act like a lubricant when using the veiner
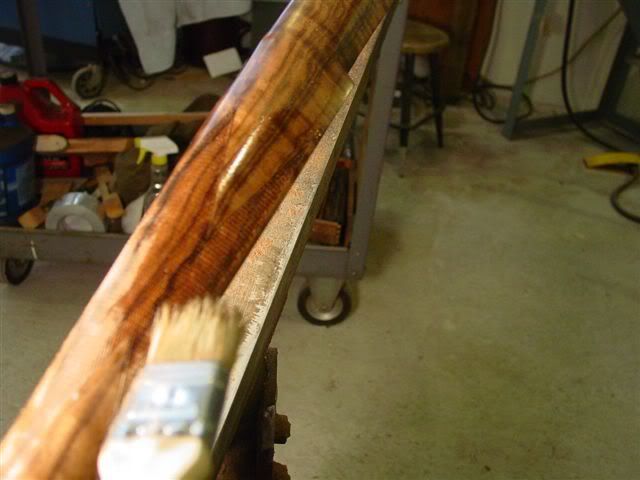
Each and every line must be taken carefully to the edge. I use a veiner...a very sharp veiner! Need I mention that stopping in time is pretty important to avoid runovers.

We'll be using a border, but first we'll do the grip...next time.
I know I couldn’t have cover all the nuances, so fire away with any questions. I would also invite the other stockmakers to join in.
Thanks.
Duane
14 July 2007, 04:47
ForrestBBeautiful girls don't need make-up.
Duane, your work shows why very well made rifles don't need a lot of frills and fluff for decoration. All we're lacking is some tasteful rose & scroll and a good bluing job.
I guess we need to start organizing a raffle.
Anyone and everyone who wants to volunteer for helping out with our publicity effort please remind us who you are. We need national (even international) publicity in order to raise the most amount of money possible. Think about what needs to be done and what part of that you're willing to do.
Thanks,
Forrest
______________________________
"Truth is the daughter of time."
Francis Bacon