As stated. trying to remove the bolt guide. Has no visible pins, hole etc. to depress the retainer spring that prevents fore-aft movement of the guide when positioned on the bolt. Internet search turns up nothing. Any help would be appreciated.
Posts: 1131 | Location: Wyoming | Registered: 04 April 2009
I've seen all of that info. Very resistant to moving and parts are scarce. Is there a trick. It is bowed slightly in the middle, need to be flush against the bolt to move maybe. I did read a post on a forum where the poster 'lifted' the rear of the guide with a small blade prior to sliding the guide off supposedly to clear the retaining spring. Is this necessary.
Posts: 1131 | Location: Wyoming | Registered: 04 April 2009
I have done a number of them before a re-barrel/re-blue. I have always driven them off forward and have broken that spring every time. It is a simple matter to put it back together if you can find the spring. I have had a few of them, don't know if I have any more. Maybe check with Beretta USA or Western Gun Parts. Rod?
Jim Kobe 10841 Oxborough Ave So Bloomington MN 55437 952.884.6031 Professional member American Cusom Gunmakers Guild
Posts: 5500 | Location: Minnesota | Registered: 10 July 2002
That stupid spring gets screwed up because it's captured by the notch in the bolt body. cut up a beer can and slide it under the guide and rotate the guide so it's at the bottom of the bolt. Then there is no notch there to trash the spring. Now you should be able to tap it forward without bubba screwing it up. If you can't see both notches in the bolt body you shouldn't be smacking it with a hammer.
gunmaker ------------------ James Anderson Metalsmith & Stockmaker WEB SITE
I only drink bottle beer, now I have to go visit my neighbor! That's an elegant solution, do I come under the spring from the rear or front or does it matter. Thanks to all who answered.
Posts: 1131 | Location: Wyoming | Registered: 04 April 2009
Originally posted by kda55: Gonna weld a bolt handle on; does it need to come off. Jim, if you do have an extra spring and if it is for sale please PM me.
The guide does not need to come off to do the bolt handle but will if you intend op have it reblued
Jim Kobe 10841 Oxborough Ave So Bloomington MN 55437 952.884.6031 Professional member American Cusom Gunmakers Guild
Posts: 5500 | Location: Minnesota | Registered: 10 July 2002
Originally posted by kda55: Gonna weld a bolt handle on; does it need to come off. Jim, if you do have an extra spring and if it is for sale please PM me.
I have a few of them, different sizes and would need your bolt to determine which on it is when disassembled
Email me: Jkob60@msn.com
Jim Kobe 10841 Oxborough Ave So Bloomington MN 55437 952.884.6031 Professional member American Cusom Gunmakers Guild
Posts: 5500 | Location: Minnesota | Registered: 10 July 2002
Per Gunmaker recommendations, rotated the guide rib to the closed bolt position, slipped a piece of aluminum under the spring and rotated 180 deg to the off side of the bolt. Still could not budge the guide rail off but no need, good to go. Thanks.
Posts: 1131 | Location: Wyoming | Registered: 04 April 2009
Years ago, I did some polishing on a broken dental pick....for this problem. I slide it under the bolt guide in order to depress the internal(hidden)guide collar retaining clip....thus allowing the guide to slide forward. Correct re-assembly is critical.....otherwise the bolt guide can slip forward, under recoil, locking the bolt.
FWIW....there is a current thread, with pictures, concerning this situation over on the Sako collectors board.
Hope this helps.
Kevin
Posts: 409 | Location: The Republic Of Texas, USA | Registered: 28 December 2000
Good post Kevin. 27 years since I've had mine apart. It's kind of an odd Sako. Round top without dovetails receiver and Argentine trigger bow floorplate release factory. Bought it as an action only. My guide rib has a hole in it just behind the collar and it looks like it has that clip to keep it from recoiling forward. Looking at several pics of Sakos it seams they didn't always put the disassembly hole in the rib. If I had one without the hole, I'd probably put one in it. Looks like you could bend a paperclip to pull the release. I'd still think you would need to spin the rib around to the bottom of the bolt, otherwise the anti rotate puck and little spring would keep it from sliding forward.
Like Kevin mentioned the Sako collectors have some more pics to peek behind the curtain.
gunmaker ------------------ James Anderson Metalsmith & Stockmaker WEB SITE
Originally posted by Nortman: Does the guide rail do anything other then making it look more M98 like?
I have heard it can stop the extractor for shooting back into you eye if a case ruptures ...
Was this supposed to be problem for everyone or just southpaws? As a right-hander, I'm more inclined to worry about looking down the left lug runway, left uncovered by the skimpy bolt shroud.
Posts: 4956 | Location: Melbourne, Australia | Registered: 31 March 2009
poking around looking for pics of the L579 bolt I've found some that are pinned on just like the MiniX from Yugoslavia. Looks like Sako had those in charge using my favorite slogan. "Indecision is the key to flexibility"
gunmaker ------------------ James Anderson Metalsmith & Stockmaker WEB SITE
That looks like the textbook definition of a cluster. You have to raise the spring to clear the collar looks like. Mine has no hole; maybe the reason it won't come forward, can't clear the spring. I'll leave well enough alone.
Posts: 1131 | Location: Wyoming | Registered: 04 April 2009
Excellent pictures, James!.....worth more than a thousand words.
All this discussion reminds me of the guide rod changes, over the years. First, they started with a small cross-drilled retaining pin.....wish they would have left well-enough alone. Then there was the solid guide, with internal retaining clip. And then later(I think including the "A" series actions), the "peep-hole" was added. So much for.....progress.
I just wish I could find a "clean" way to disassemble the "A" series firing pin assemblies. Gotta admit....haven't tried very hard.
Kevin
Posts: 409 | Location: The Republic Of Texas, USA | Registered: 28 December 2000
Reviving this old thread. Mr. Anderson, could you give me the measurement from the rear of the guide to center of the hole and diameter of the hole to access the spring clip retainer. Thanks.
Posts: 1131 | Location: Wyoming | Registered: 04 April 2009
Bill, I do not understand the cross pin. The hole appears to be solely to lift the keeper spring to be able to slide the rib off the collar. Could you please explain.
Posts: 1131 | Location: Wyoming | Registered: 04 April 2009
A 1/16" hole is drilled accross the rib right behind the collars which hold the rib to the bolt. So these holes are at right angles to the hole you reference. The little keeper and spring is deposited in the nearest trash bin where it will be at least as useful as it was on the bolt. The pin (or pins) will keep the rib from sliding forward and will do so positively. Properly located, the pin will just clear the bolt body. Regards, Bill

 Guns, Politics, Gunsmithing & Reloading

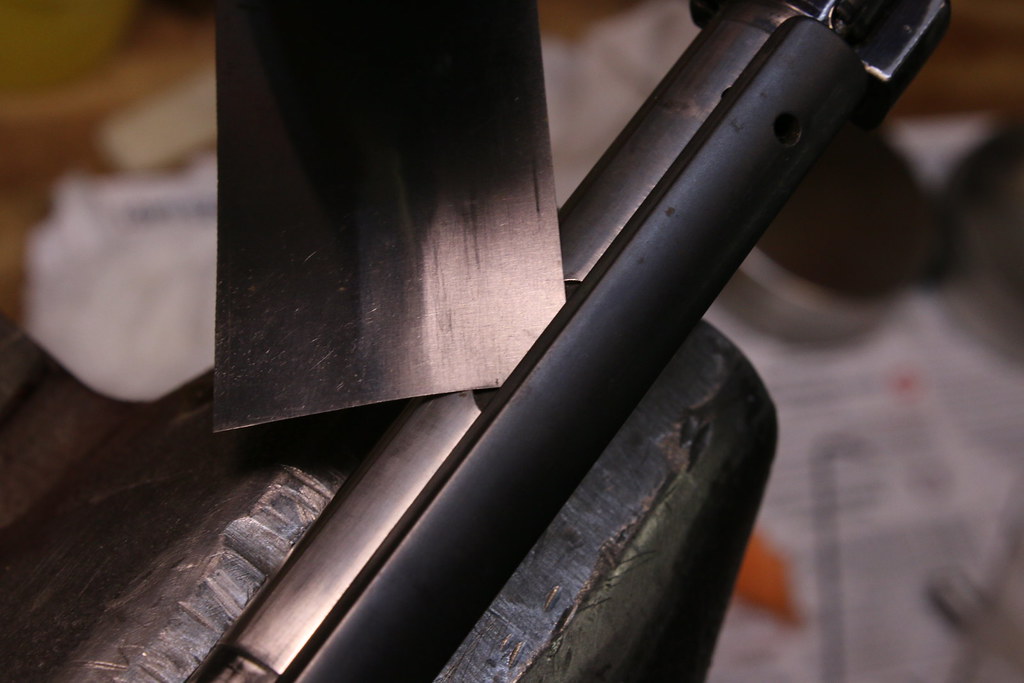 IMG_4441 by JAMES ANDERSON, on Flickr
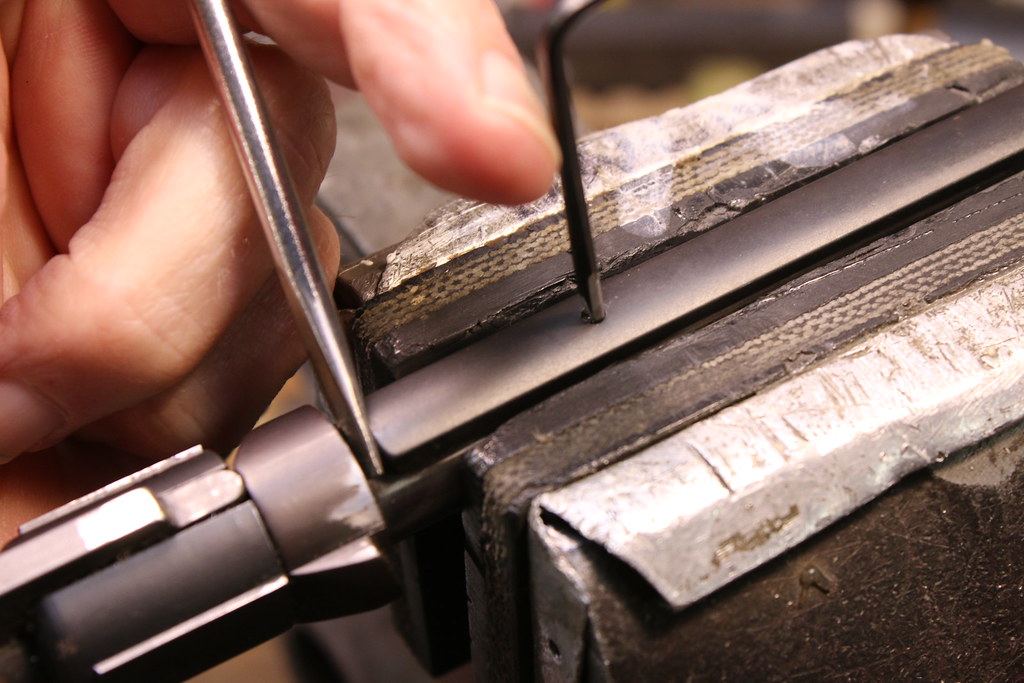 IMG_4442 by JAMES ANDERSON, on Flickr
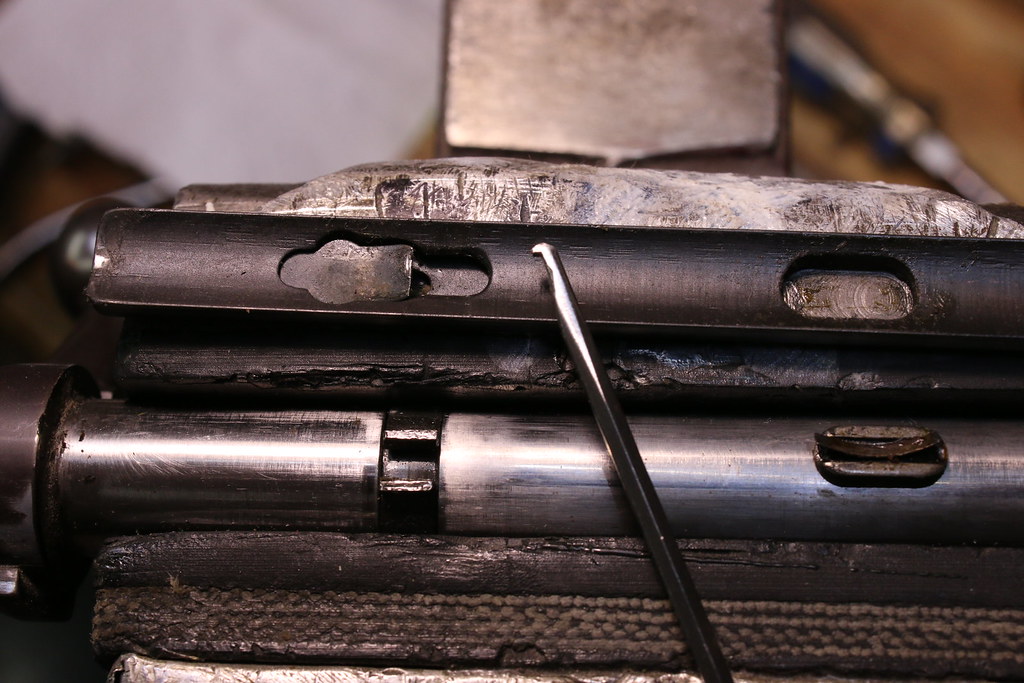 IMG_4440 by JAMES ANDERSON, on Flickr