 Rifles Custom Built Rifles
 Go | New | Find | Notify | Tools | Reply |
| English Walnut Winchester 70 .270 | Login/Join |
| One of Us |
I'm attending Steve Hughes' seminar in September and as a project will be starting work on another stock for my Winchester 70 .270 I bought a quartersawn English walnut blank from Cecil Fredi and had him send it to Shane Thompson to semi-inlet the blank. We discussed the rifle and dimensions and he went to work. It only took a couple of weeks before the stock arrived today. This will be my first time working with English walnut so I'm looking forward to it. The wood has more dark lines in it than I expected and I'm really happy with Shane's work so I think this could turn out pretty well. Here are some pics:  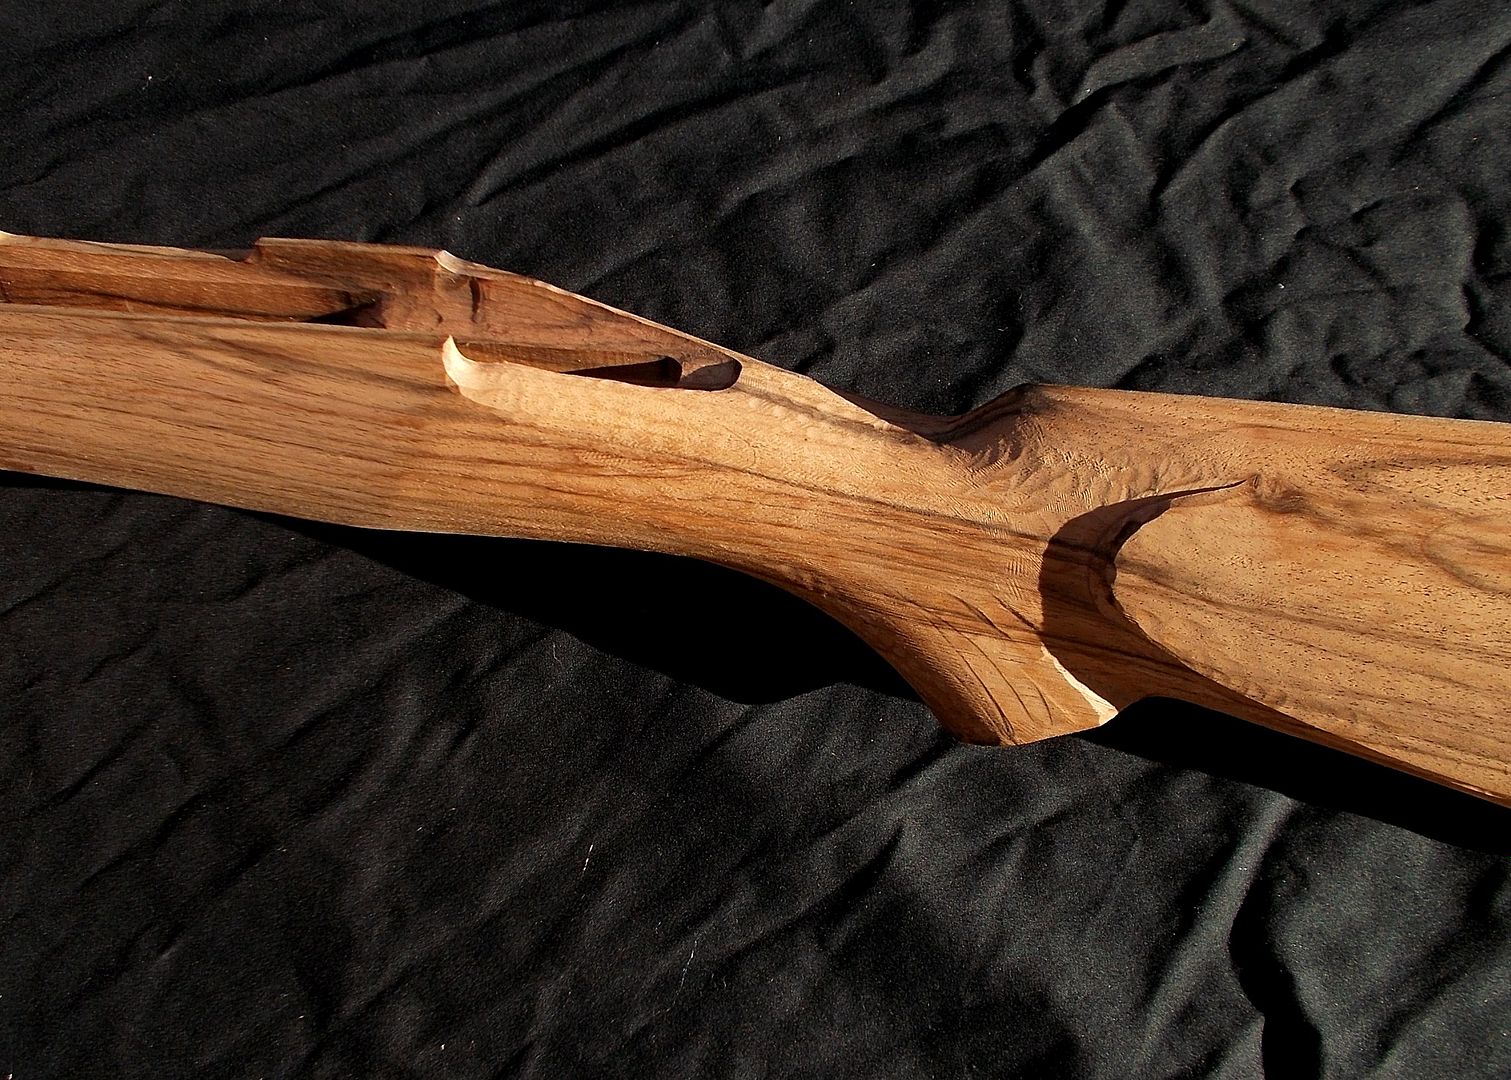 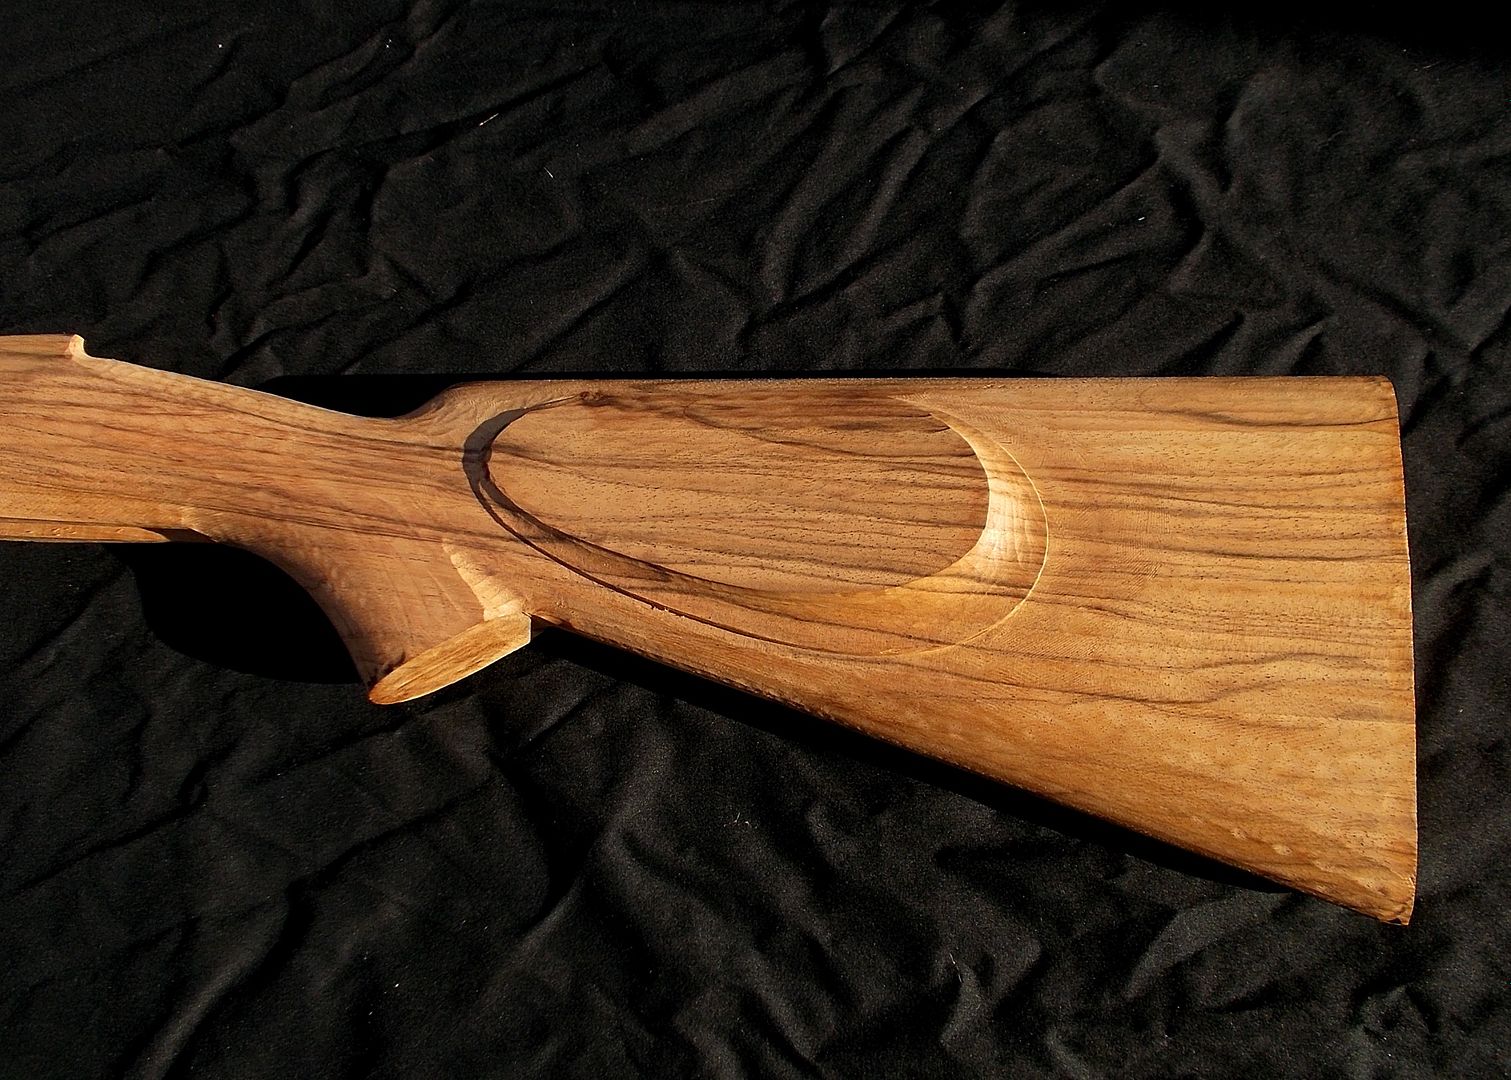 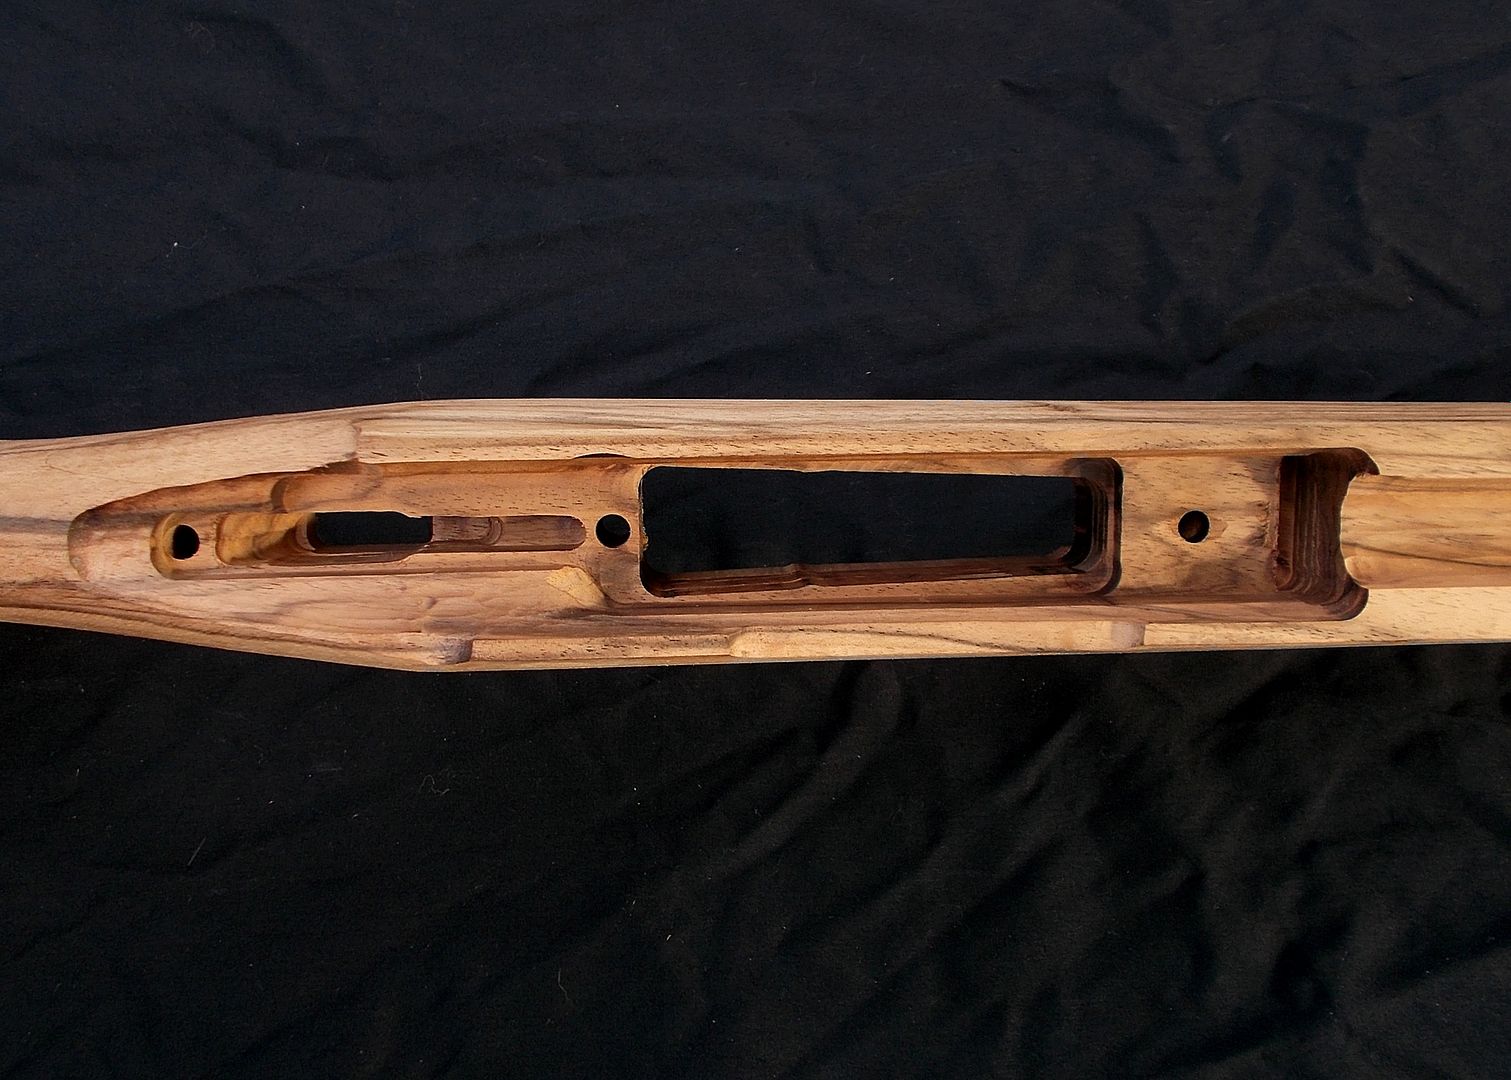 I'll be adding a checkered steel buttplate, steel grip cap, inletted swivel studs, an ebony fore-end tip, and will checker the stock too. The character in the wood really shows up with some mineral spirits wiped on. 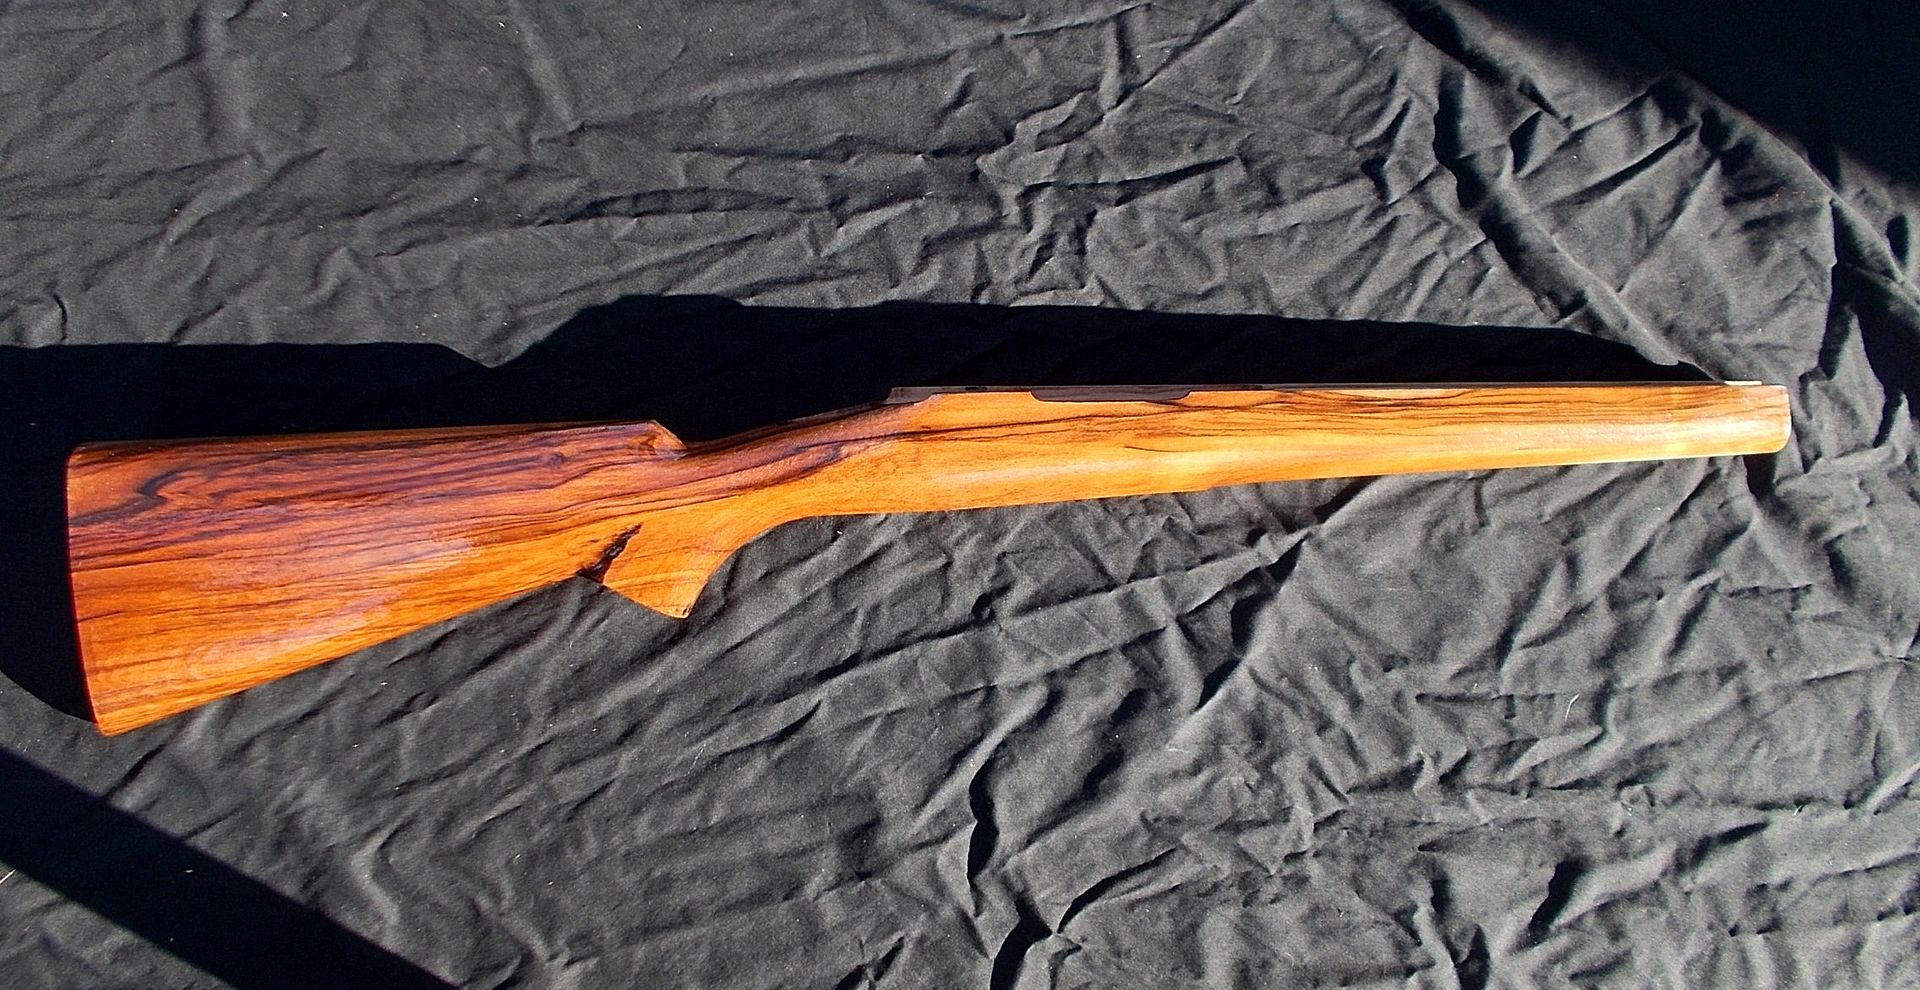 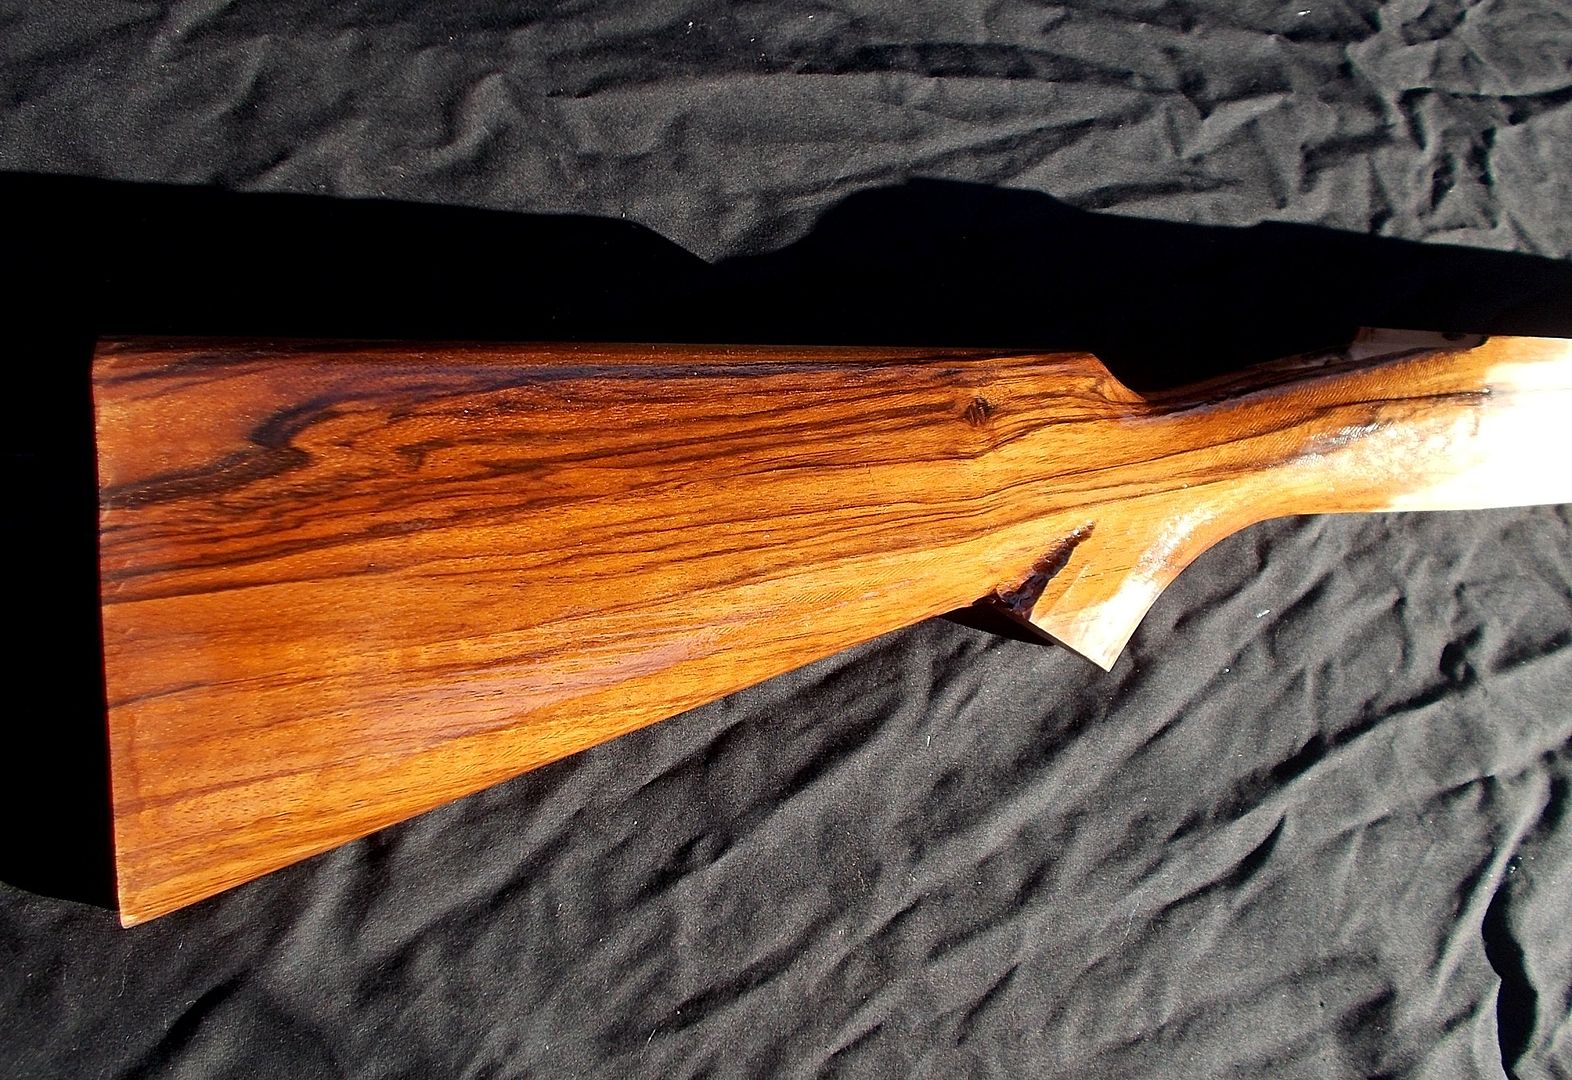  "If the women don't find you handsome, they should at least find you handy." | ||
|
| One of Us |
Should make a very handsome rifle, and in one of my favorite cartridges as well. | |||
|
| One of Us |
Evan, Nice pick. Ray Life itself is a gift. Live it up if you can. | |||
|
| One of Us |
Good looking wood. Should be a fun project and a really nice rifle. Can't wait to see the finished product. | |||
|
| one of us |
Looks like you are off to a great start. And a classic combo. Good luck and tell Steve hi. Anyone who claims the 30-06 is ineffective has either not tried one, or is unwittingly commenting on their own marksmanship Phil Shoemaker Alaska Master guide FAA Master pilot NRA Benefactor www.grizzlyskinsofalaska.com | |||
|
one of us |
beautiful wood! | |||
|
| One of Us |
I've had a couple of guys ask questions about the stock so I thought I would clarify. I left extra wood behind the grip so that Evan would have room to lengthen the grip to his specs. The bumps on the sides of the magazine box are for a factory Winchester box that has those ridges in it. His bottom metal was a different brand than what this pattern was for so I just left extra wood there for him as well. The pattern was slightly less developed than some of my others but the dimensions fit his needs better than any other so we used it. I think it's going to make into an excellent rifle for Evan. Good luck Evan and enjoy a great opportunity to learn from one of the best at Steve's seminar. Shane Thompson | |||
|
| One of Us |
Thanks all! Will do, Phil.
I should have added to my first post that I recieved the stock exactly as I requested and am happy with it. Thanks again Shane! "If the women don't find you handsome, they should at least find you handy." | |||
|
| One of Us |
Cecil has some very beautiful blanks. | |||
|
| One of Us |
Evan's stock is 100% quarter sawn wood, dry with great grain flow. Shane accommodated described bottom metal without having it in hand. Evan will be miles ahead of any commercial semi inlet IMO. George's is decades old 1/4 sawn Cal. English blank from James Tucker machined in the Dressell shop. Jim's has Wiebe metalwork with drop box, English walnut stock machined by John Vest. There three students will have stocks machined by three different pros, two M-70s and a 1909. Each will require a lightly different approach and we will learn from each project. (One work station is open for a last minute student commitment.) Actual bench time will be somewhat limited as we will have much to discuss and demonstrate. (toolmaking, forging, shaping, hardening, tempering and sharpening, full scale drawing, wood selection, plus many custom and classic guns to raccoon. I have three custom Mausers (one early German vintage, one Blackburn metal) and a Jerry Fisher/Blackburn M-70, .270 in the shop to study and use as examples along with Fisher full scale drawings. Good guys and should be much fun spending 10+ hours for five straight days in a custom gunshot outfitted to work... Will post pics after the Seminar. Scroll down to see pics of the June group. ( One work station is open for a last minute student commitment. )September 2-6, 2013. Serious inquiry 406-222-9377 Best, Steve Hughes ACGG Life Member, since 1985 | |||
|
| One of Us |
I just got back home from Montana on Sunday night. I'm glad I'm done with that 1000 mile (one way) drive. Steve was an excellent instructor, Jim and George are great guys, Montana is beautiful, and I made progress on this stock project. I finished inletting the the bottom metal and got a good start on the barreled action- it is sitting about 1/4" tall of its final depth in the stock. I took a ton of photos and am still wading through them, but will hopefully post some soon. Thanks again to Steve, Jim, and George for an awesome week! "If the women don't find you handsome, they should at least find you handy." | |||
|
| One of Us |
Excellent wood grain! ---------------------------------------------------------------------------------------------------------------------------------- “A man can never have too much red wine, too many books, or too much ammunition” ― Rudyard Kipling | |||
|
| One of Us |
Progress. 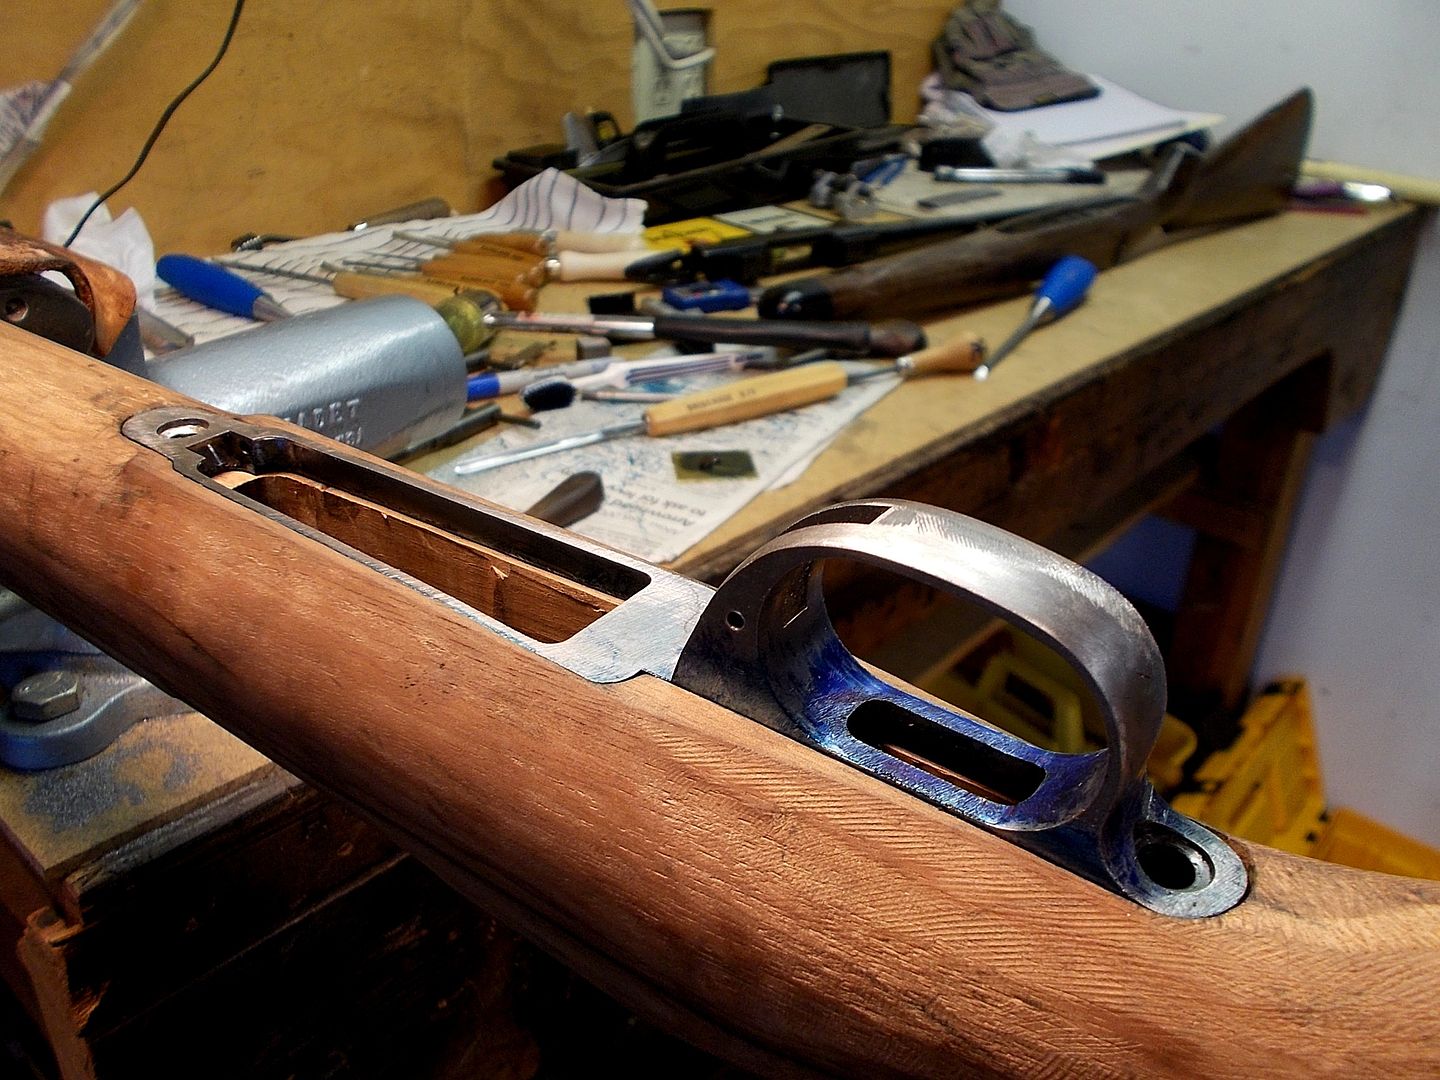 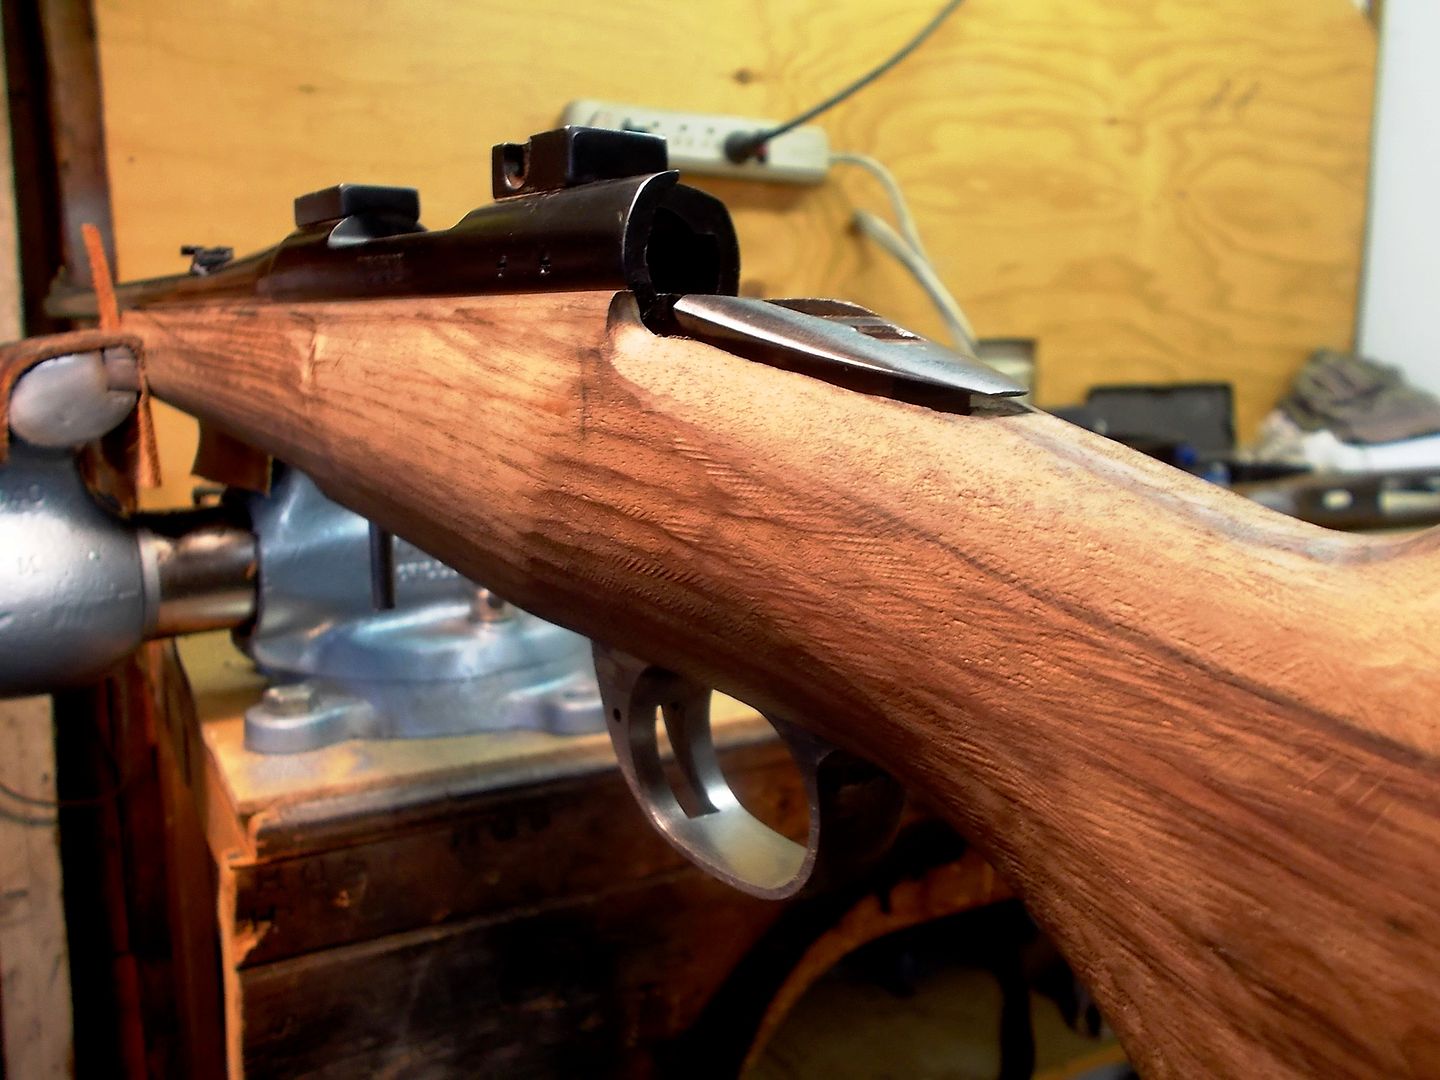 I will put some photos from the seminar in a separate thread. "If the women don't find you handsome, they should at least find you handy." | |||
|
| One of Us |
You all notice that 60s vintage Wilton Cadet vise.. 3 of the four bench vises are Wilton.. ACGG Life Member, since 1985 | |||
|
| One of Us |
Progress pics... I couldn't get a good photo of the inletting so I'll try again. 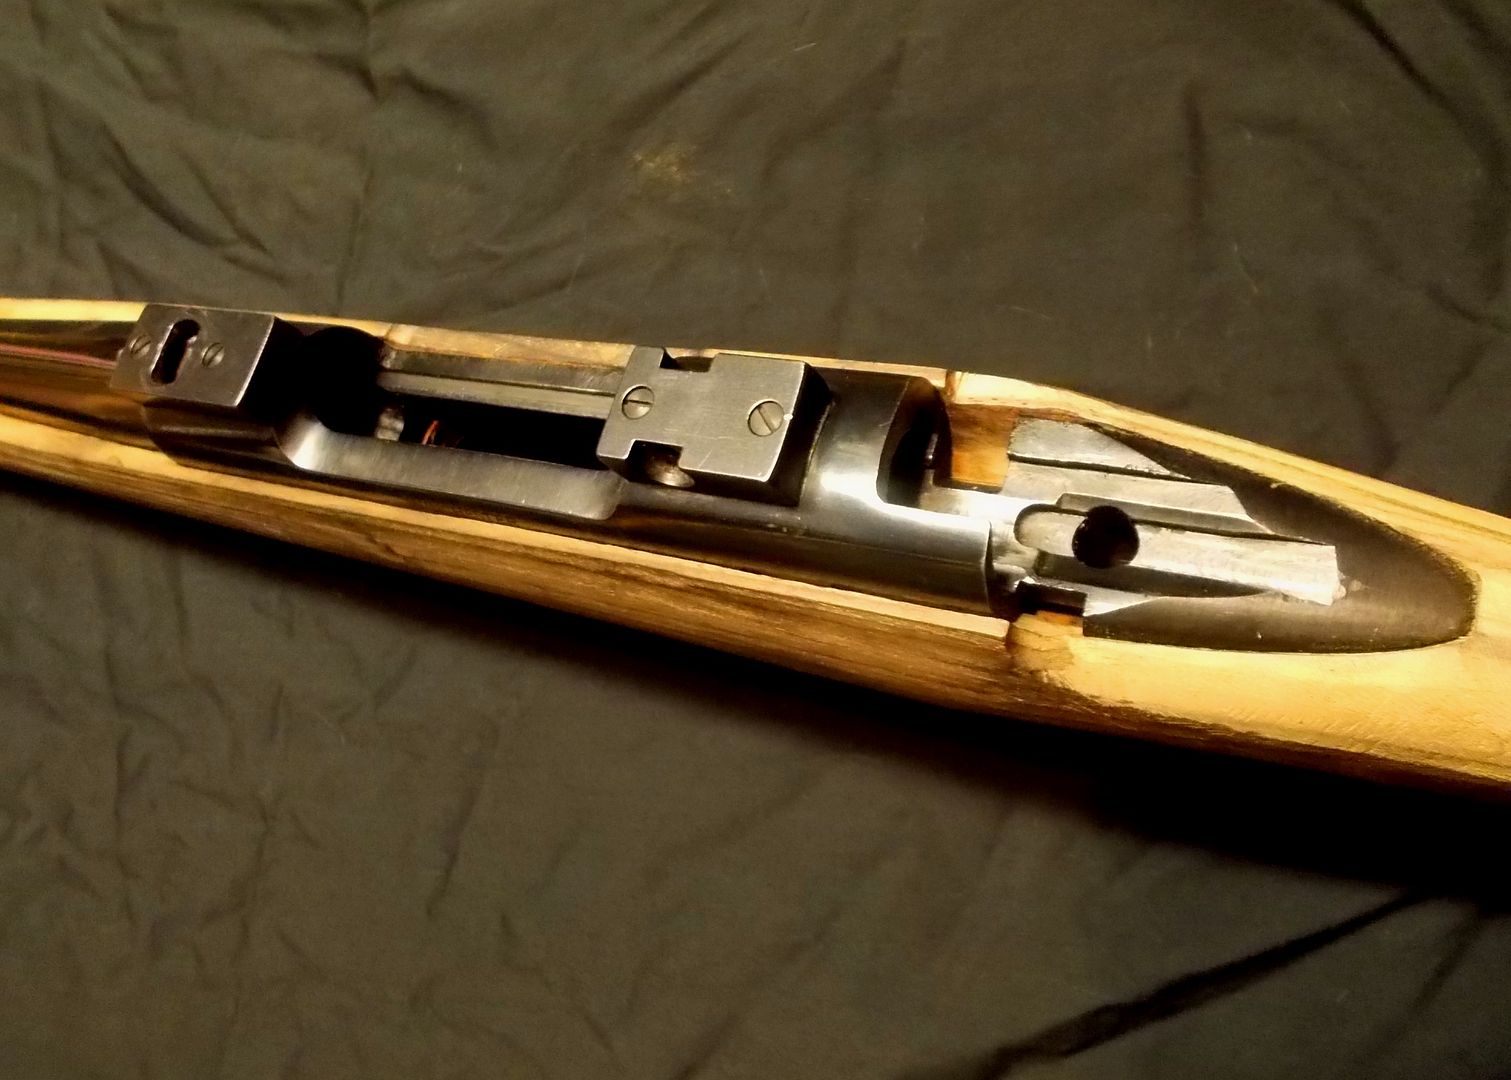 The barrel is 22" long, and following the Golden Ratio the fore-end should be 8" long so I chopped a little over 3 1/2" off the fore-end and glued on a 1 5/8" long block of ebony to have 8" with the tip. 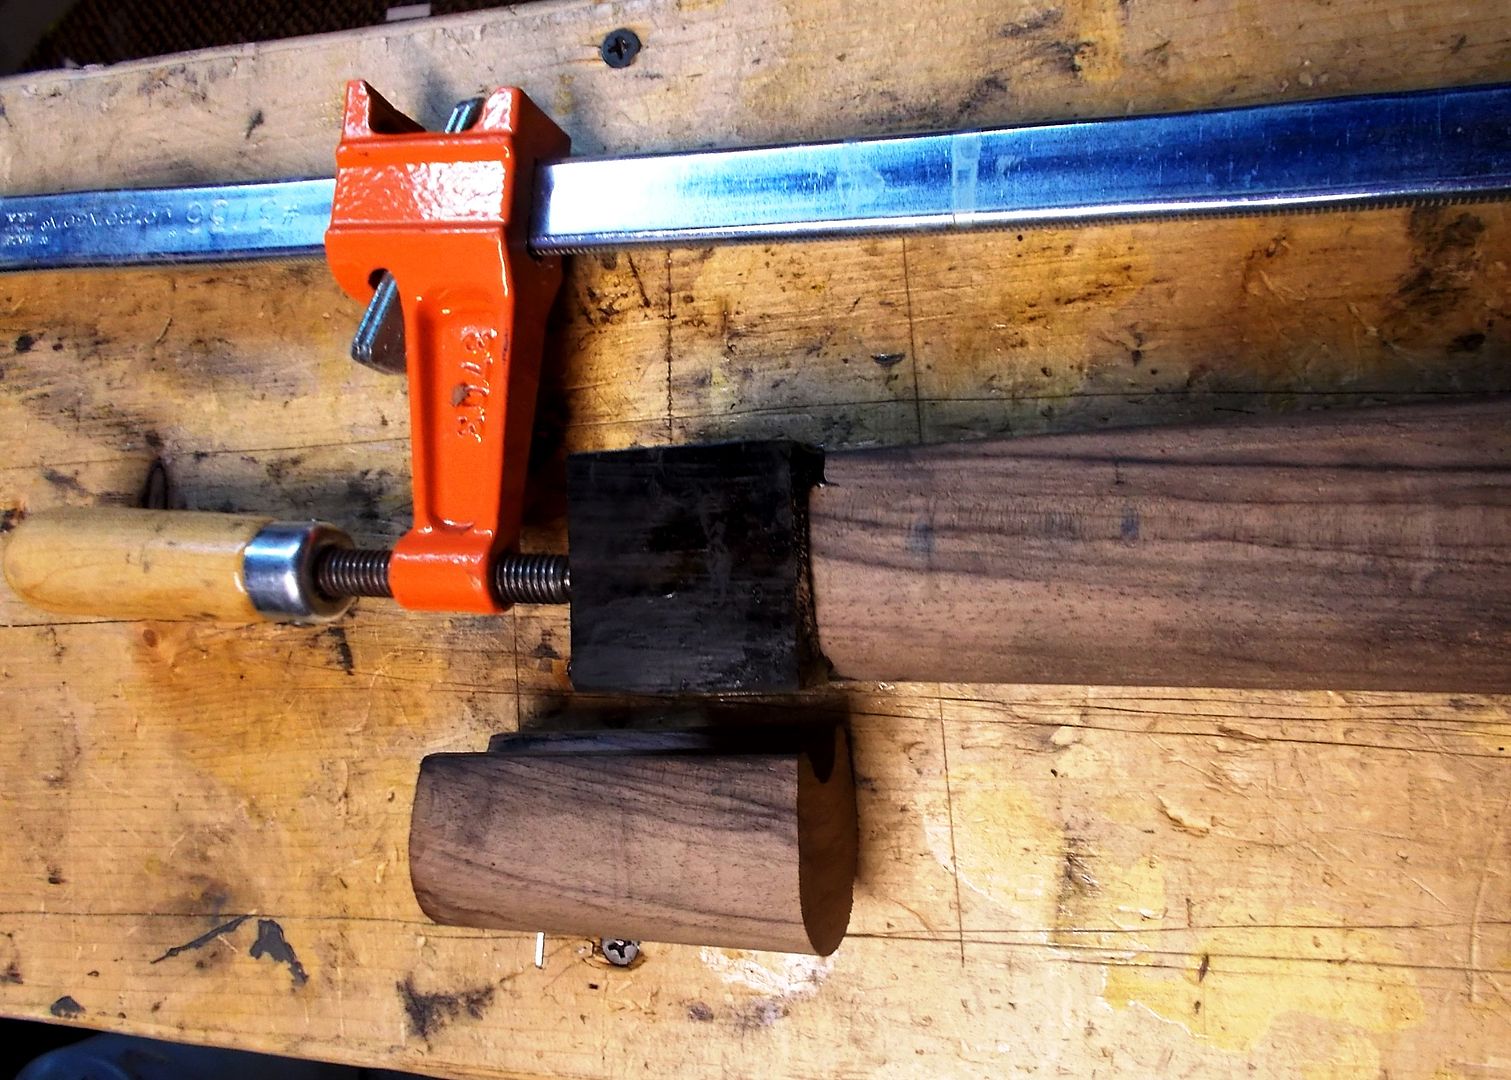 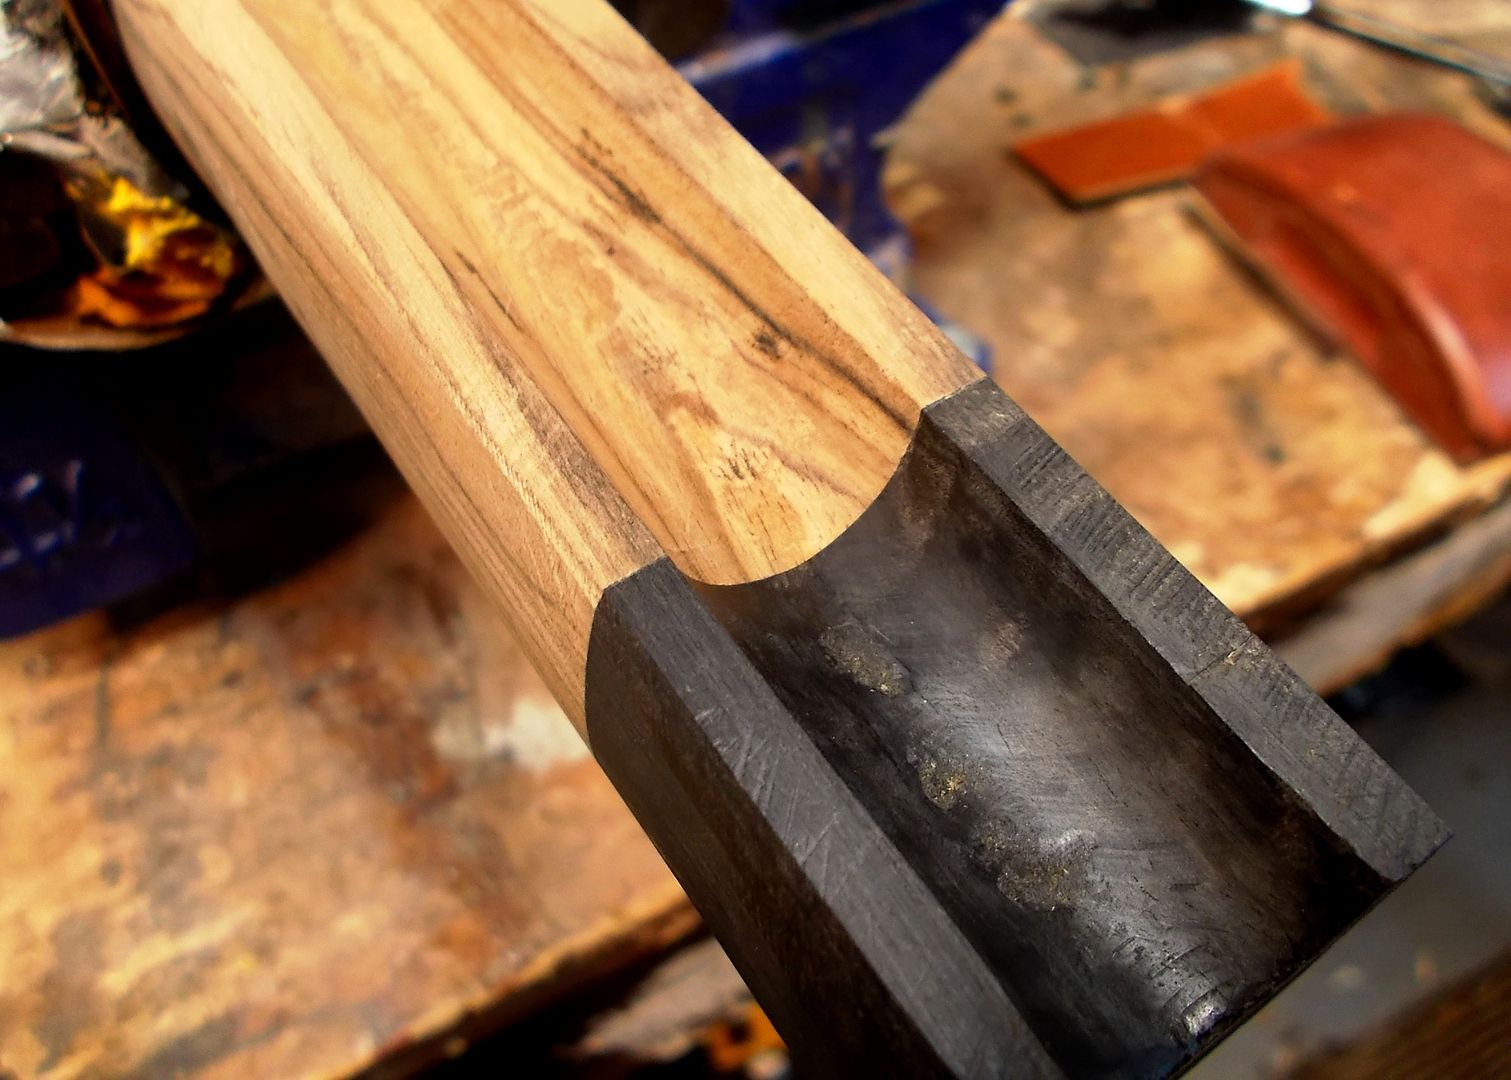 With the inletting (nearly) completed, I went on to install the grip cap and rasp off some of the excess wood around the grip, receiver tang, and underside of the fore-end. It looks a lot better now- at least closer to how I want it. 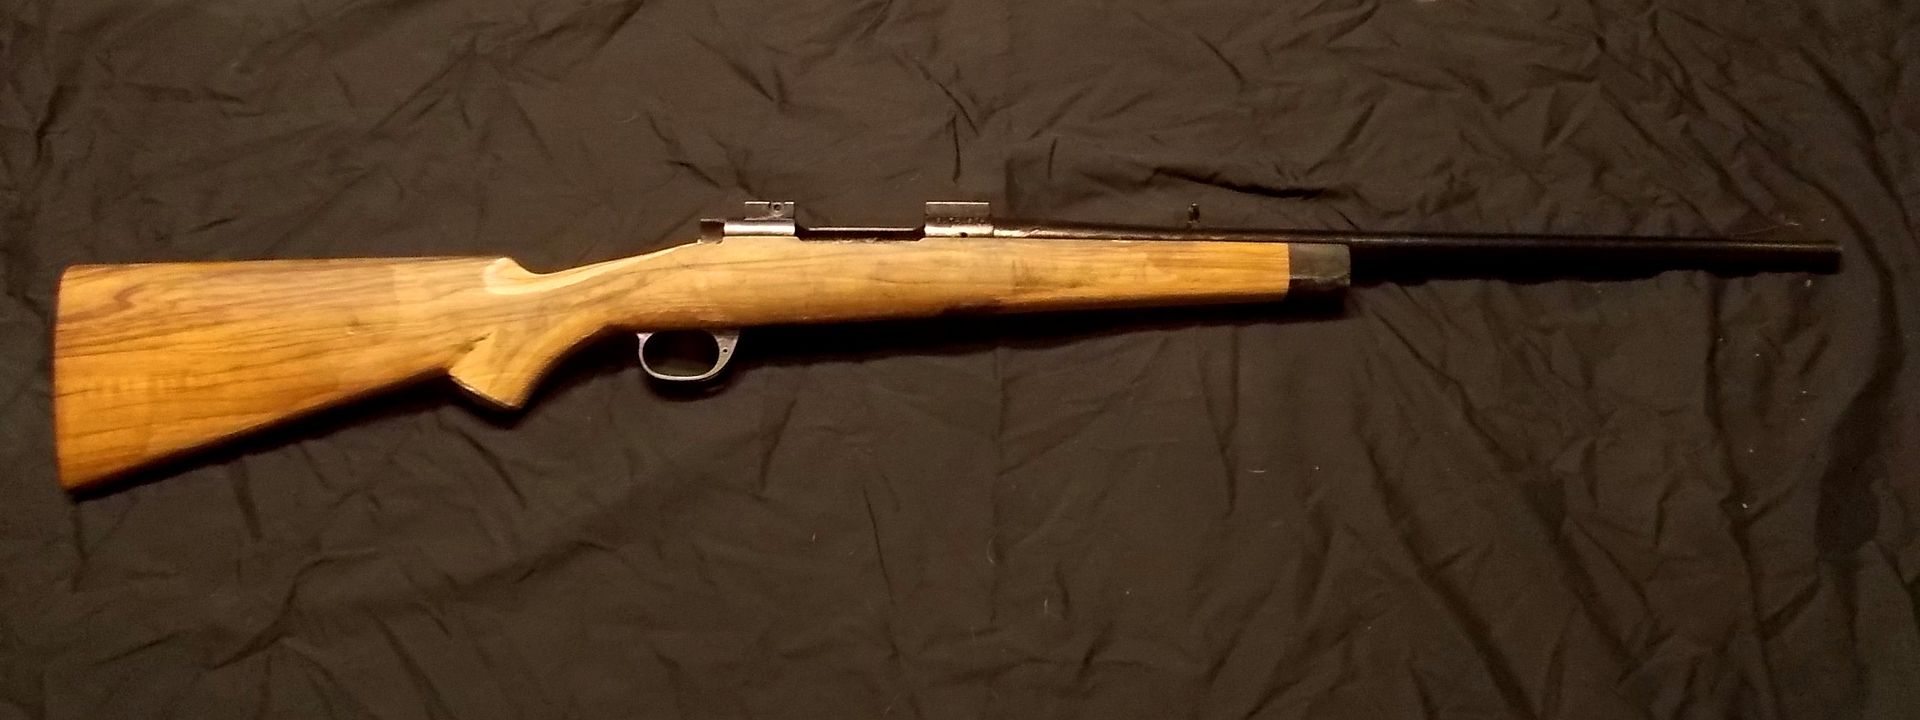 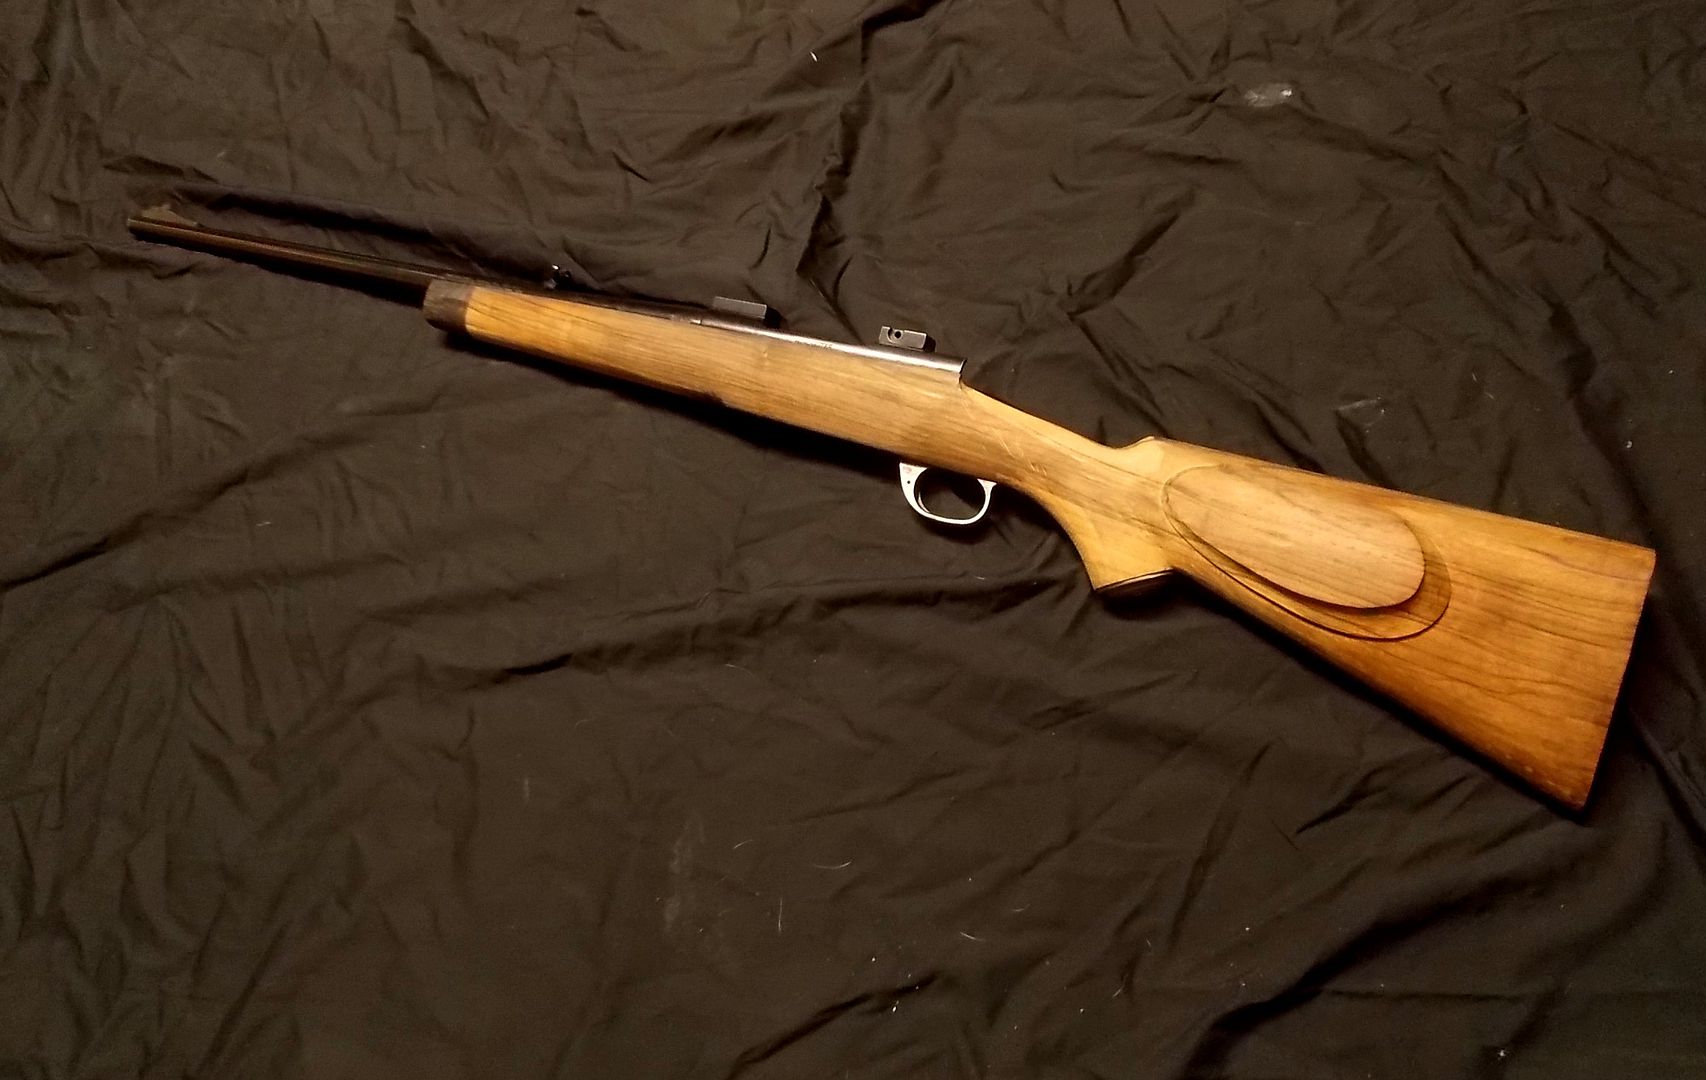 "If the women don't find you handsome, they should at least find you handy." | |||
|
| One of Us |
Nice job with the ebony, Evan. Remember how I hogged out the barrel channel of Jim's stock with the mallet and chisel? But be careful and watch the ebony grain, the wood is brittle and chippy. Also, Keep in mind the pics of Tucker's pressure bedding... behind the tip. ACGG Life Member, since 1985 | |||
|
| One of Us |
Thanks Steve, I roughed it in with a chisel (carefully!) then finished the inlet with the barrel bedding tool and Fisher scraper. That chunk of ebony does not have straight grain and wasn't exactly tool-friendly, but it went fine. Last night I was able to cut in the bolt handle notch then inlet the magazine box and trigger assembly. Now the entire rifle can be assembled and is feeding/functioning perfectly with dummy rounds. I am very happy with that and am way farther ahead with this project now than I expected to be. On to the buttplate... 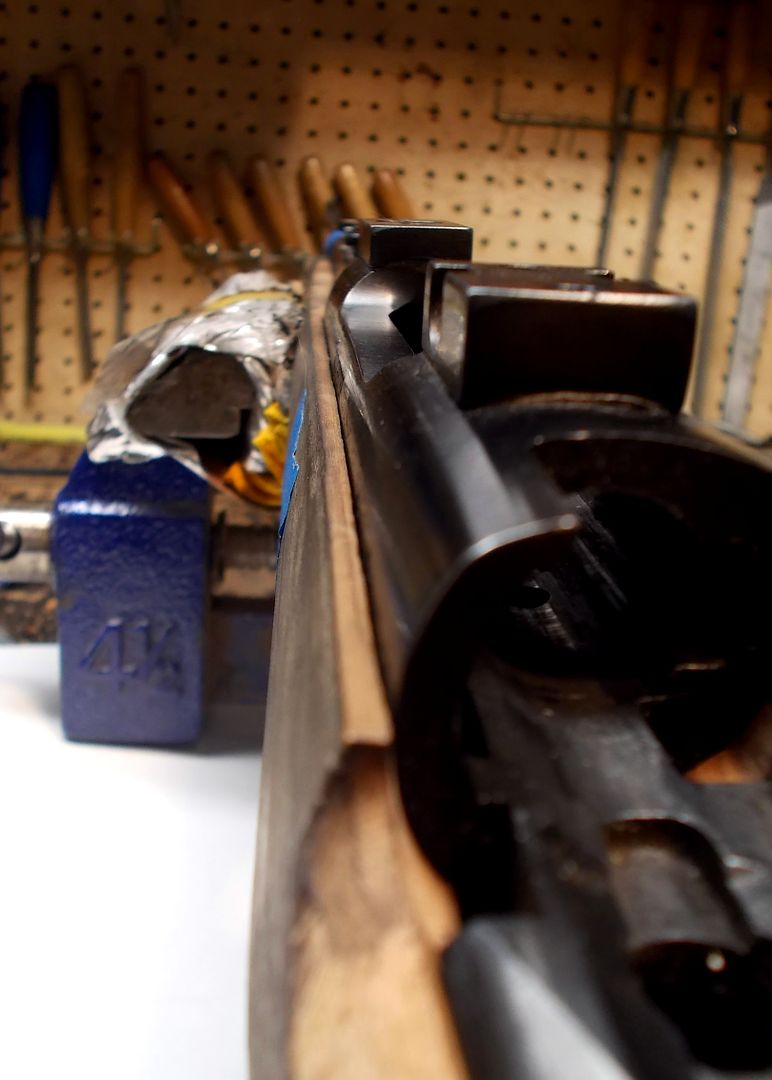 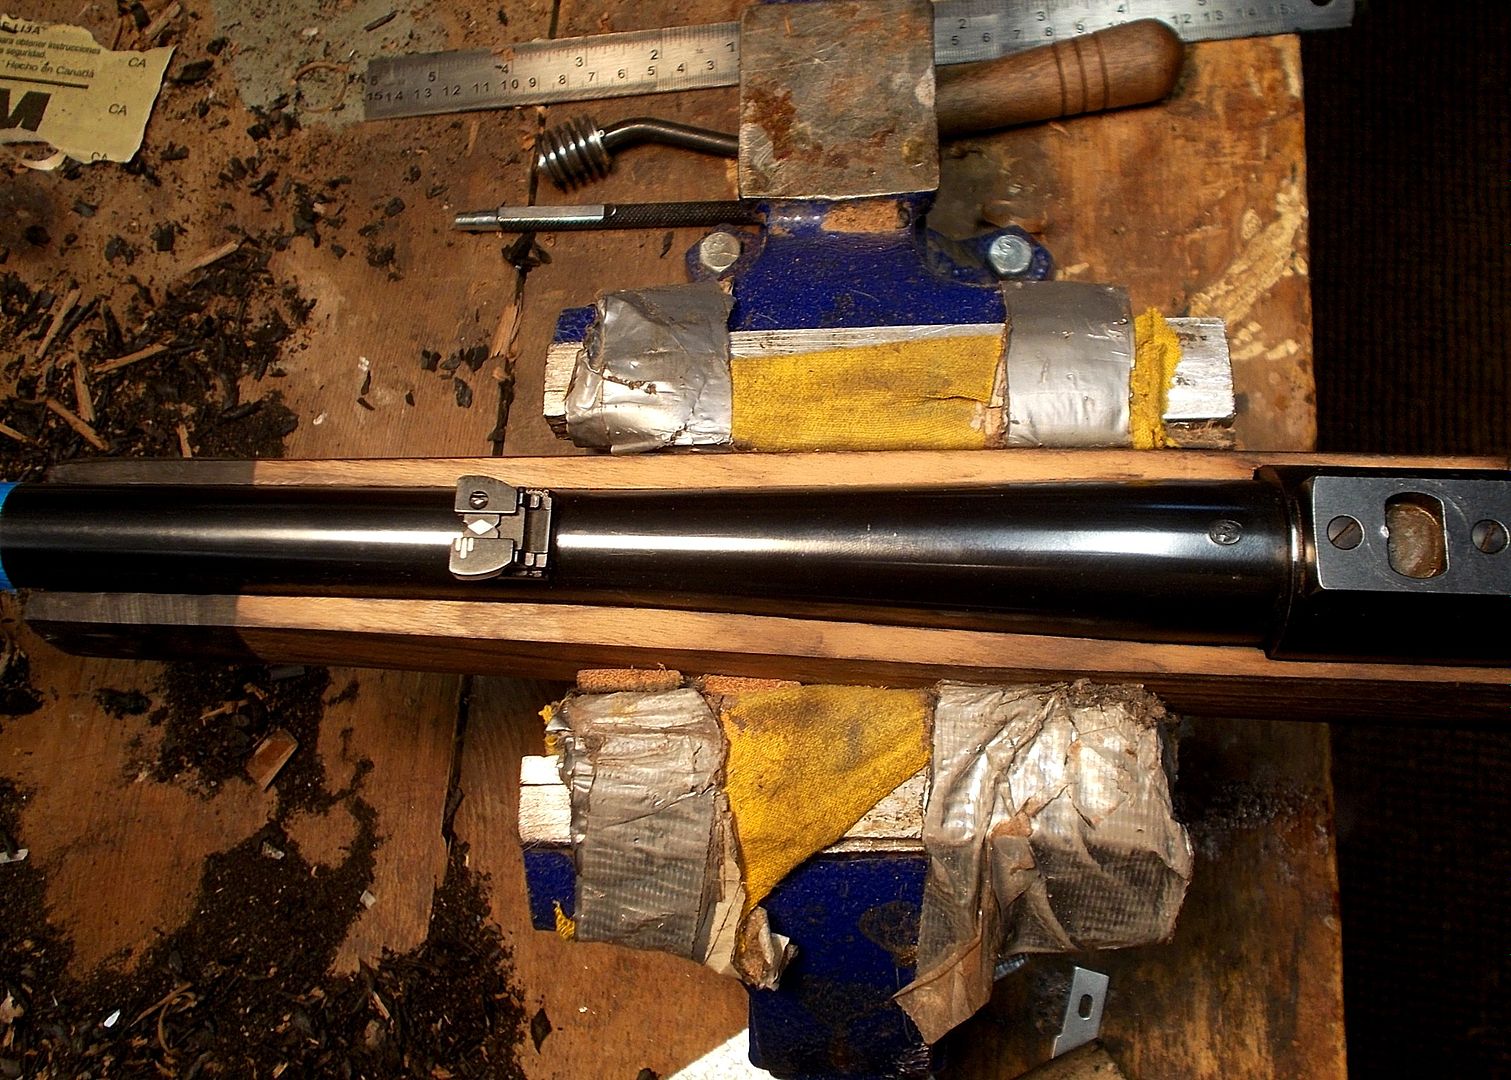 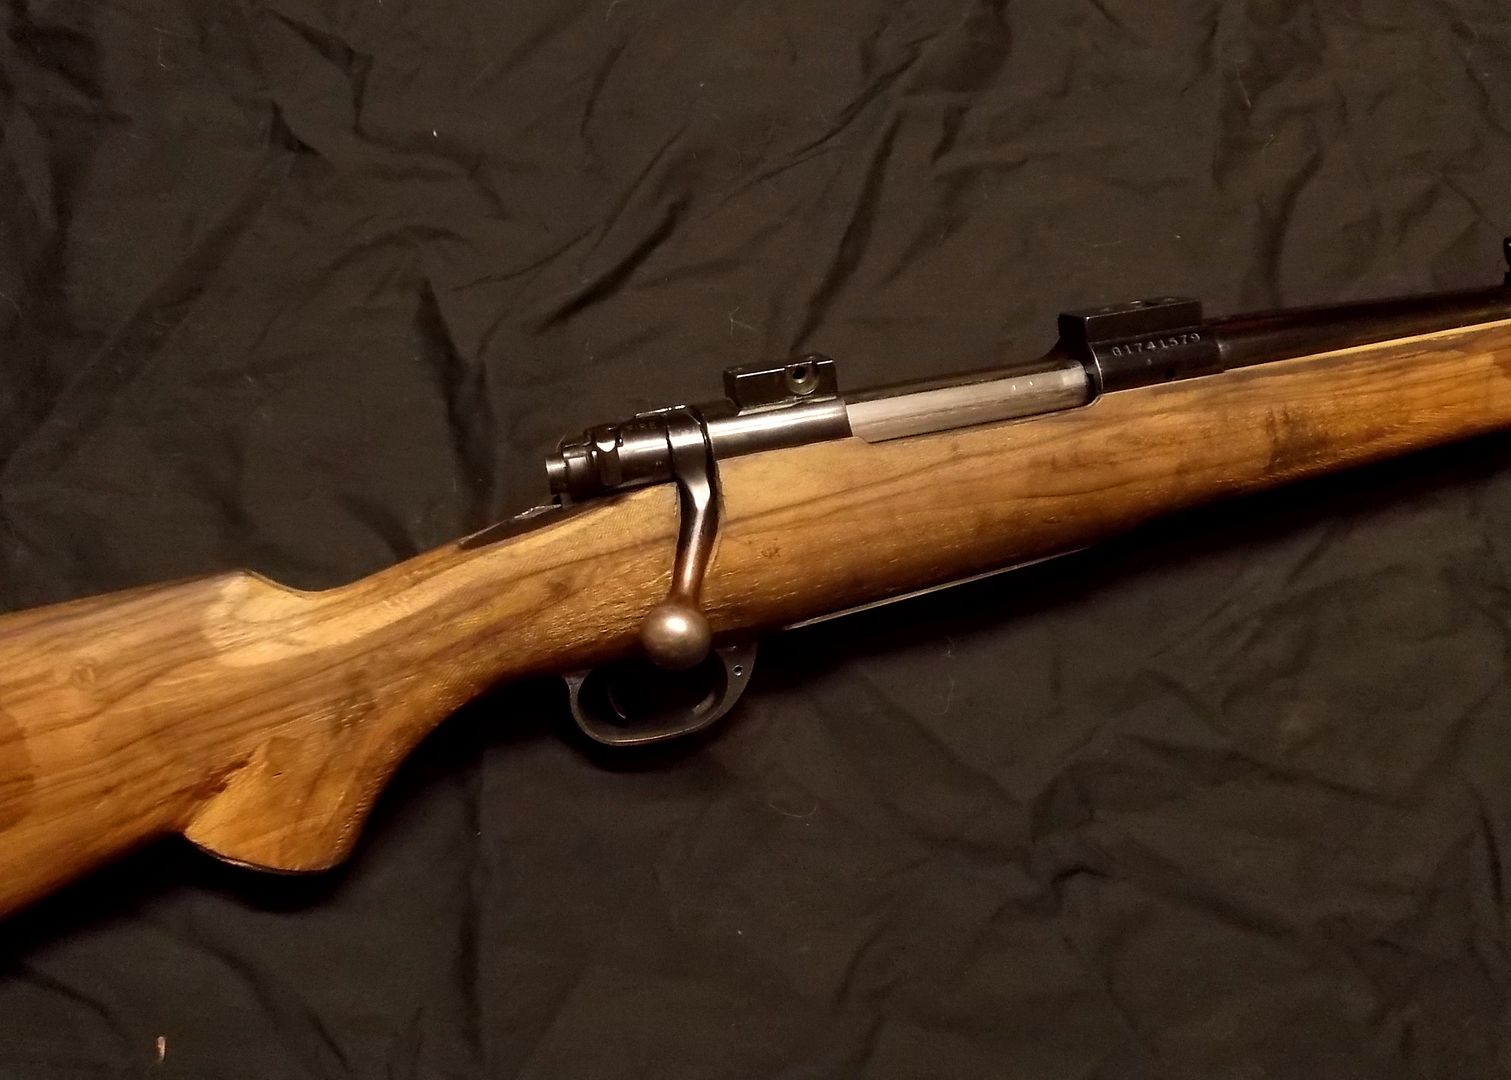 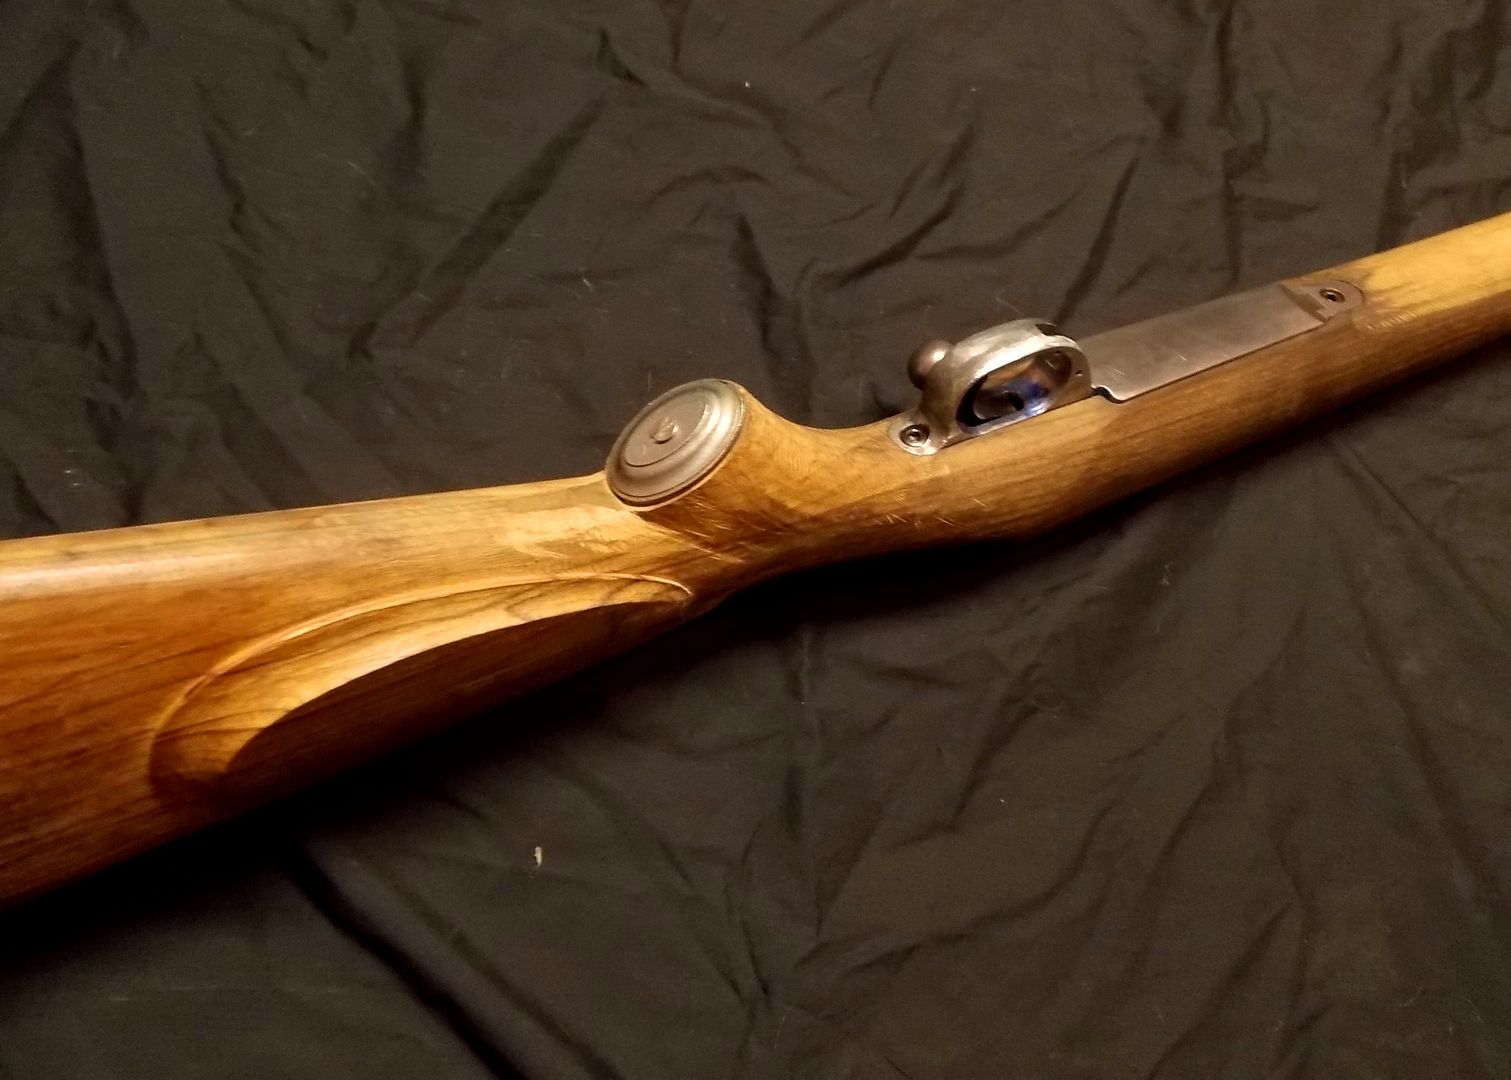 "If the women don't find you handsome, they should at least find you handy." | |||
|
| One of Us |
Evan, The stock is looking great, I like what you did with the grip. The way we went about it (leaving wood here and there because exact pattern wasn't available) is a little more work for you but appears to be working out nicley. This is how I do it when I build from my own patterns as well. If I built a pattern for every variation or change in dimension, then I would spend all my time amassing hundreds of them that would rarely if ever get used. Nice work! ..........the stock is looking great! Shane Thompson I do a lot of the same things when building from my patterns. | |||
|
| One of Us |
More updates... I have the steel buttplate about 90% inletted, and haved removed a lot of the excess material around it. I also moved the comb nose back 1/4" to better align with the grip cap and then moved the front edge of the cheekpiece back 1/4" so the comb fluting won't crowd the cheekpiece. I've also taken about 1/8" off the underside of the fore-end so it is more tapered and follows the bottom metal better. Roughing in the buttplate: 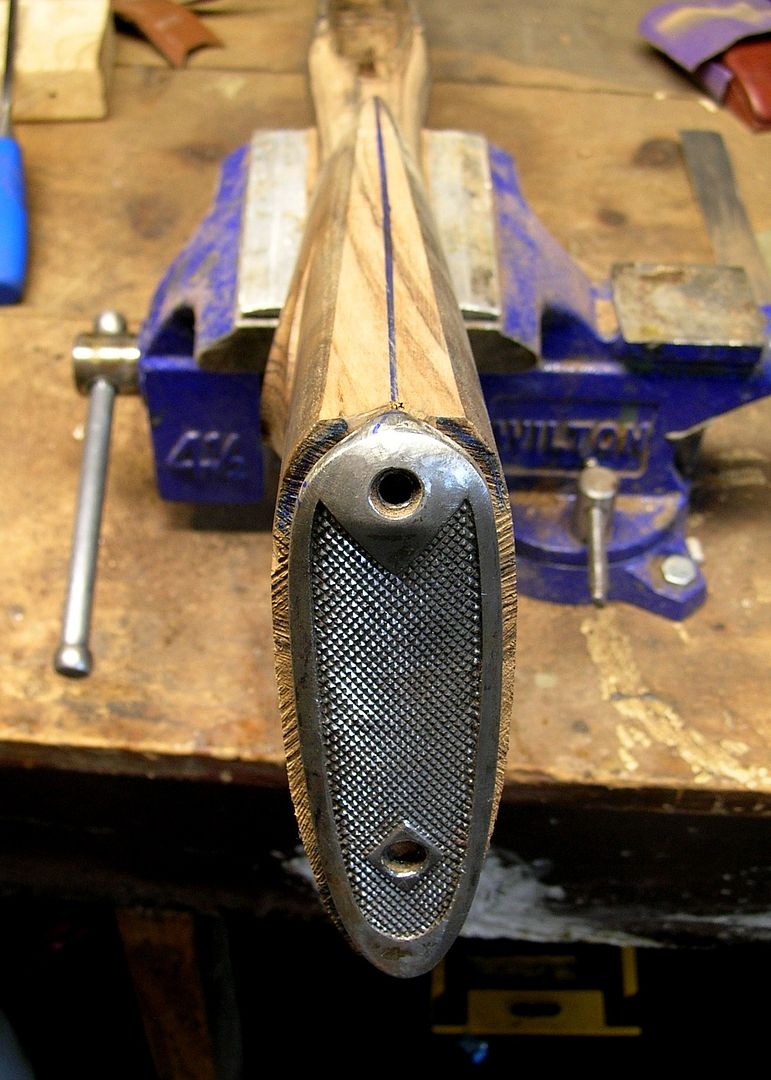 I used a #49 rasp to rough in the inletting and have done the rest with a 1/4" chisel and 1/4" scraper sliver by sliver. I had about 1/4" of to spare on the butt of the stock to locate the buttplate, so I added about 3/16" of drop to the heel of the stock and a bit of toe-out. I think it improves the look of the stock and fits well too. These dimensions are close to the M70 stock I made last year. 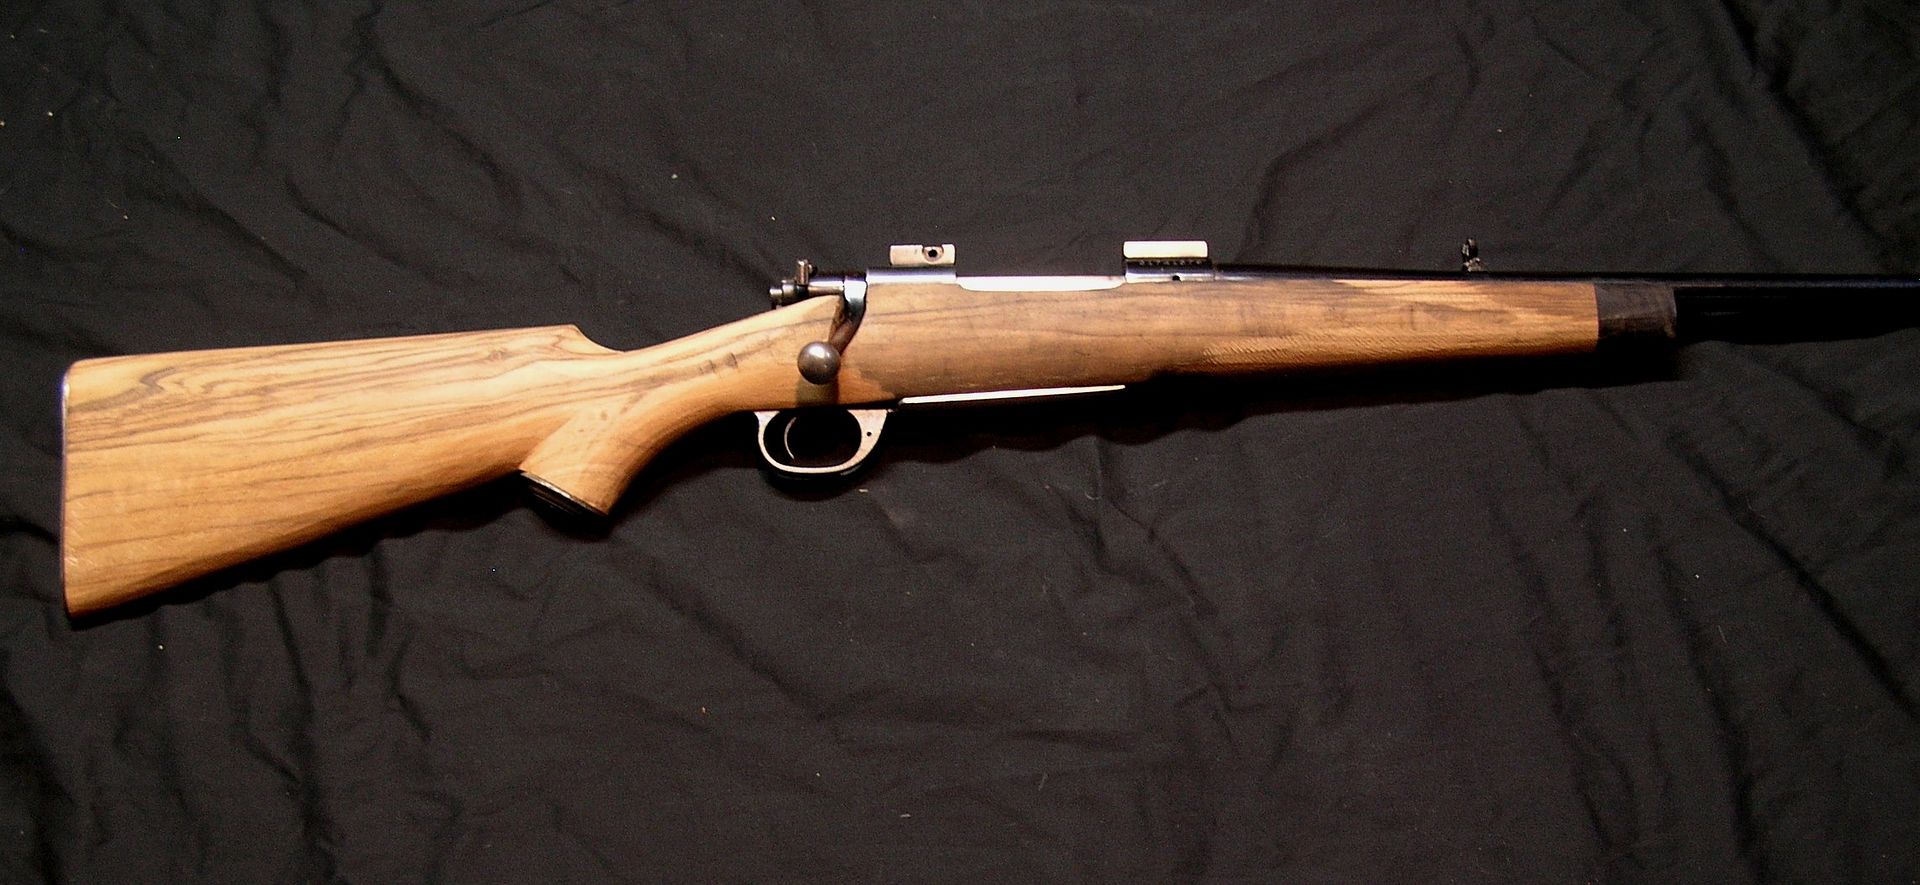 Moving the comb nose and cheekpiece back 1/4" took a fair amount of carving work but isn't too dramatic visually. Again this looks good (to me) and fits me better too. 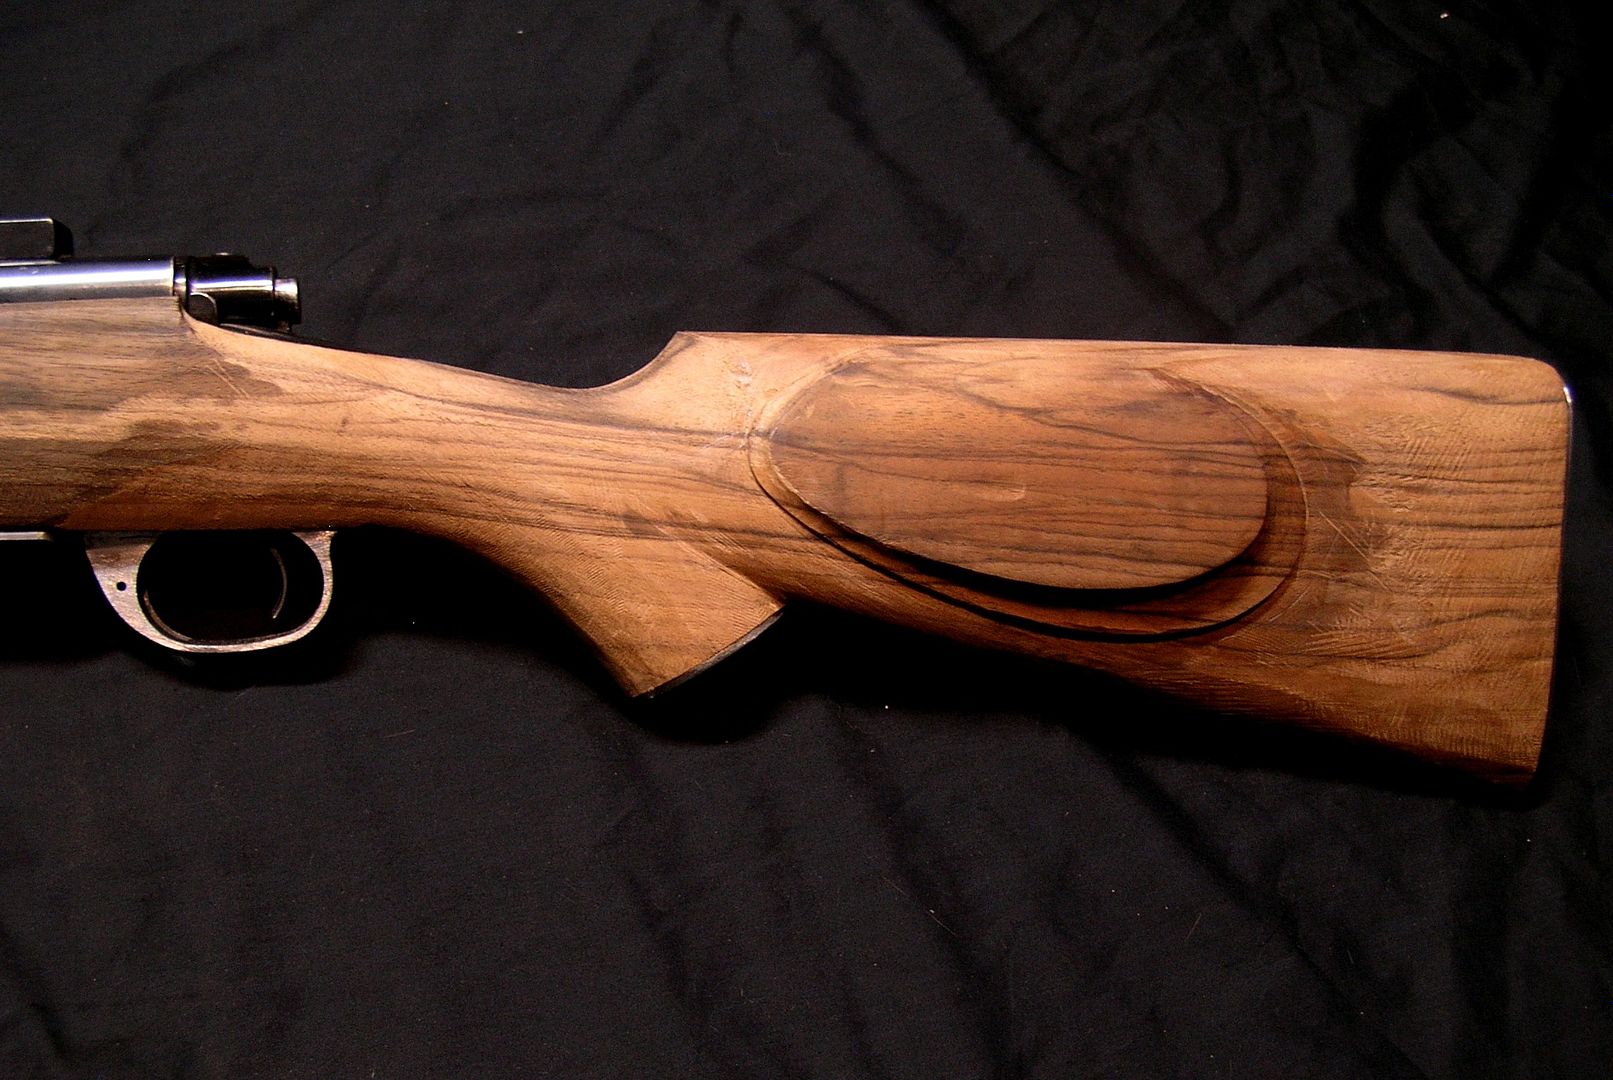 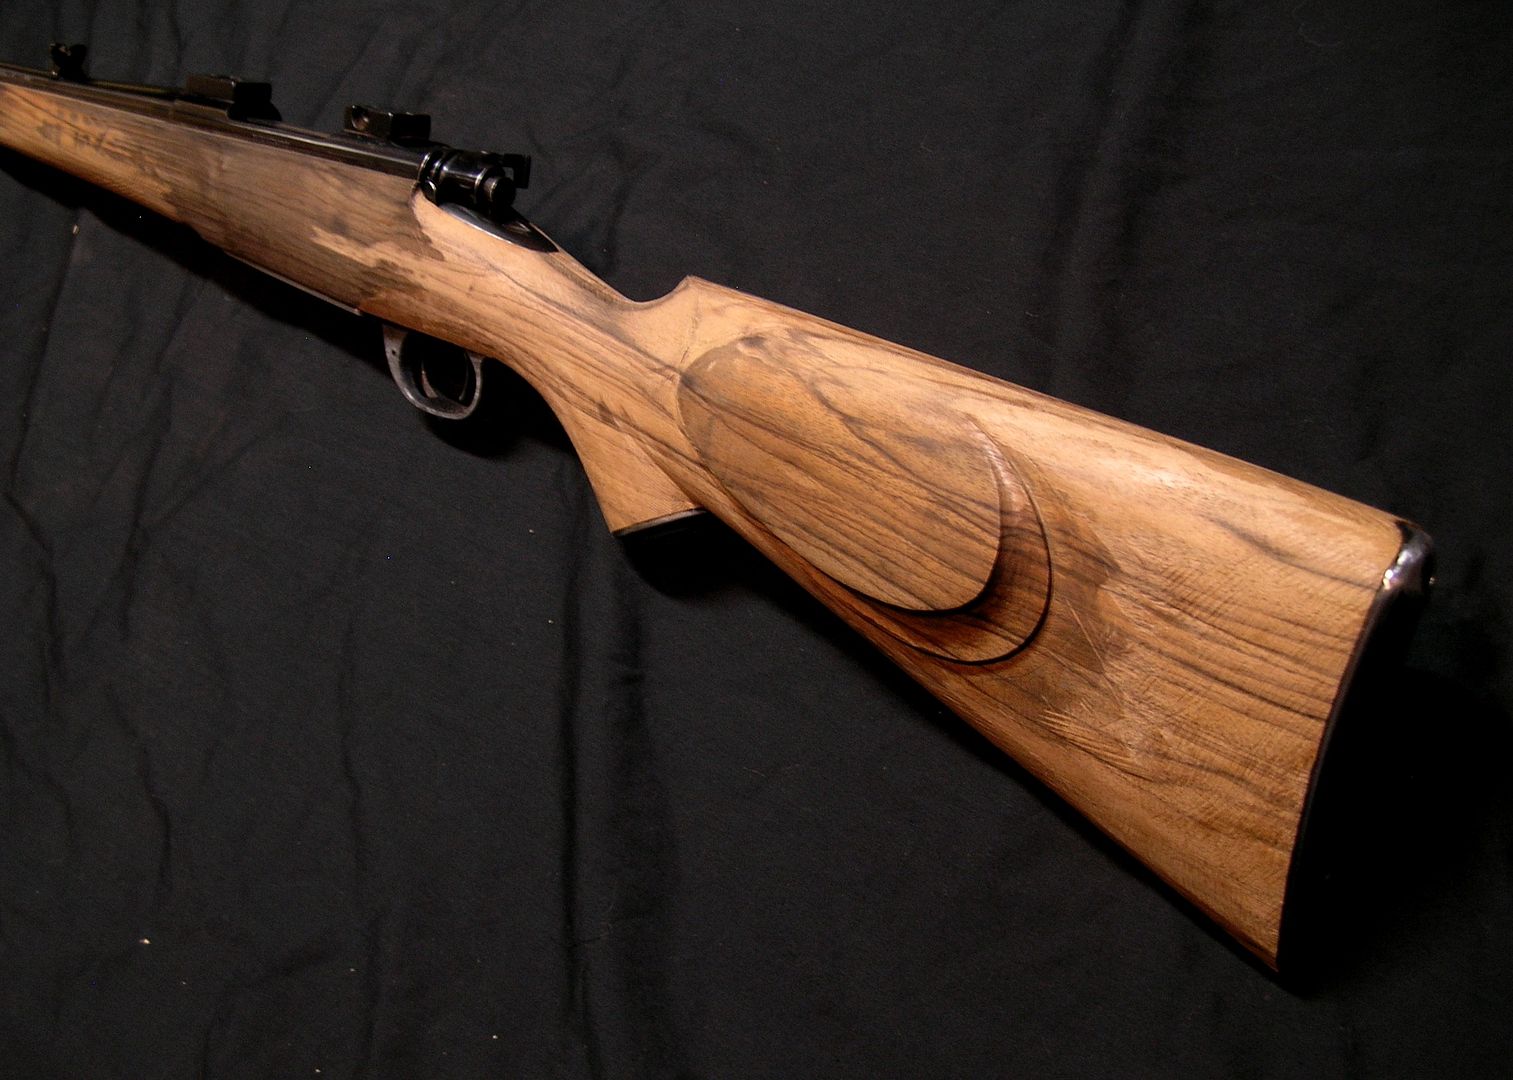 "If the women don't find you handsome, they should at least find you handy." | |||
|
| One of Us |
This is the the inletting as of last night. 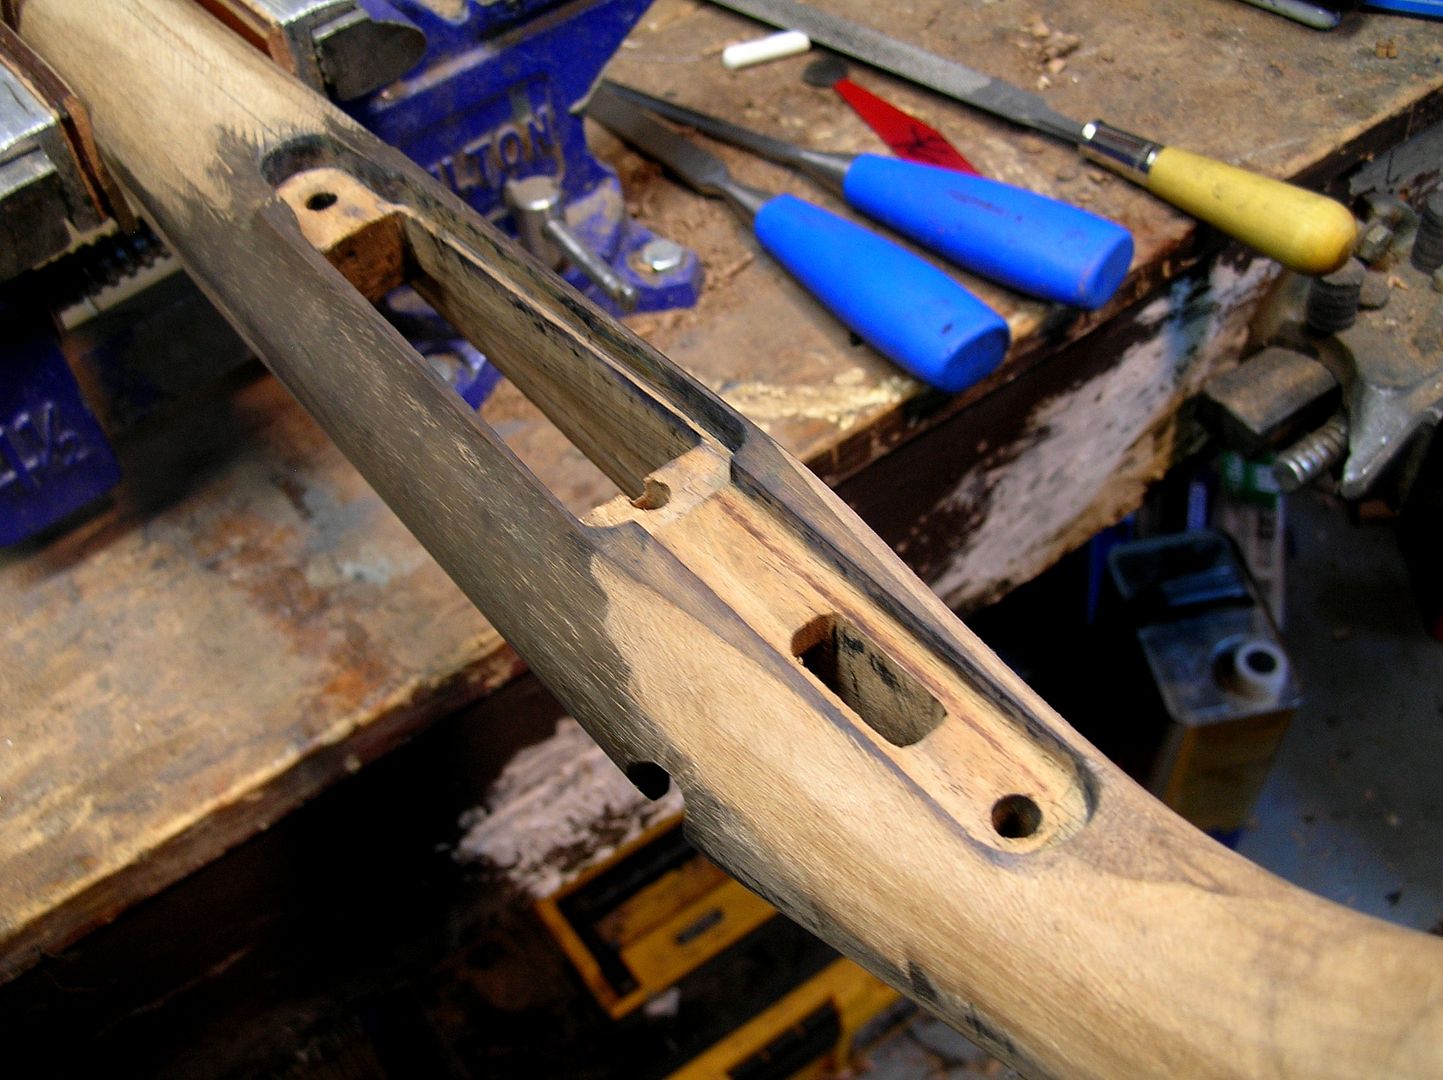 *Look closely at my bench vise and you can see I finally added some leather to pad the jaws versus the crappy rubber, fabric, and duct tape setup I had before (Red Green would be proud). Two strips of old belt leather epoxied to each of the magnetic jaw covers are working VERY well. The wood around the receiver tang is still a little proud, and I will shave off the last bit when I am settled on the inletting. The edge of the inletting here was tough. 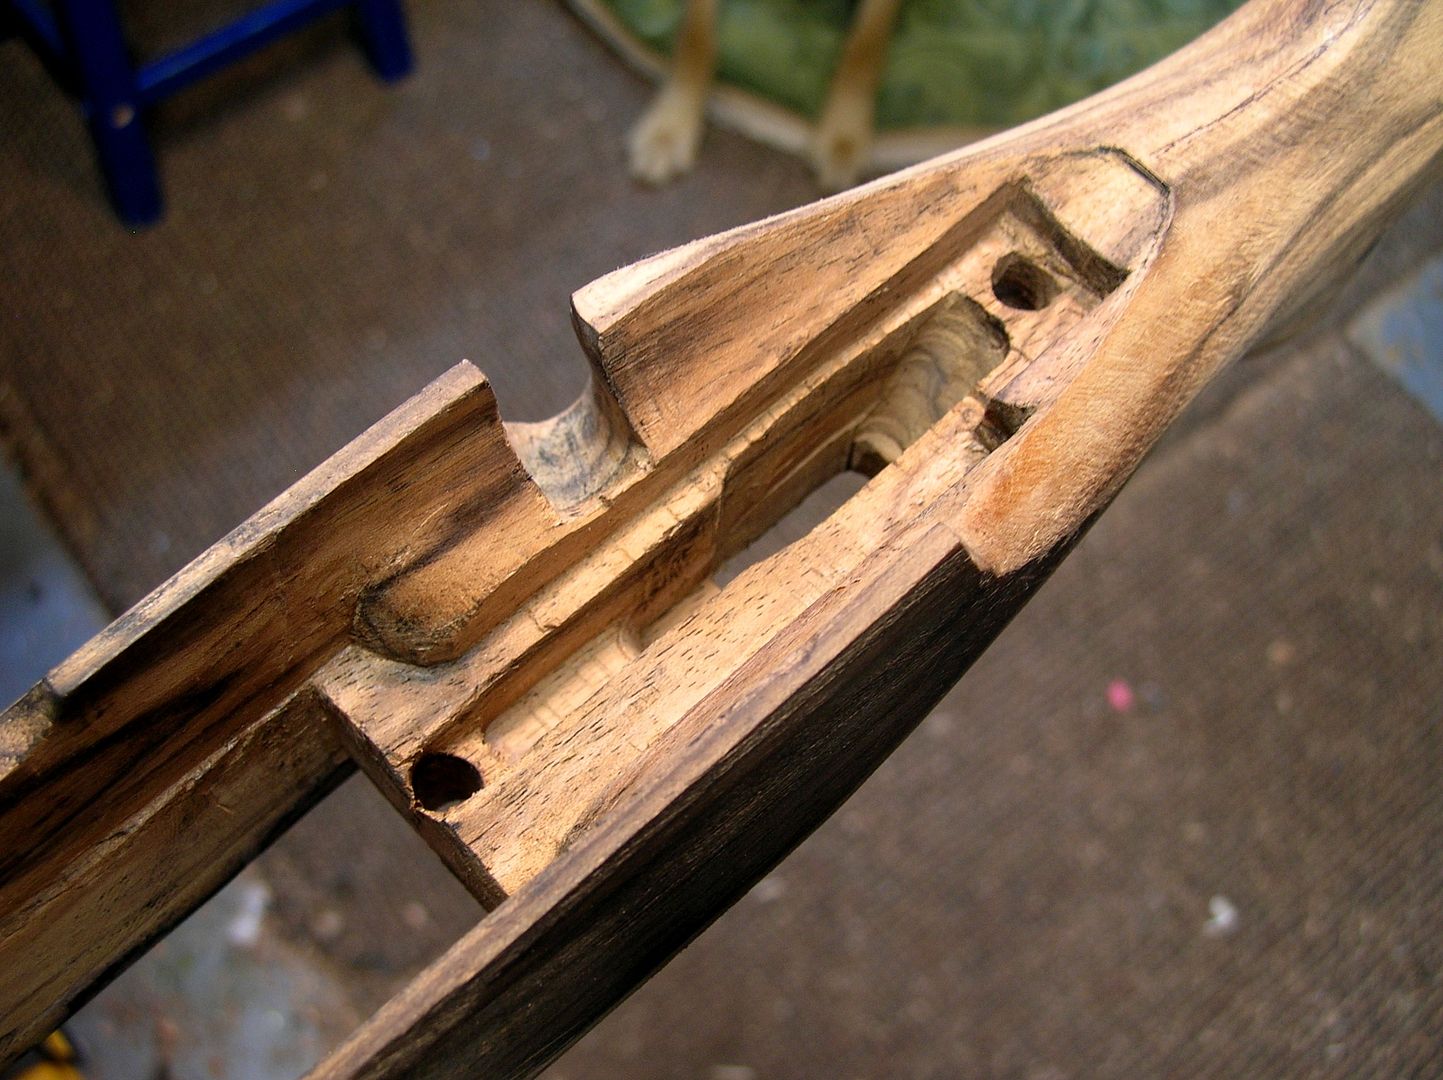 I also need to carve in a cutout for the ejection port. The challenge will be keeping the concave edges of the cutout even and clean, which has been tough for me. 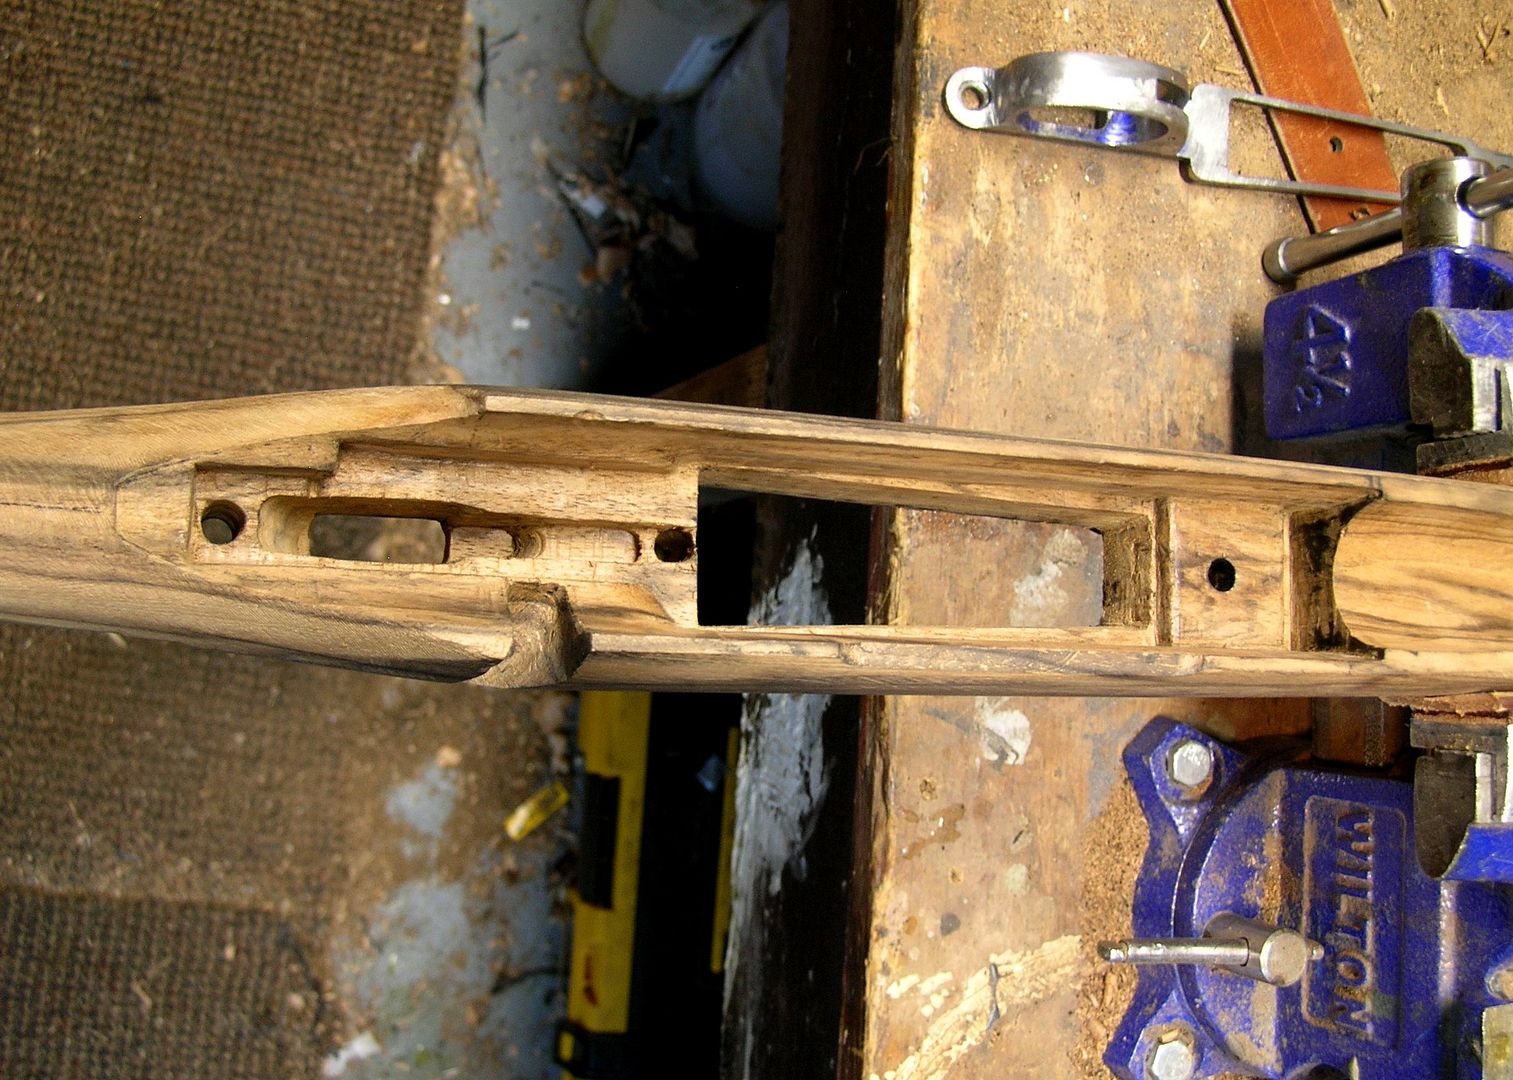 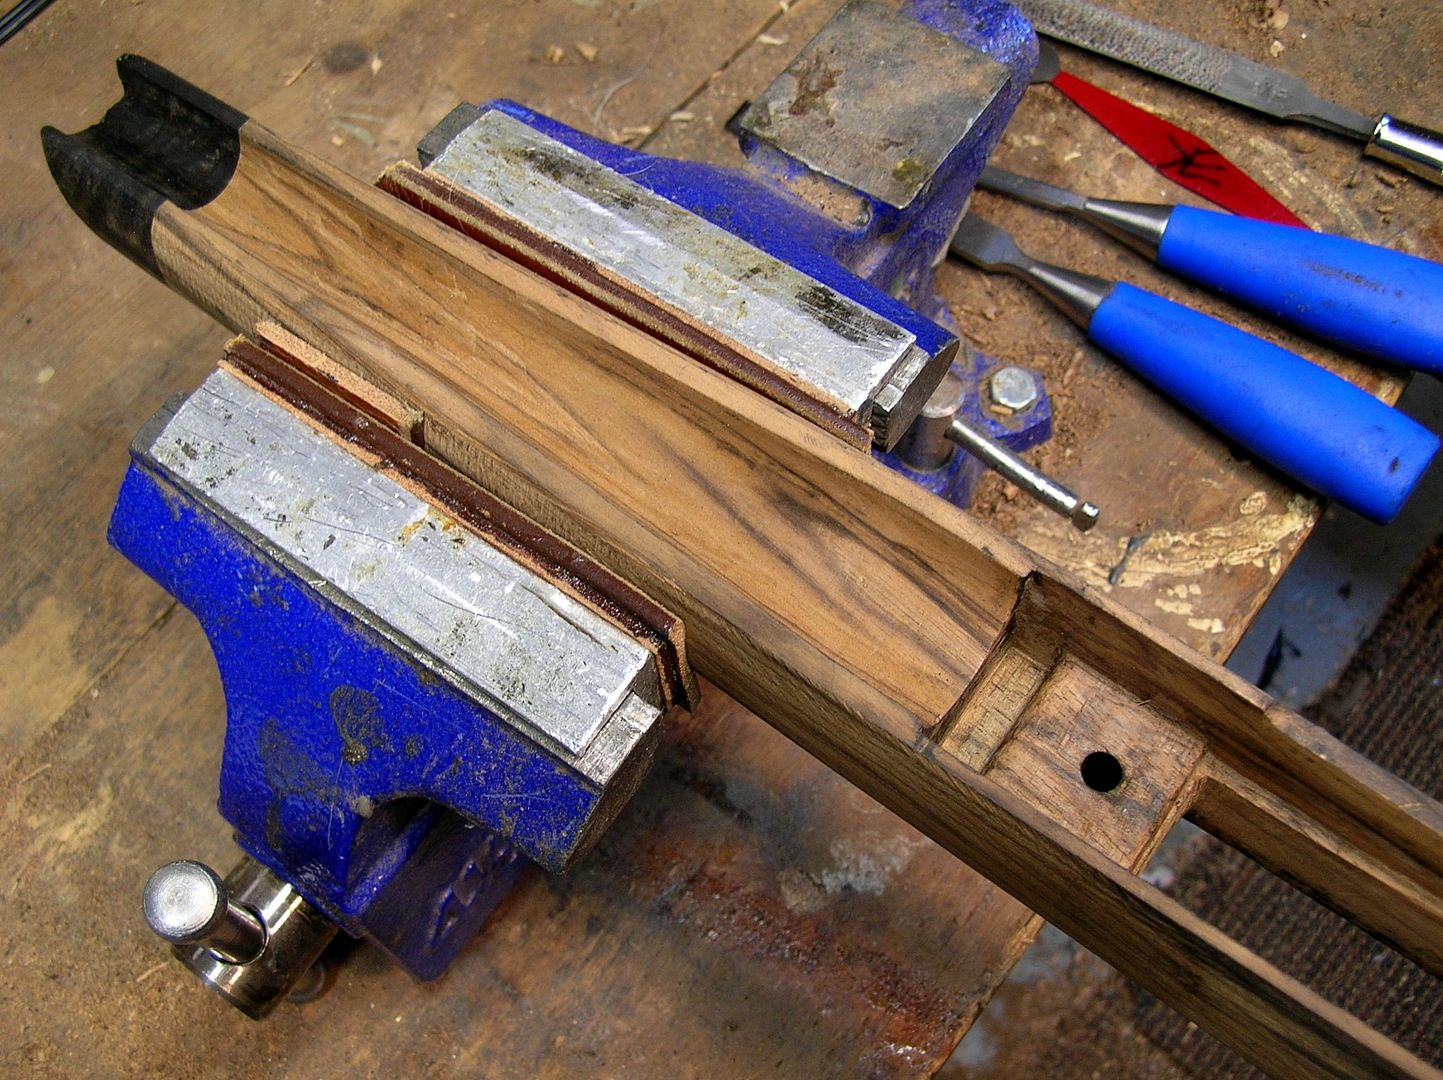 There are just a few little gaps to close around the buttplate but it is nearly fitted.  I finally started the task of shaping the fore-end tip. This style is new to me so while working I kept checking some photos, eyeballing the stock, marking contour lines, and then digging in. You can see the mark left from locating the front swivel stud on the stock with super glue. It will be centered with the swivel itself 1" from the ebony tip. 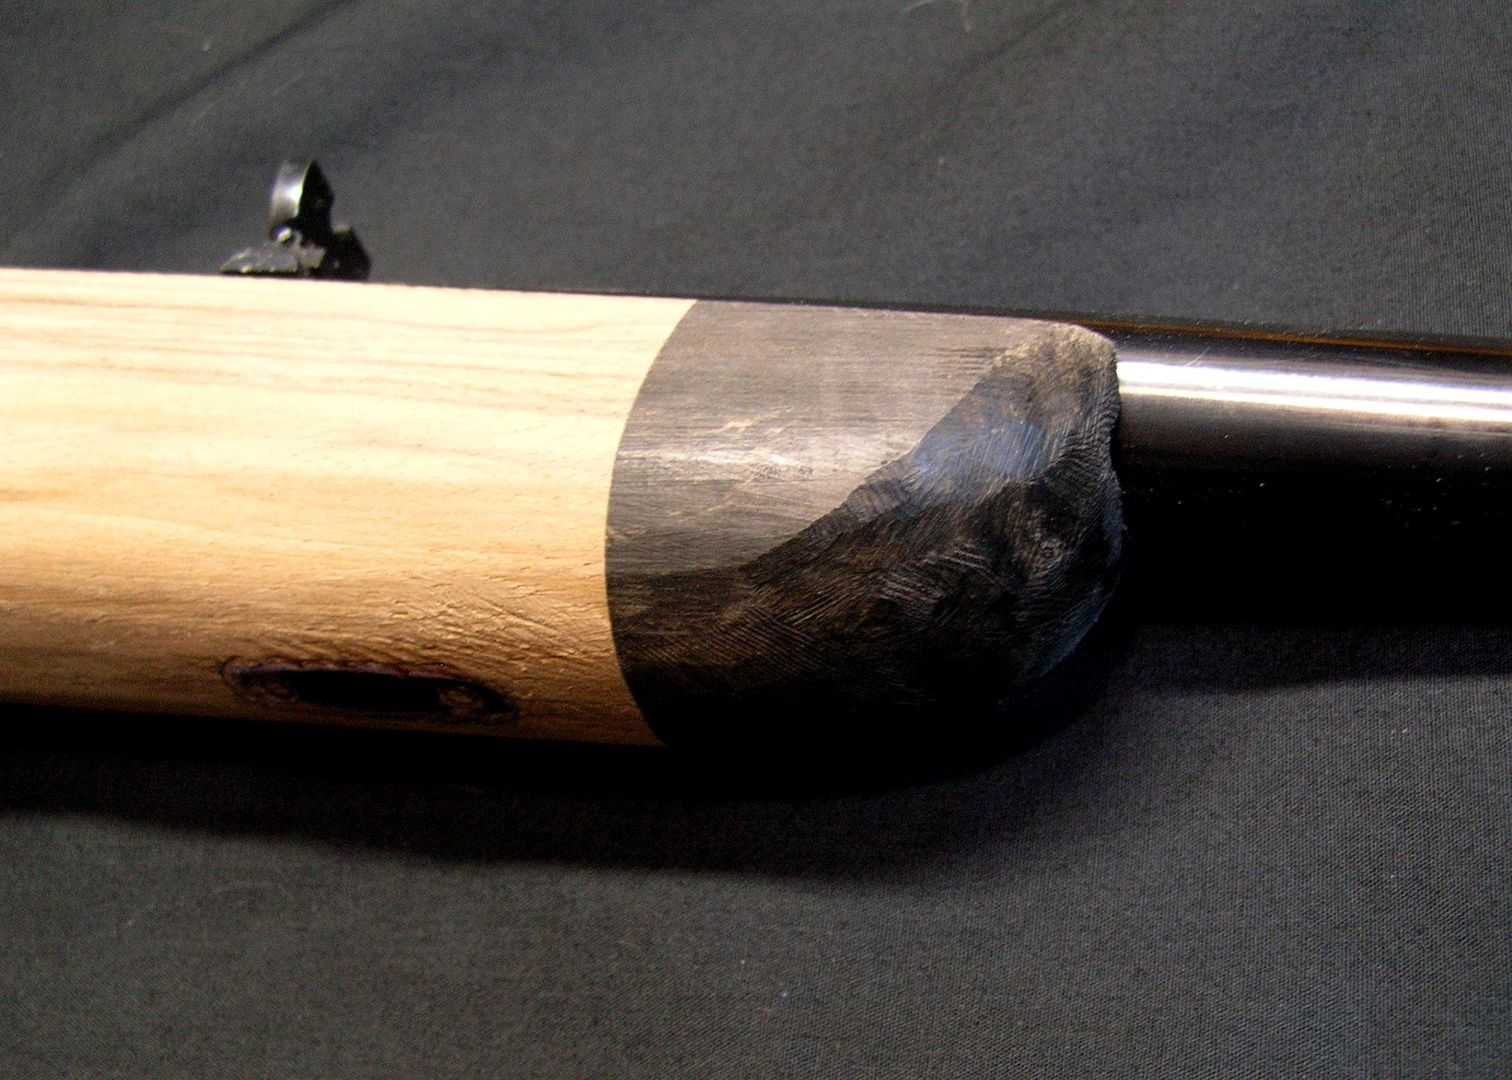 If I could re-barrel the rifle, I'd probably add a barrel band swivel stud and skip the stud in the fore-end. But I think this will still look good, especially with classic point pattern checkering. 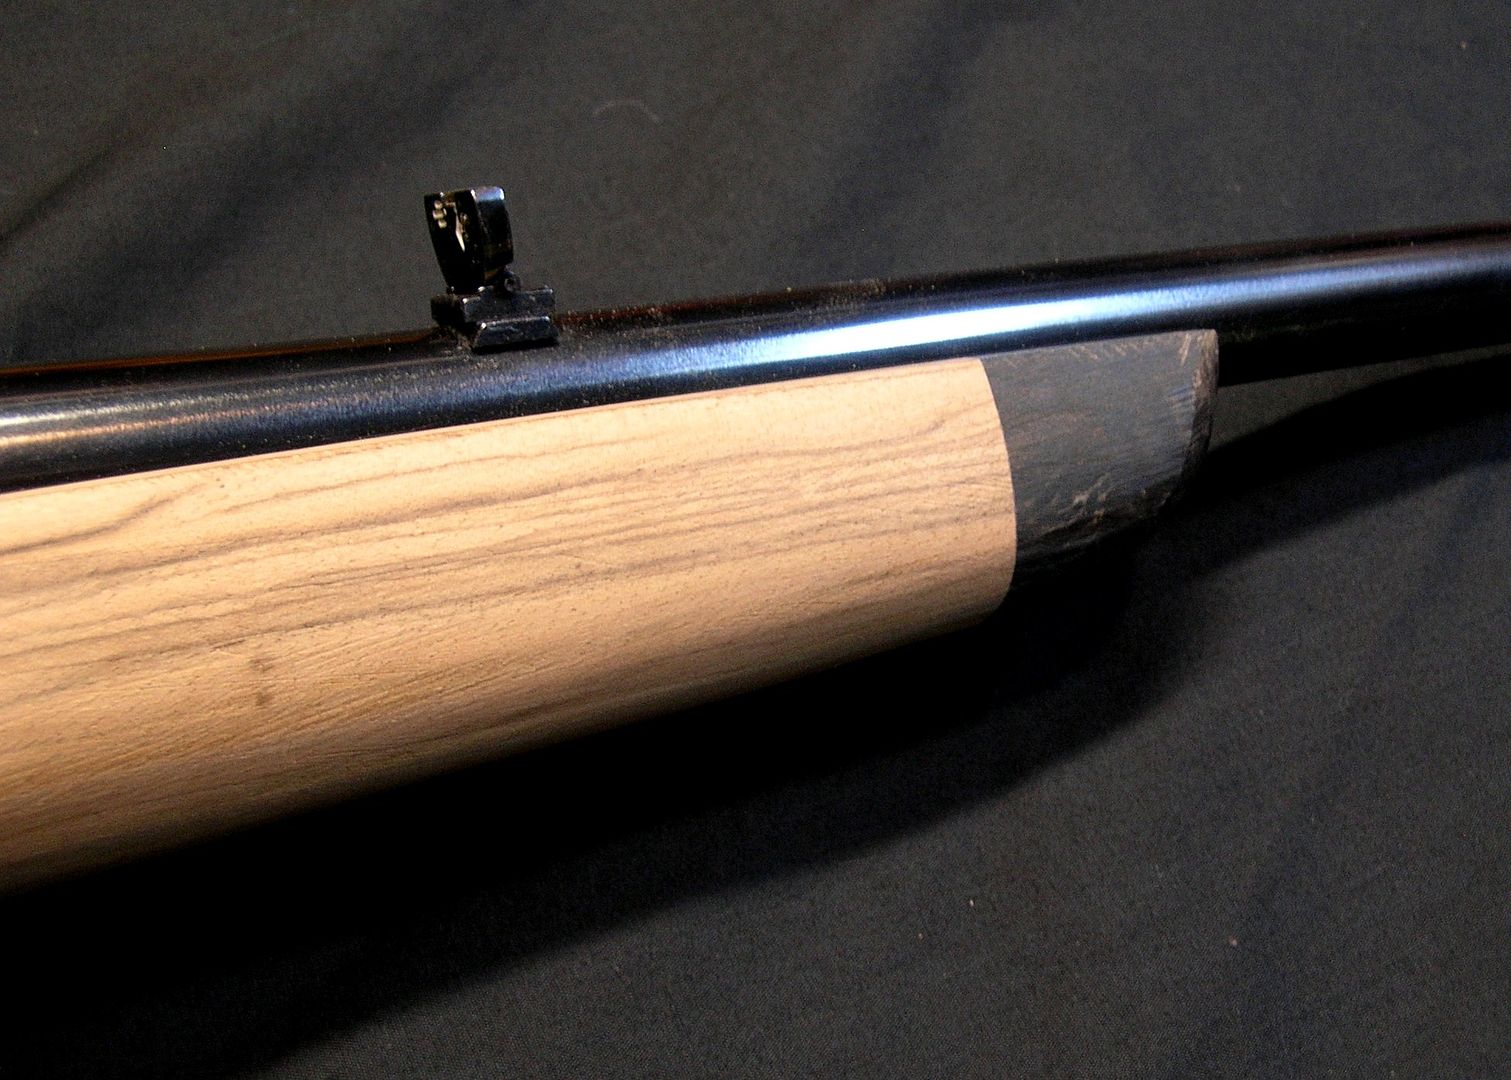 I sanded the stock a bit so the grain looks nice again. The grain in the ebony tip is wavy and it shows up in this photos. It has been a chippy piece to work on and I have to repair the edge along the barrel channel, thanks to it not liking the rasp. 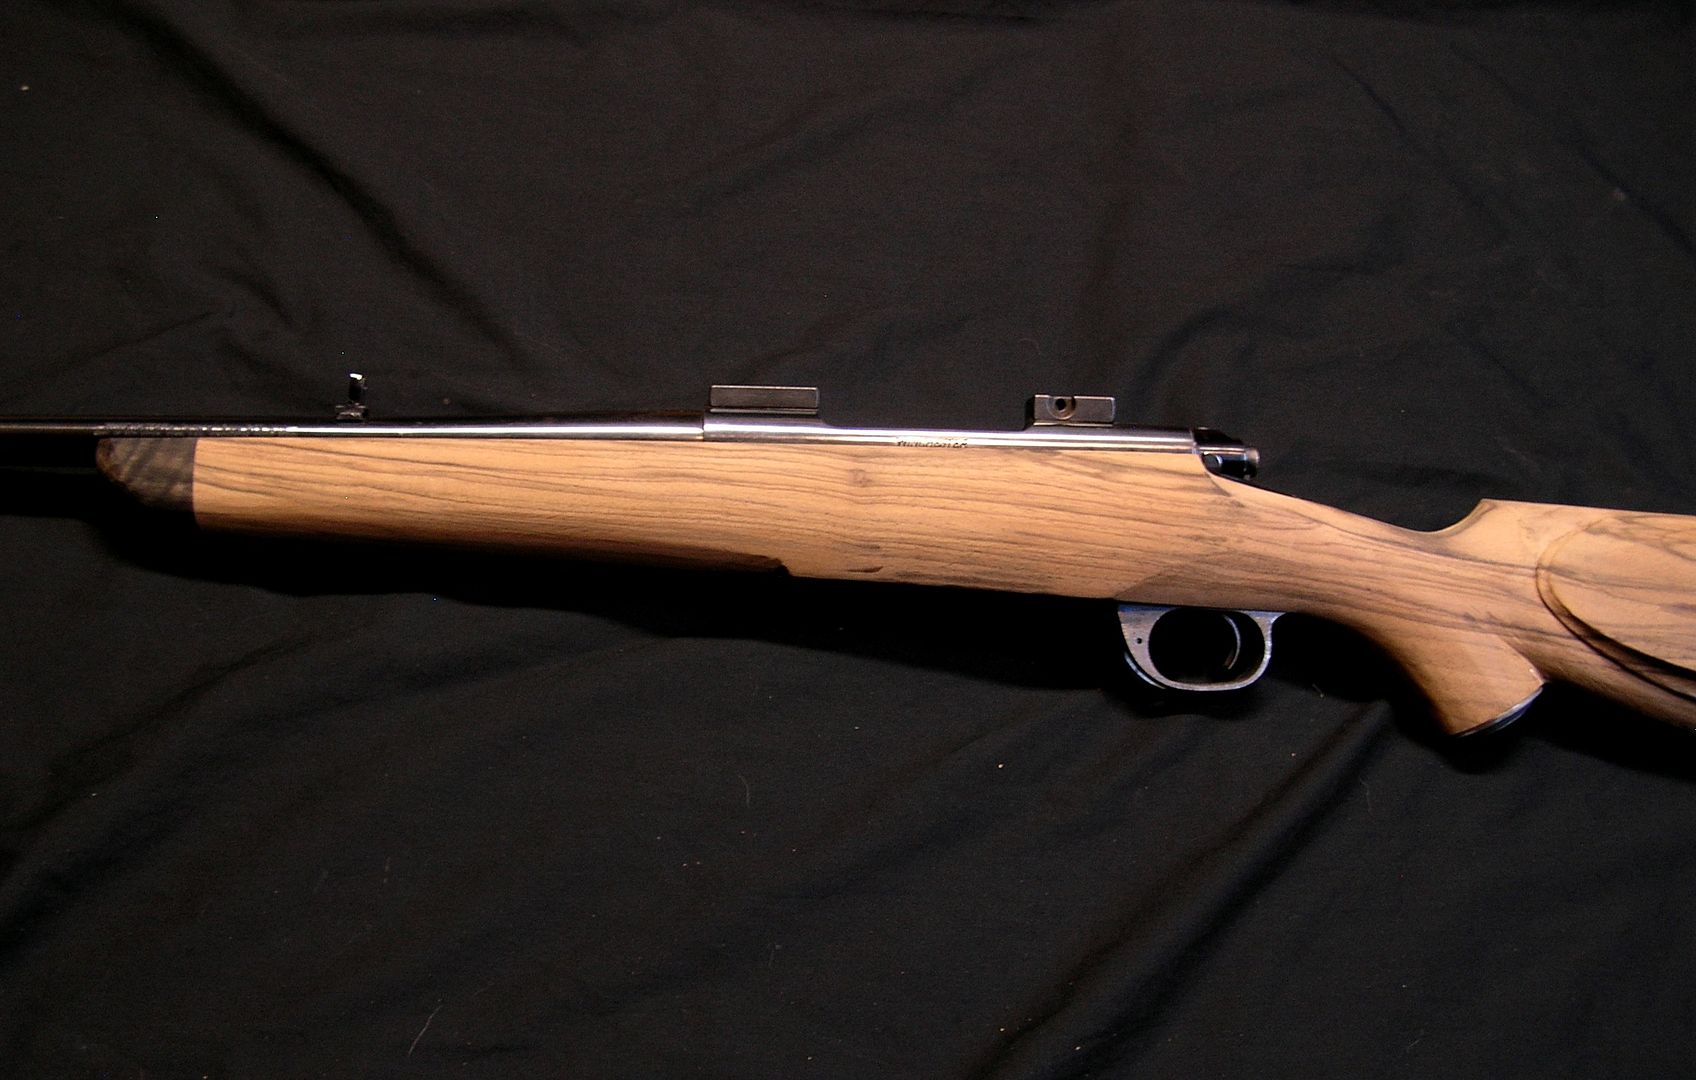 A couple full-length photos: 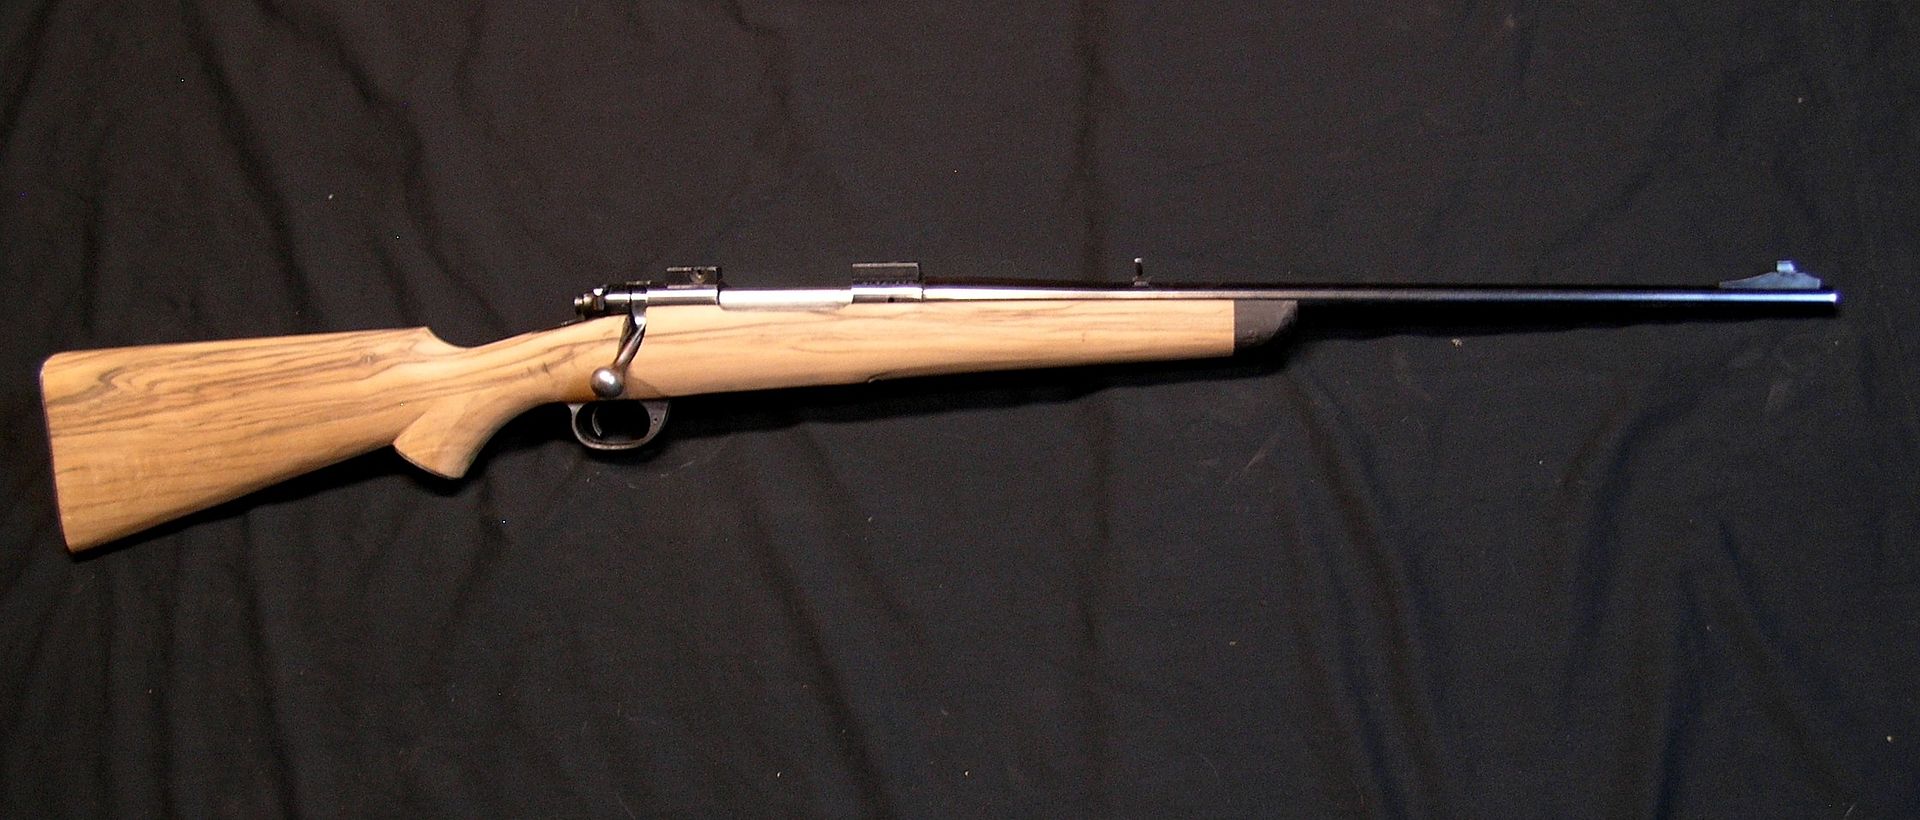 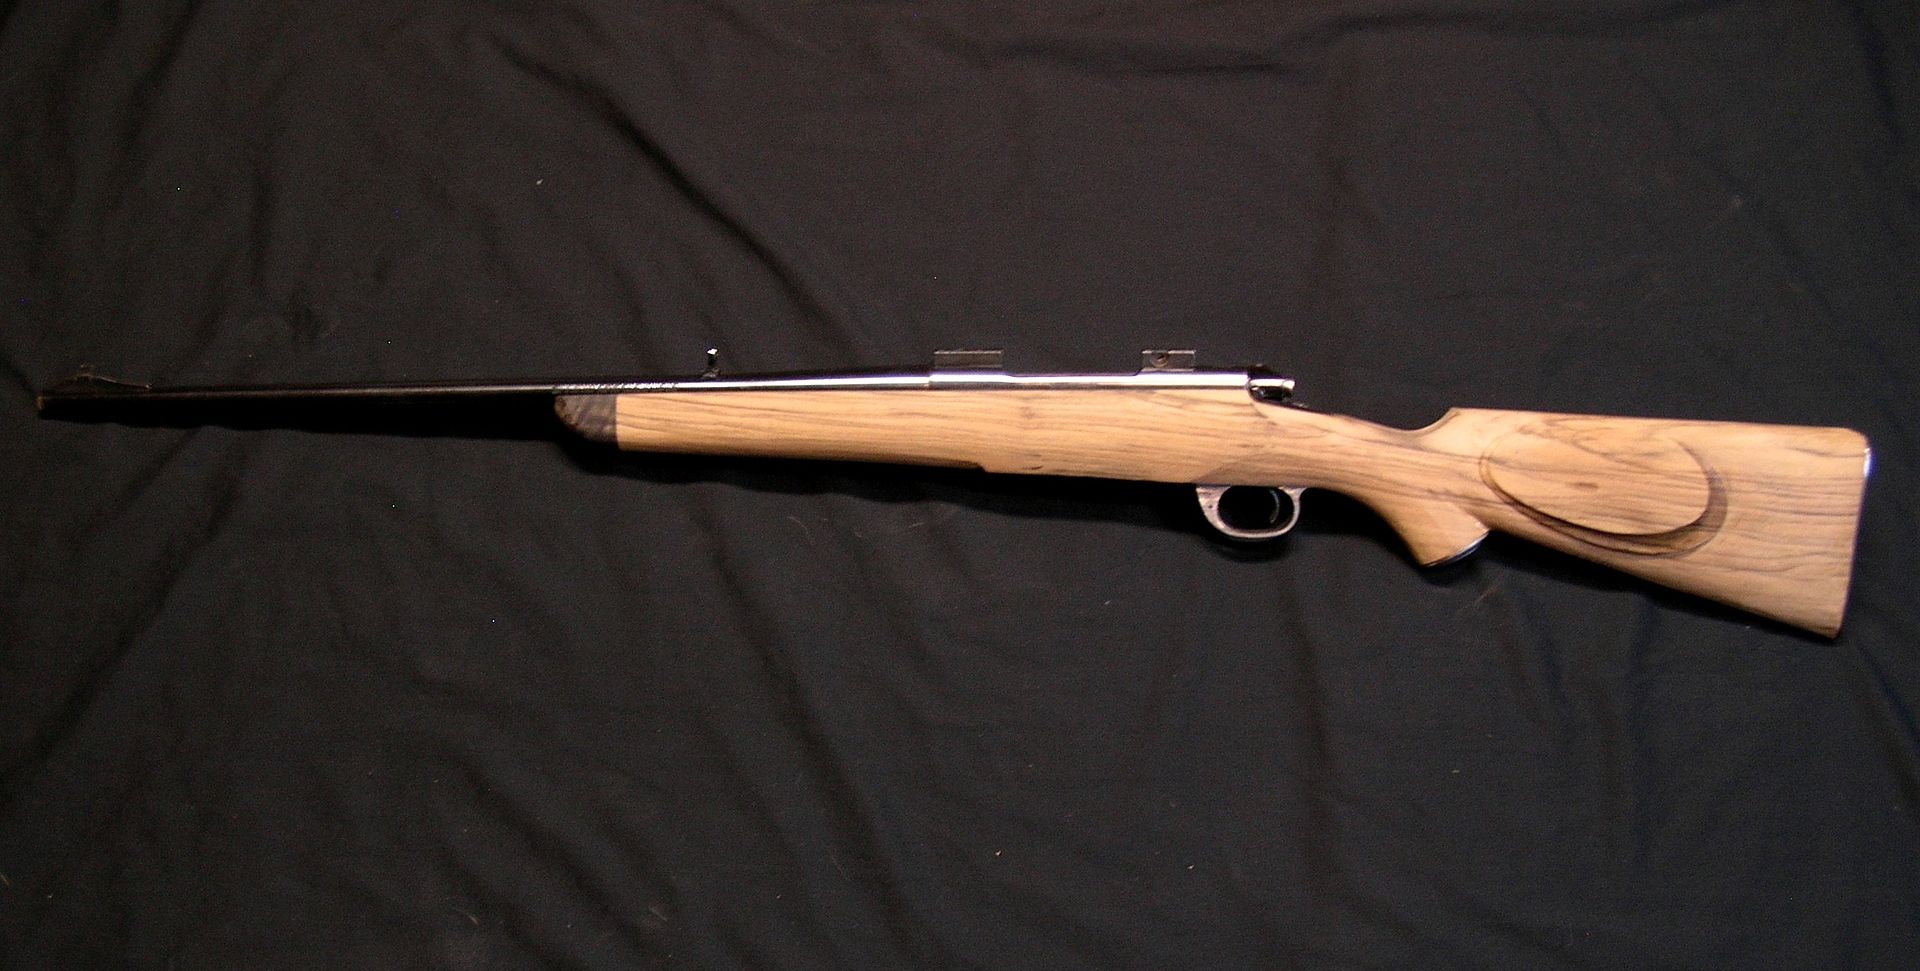 "If the women don't find you handsome, they should at least find you handy." | |||
|
| one of us |
Very nice! | |||
|
| One of Us |
Evan, I'm extremely proud and pleased with your accomplishments. The rifle is looking great and is getting more shootable as you tweak the stock dimensions. I can tell you learned a lot in the Design and Drawing part of the class and along with your dexterity, and proper tools, you are making great headway. I'm particularly pleased with the forend tip shaping. As you know it is more difficult than it looks and you now have a full understanding of just how brittle an chippy ebony can be. I'm sure you are aware, the cheekpiece cove is larger and out of proportion in the lower rear and you may have fixed it but light and precise peening will close the gaps of the buttplate, filed up afterwords. I just got an email from Jim and a call from George who are both looking to return next year for Advanced Stock Shaping.. Keep after it you are doing great! Best, Steve ACGG Life Member, since 1985 | |||
|
| One of Us |
Thanks much Glen and Steve! I'm glad I have the bulk of the for-end done. I've done a few ebony tips now but by far this one has been the toughest. Looking at it, the rear of the cheekpiece could be trimmed back some. I've been focusing on the forward end of the cheekpeice with the grip and comb fluting more. This is the color and grain after a bit of mineral spirits has been brushed on. There's a lot more to it than I expected based on photos when I bought the blank. 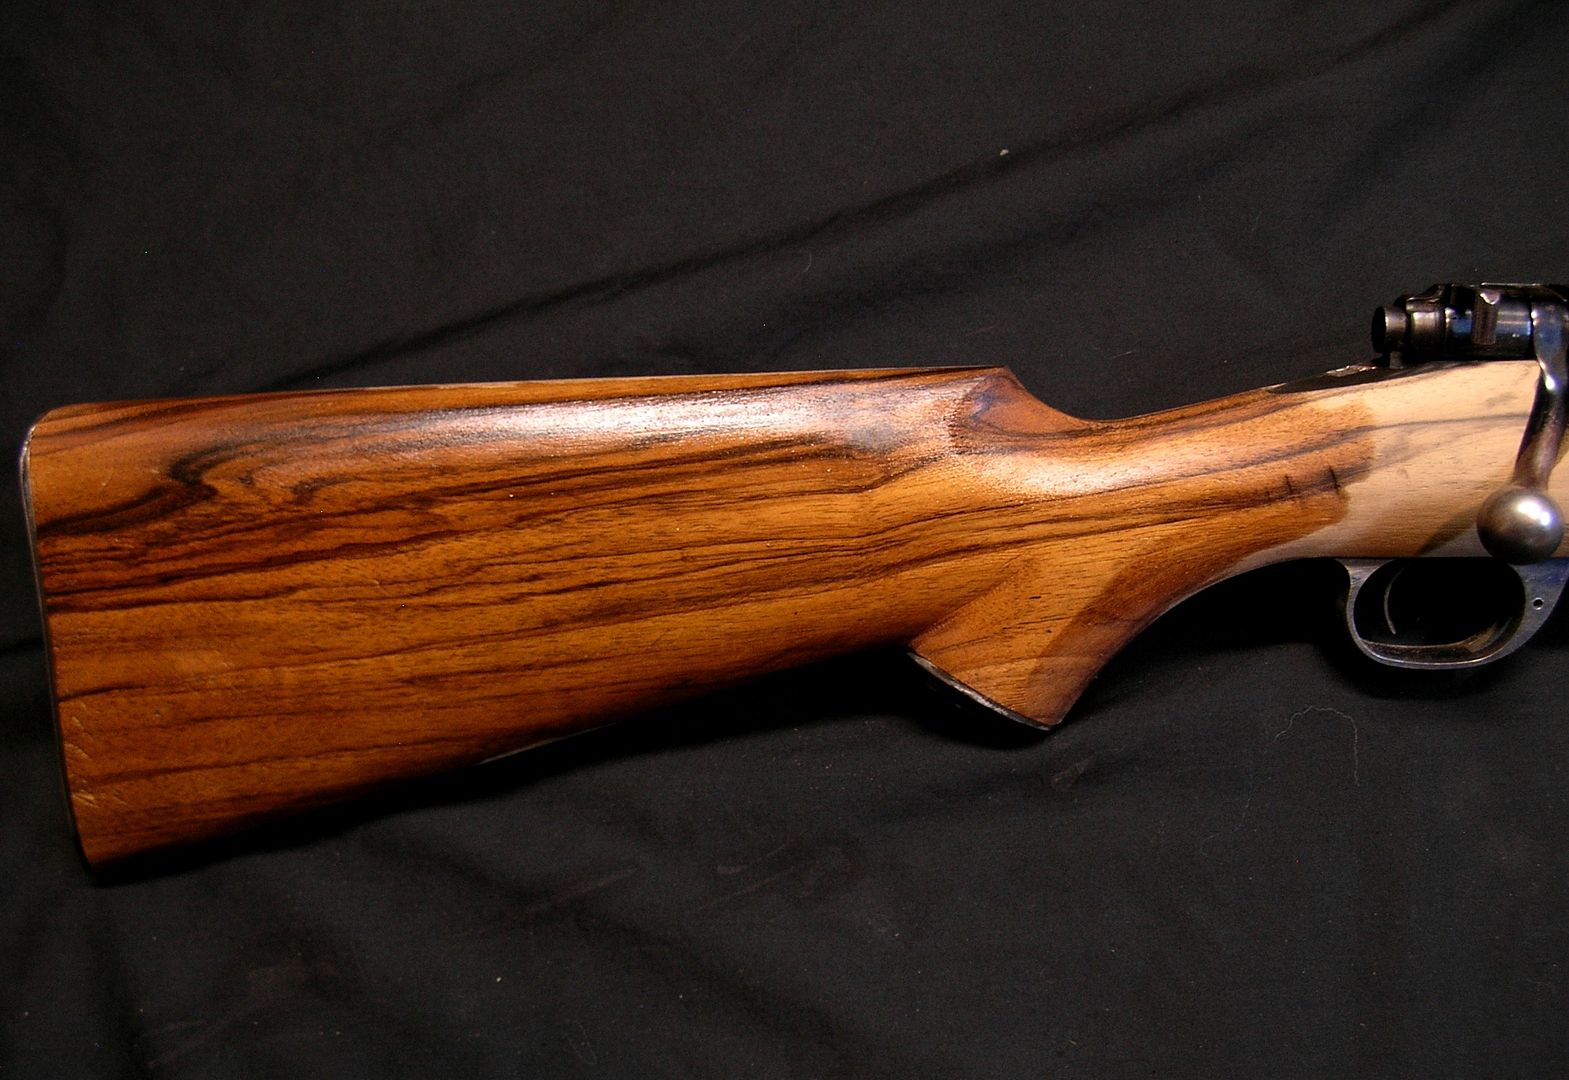  "If the women don't find you handsome, they should at least find you handy." | |||
|
| One of Us |
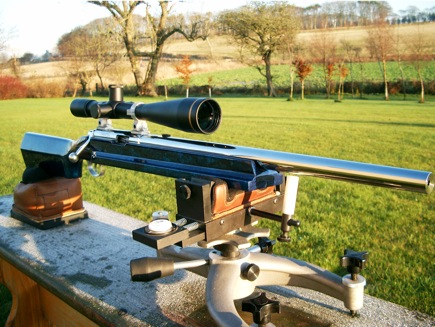
The rifle is ready for deer opener this weekend. I put a few quick coats of lacquer on the stock so it can be handled and sighted the rifle in last night. The finish isn't pretty but is functional. I was shooting Hornady 130 gr. SST Light Mag ammunition and shot this 3-shot group at 50 yards while sighting in the rifle: 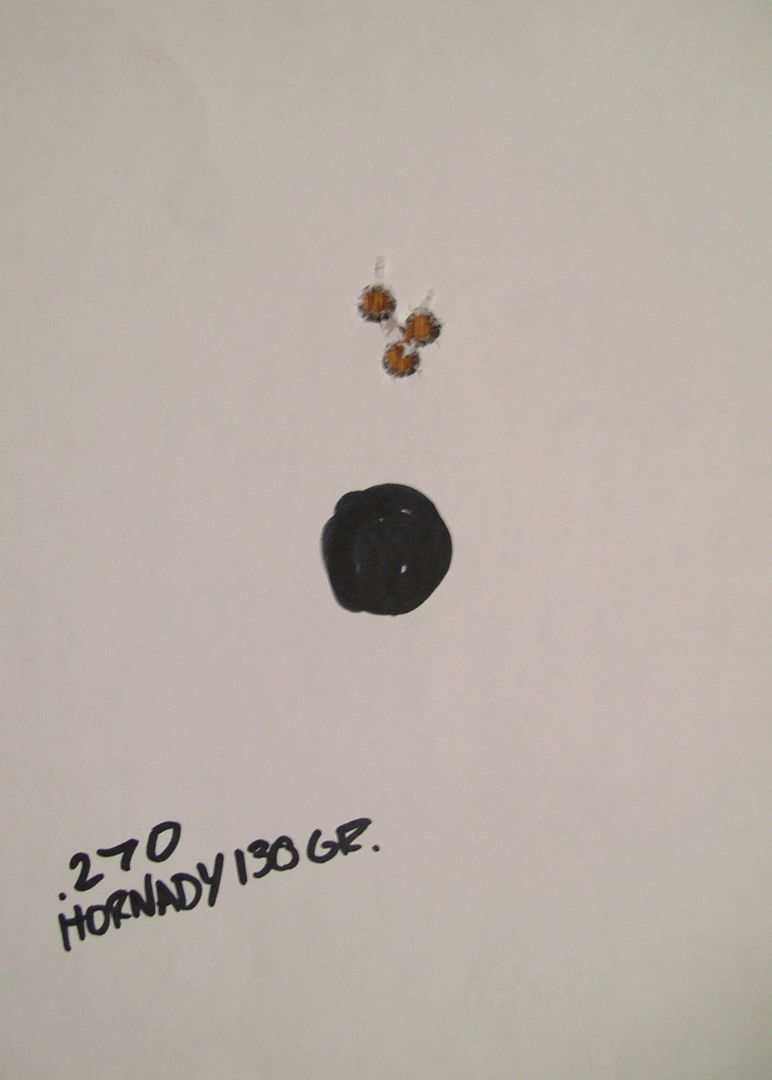 Groups opened up a little more than an inch at 100 yards, which exceeds my expectations. More than enough to shoot a whitetail. Recoil off the bench was mild and it feels good shooting offhand. I'll be adding some screw-in swivel studs before this weekend so I can use a sling with the rifle. After deer hunting I will strip the stock, add the inletted swivel studs and finish some detail shaping, then color, re-finish and checker it. While finishing I need to polish and blue the stock hardware too. 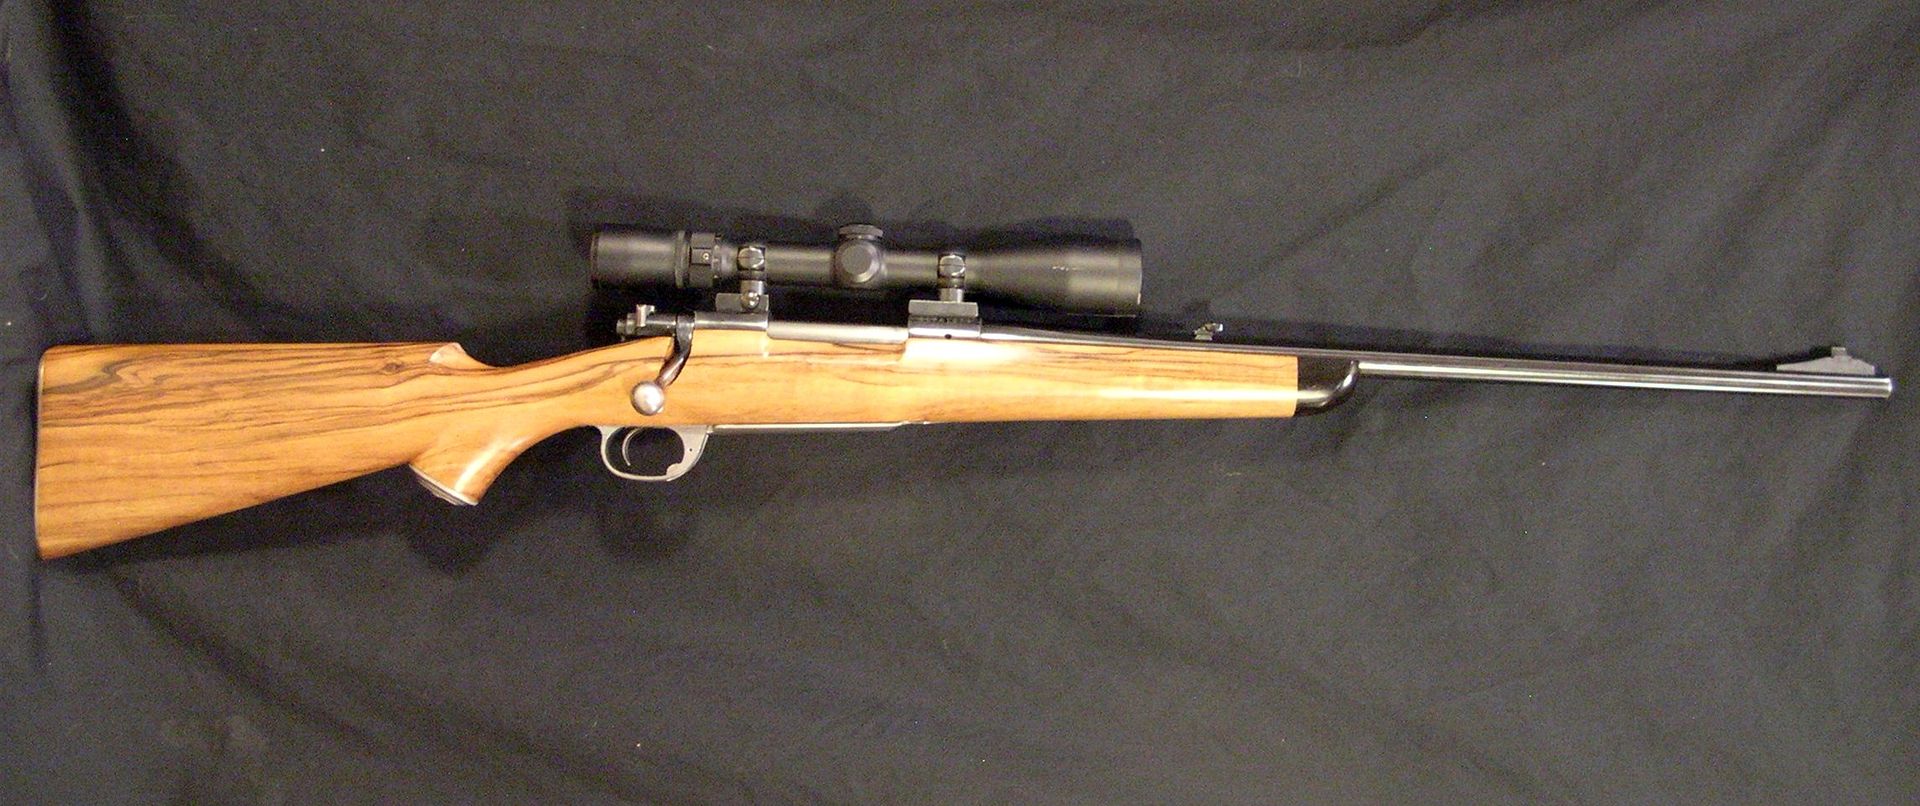 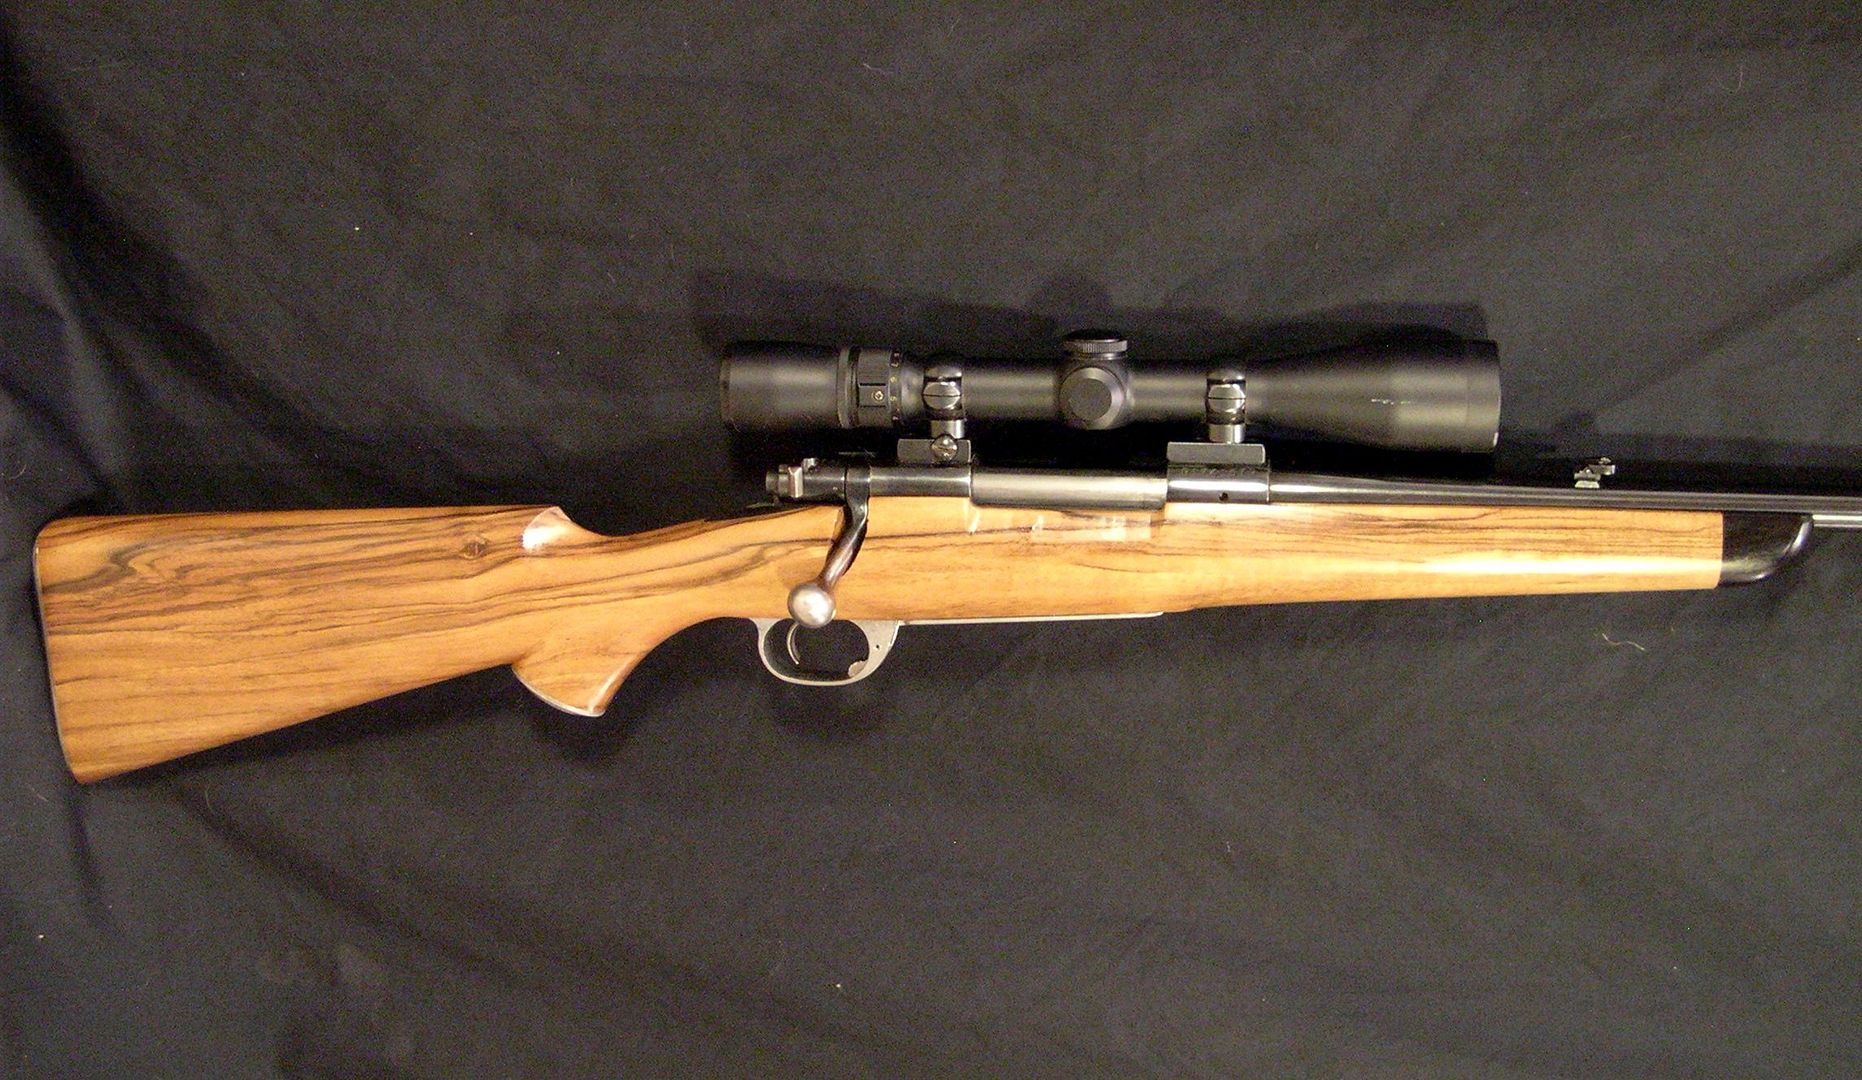 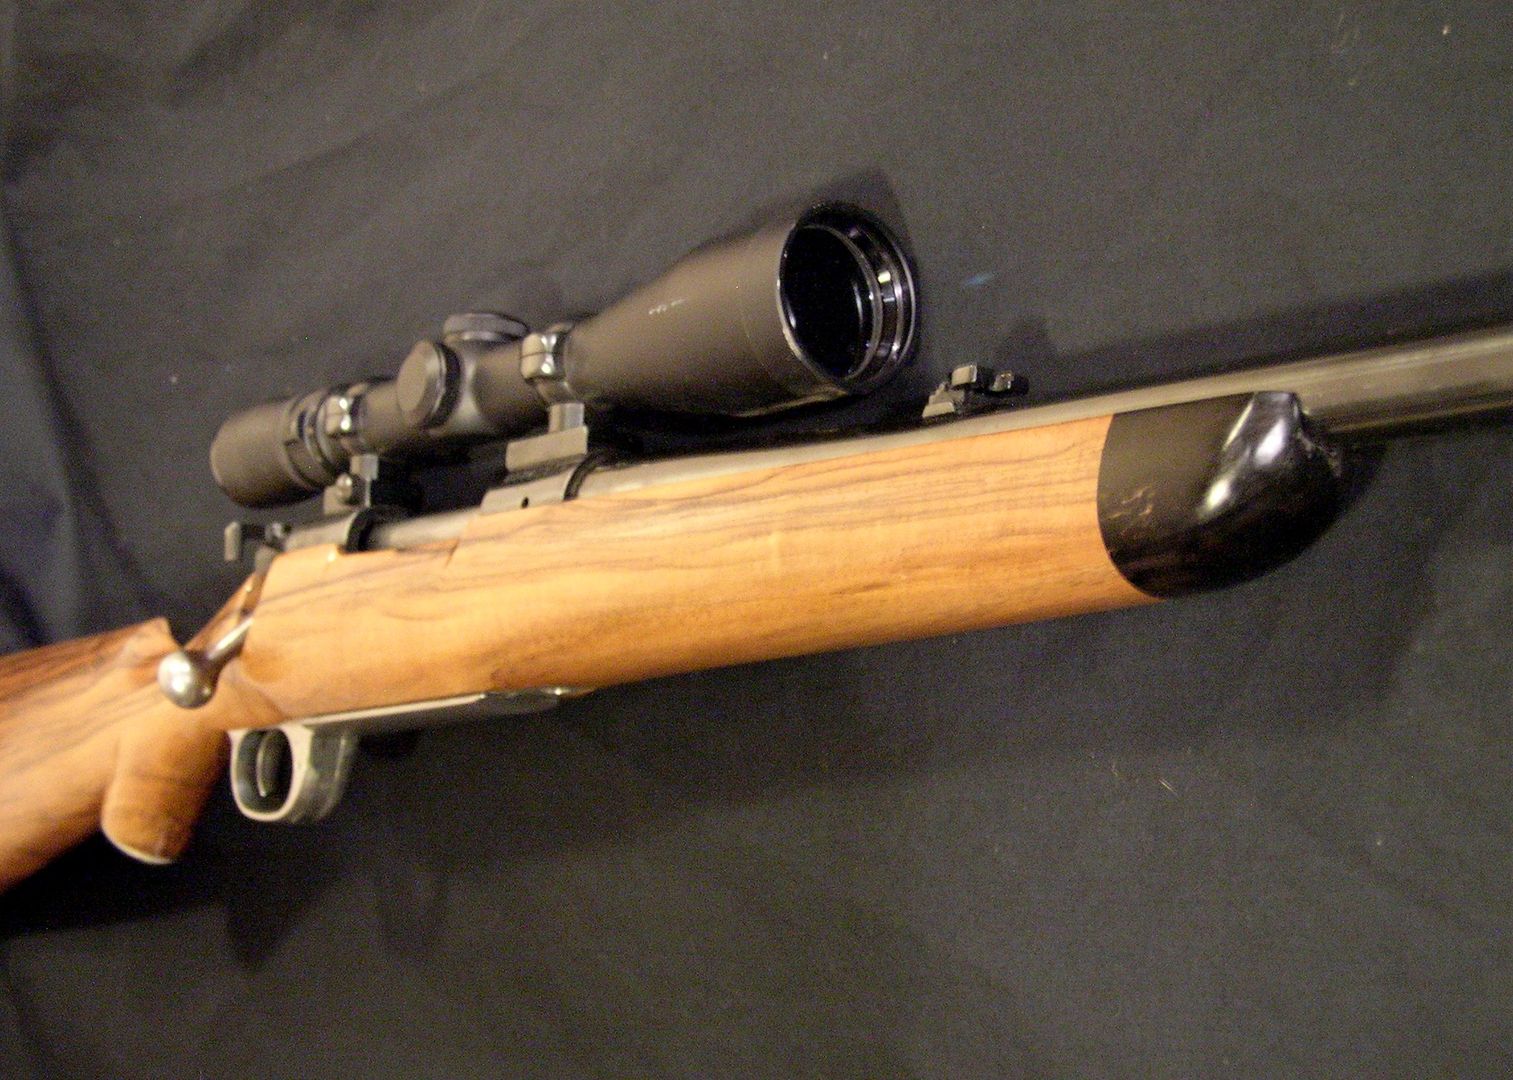 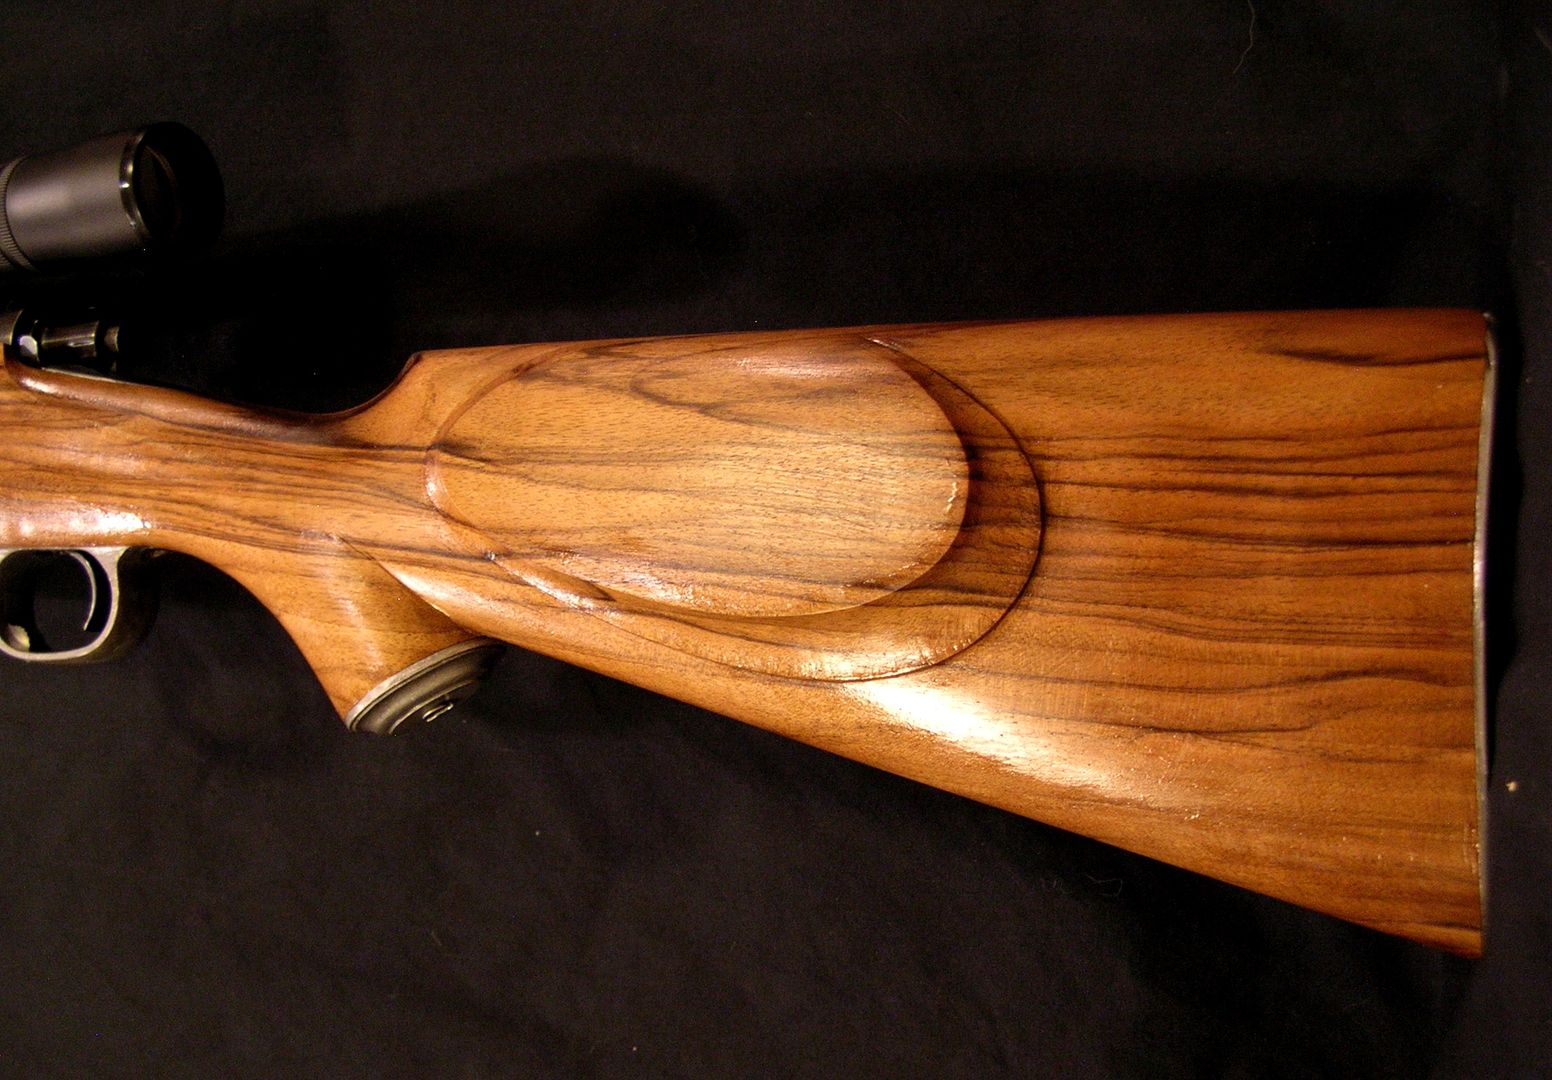 "If the women don't find you handsome, they should at least find you handy." | |||
|
| one of us |
Puts my "stockworking" to shame. Awesome job. ____________________________ If you died tomorrow, what would you have done today ... 2018 Zimbabwe - Tuskless w/ Nengasha Safaris 2011 Mozambique - Buffalo w/ Mashambanzou Safaris | |||
|
| one of us |
+1 | |||
|
| One of Us |
Evan, if you are not already there, you need to join the ACGG, at least an associate member. Jim Kobe 10841 Oxborough Ave So Bloomington MN 55437 952.884.6031 Professional member American Cusom Gunmakers Guild | |||
|
| One of Us |
Yah, vut he sayd!! Dennis Earl Smith Professional Member ACGG Benefactor Life NRA Life NAHC | |||
|
| One of Us |
Thanks fellas! Jim and Dennis, you'll be hearing from me. I had the .270 with me for deer opener this past weekend and shot a doe tonight. It was about 50 yards from my stand and dropped at the shot. I'm happy to put some good venison in the freezer but also to get some action with this rifle already. 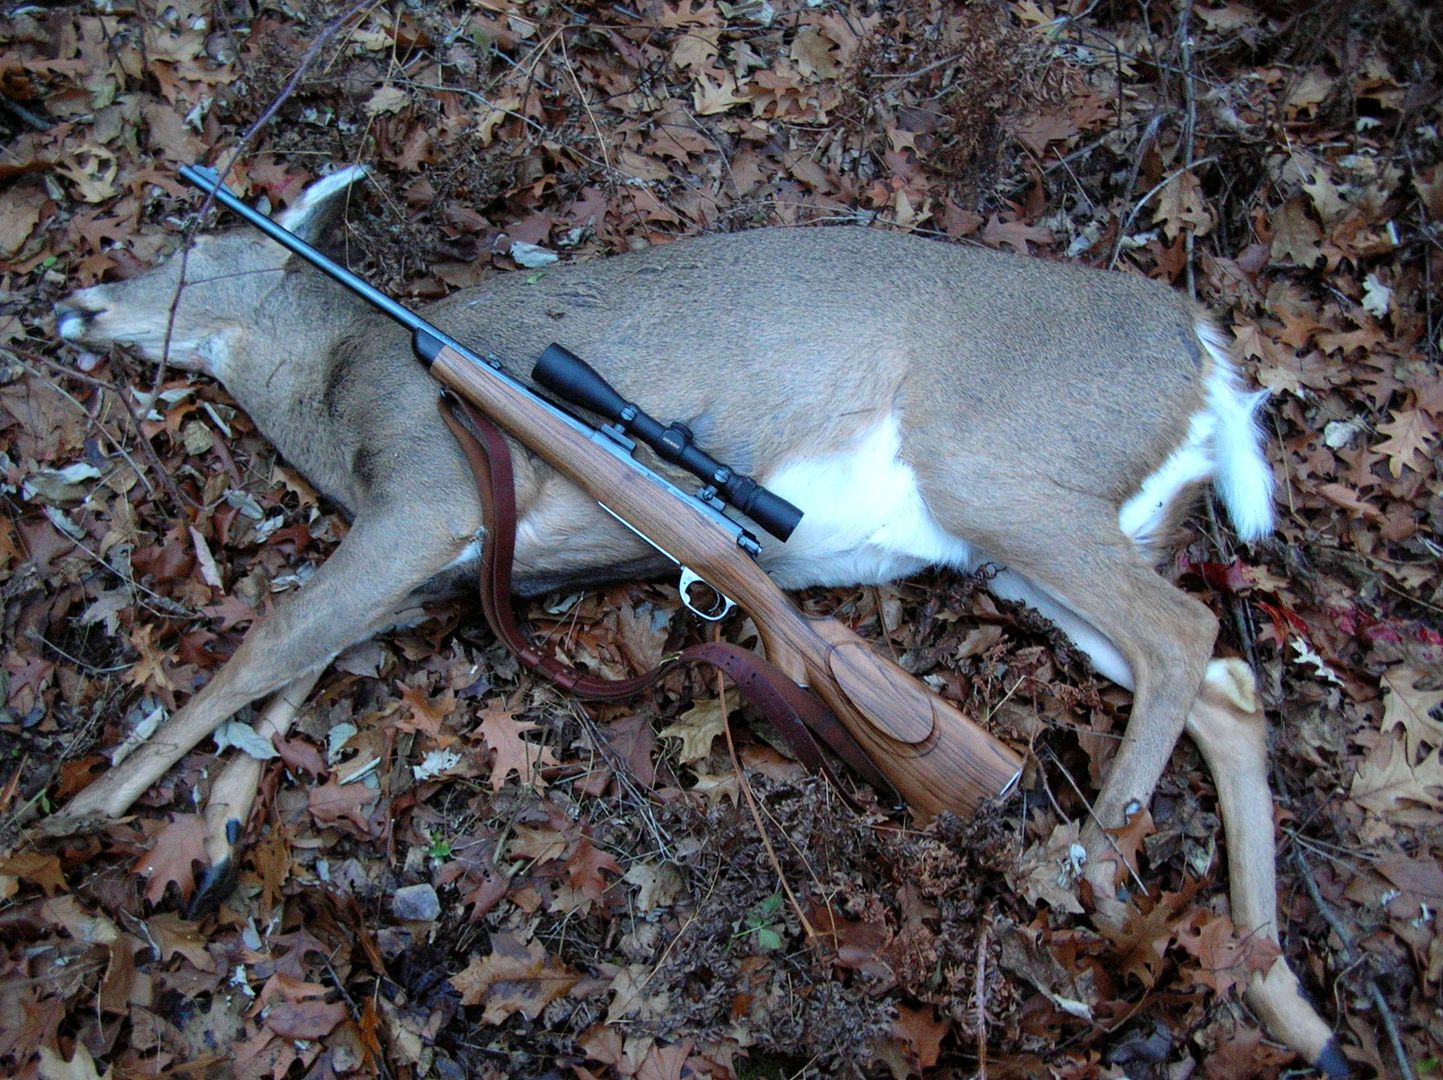 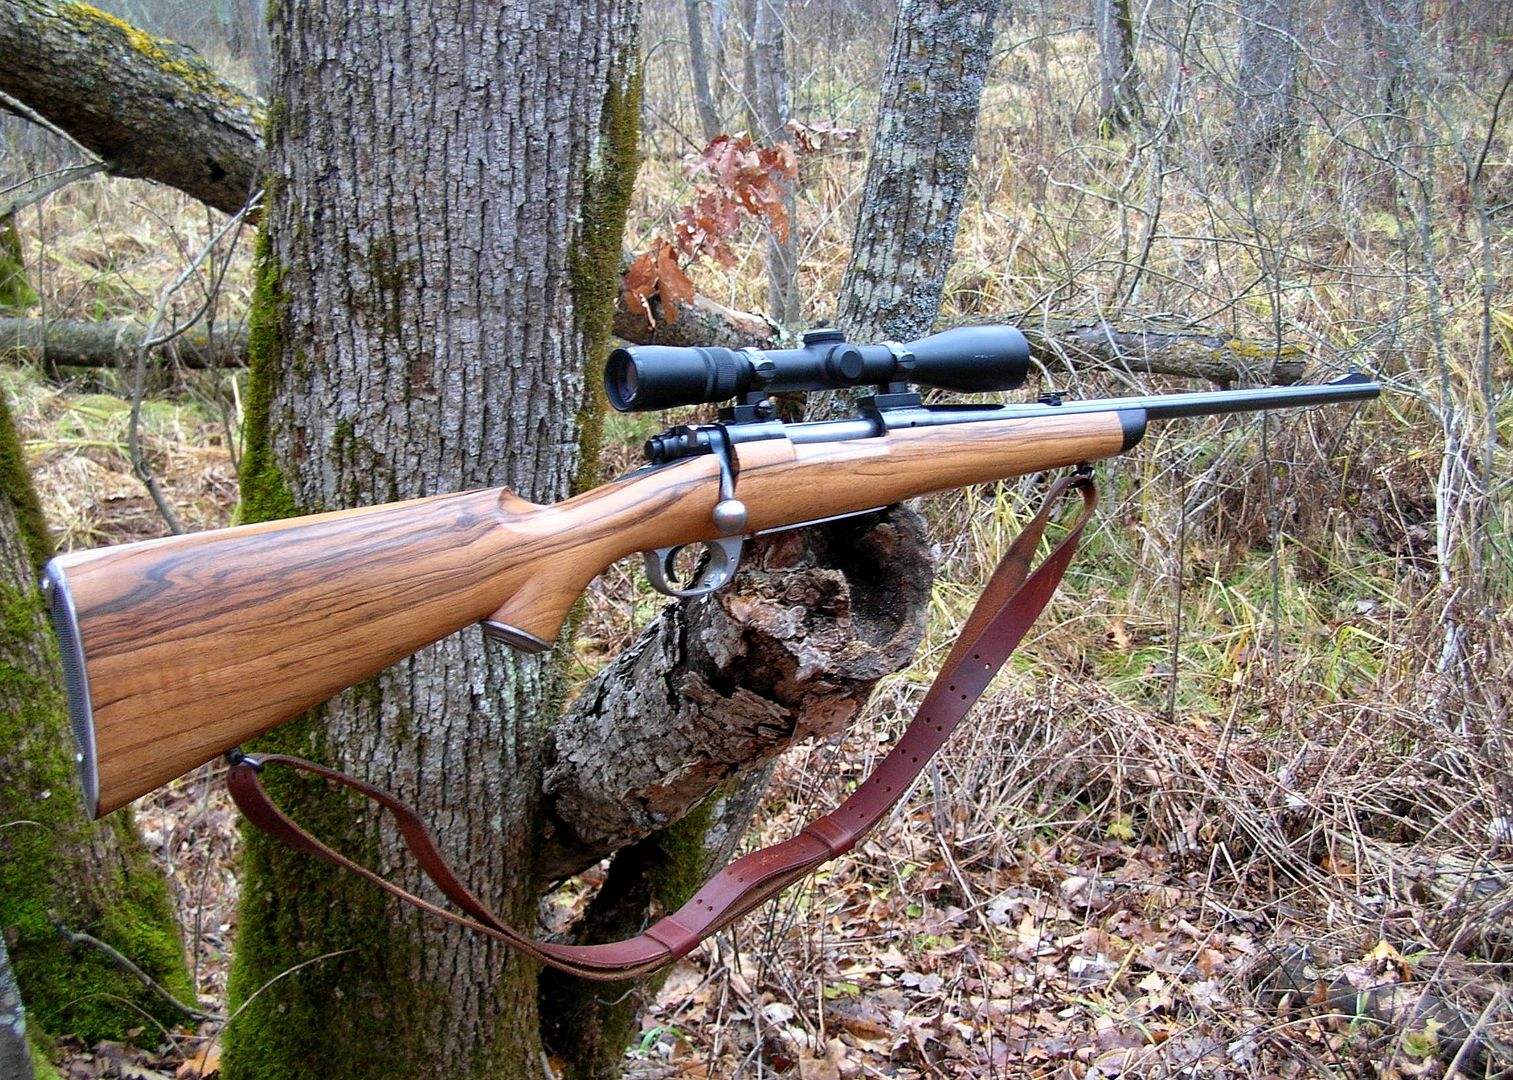 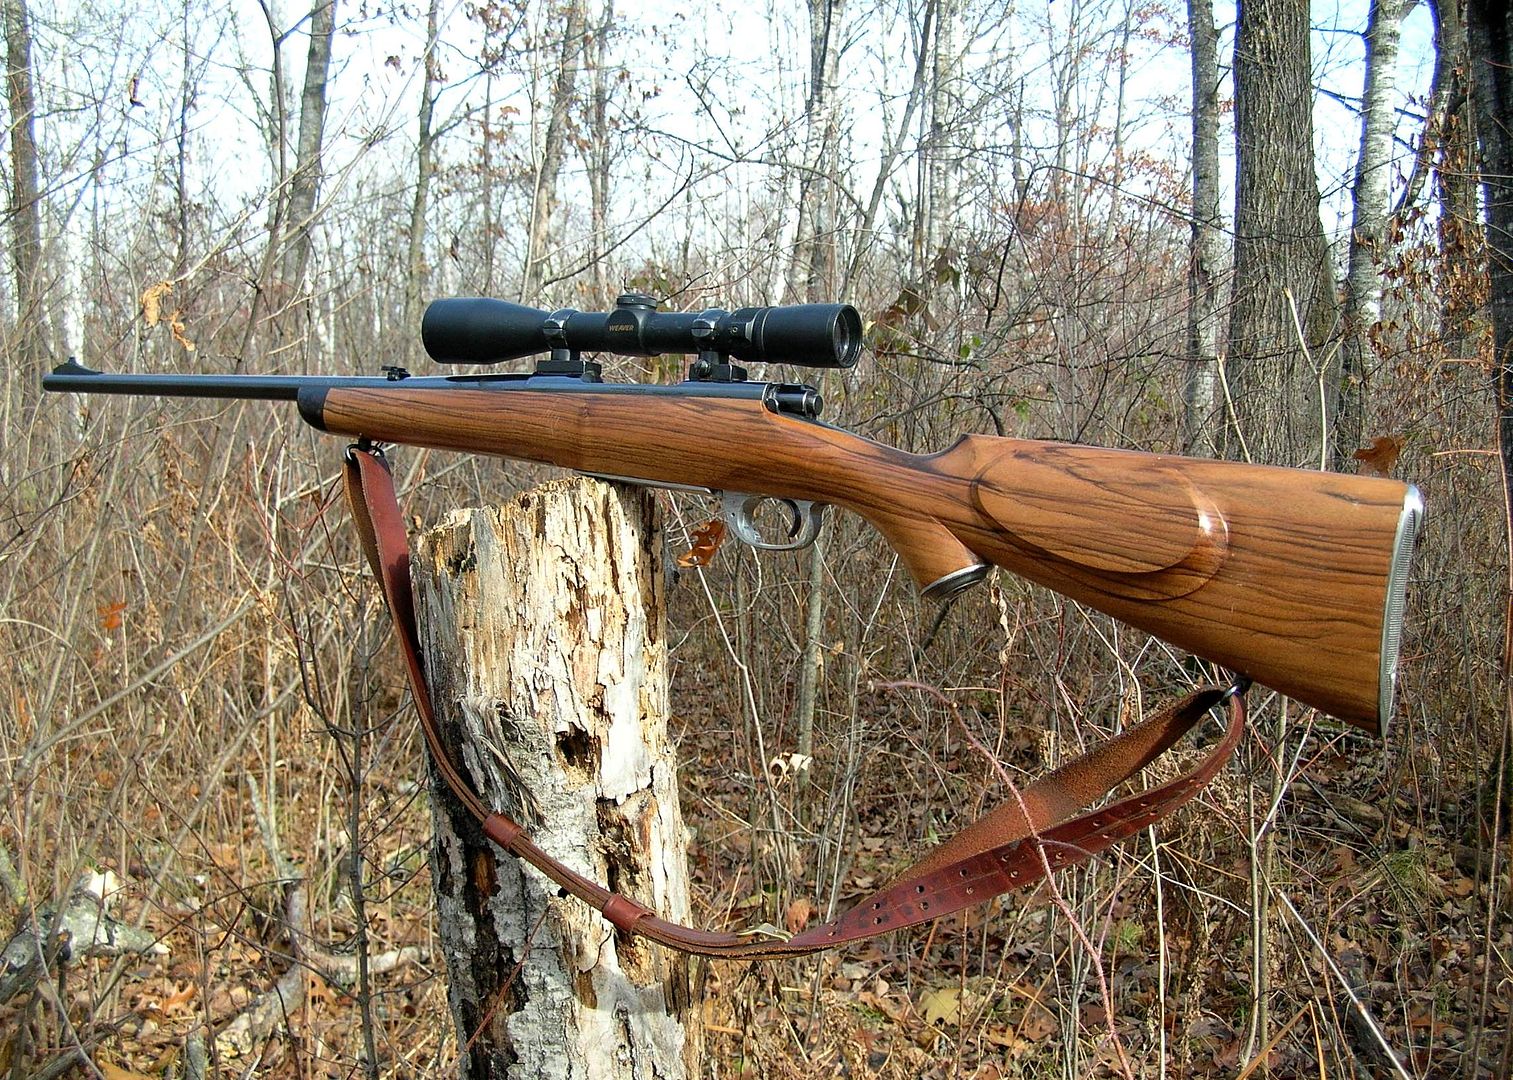 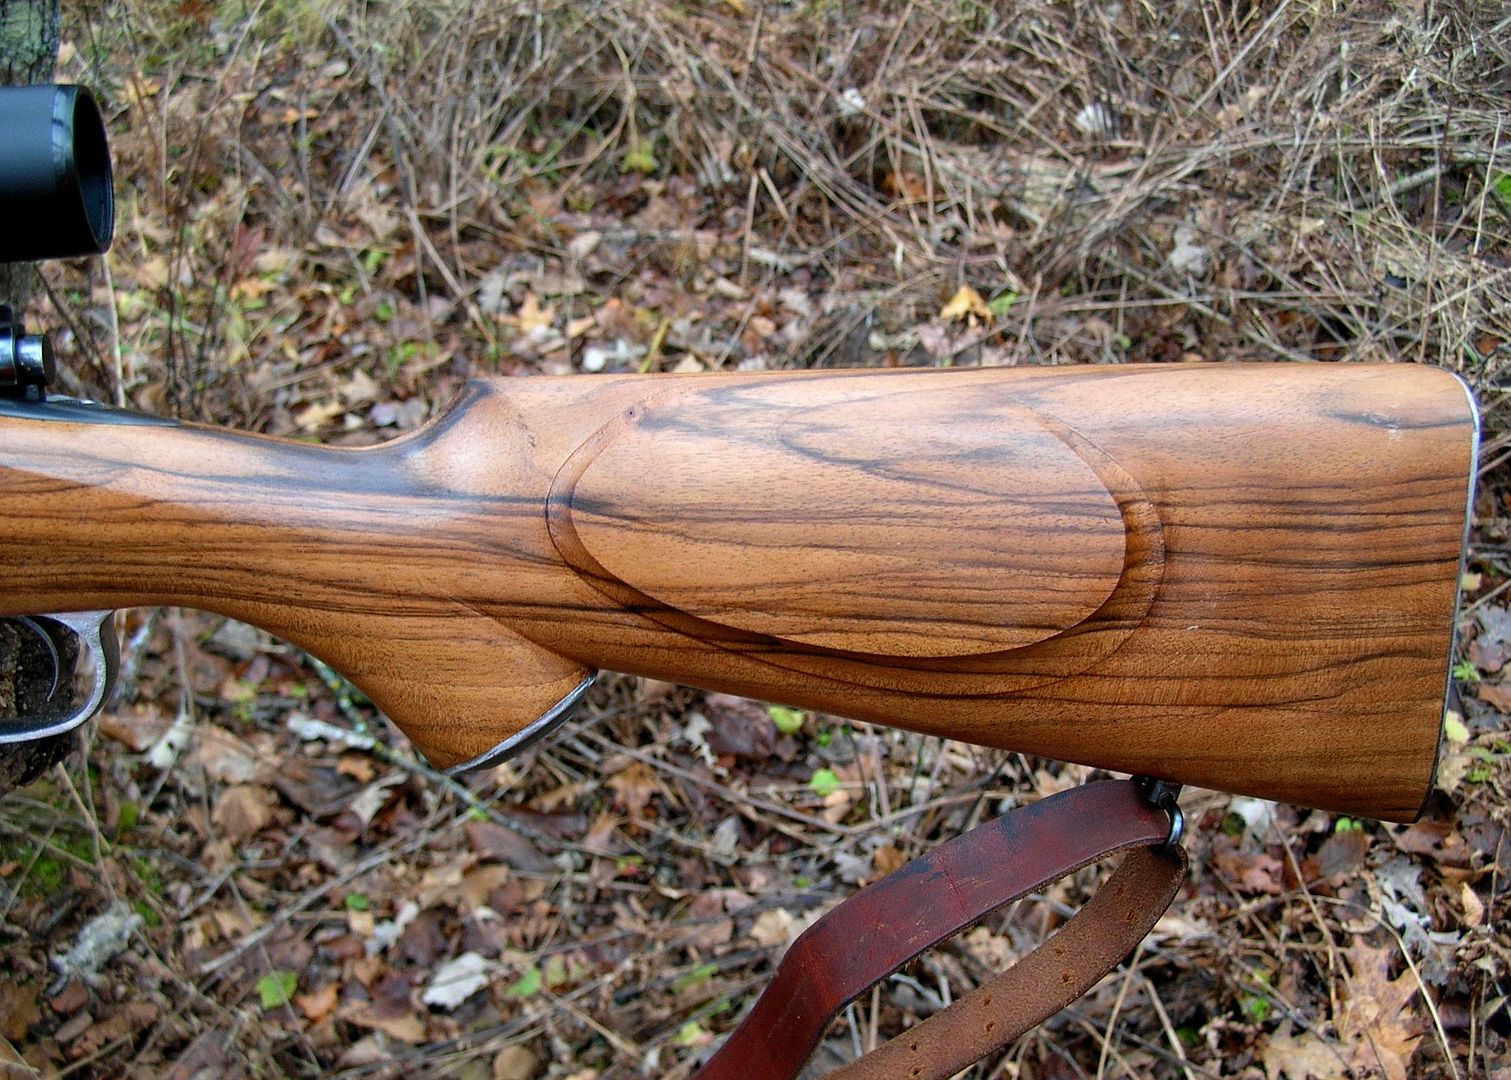 "If the women don't find you handsome, they should at least find you handy." | |||
|
| one of us |
Sweet! | |||
|
| One of Us |
Ain't too bad, I'm proud of you. | |||
|
| One of Us |
EK, I happened upon this thread just a few minutes ago. This would be subsequent to our conversation yesterday AM. At that time I was unaware of the significance of the rifle in your Minnesota opener photos. I am a big fan of SDH. and now am officially envious. Juts fer shitz n giggles, (and I mean this in the sincerest form of flattery), can you also leap tall buildings in a single bound. I repeat, good stuff there guy. Best, GWB | |||
|
| One of Us |
Thanks again Glen!
Hey thanks Butch, it has been a long time (to me) since we first talked about wood/carbon fiber laminates.
Thanks much GWB, sincerely. Now the two main things on my mind with this project are how to color the stock and cut mullered borders along the checkering- after shooting another deer with it this weekend. Fun stuff. I am really looking forward to checkering this English walnut after carving it. "If the women don't find you handsome, they should at least find you handy." | |||
|
| One of Us |
Absolutely wonderful Evan. That's what it is all about!! ACGG Life Member, since 1985 | |||
|
| one of us |
Evan, I know it is just preference, but I would not color that stock. It looks way too good the way you have it. Just my $.02. That is some great work. Larry "Peace is that brief glorious moment in history, when everybody stands around reloading" -- Thomas Jefferson | |||
|
| One of Us |
Thanks Steve! I appreciate the kind comments larrys and agree it looks good, but I'm still warming up to the looks of blonde walnut. After hunting with it again this past weekend I've decided it needs a bit of color. Just my preference. "If the women don't find you handsome, they should at least find you handy." | |||
|
| One of Us |
Evan, I agree. You need a little alkanet root in your finish. | |||
|
| One of Us |
Since my last update on this thread I've managed to shoot three bucks with the rifle in three consecutive seasons, two spikes and a nice mature 8 point buck. All three fell around the same rock pile in a pasture in northern Minnesota too, with shots from sitting or kneeling position ranging from 160 to about 210 yards. 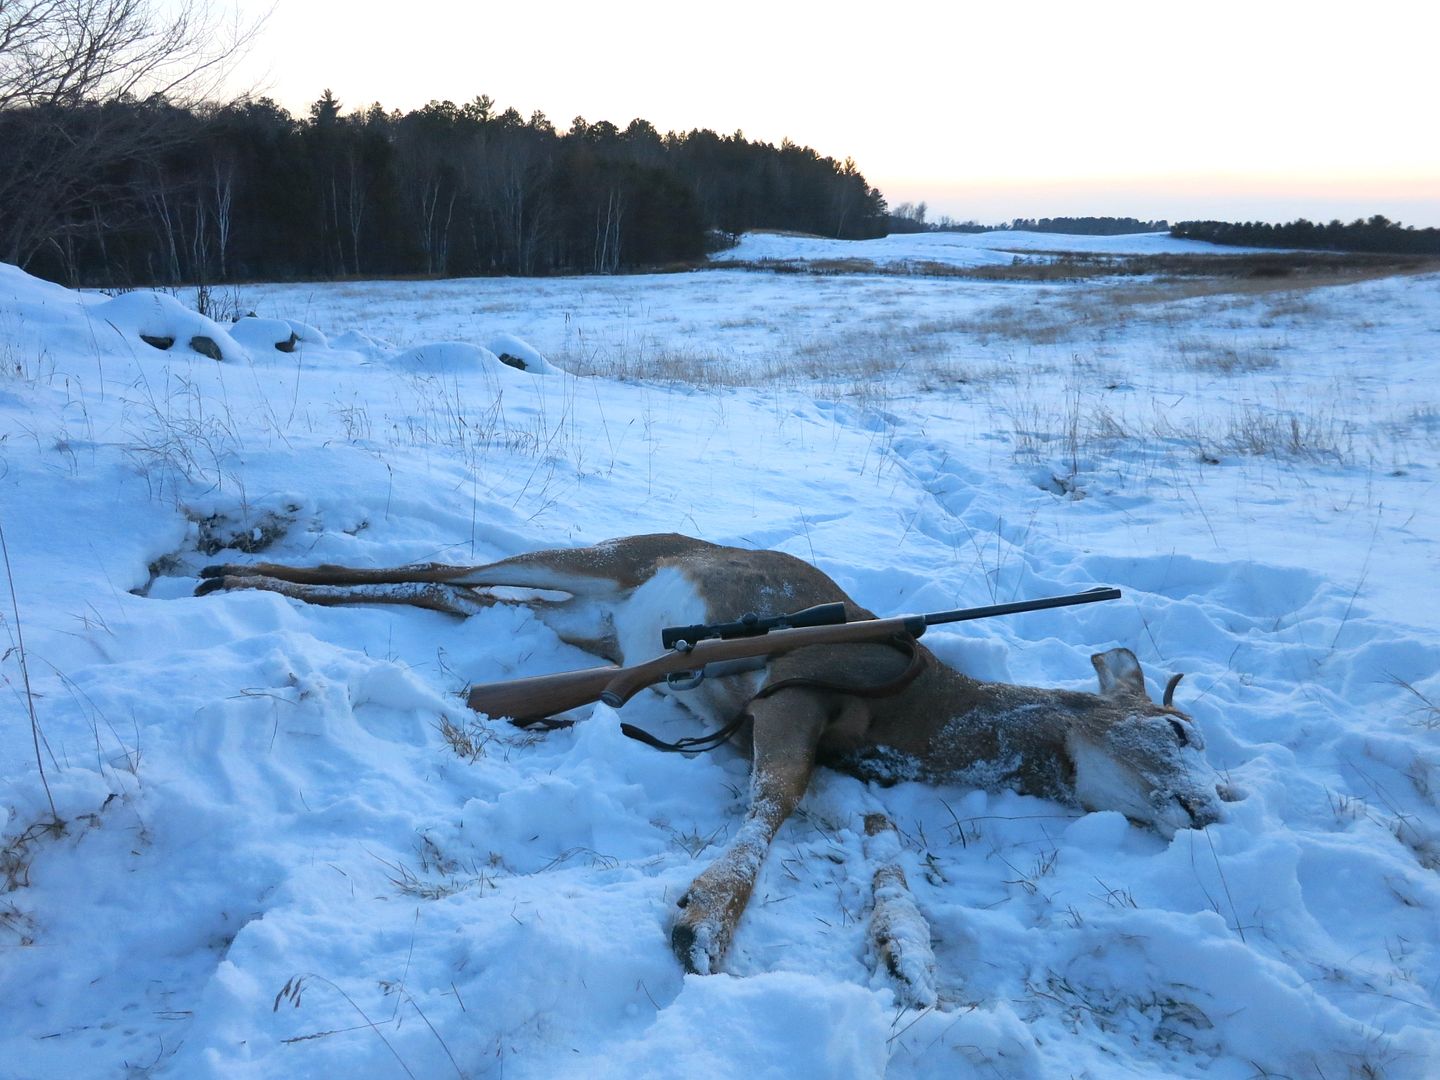 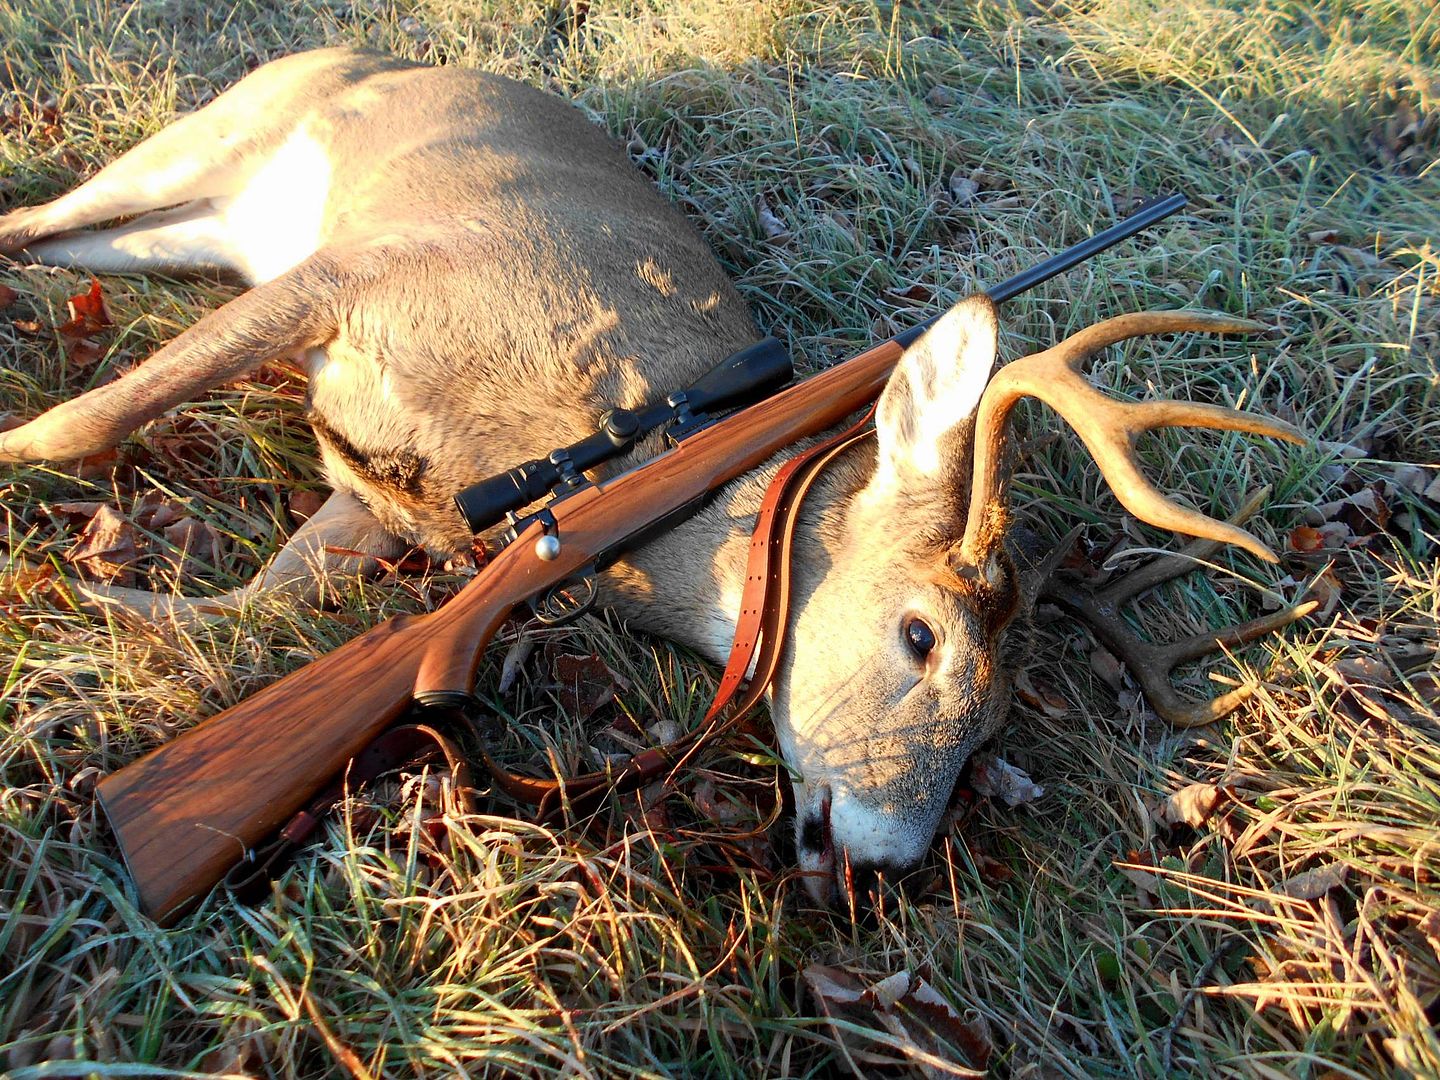  Needless to say I feel confident with this rifle in the field and expect things to fall when I pull the trigger. Look close and you can see the bottom metal and checkering evolving over time. The finish has changed too, from 2013-2015 the stock had a lacquer finish and over this past year I stripped and refinished it with an alkanet root tinted Waterlox finish- not sure how I feel about the new color but the finish seems a lot more weather resistant. You can see in the photo of the big buck that the stock hardware looks like it was blued, but it was just a cold blue and it looked like shit up close. One of my goals for this year was to start learning how to rust blue metal and I dove in a few weeks before the deer opener with the stock hardware and bottom metal. Here was the bottom metal as-received from PTG again, note the chunky unshaped trigger guard bow: 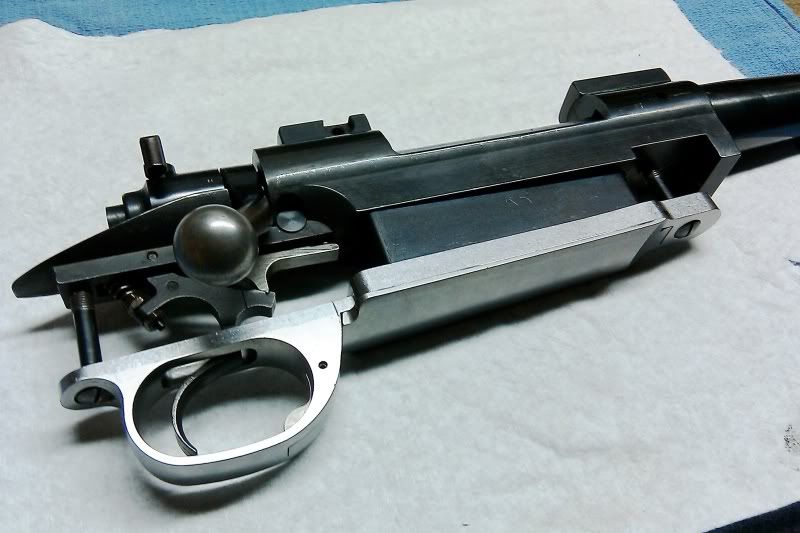 There was some serious shaping work to be done with the trigger guard bow and for this I had help from someone with a milling machine and some real expertise on how to shape stock hardware like this, thanks very much to them again. At first I was a little surprised how much material was hogged off but in hindsight it all made sense. As machined: 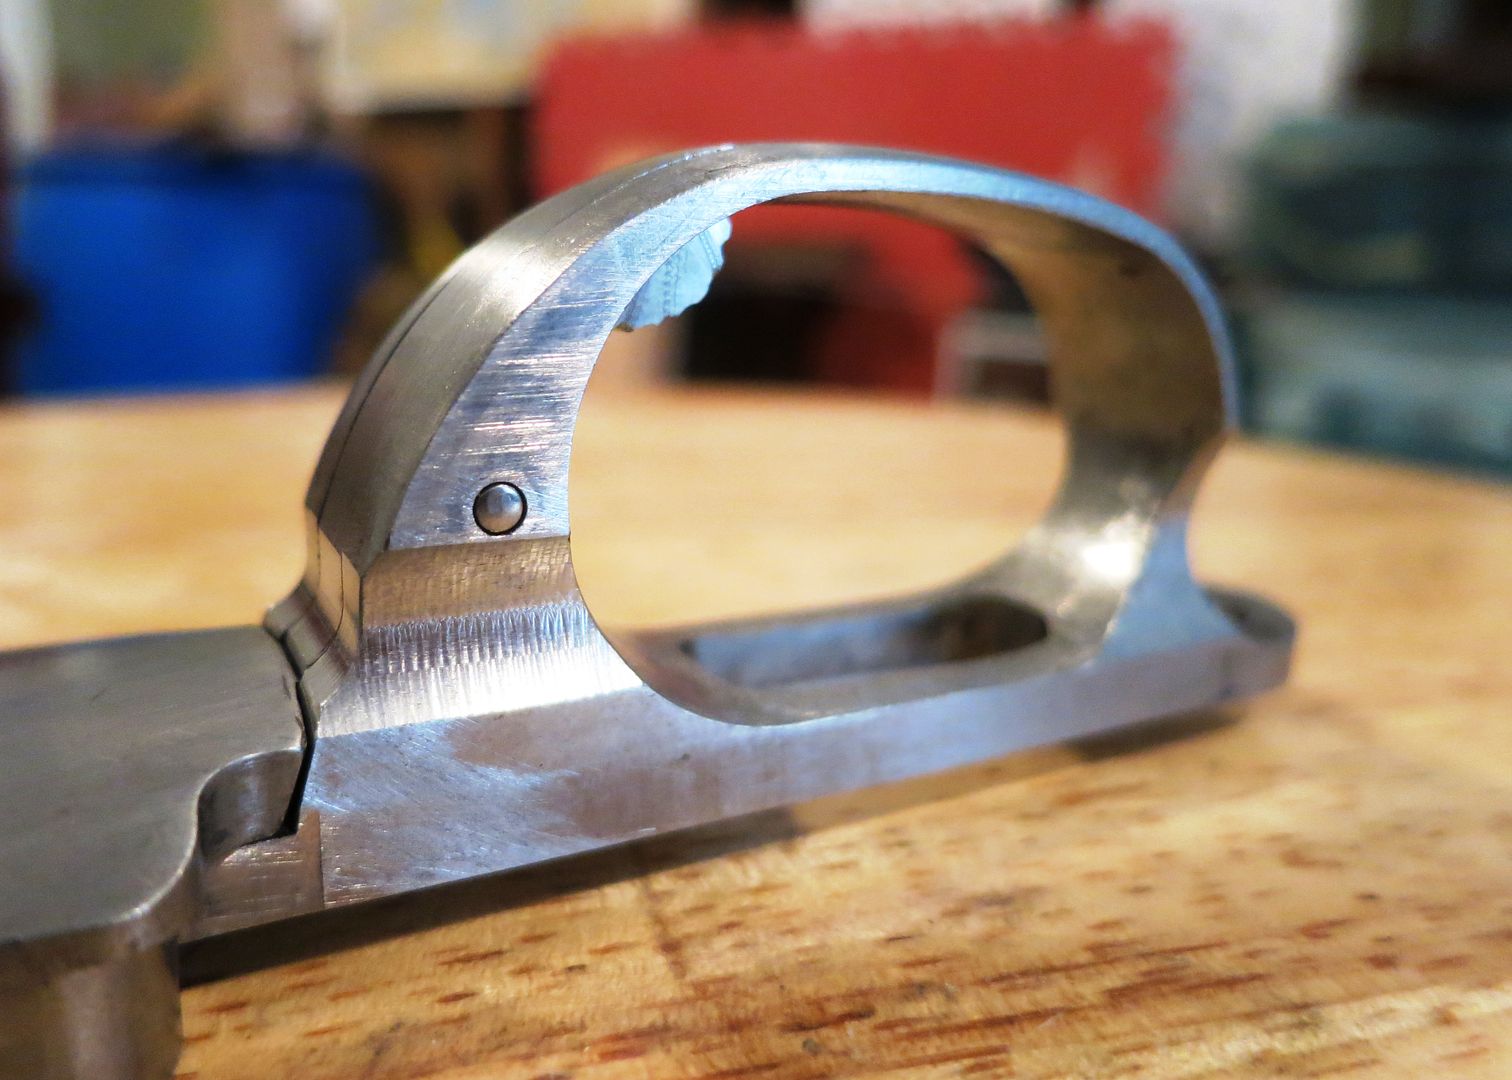 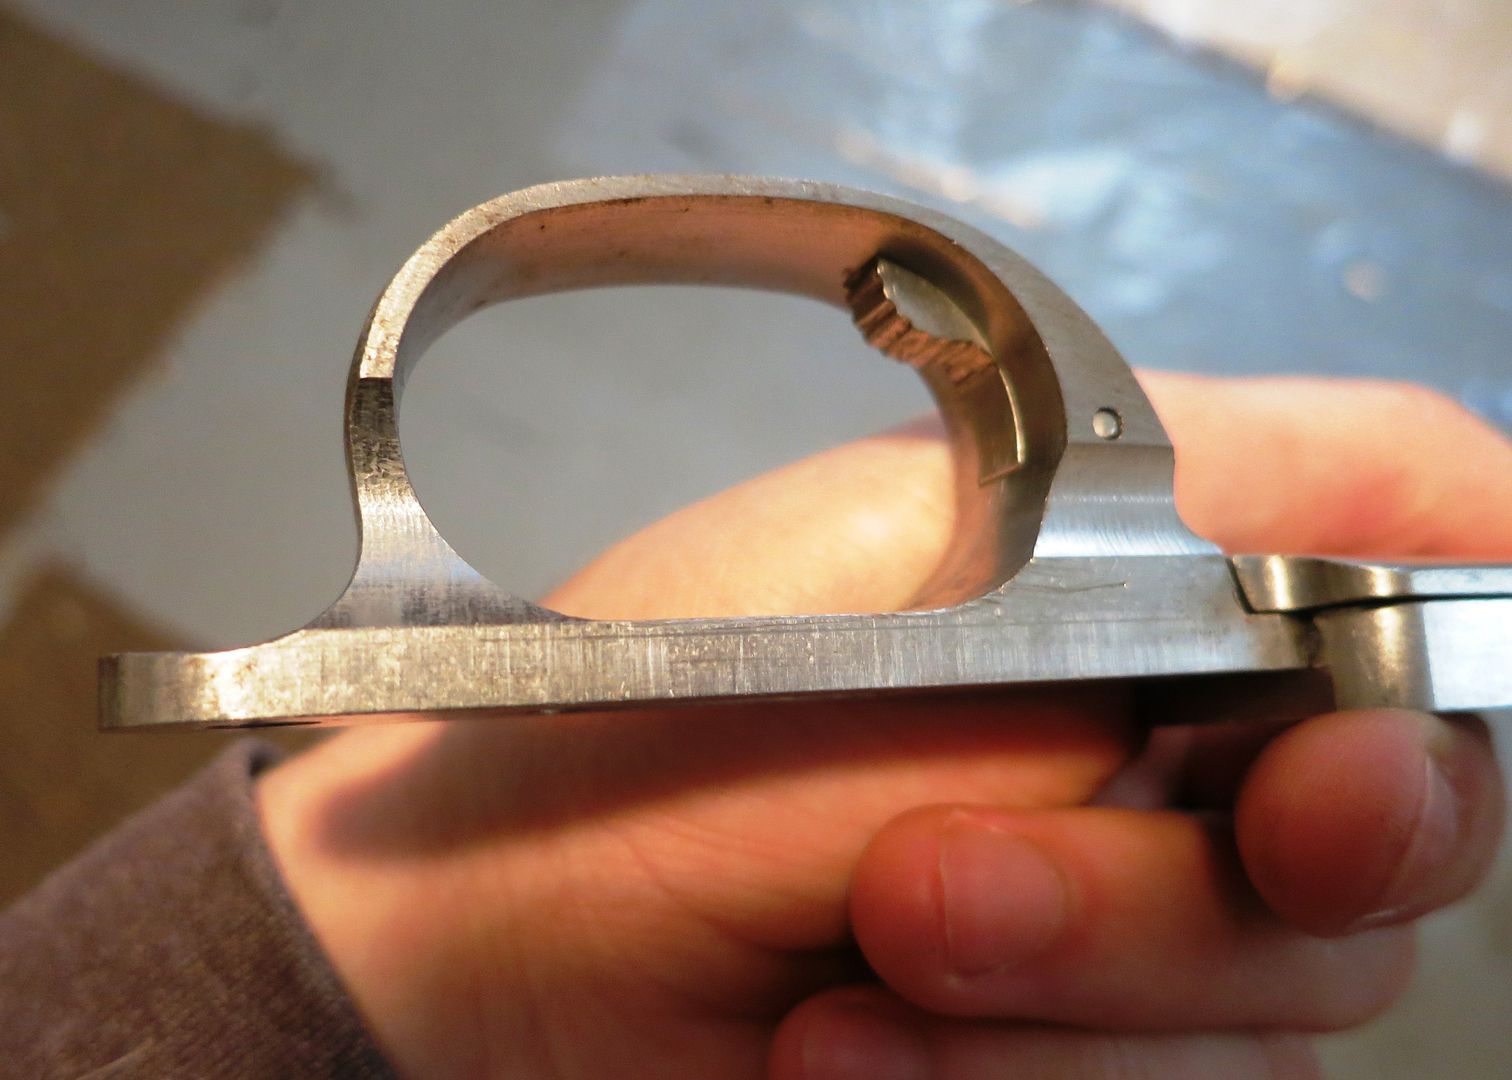 After some filing: 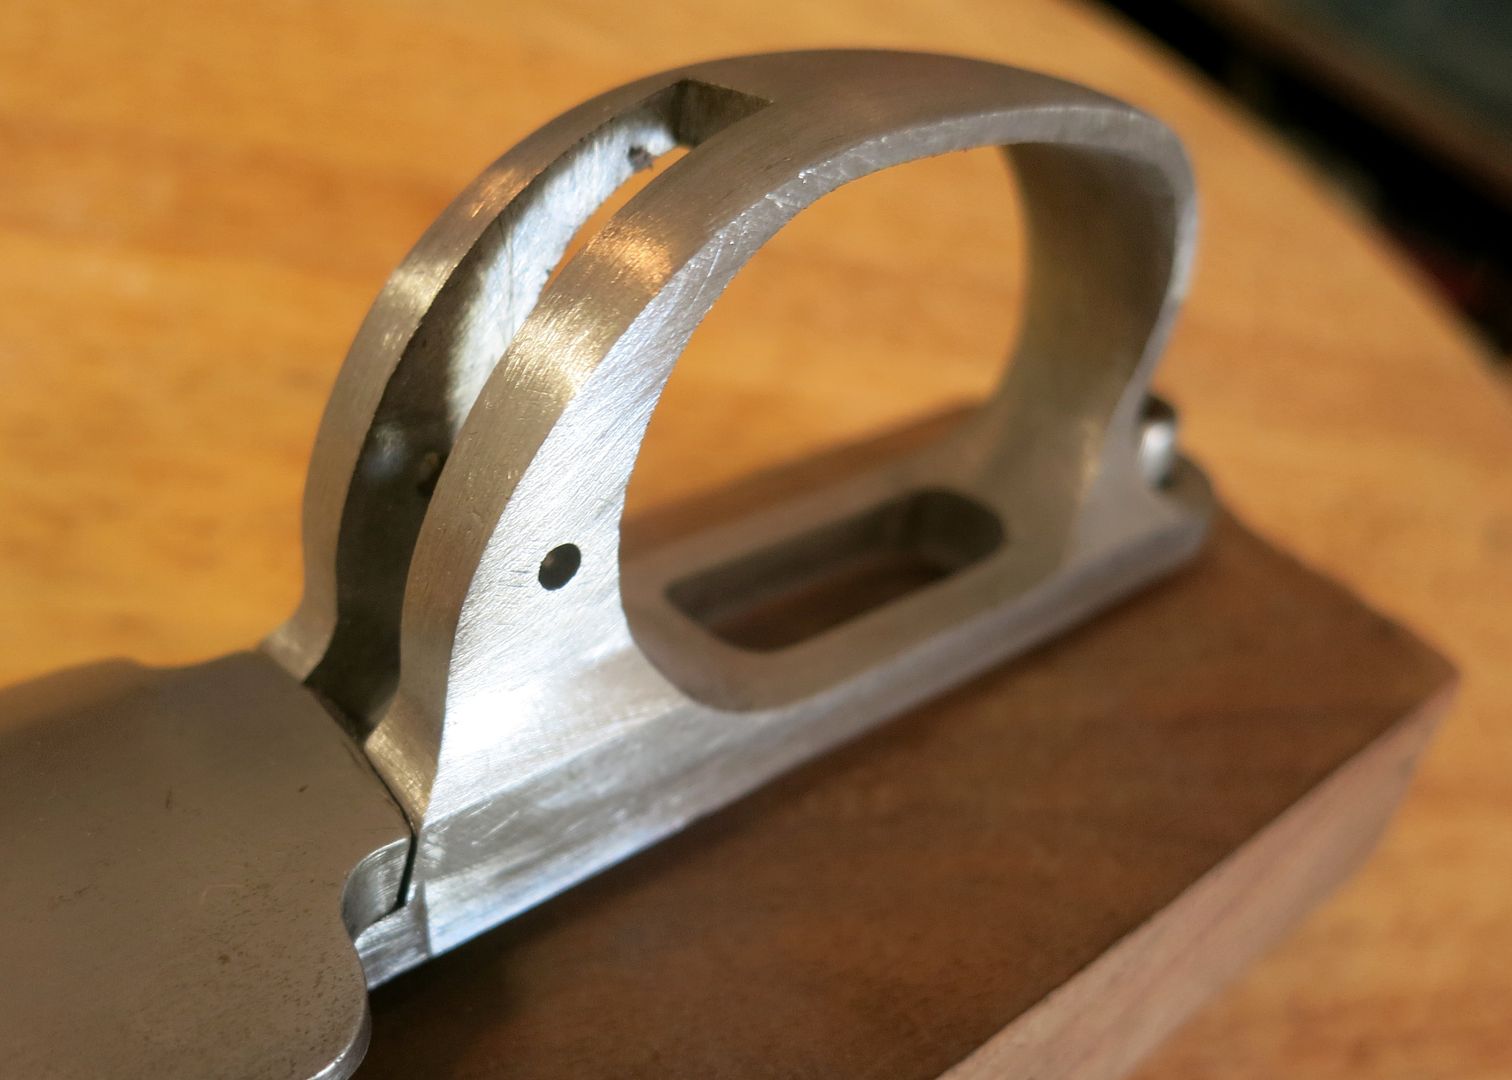 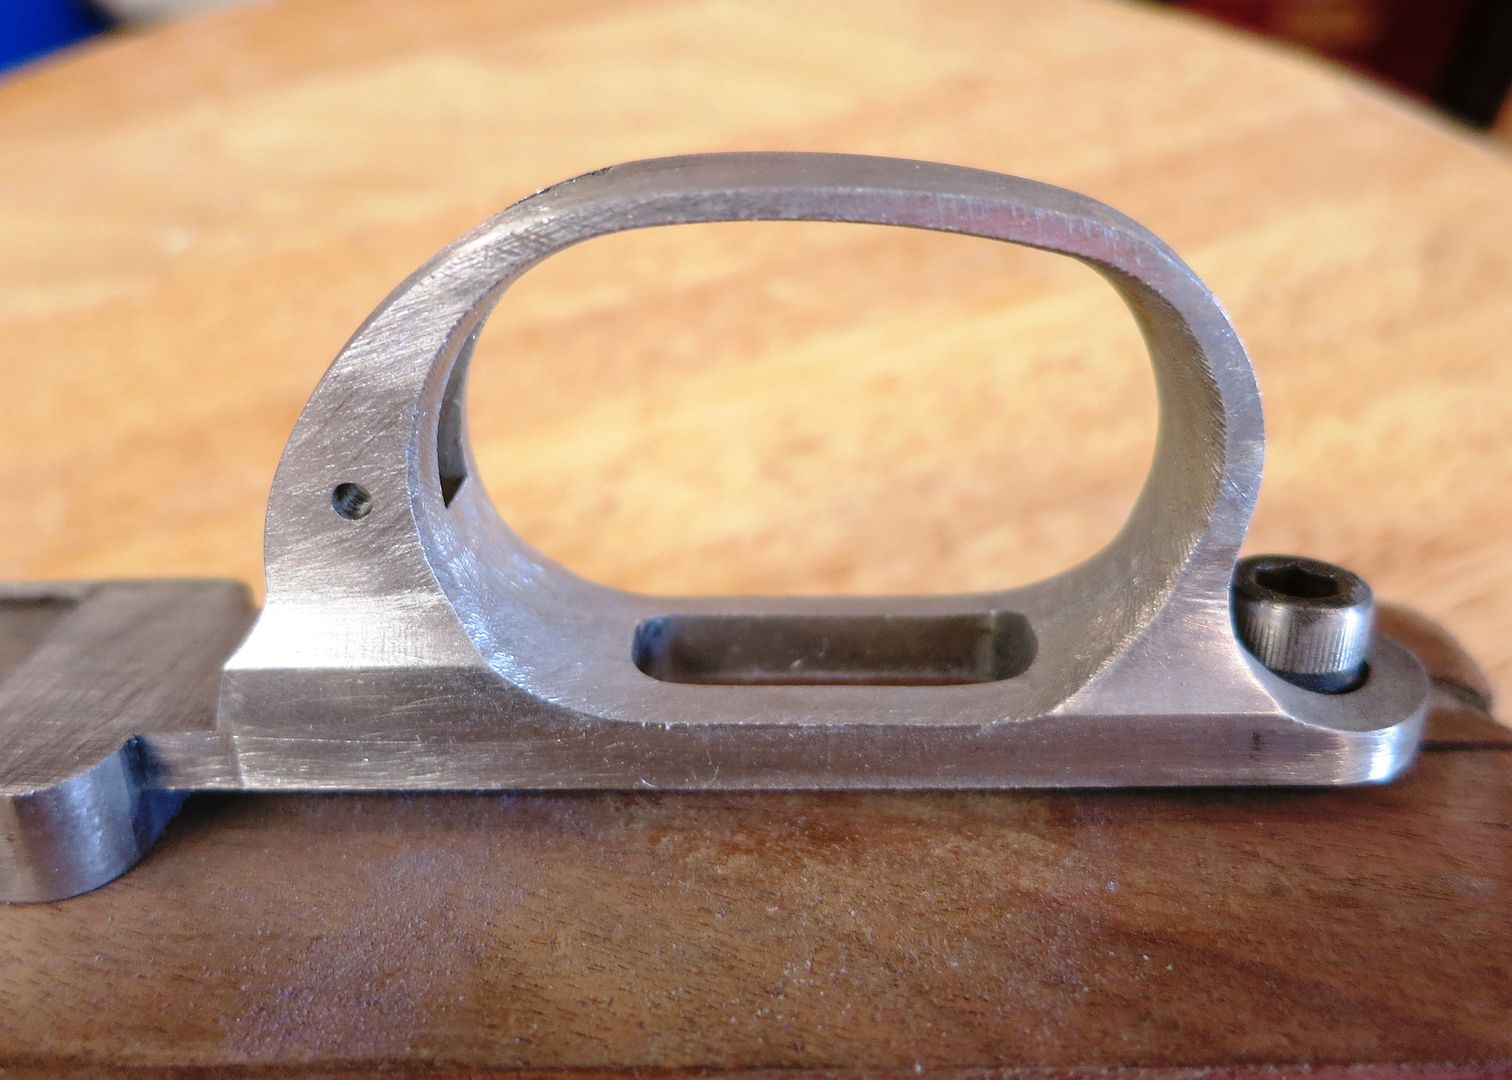 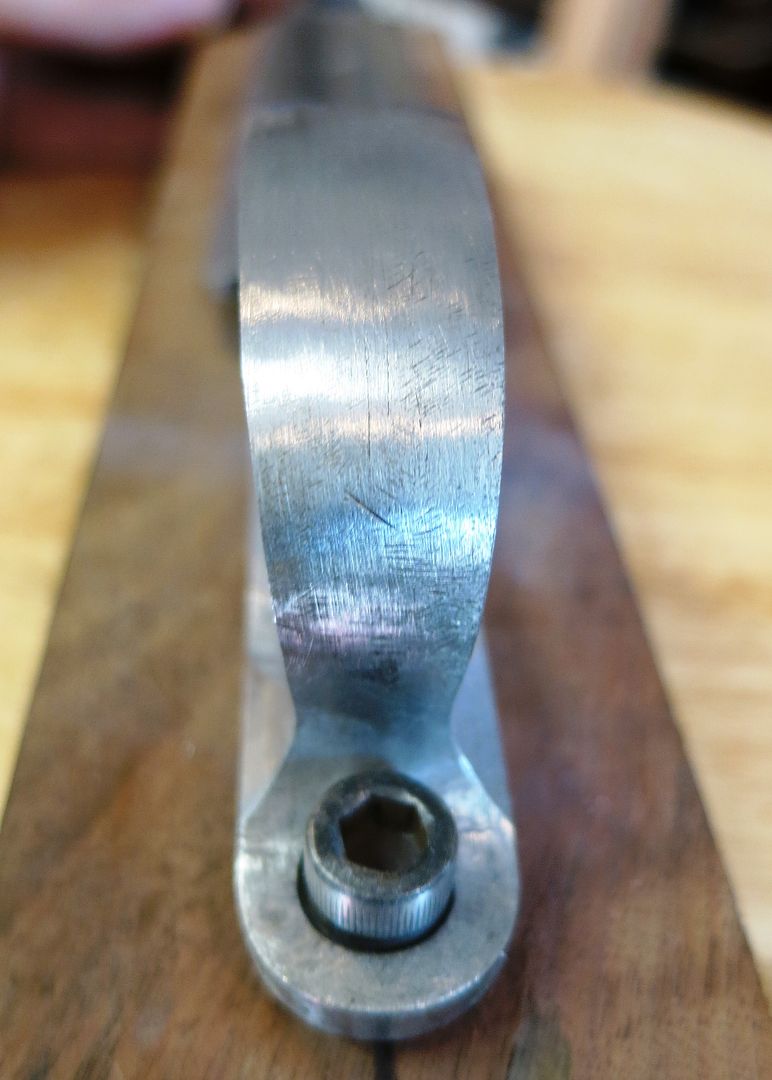 Rough but way better. Then after polishing to 320 grit and prepped for bluing: 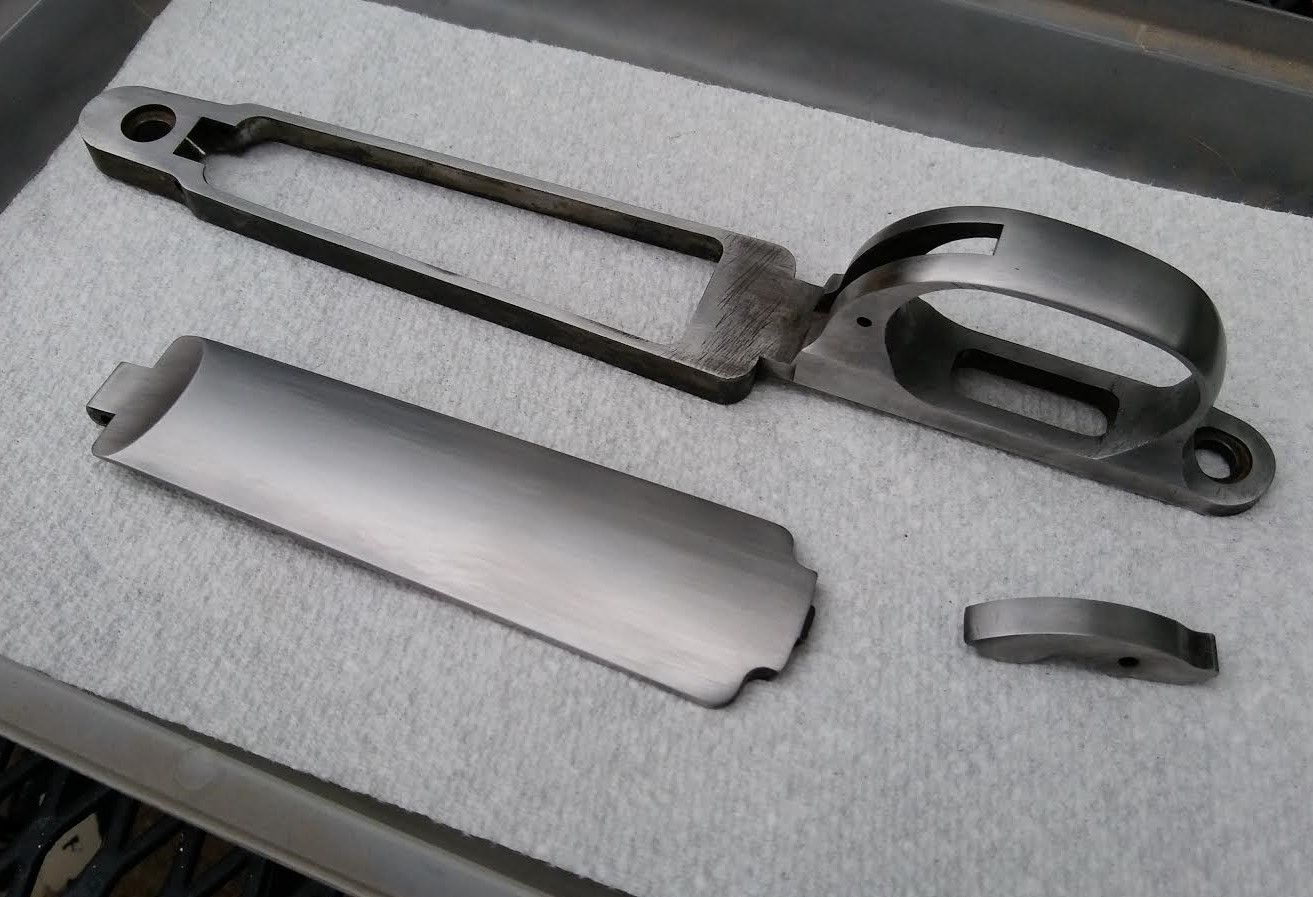 After 6-7 rust bluing cycles: 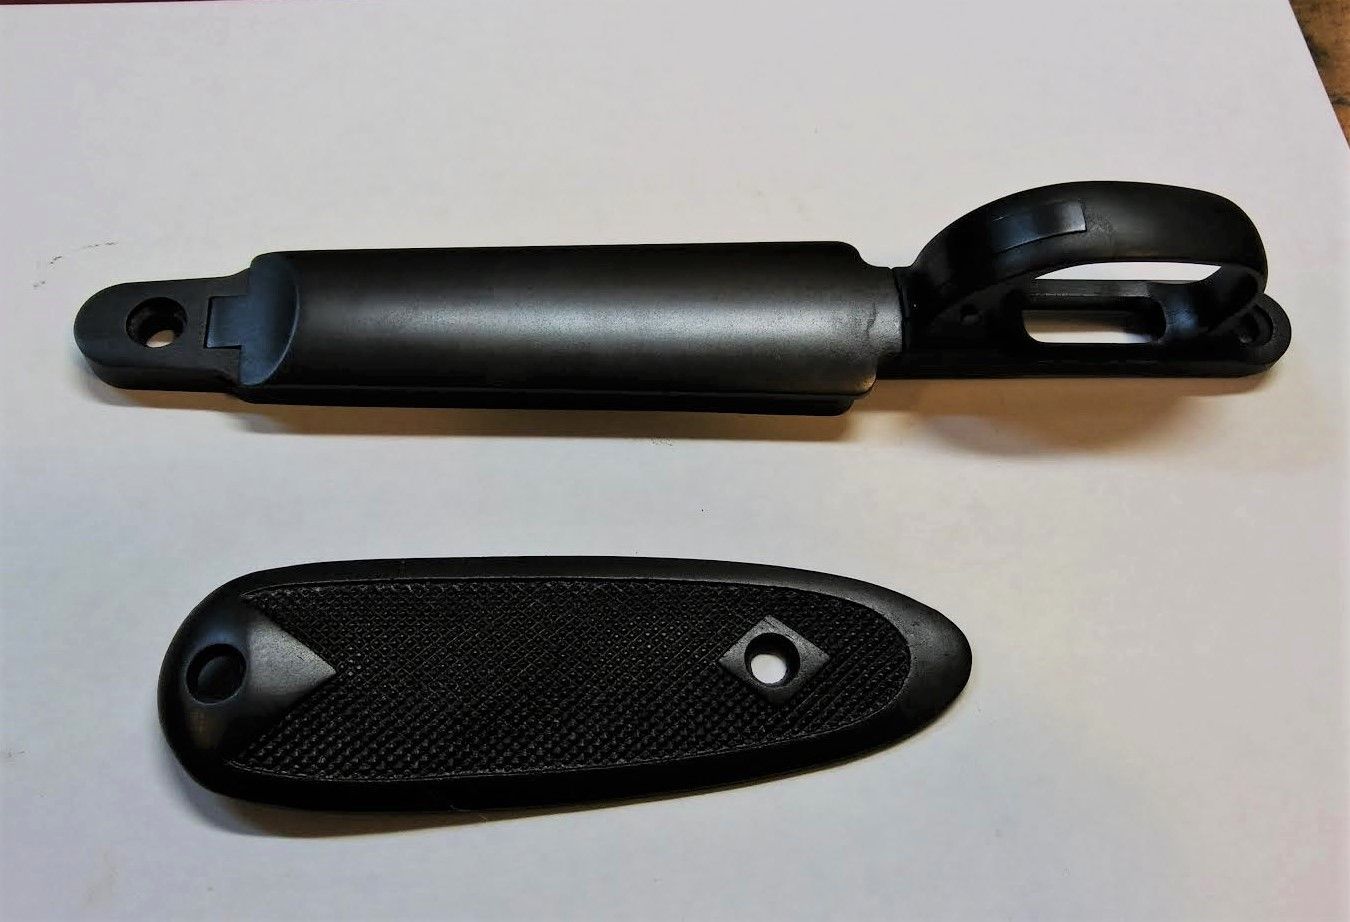 Here's the Brownell grip cap, you can tell I didn't completely polish it out beforehand. 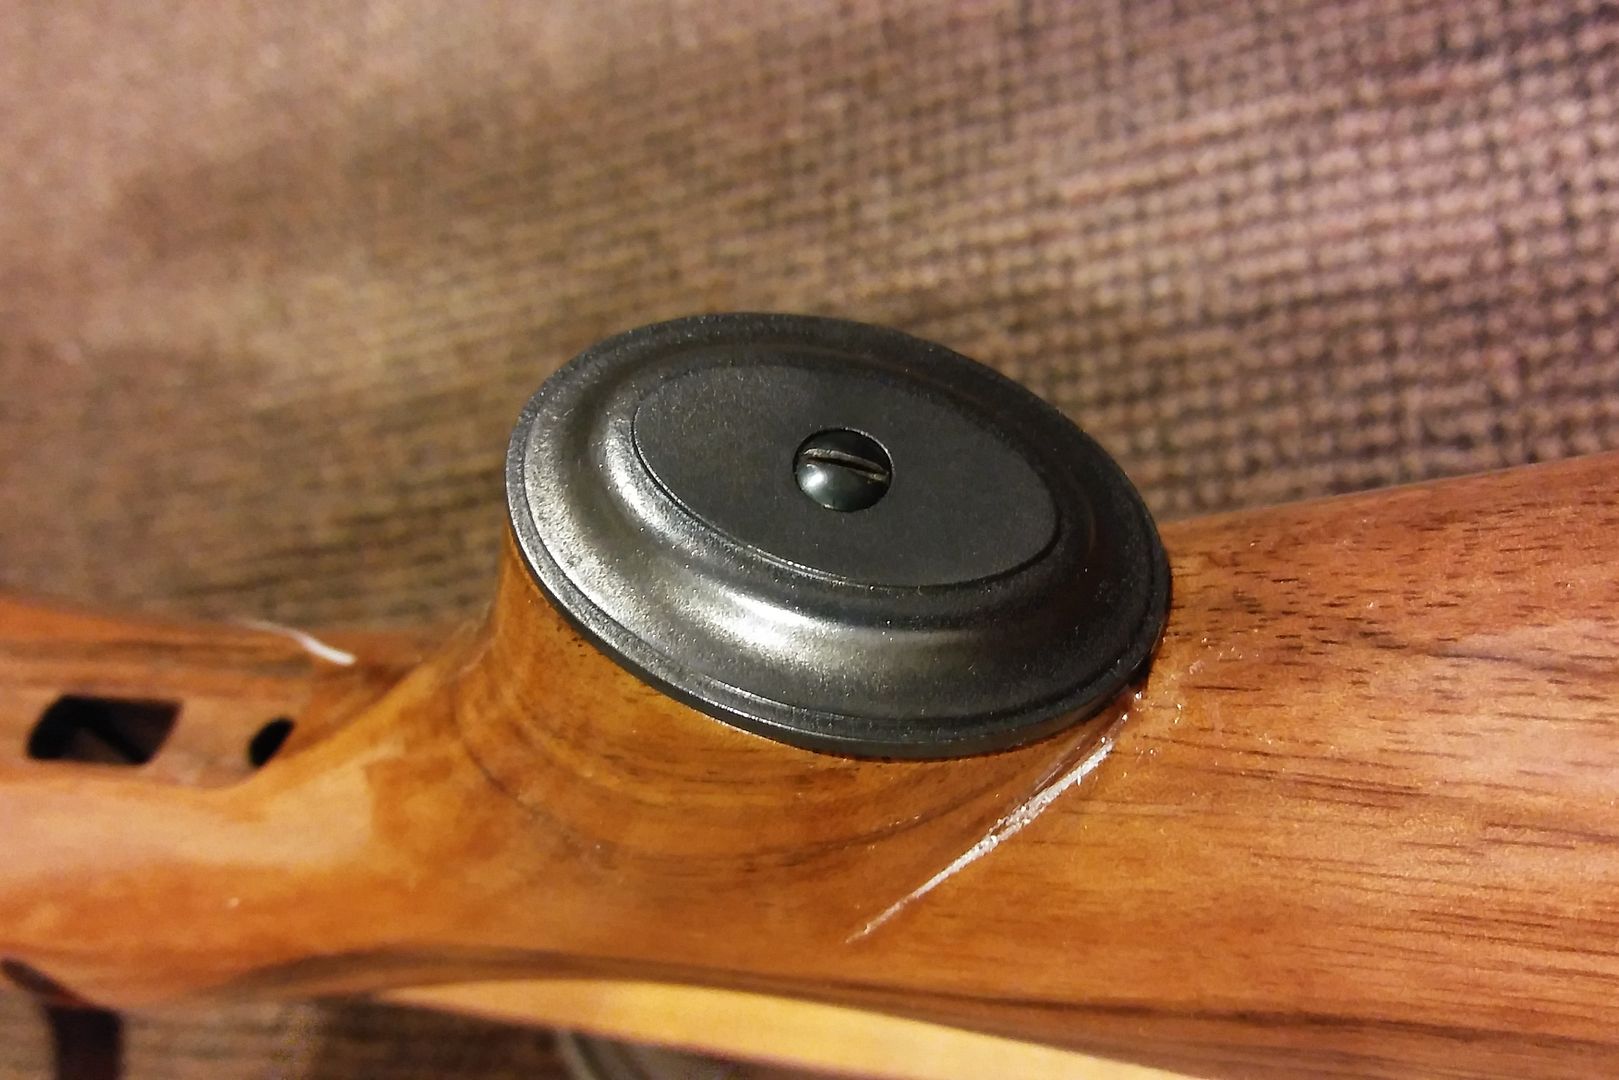 I used Brownell's solution and a hand-held carding brush, the pieces aren't perfect but frankly they look and feel better than expected and I think I know what I need to do differently next time and in the future for better results. I would have done more bluing cycles but there are already some issues that will require re-polishing and starting over, so I will just hunt with it as-is and fix the pieces up over the winter. "If the women don't find you handsome, they should at least find you handy." | |||
|
| One of Us |
Now on to completing the stock with 24 LPI borderless point patterns. 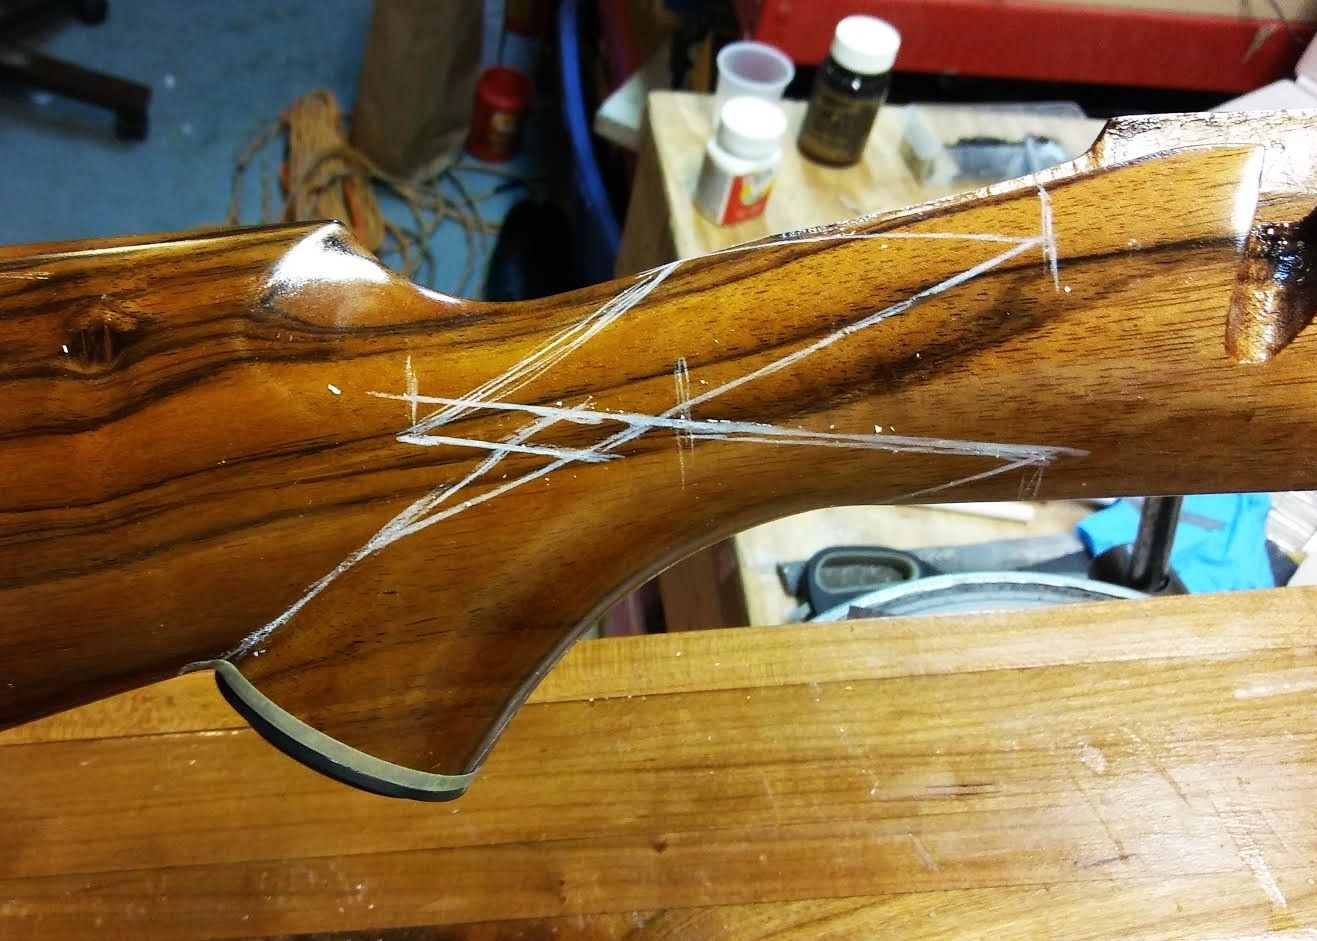 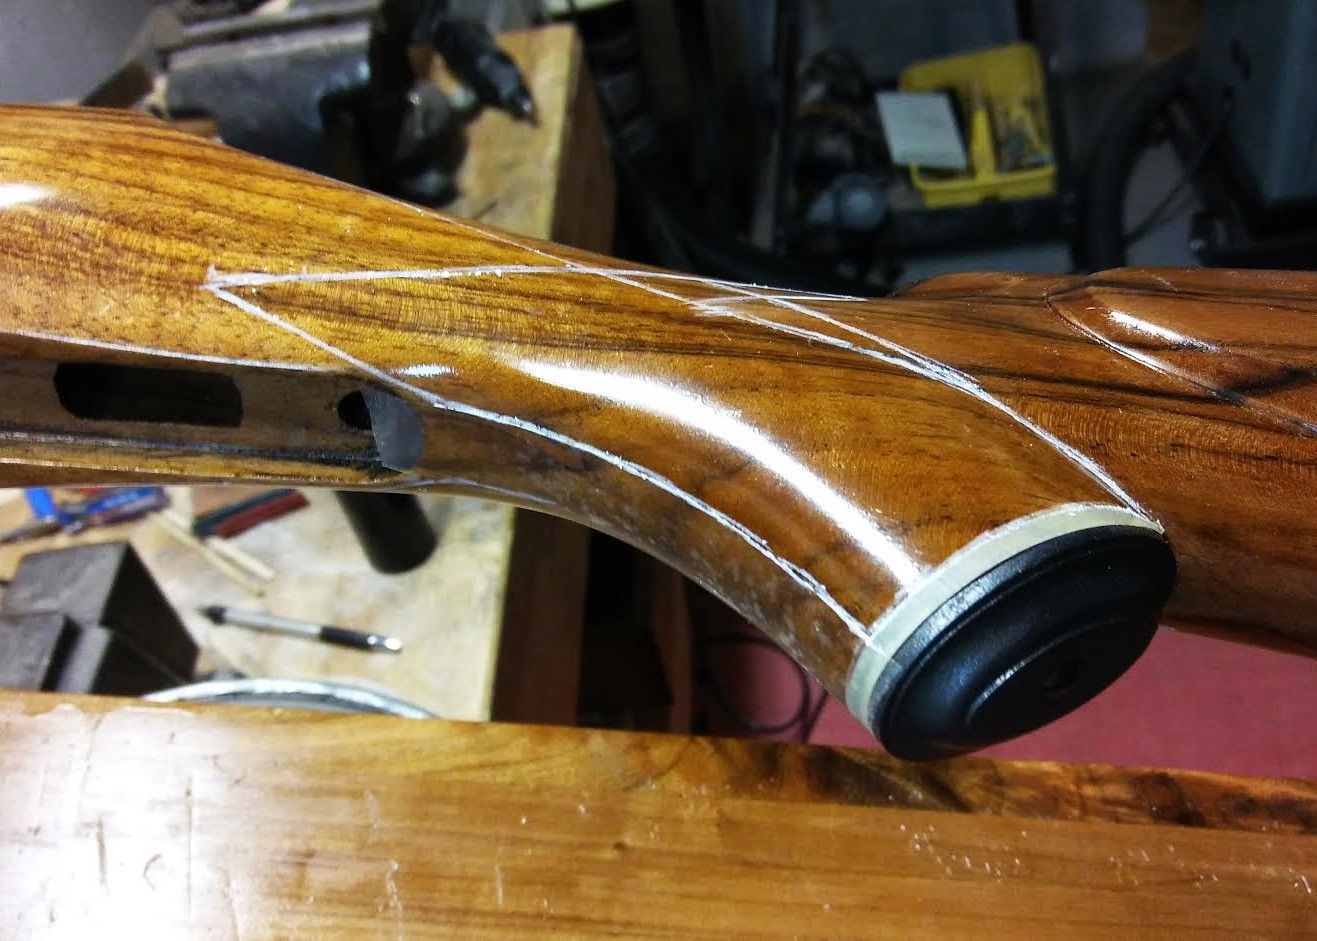 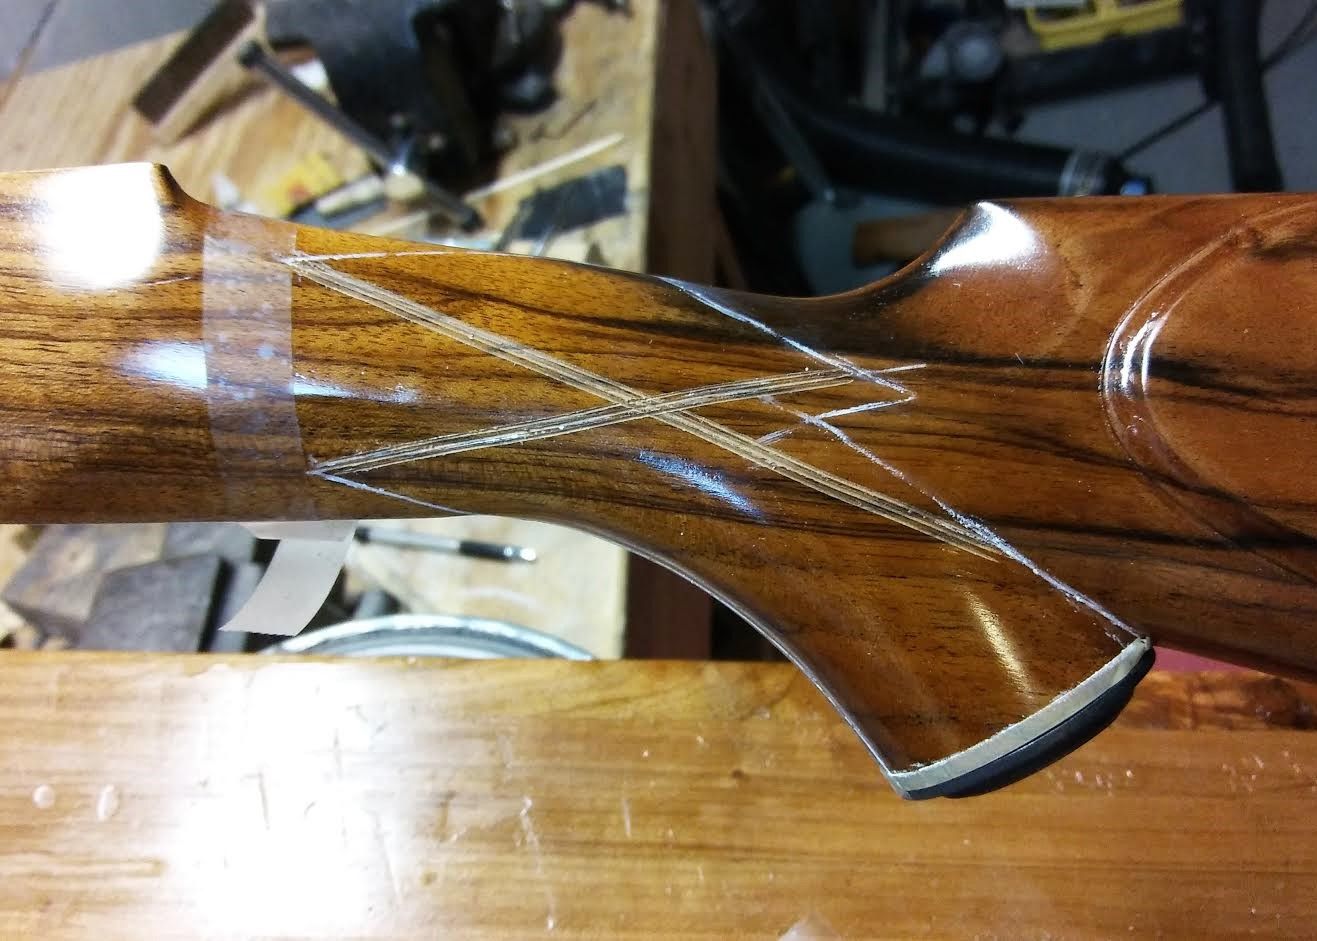  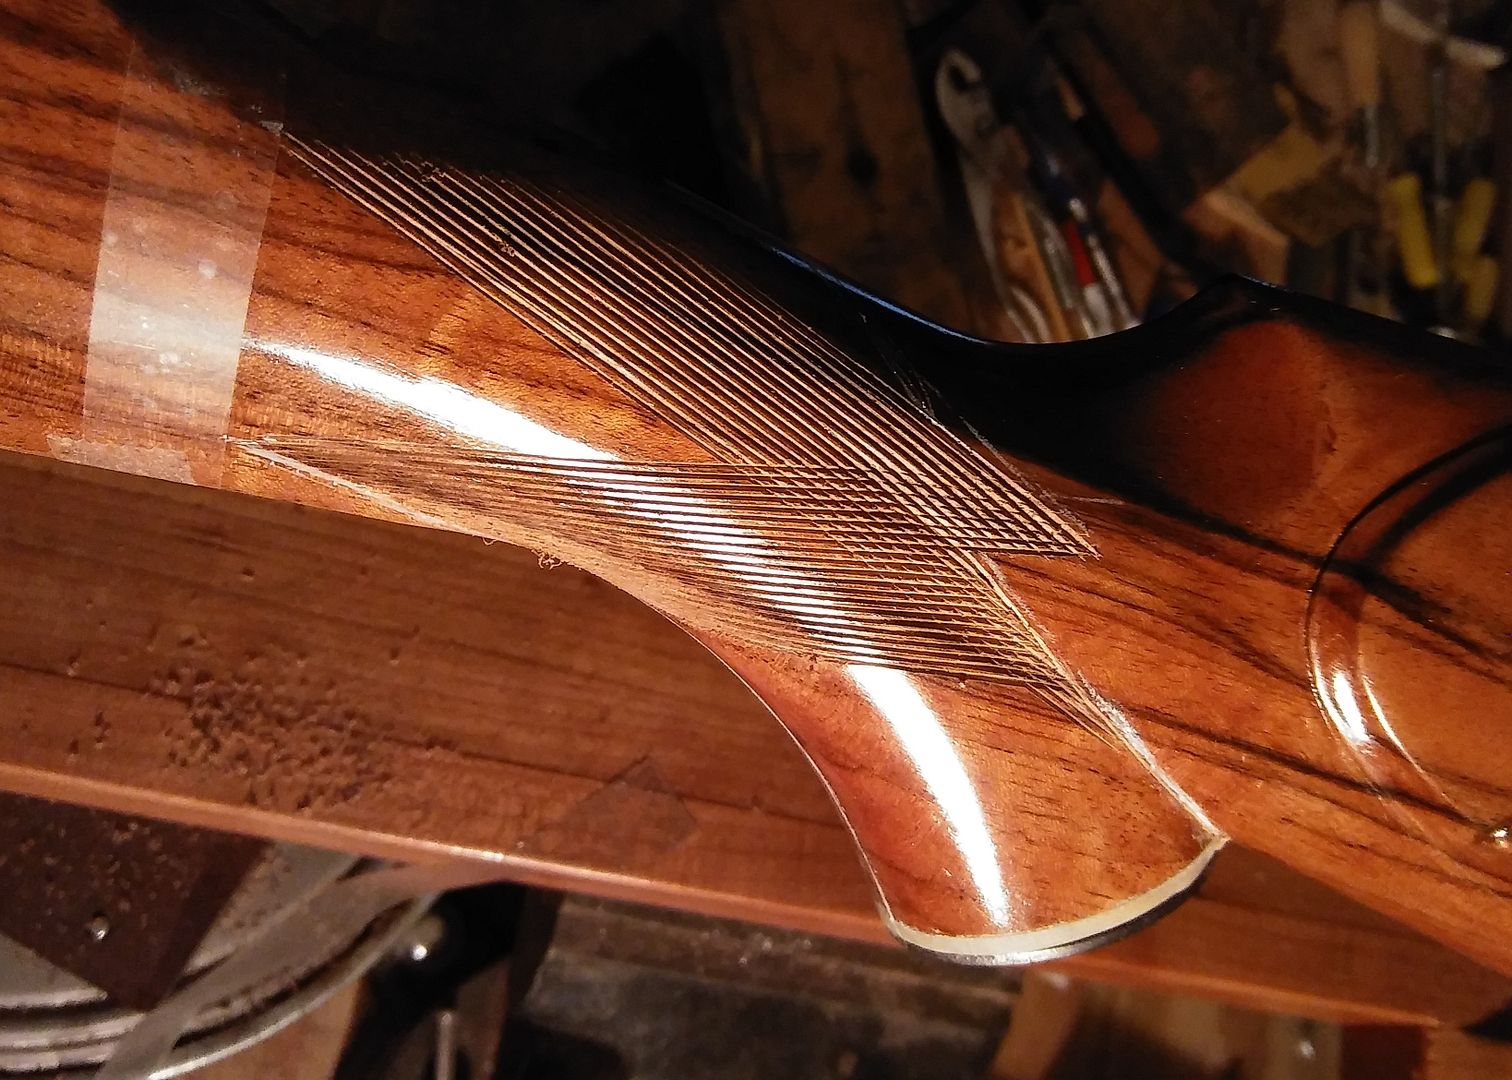 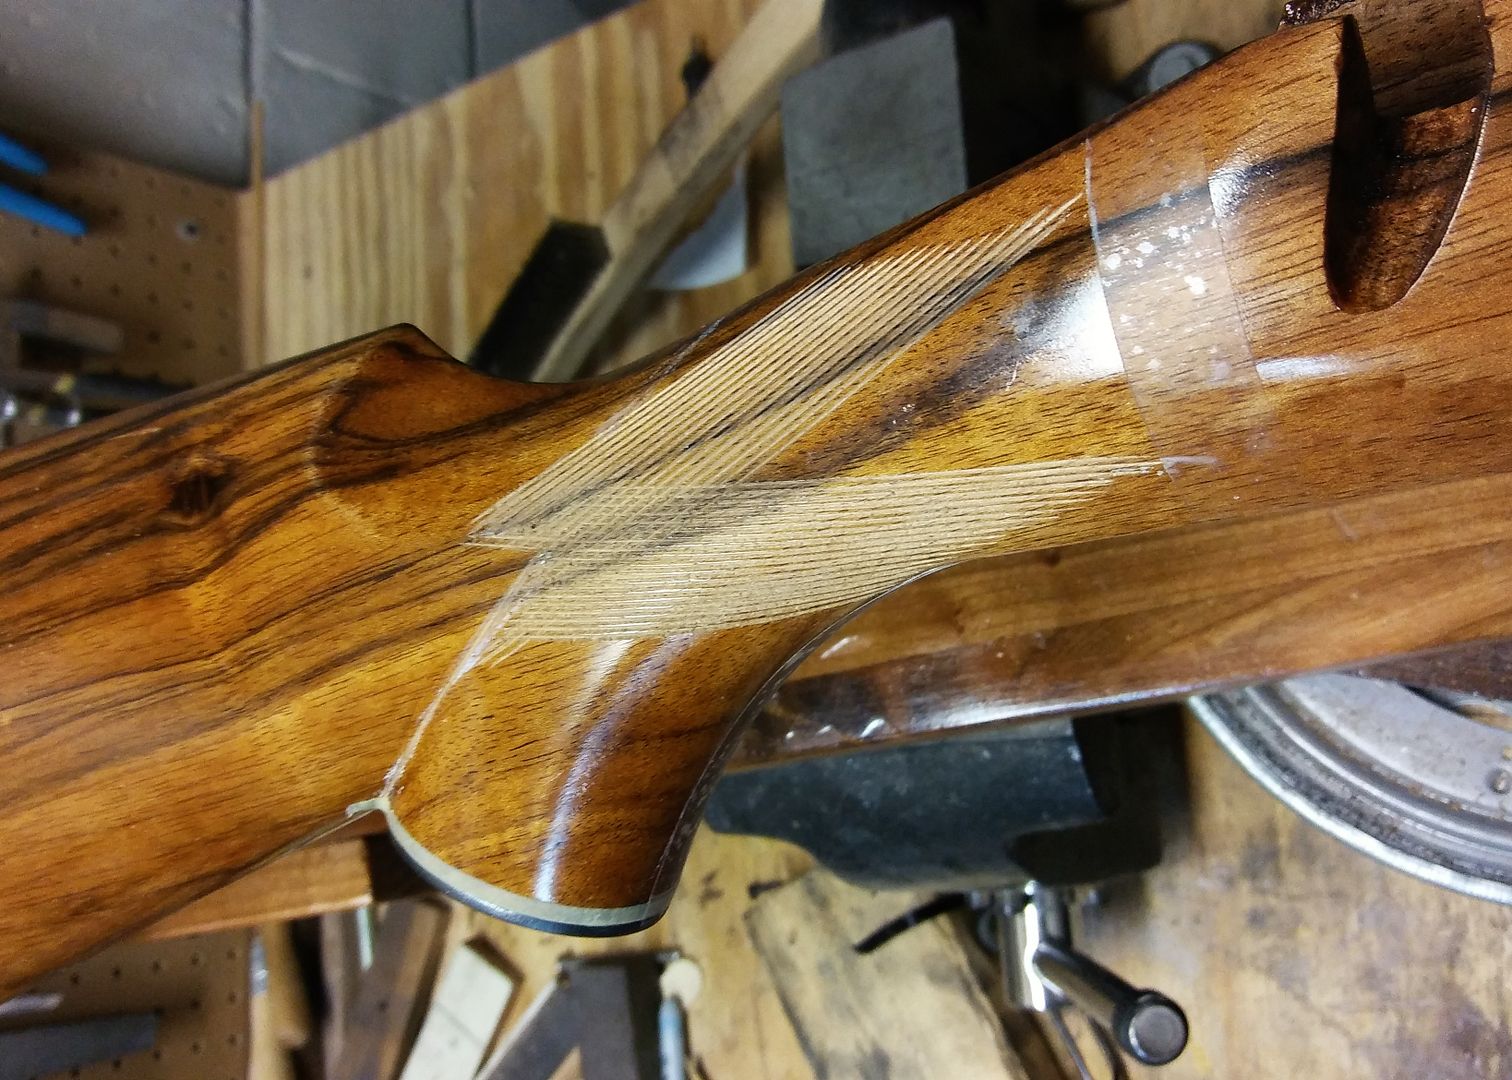  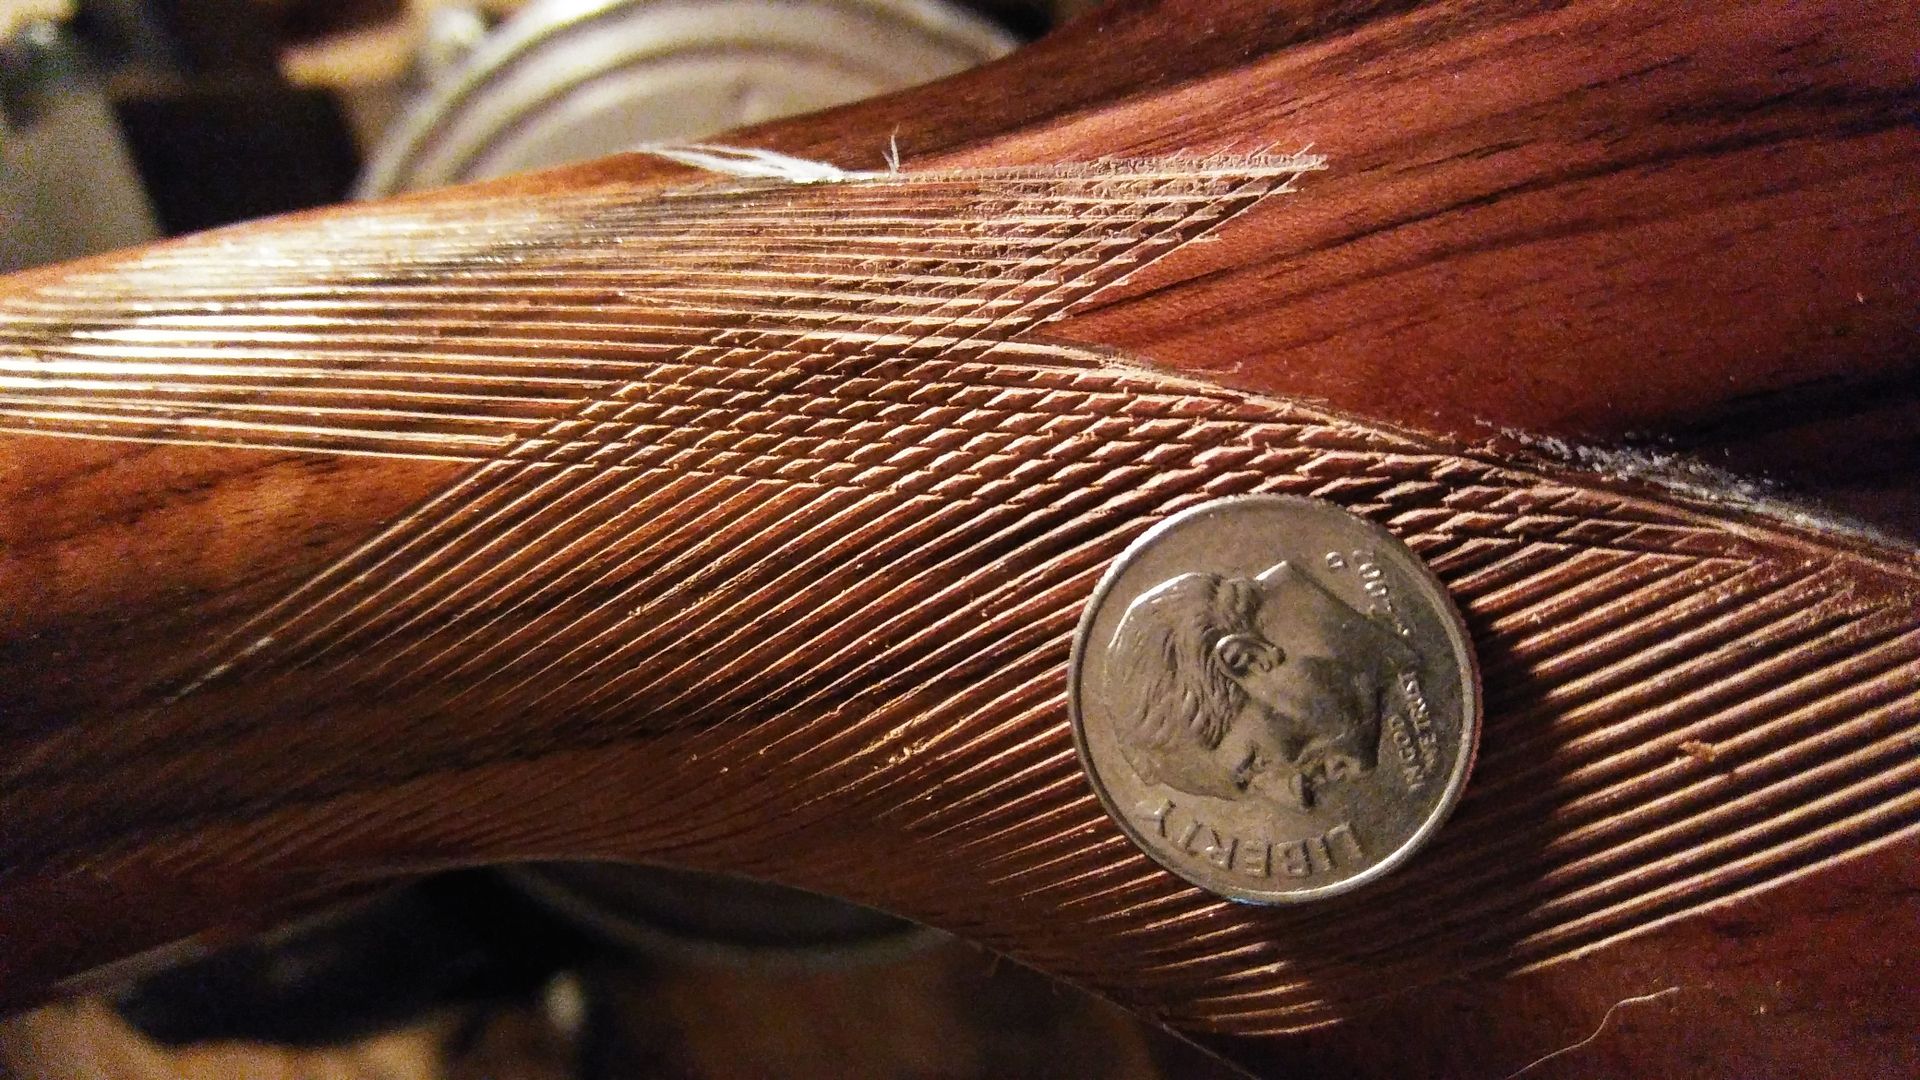 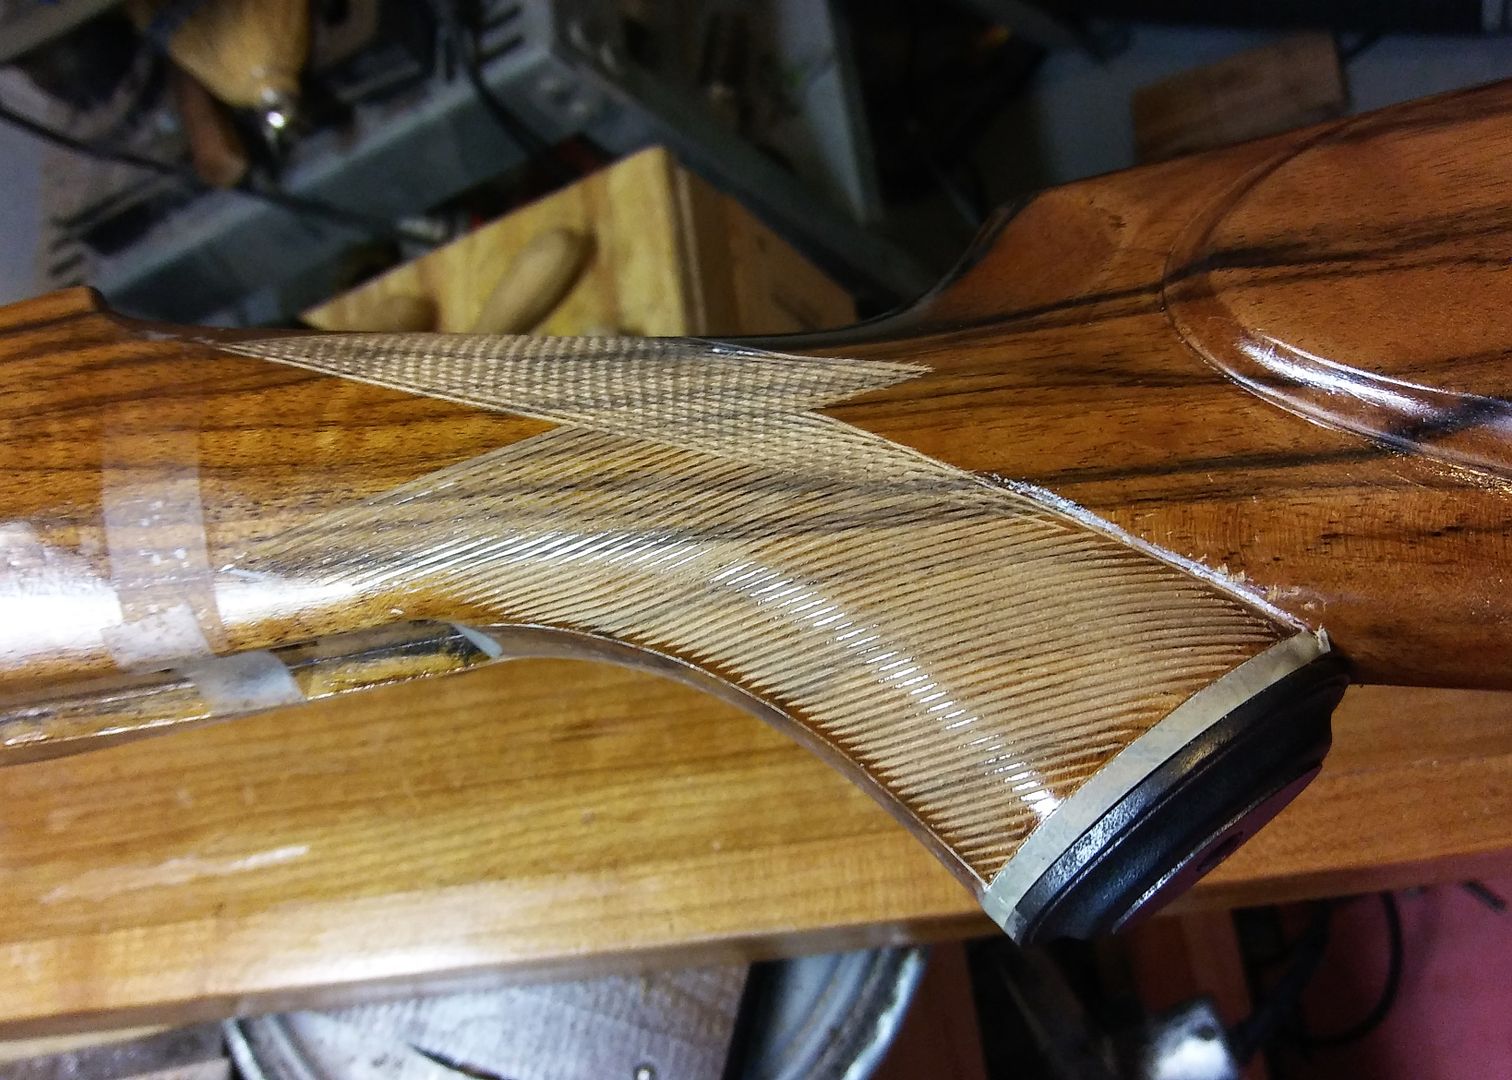 I did not intend for the grip pattern to wrap all the way over the top like this, I planned for the patterns to just kiss over the grip but screwed up drawing the rear border edge and cut the lines way too far while laying them out so I had to move the rear border back to accommodate for that- lesson learned. 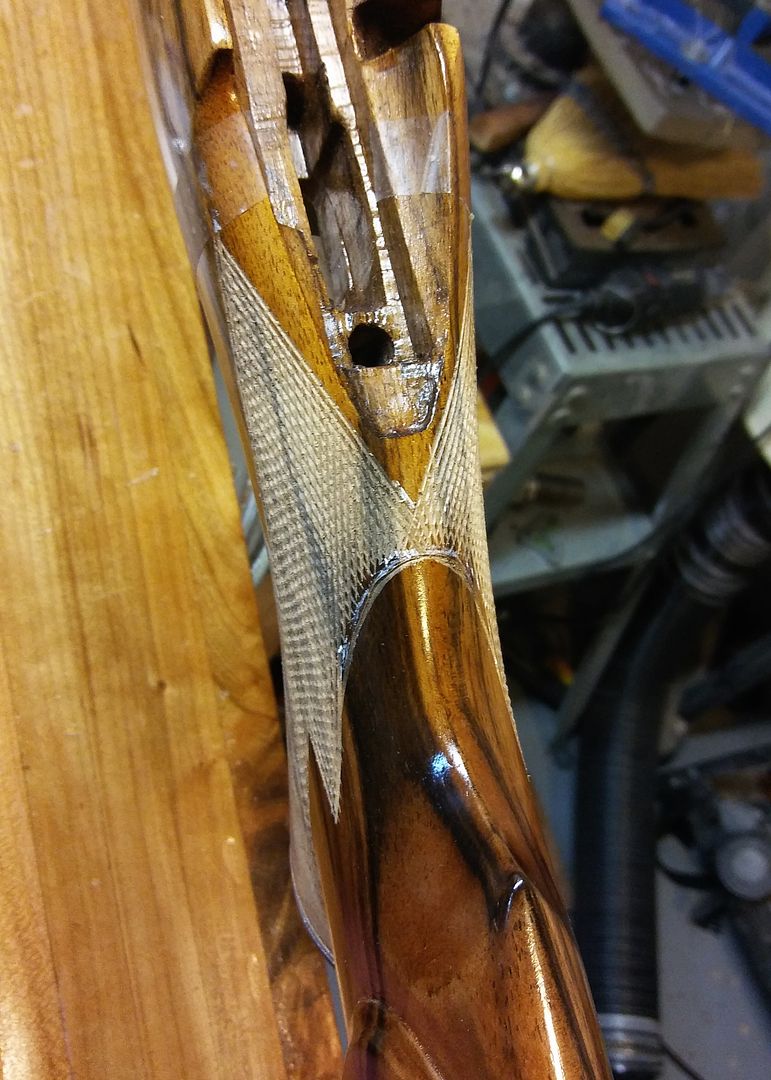 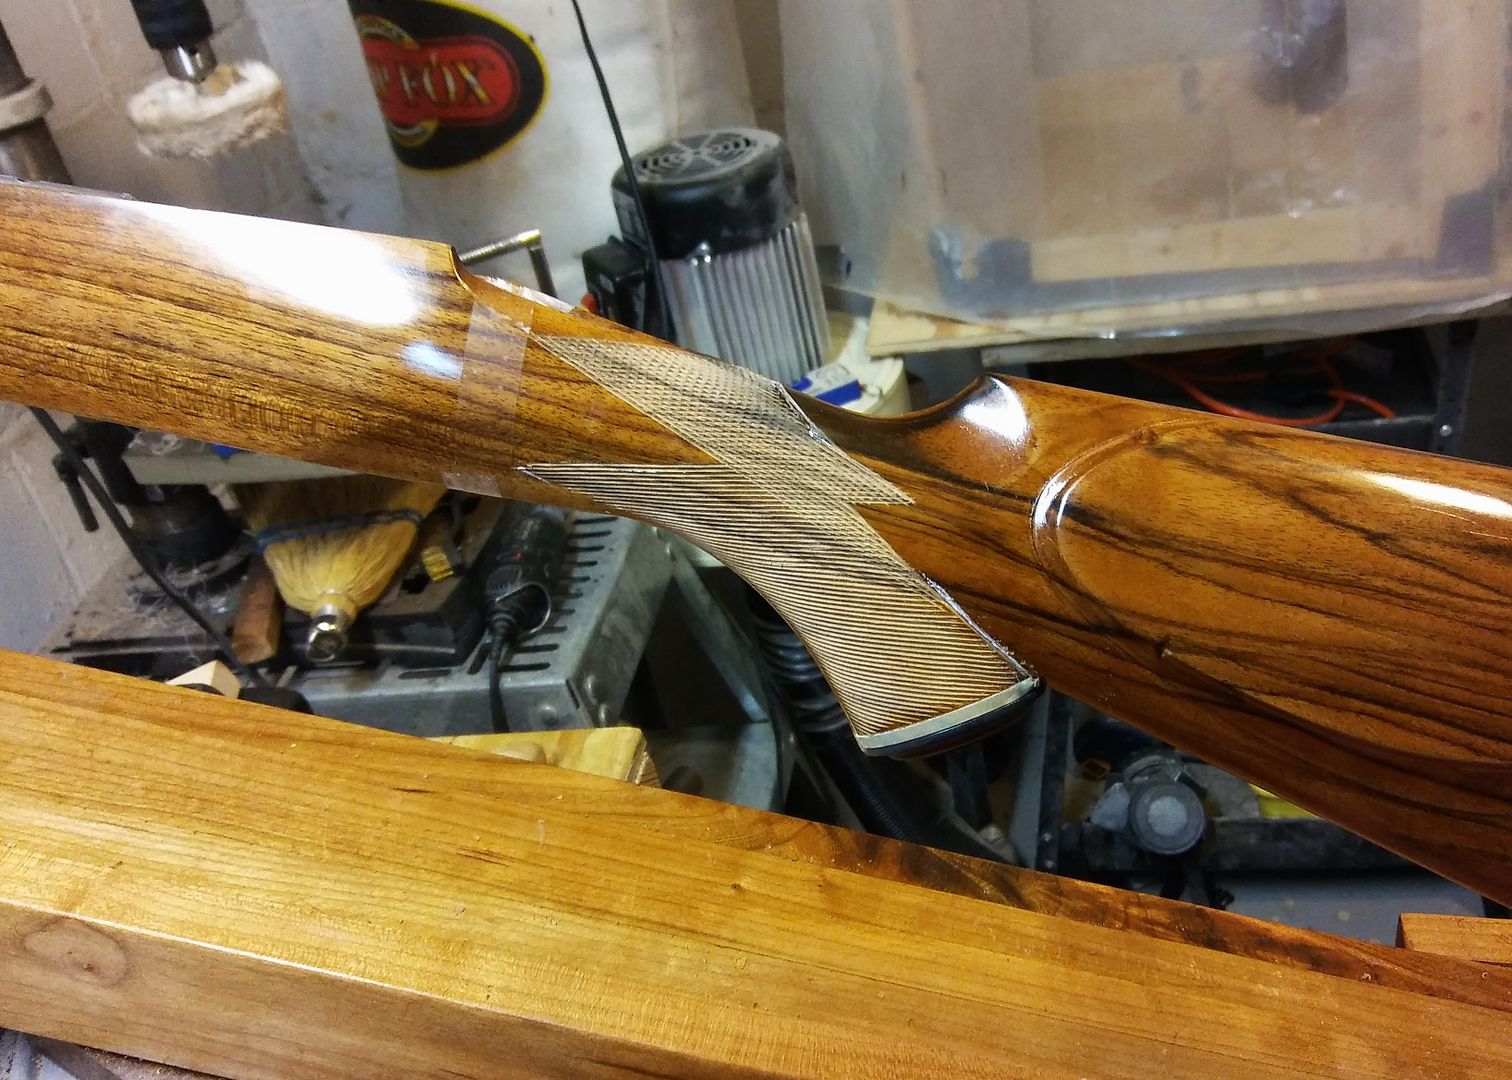 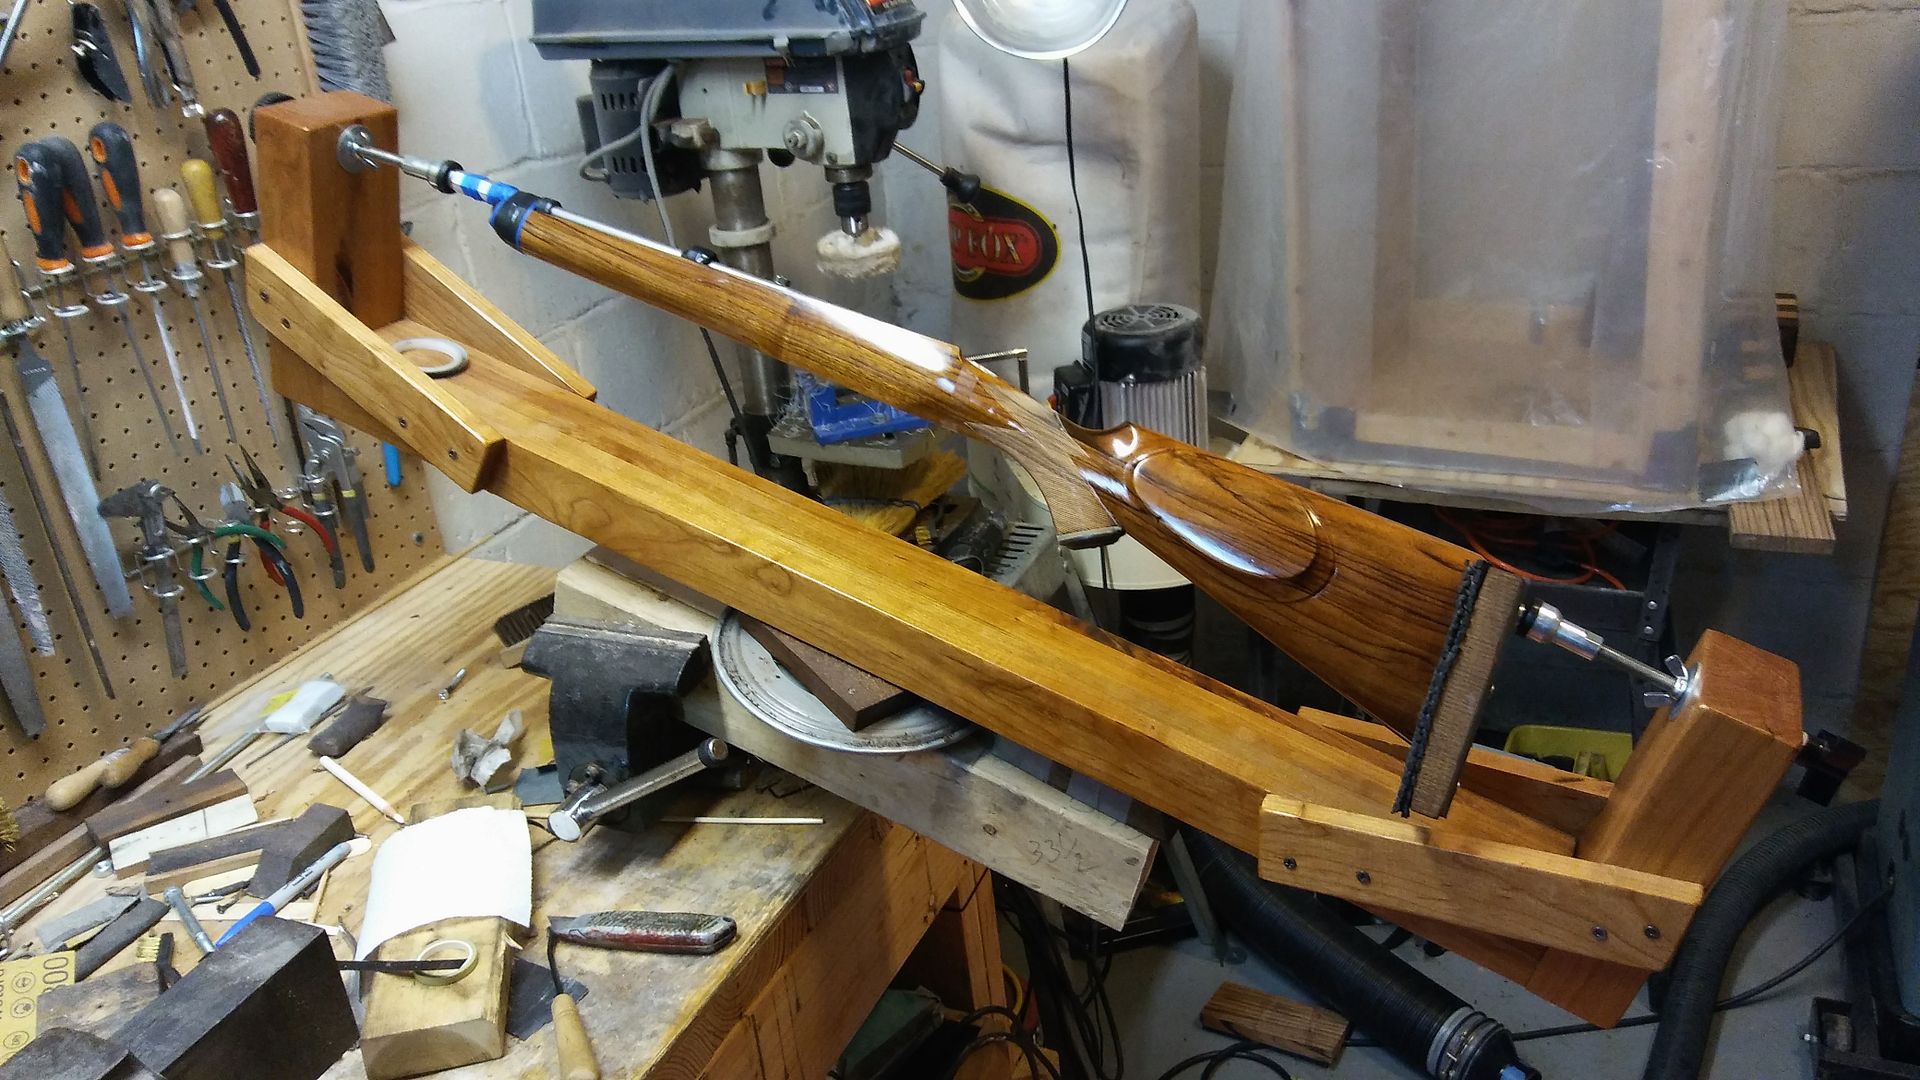 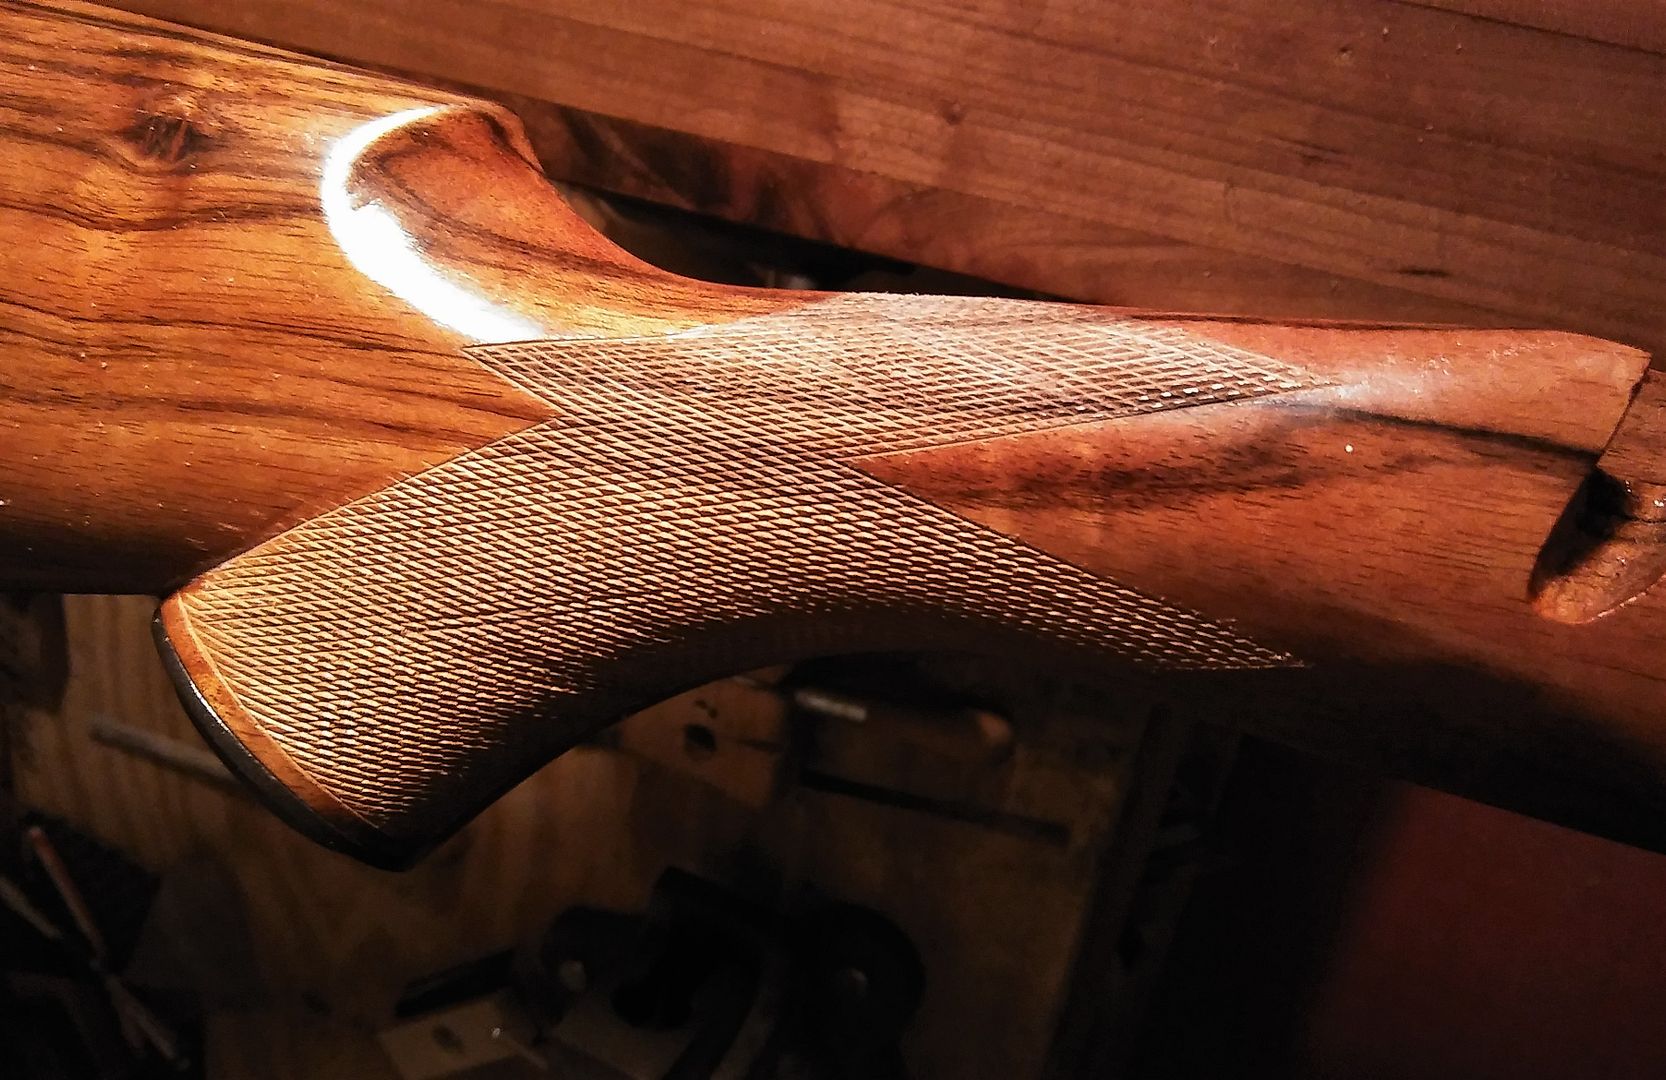 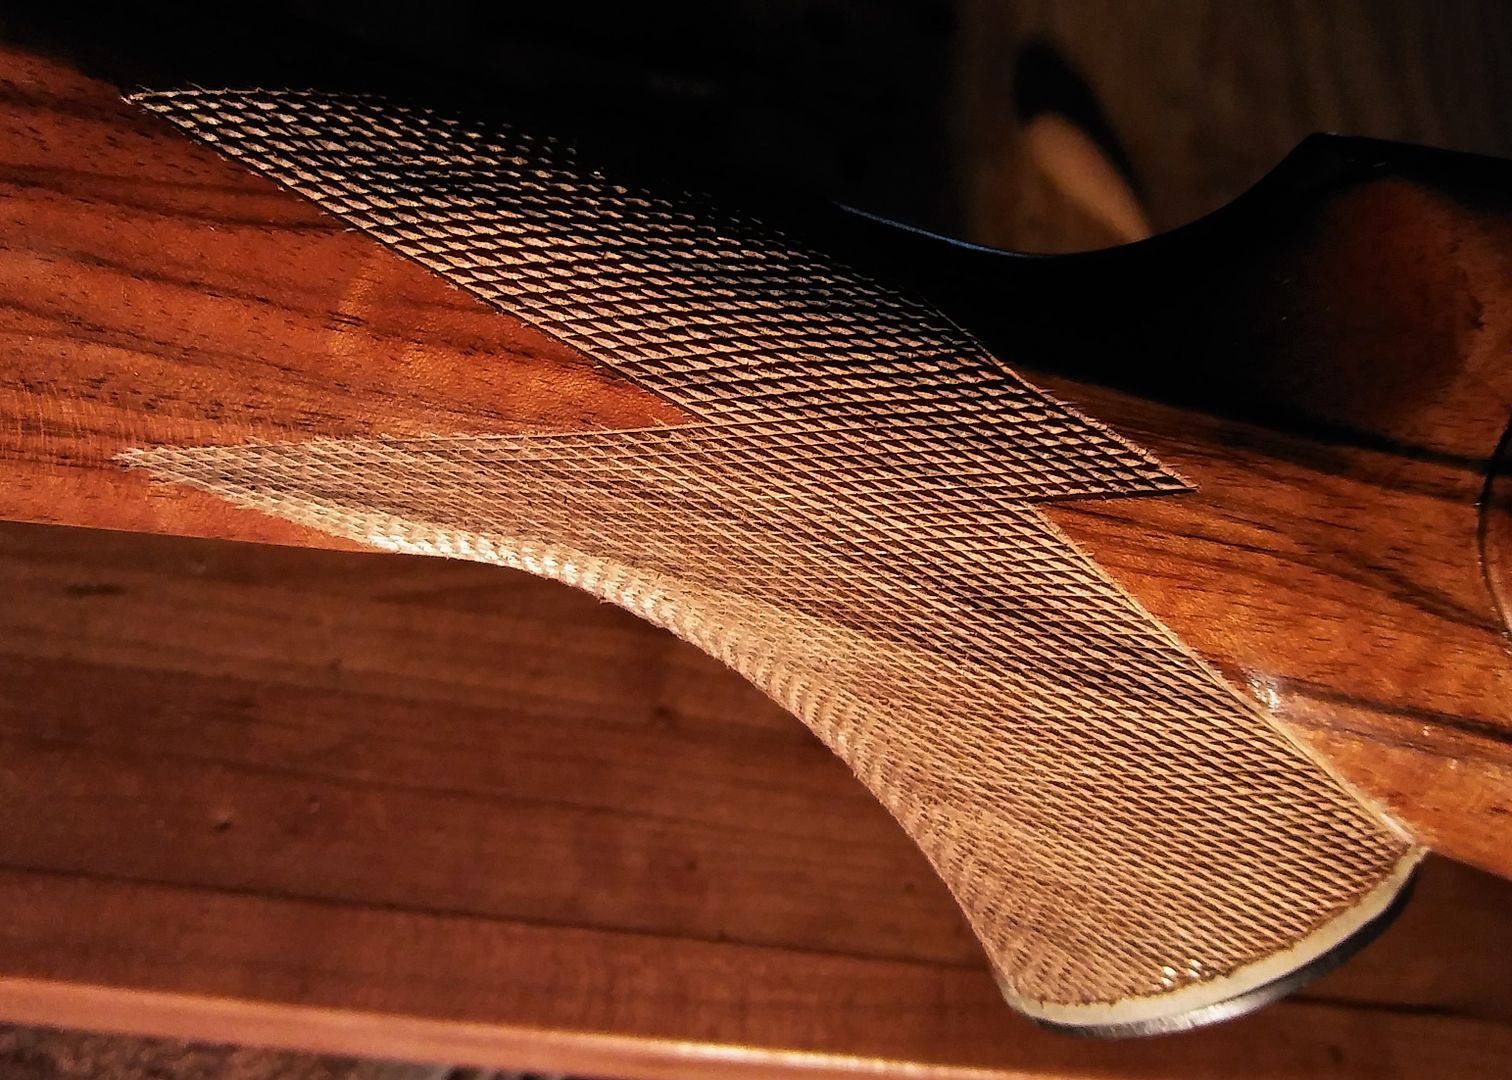 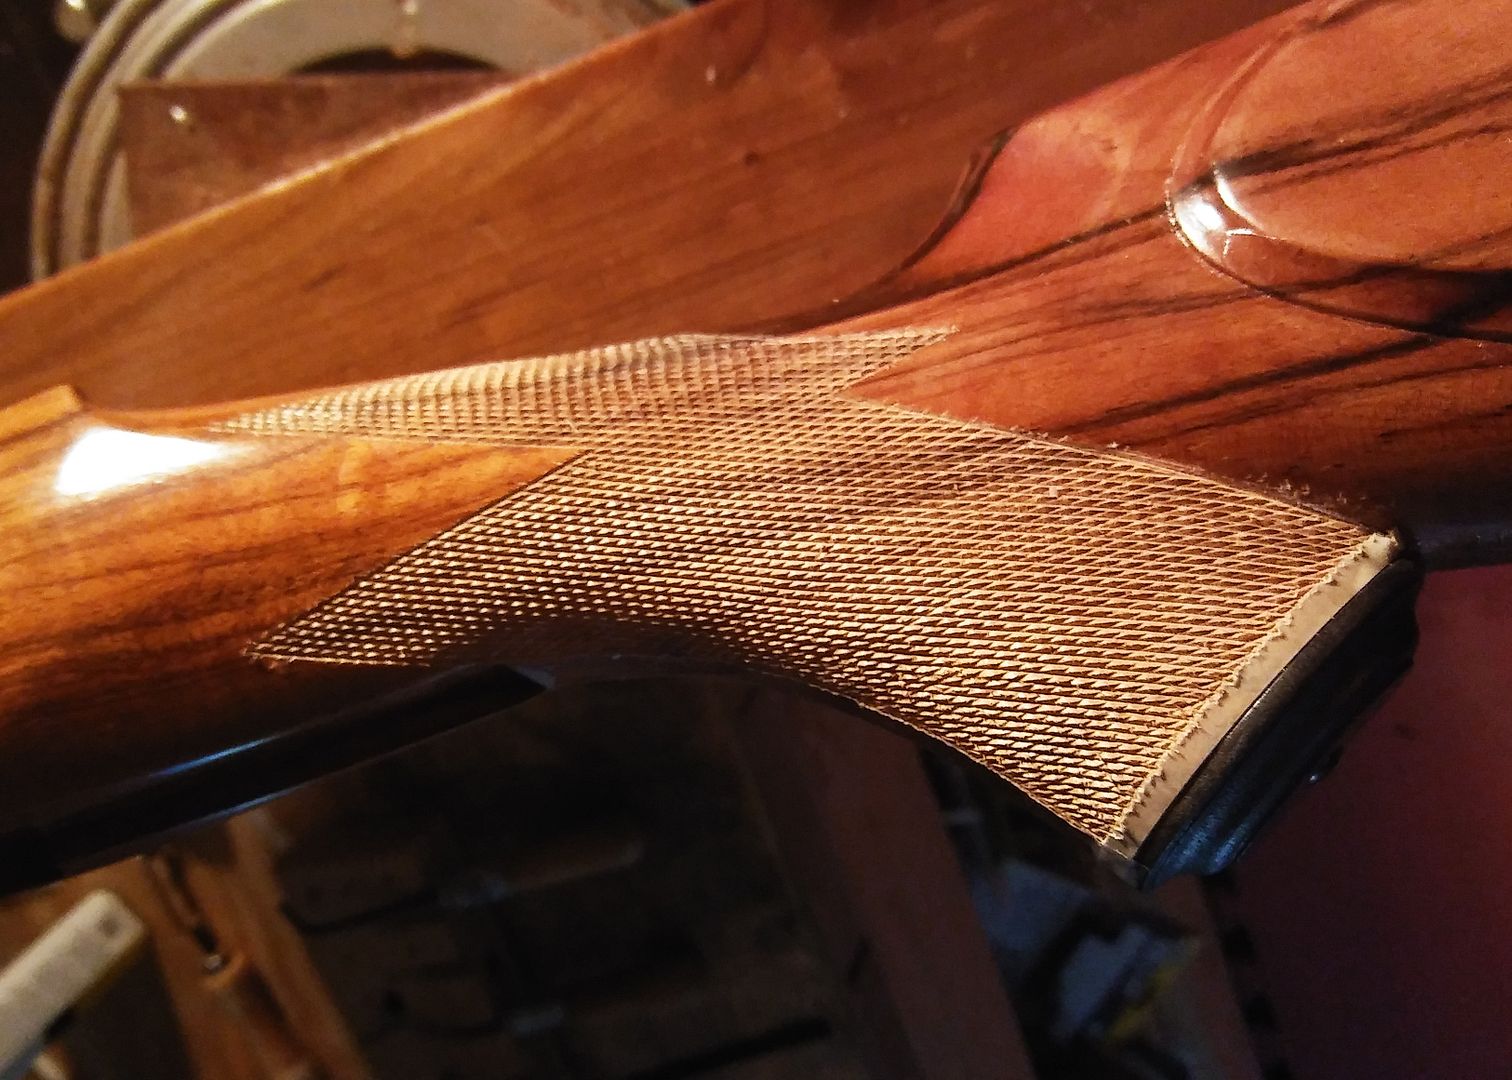 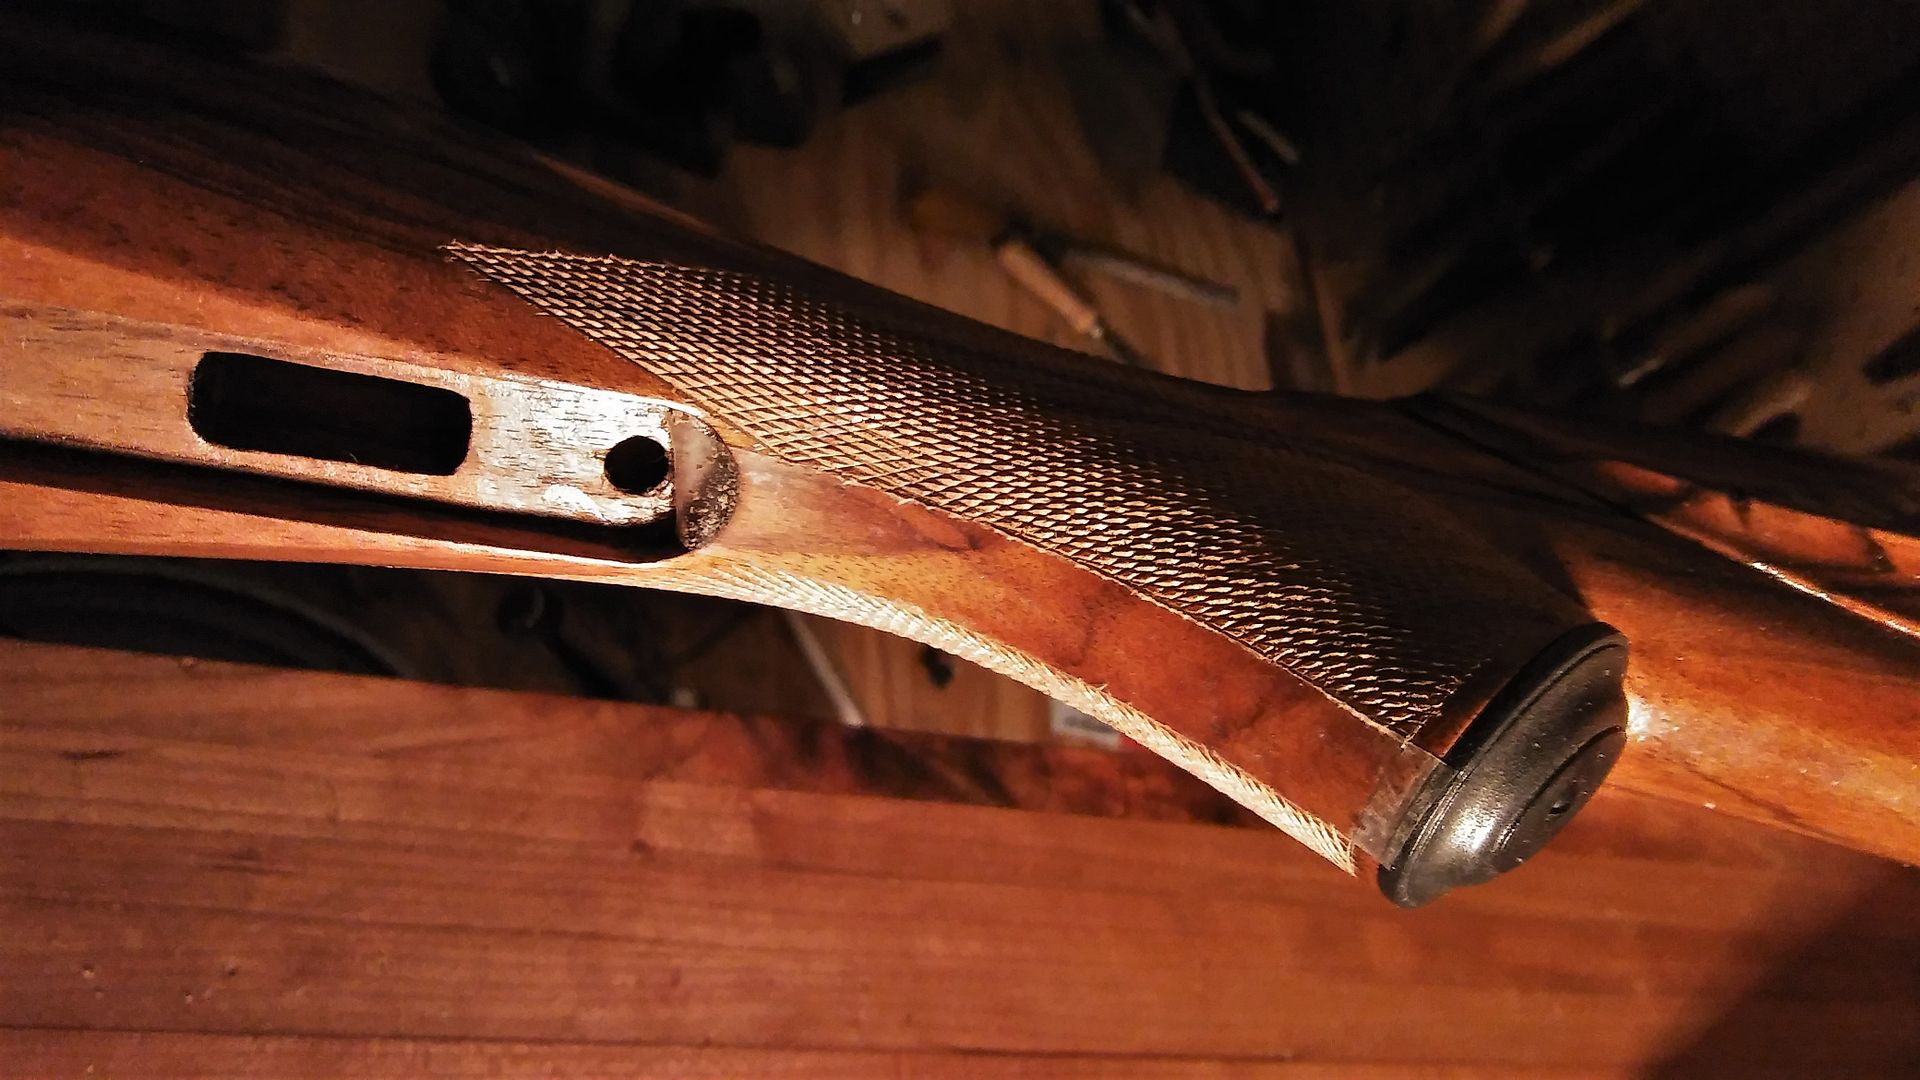 I struggled some with runovers but didn’t cut any that are too deep to erase and the straightness of the lines makes up for them a bit. There is plenty of work left to do on the grip patterns, evening out lines and cleaning up at the borders, but I had the deer opener coming up fast and only had time to put a couple coats of poly in the checkering and sight the rifle in. 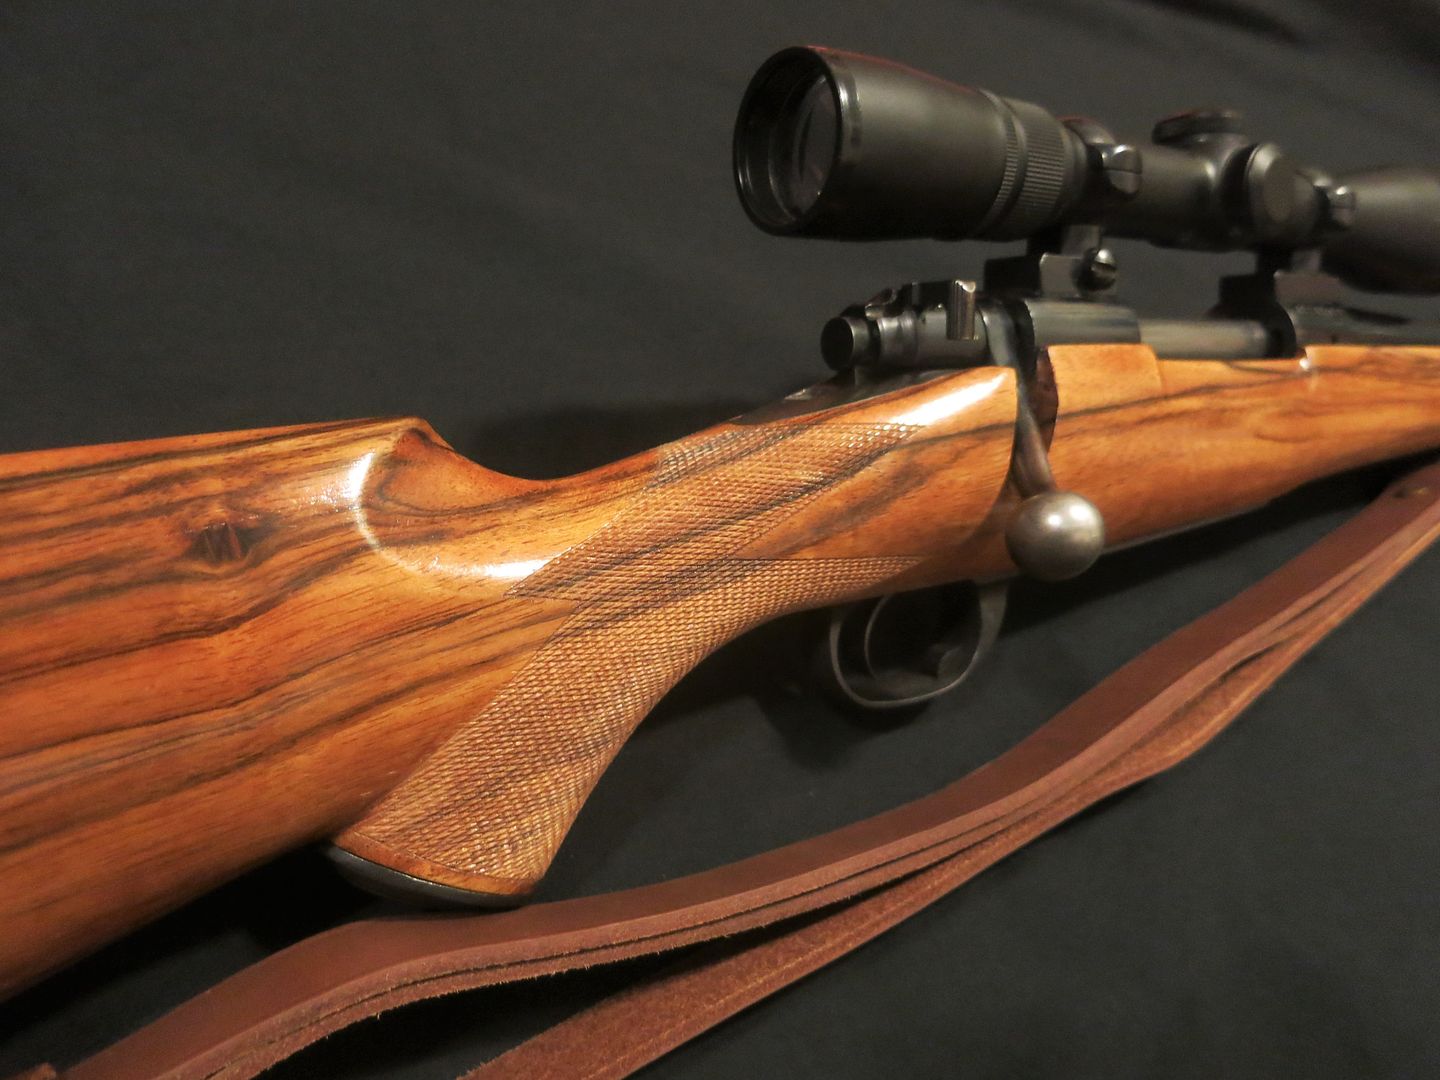 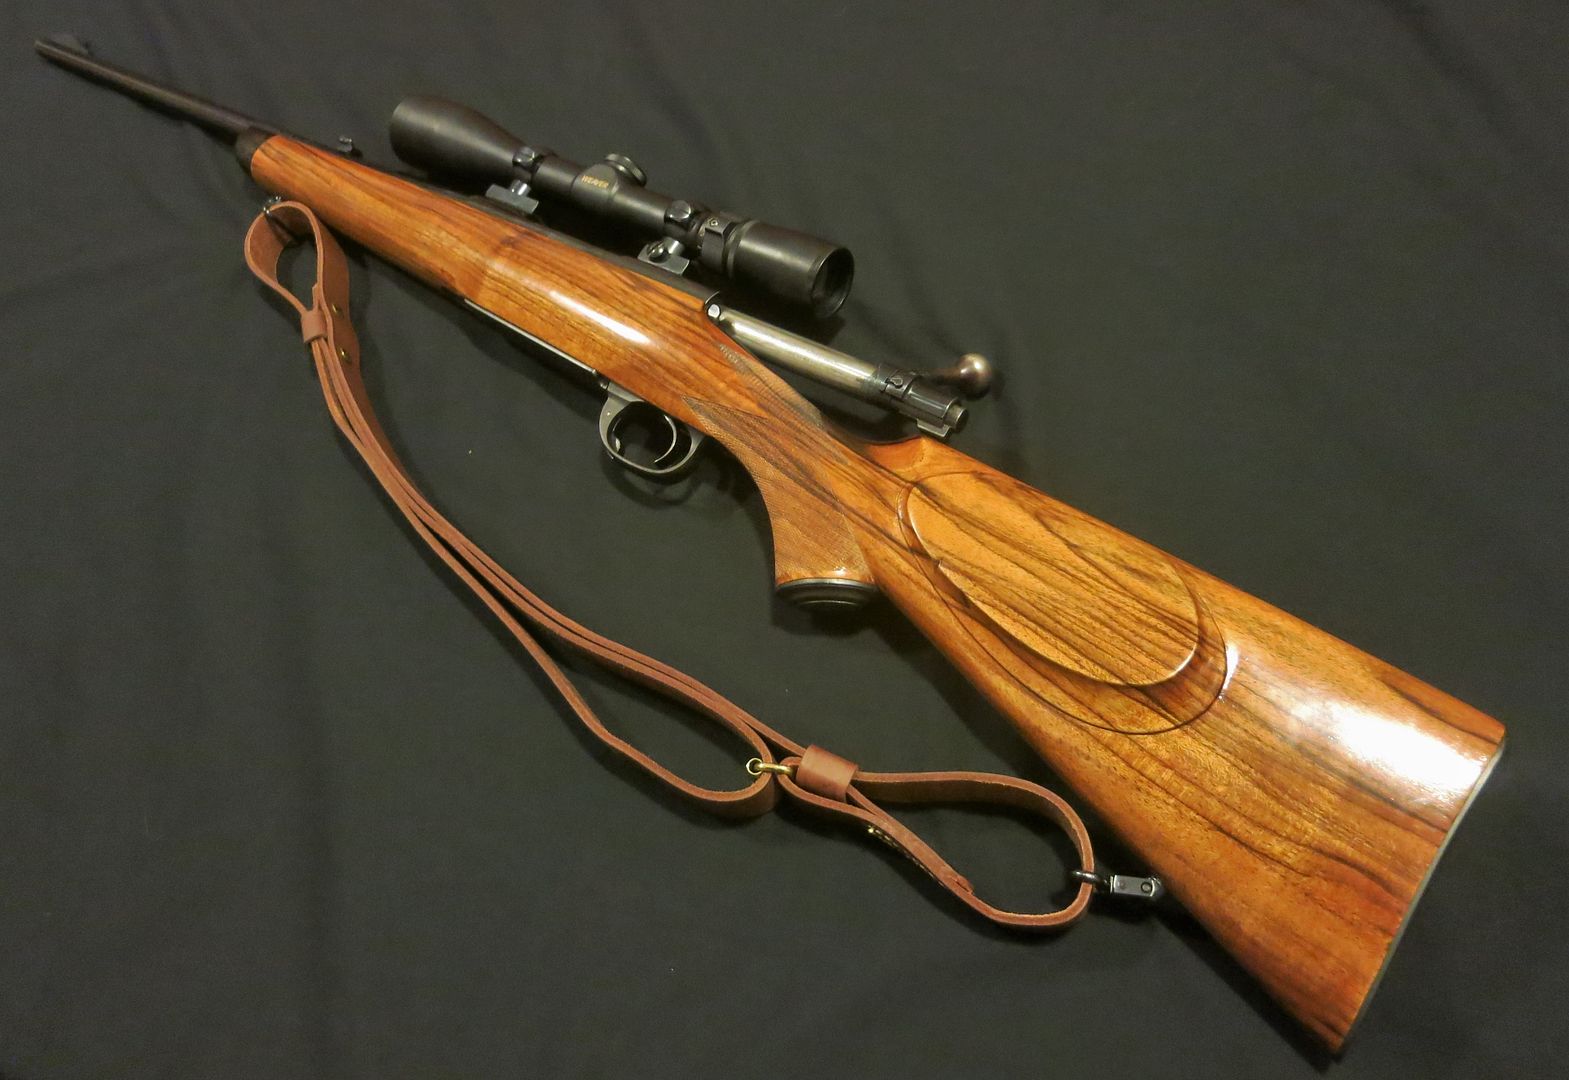 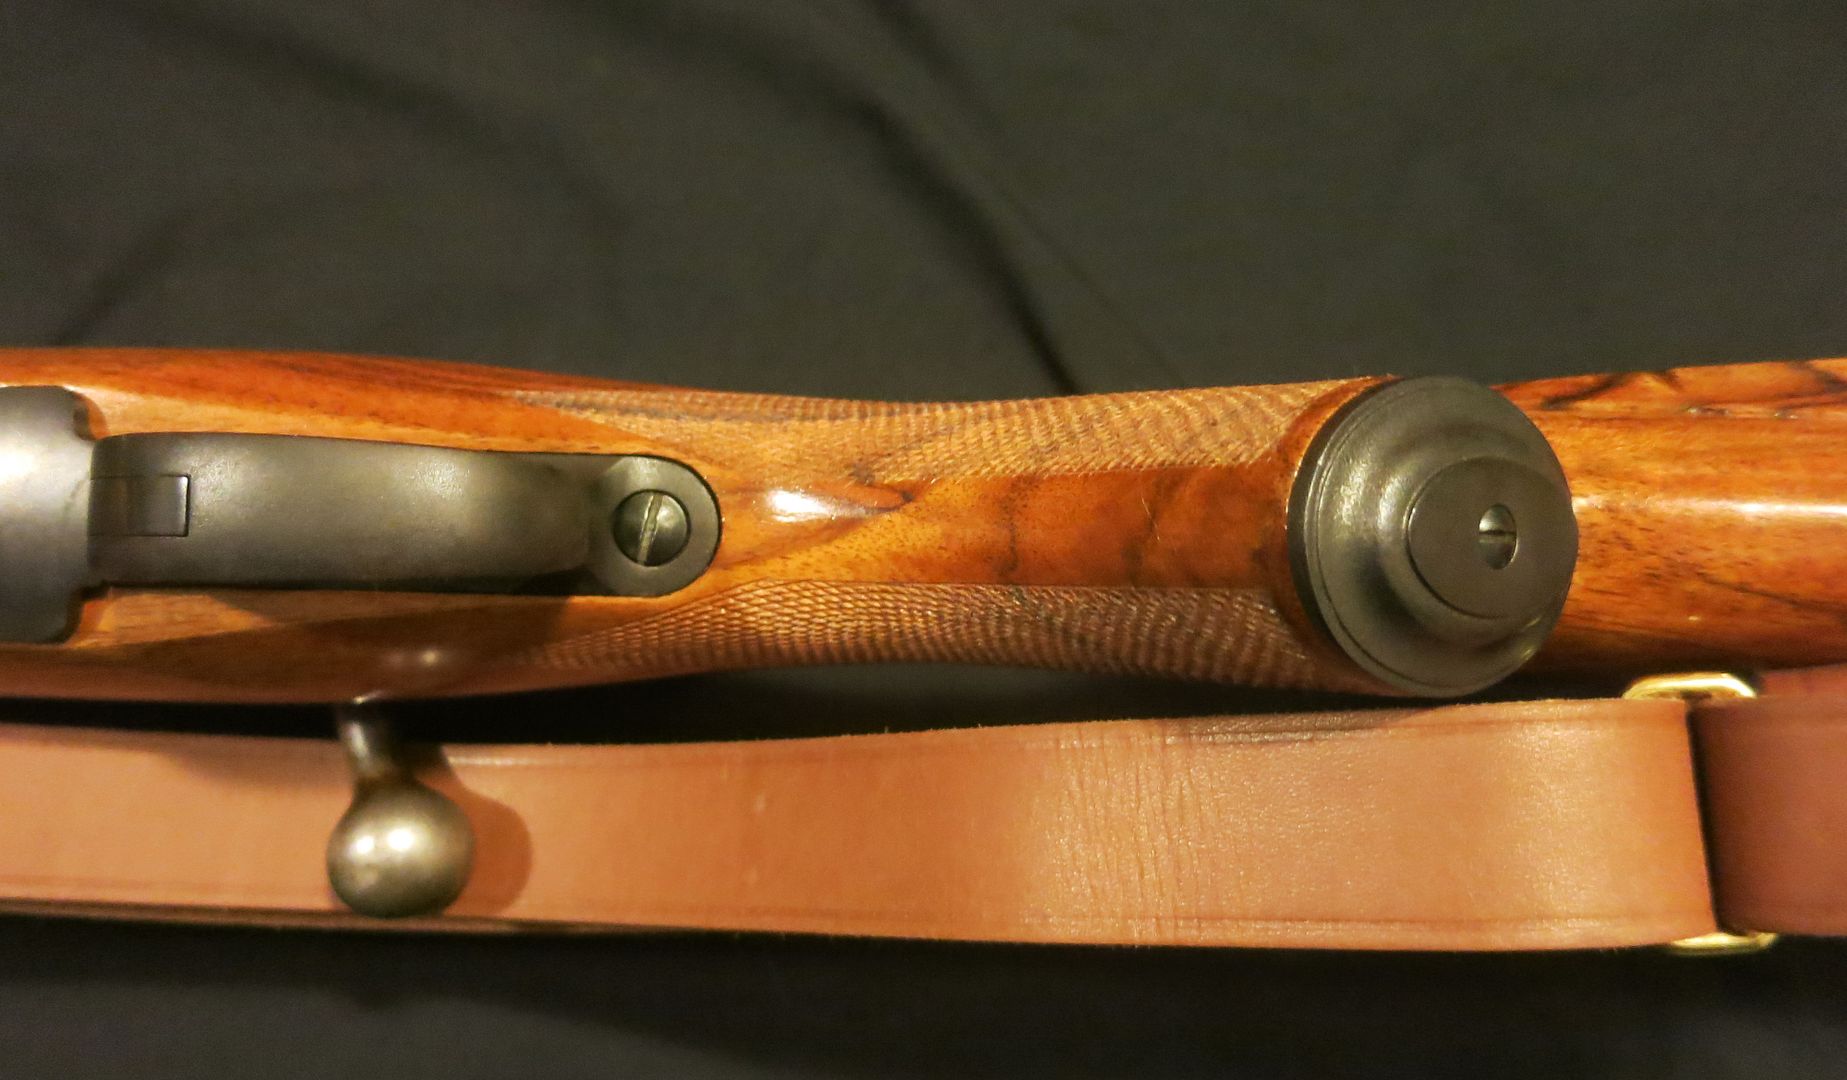 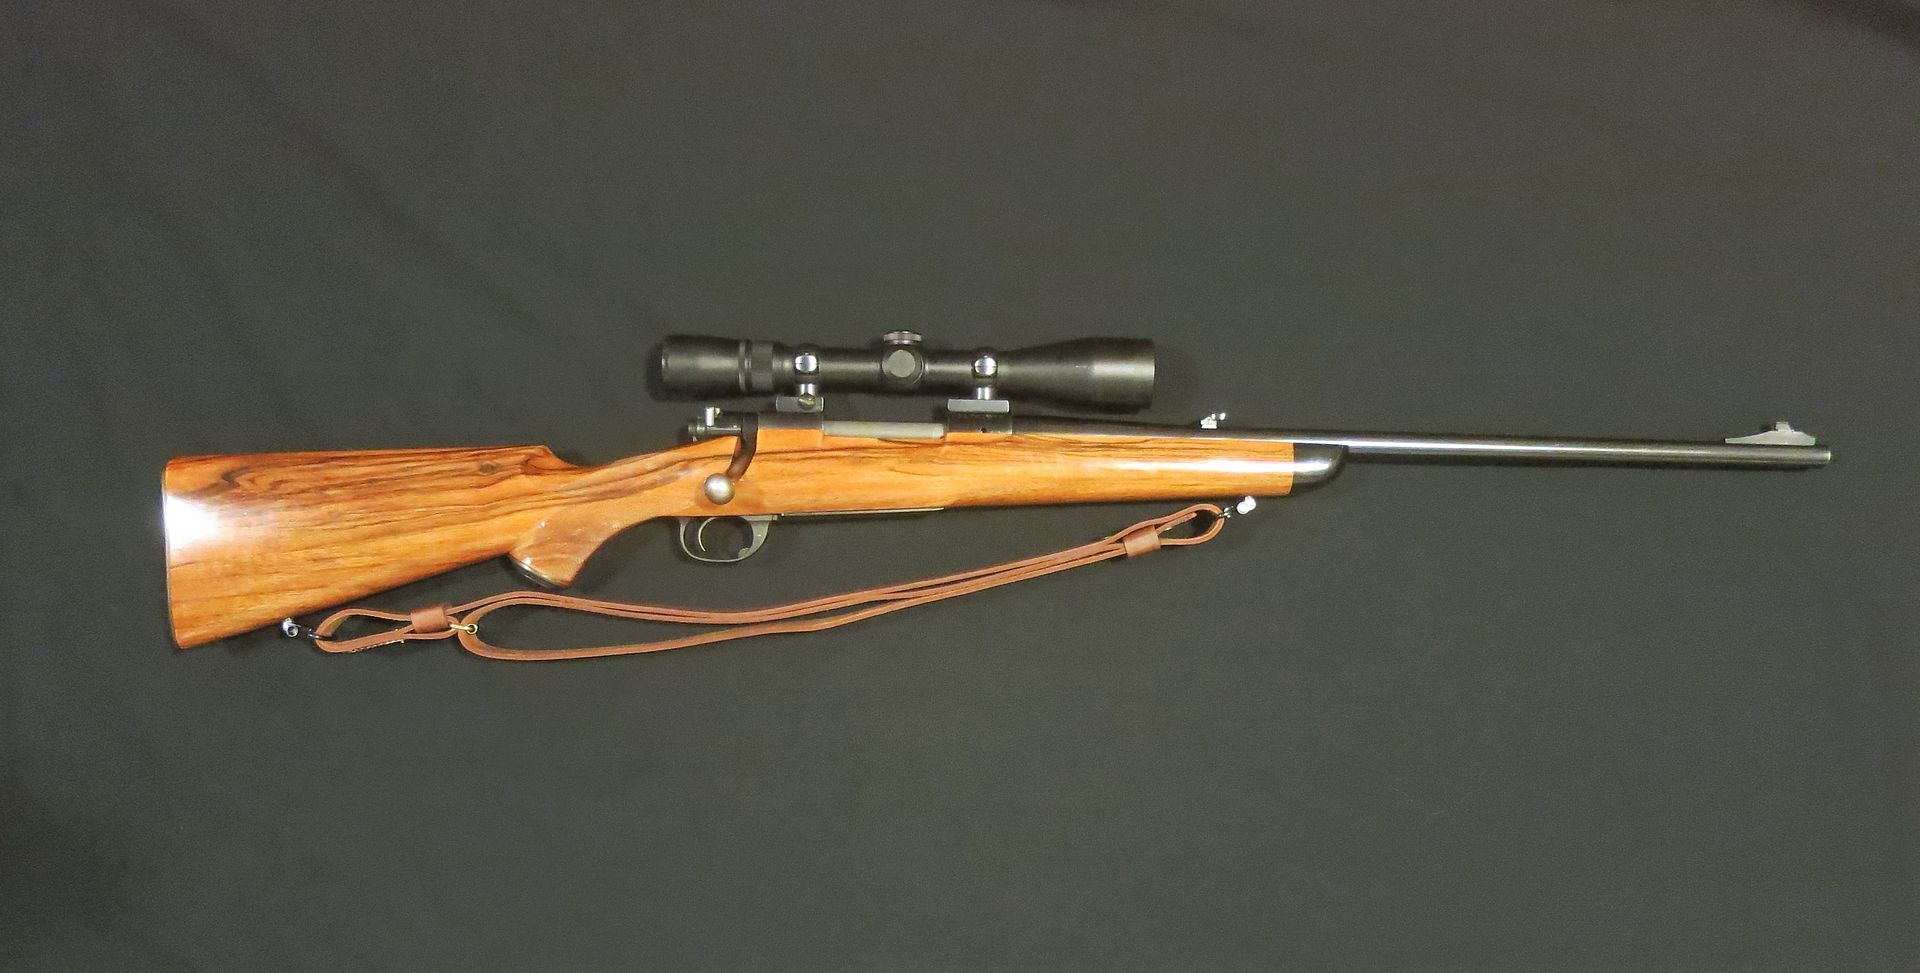 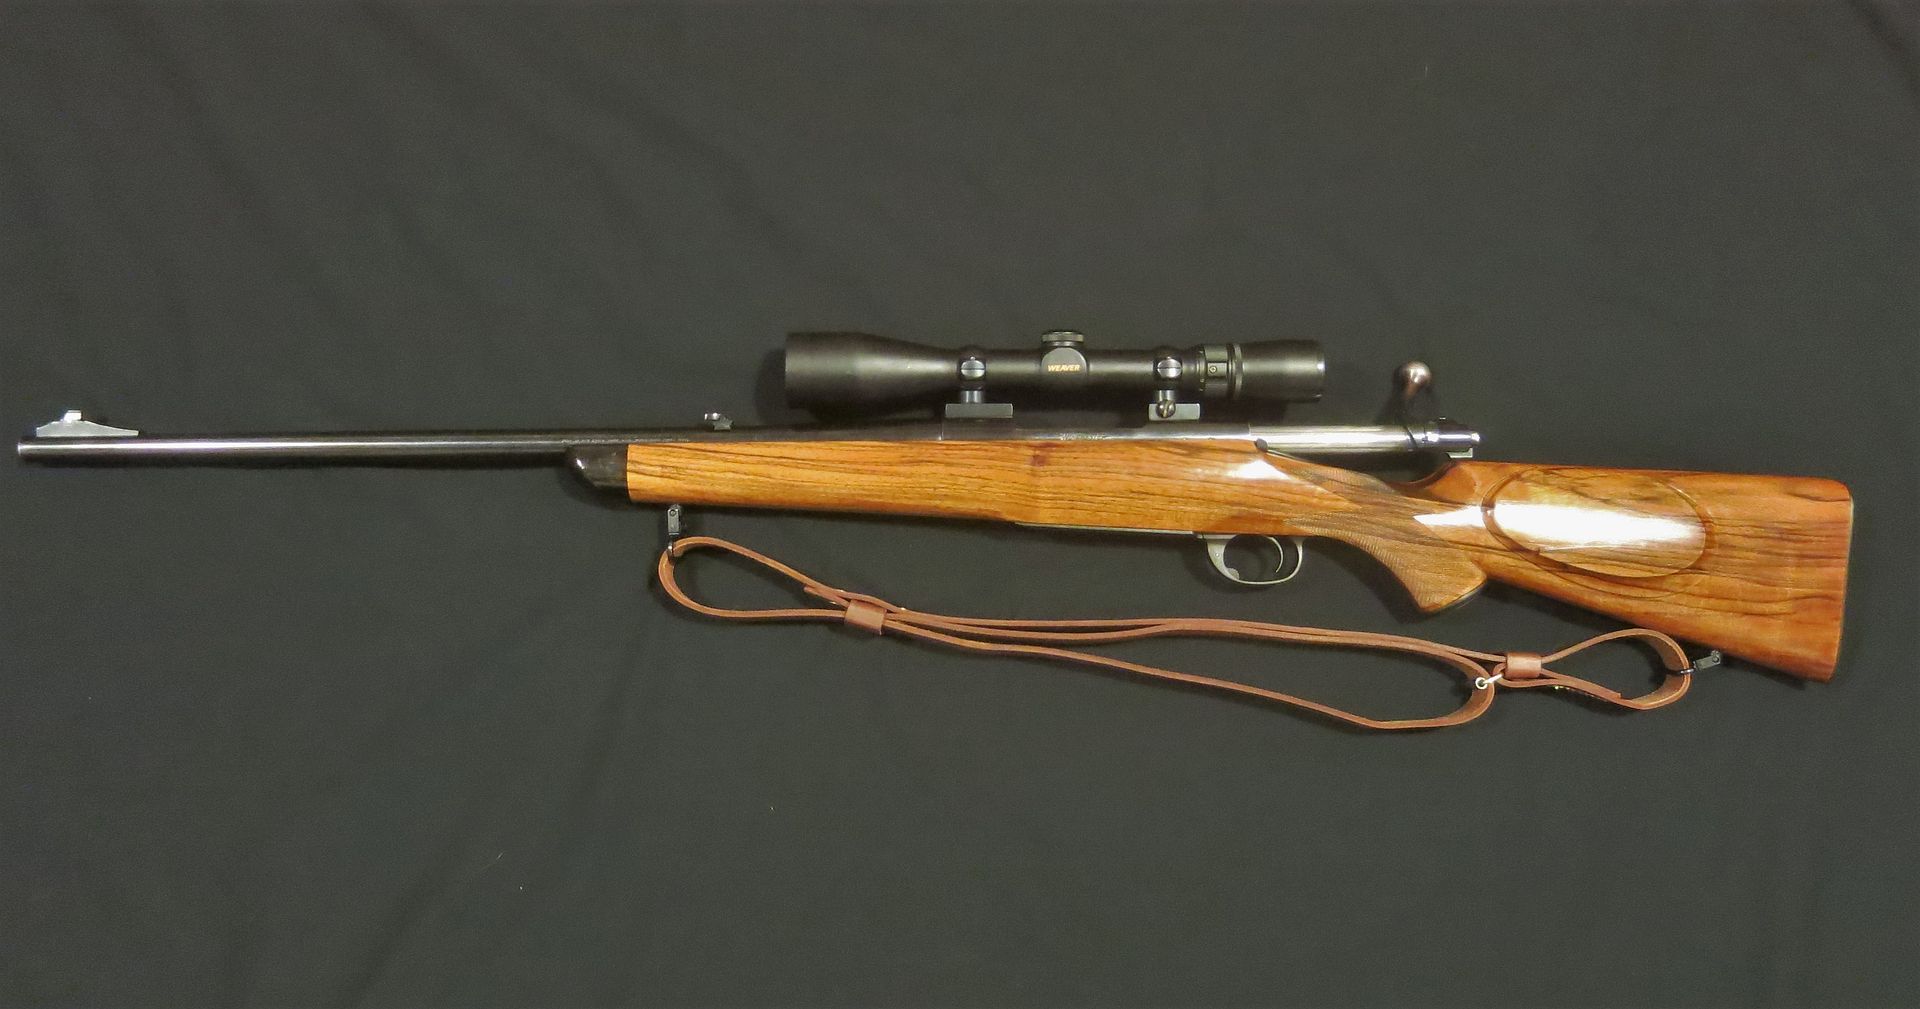 Next is completing the grip checkering and cutting in the fore-end pattern, and redoing the stock hardware bluing. Thanks again to everyone that has helped me with this project, there’s too many to list and I sincerely appreciate everything. "If the women don't find you handsome, they should at least find you handy." | |||
|
| One of Us |
Very nice; reflects a lot of careful work in all phases! Clarence | |||
|
| Powered by Social Strata | Page 1 2 |
| Please Wait. Your request is being processed... |
Rifles Custom Built Rifles

Visit our on-line store for AR Memorabilia